Tag : twine

11 posts

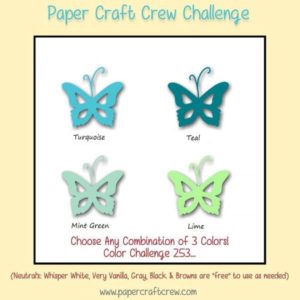
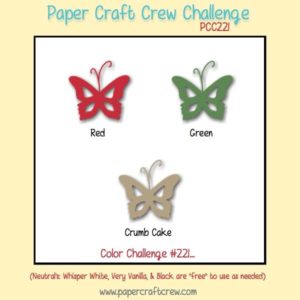
This week’s Paper Craft Crew Challenge is a color challenge using the following colors:

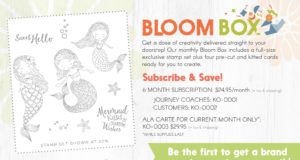
I received this stamp set in my July 2017 Bloom Box Kit.

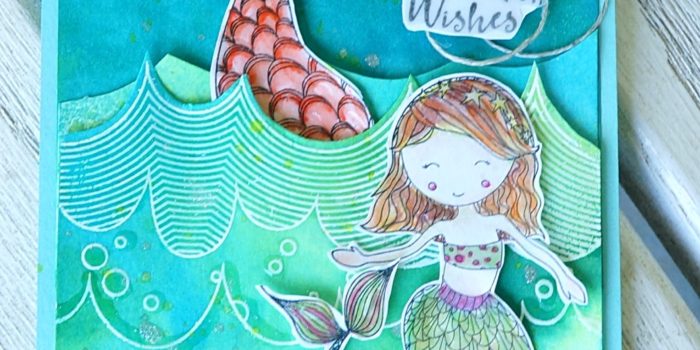
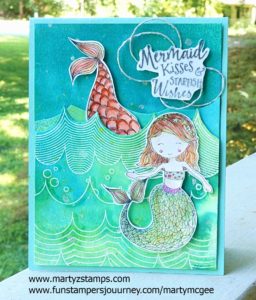
I fell in love with these adorable mermaids the moment the first images came out for this kit. I wanted to make a card that gave the feel of the ocean and the playfulness of the mermaids. I began with a base of FSJ Cool Pool cardstock. Both of the mats are Cool Pool cardstock as well. I took the smaller mat and embossed in white the retired FSJ background stamp Catching Waves. I cut out across the edge of one of the waves. To create the watery effect on both mats. I used my FSJ splashes (Blue Lagoon, Electric Lime, and Cool Pool). I gave each of the mats a good spray from each of the colors and moved the cardstock around to allow the different spalshes to blend together. I blotted excess liquid with a baby wipe. It took a good while for the mats to dry (I must have really saturated them. The next step was to stamp the mermaids and color them. I stamped them with FSJ Black Licorice ink onto FSJ Whip Cream cardstock. I colored them with my FSJ Color Splash watercolor pencils. The sentiment was stamped onto Whip Cream cardstock with the Black Licorice ink as well. I fussy cut the mermaids and the sentiment. Once the mats were dry, I contructed the card. The cut off the bottom of the first mat and with the extra piece I cut reversed scallops to create a wave. I adhered the base mat with FSJ White Liner Tape (this is the best adhesive for cardstock that has been wet and dried with the edges pulling up. I placed the liner tape on every edge so the panel would bend. The extra piece of cut cardstock was adhered next. The embossed mat was adhered with White Liner Tape around the edges. By only adhering to the outside edges I created a pocket for my diving mermaid. Before I adhered the sentiment and mermaids I used FSJ Sparkle Silk to sprinkle a little glitz and glamour to the card. The mermaids and the sentiment were popped out using FSJ medium Foam Squares. Before placing the sentiment onto the card, I looped some FSJ Twine onto the base mat where the sentiment would be placed.

I really love this card, and I hope you do to.

Fun Stampers Journey is providing an amazing opportunity for its coaches to submit their projects in hopes of being given the honor of participating on the Designer Showcase team for the coming catalog year. The chosen designers will have their work showcased at FSJ events throughout the year. This means the design team will receive selected product before product launch to bring to life amazing projects that will inspire others to create.
Any FSJ coach can submit 2 cards and 1 scrapbook page. Once all entries are in by July 10th, Richard and the FSJ Crew will select 20 coaches to move on to the final selection (I don’t know how many are in the final selection). I have worked the last week on my projects. I wanted to share them with my readers the day I submit them to Fun Stampers Journey.

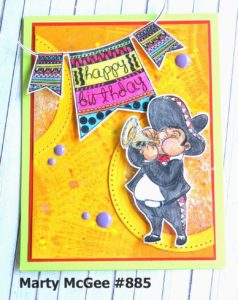
The first card is a birthday card featuring the following ATS sets AT-0156 Felicidades with the Mariachi trumpet player and AT-0195 Bday Banner. The base of the card is FSJ CS-0123 Electric Lime cardstock, the first mat is FSJ CS-0007 Candy Apple cardstock, and the final mat is FSJ CS-0042 Summer Days cardstock. To create the amazing background on the Summer Days cardstock, I took FSJ IP-0113 Orange Rave ink and applied the ink pad to the cardstock with a technique we learned from one of our Bloom Box kits (a sunburst effect is created). Then, I just had to flick as many FSJ silks as I thought reasonible (orange rave IP-0118, electric lime IP-0108, gold ip-0096, sour lemon IP-0110). The pierced open circle was in my scraps of Summer Days cardstock having been left over from a previous project. I started to make a shaker card but I didn’t want anything to disctract from the adorable Mariachi player. I remembered, when we were at the Orlando event, we made a card featuring a star with a sparkle cut center. I created the same thing but with the circle. I adhered a circle of acetate behind the open pierced Summer Days circle (DI-0039 Journey Circles); I took Journey Glaze and placed all over the acetate; then, I sprinkled FSJ AC-0151 Sparkle Cuts over the glaze and rubbed it into the glaze. I set it aside to dry. This technique just makes the card. I cut one end off the cirlce and placed them diagonally across from each other directly onto the background mat. I colored the Mariachi player and the banner with Journey Color Burst Pencils JM-0077. I accented the banner and the trumpet (after I sprinkled Journey Sparkle Dust AC-0013 onto the trumpet) with Journey Glaze AD-0002 4 oz. The banner and the Mariachi player were popped out using FSJ AD-0085 Medium Foam Squares. The final accent were a scattering of Lavender Candy Minis AC-0135. Oops, almost forgot the Sparkle Dust on the rim of the hat, seam of the pants, and the belt buckle. So cute, so adorable. Love it! It just a gorjamust-have card.
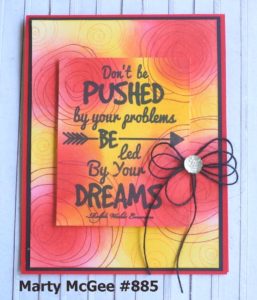
My second card is a quick and simple (very easy card) to bring to life. I started with a base of FSJ CS-0093 Rich Coral cardstock. I love this color. It is a bright red with a hint of orange. The first mat is made using FSJ CS-0003 Black Licorice cardstock. The background base and the raised smaller mat with the sentiment were created using the following: FSJ CS-0040 Whip Cream cardstock, FSJ IP-0114 Outrageous Pink ink, FSJ IP-0052 Rich Coral ink, FSJ IP-0043 Lemon Drop ink, FSJ IP-0042 Summer Days ink, FSJ IP-0041 Black Licorice ink, FSJ Dauber Dowel Large TO-0138, FSJ AC-0004 Journey Black Twine, FSJ AC-0022 Sparkle Drops, FSJ AD-0085 Medium Foam Squares, and FSJ AT-0146 Dreams ATS and last but not least FSJ SS-0454 Flower Swirls.

To begin the background process, I rubbed Outrageous Pink ink and Lemon Drop ink onto the Whip Cream cardstock with the Dauber Dowels. I added a touch of Rich Coral ink to the centers of the Outrageous Pink areas of color. I then took the various sizes of floral blooms from the Flower Swirls stamp set and stamped them onto the swirls of color using Rich Coral and Summer Days ink on the corresponding shade of color.The sentiment was stamped with Black Licorice ink (I used my Misti to stamp the sentiment several times so the black wording would pop). The finishing touch is the triple bow from the Black Twine accented with a Sparkle Drop. The sentiment mat is popped out with medium foam squares.
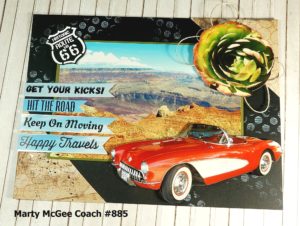
The last project is an 8′ x 6″ scrapbook page. I love the stamp set FSJ SS-0312 Hit The Road. I wanted to create a page featuring this stamp set based around Route 66 out in the Southwest part of our great nation. I knew my friend, Patsy Benson, had vacationed in that area; so, I called her up and asked if she had some pictures I could use. She said yes and I planned a day to drive over and look through her pictures to find the perfect one for my page. Before I went over to her house, I planned out my page. It started off with an 8″ x 6″ piece of Oatmeal Cookie that I distressed with Hazelnut Blend and Buttercream inks. I used a the FSJ SS-0438 Create a Dot background stamp for some interest on the background. I stamped and embossed in white trucks, signs, words in both Black Licorice and Hazelnut Blend cardstocks (I truly wish I had the new cactus stamp set; but alas, I did not). I wasn’t sure what would look great for the picture(s) I chose; therefore, the double color selection of stamped items.

Well, I got there and started looking at the pictures. I knew I wanted a desert/grand canyon type backdrop, and I found the perfect picture. As we were deciding what truck color looked the best on the page, I asked Patsy if there were any Route 66 pictures. She said yes, and we eventually found them. In one of the pictures, an antique convertible was parked at an old-timey gas station, which had multiple route 66 signs in the plate glass windows. As I looked at the convertible, I said, “EEeew (in a good way), what if I cut this convertible out and it looks like it’s driving off the page.” Once I get an inspiration, I’m off and running. Sort of like the Edward Scissor Hands of card making (there is a disaster all around where I was working, but the final outcome is very satisfying). I cut out the convertible and laid it on top of the picture in the right hand bottom corner. Then, I remembered seeing a picture featuring a succulent. I found it and my eyes got wide and I said, “EEeeww (again), I’m going to cut this out too!” Cut, cut, cut, and I’m off and running. Well, as the process usually goes, I change my mind about my first selections of cardstock; the Oatmeal Cookie cardstock did not make the page pop. I needed some color which would make the page truly come to life. think we went up and down her basement stairs twice to her craftroom each time thinking we had gathered all the supplies we needed to complete the page. I think she went up and down probably three more times getting items from the basement as the process developed. After looking through her selection of FSJ cardstock, I thought, Black Licorice would look great and make all the beautiful colors pop off the page. Done! I hated to lose the Oatmeal Cookie sheet because I had put so much effert into creating the background; so, I thought how ’bout I cut off the ends and make triangles. Snip, snip. Done! We tried embossing the route 66 stamp in black on red, Nooo that didn’t quite look right on the page. I tried sprinkling Sparkle Silk – you would think Sparkle Silk would go with anything – not so. I decided to wait until I got home to look through my stamps to find something to add interest to the background mat (I explain later the whole background process). I kept looking at the page and thinking, it needs something else. I then had a bright idea from a card swap I got in Orlando where a coach had stamped onto pictures. I tried the Black Licorice and it wouldn’t dry, but smeared terribly. I initially used Staz-On and it worked, but when I got home, I looked in the cataolog and we don’t have that product; so, I created my own skies using: FSJ CS-0092 Pool Play cardstock, Dowel Daubers, FSJ IP-0035 Huckleberry Fusion ink, FSJ IP-0051 Pool Play ink, and FSJ IP-0009 Whip Cream ink. I rubbed both shades of inks onto the Pool Play cardstock and went back and added white for clouds with the Whip Cream ink. I stamped the Hit the Road sentiments onto the pre-cut strips with Black Licorice ink (I used my Misti to get multiple stamped impressions – making the words crisp). I cut the banner portion of the sentiment strips, and then I added Journey Glaze and spread it out using my finger. It made the pieces look like they were straight from a picture. Voila. Patsy and I both had agreed it needed some twine, but she didn’t have FSJ twine or a background stamp I could use on the Black Licorice cardstock. I knew I could finish the page at home. I placed all the pieces of my project in my plastic bag and came home. That evening, I sat down and pulled the page together within minutes. I placed some looped FSJ AC-0006 Journey Twine Natural behind the succulent picture. I took the ATS Deco Dots AC-0211 and held it folded in half and dapped the rubber into the Buttercream ink IP-0031 and dabbed it in various places on the Black Licorice base. The Oatmeal Cookie corner triangle pieces are adhered onto the Black cardstock. Everything else is popped out. I really love how this page turned out. A picture does not do it justice.
I hope these projects inspire you to create something amazing. If you would like to create using Fun Stampers Journey products, please visit my website at www.funstampersjourney.com/martymcgee.
For this week’s Freshly Made Sketches #278 challenge, I made a variation of this month’s Make It Class card to meet the sketch challenge (I will post this month’s Make It cards on another post). Here is the FMS #278 sketch:

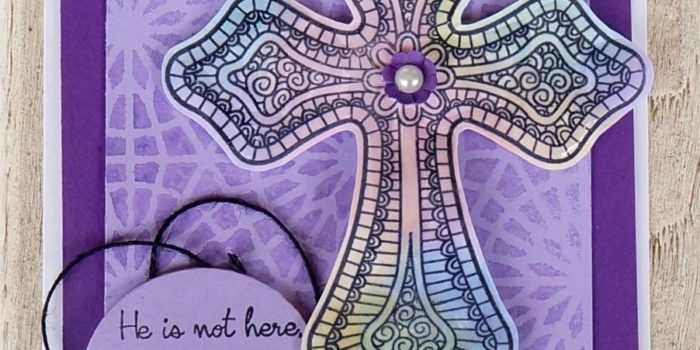
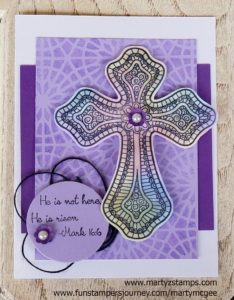
I had created a cross card from a video/demo Richard Garay had for FSJ coaches using a special technique to create a stained glass effect. I began by stamping the cross from FSJ Color Cross stamp set onto FSJ Whip Cream cardstock using Black Licorice ink. After I stamped the image, I took the solid flower stamp from FSJ Be Happy stamp set (note: any solid shape would work) and stamped it into various colors of ink (one at a time) then stamping onto the cross (you can go out of the lines because the cross will be cut out). I used the following Fun Stampers Journey inks to create this stained glass effect (Bubble Gum, Sweet Pear, Banana Cream, Pool Party, and Pretty Amethyst). Note: If you try this technique, make sure to clean your stamp off after each inking because the black ink sometimes comes off onto the stamp. This will help eliminate any frustration if colors bleed and become muddy/murky). Once I finished stamping, I cut the cross out and applied Journey Glaze to give it a little shine. Set the cross aside to dry.

I created the patterned mat by placing the FSJ Starburst stencil on top of the piece of FSJ Pretty Amethyst cardstock. In a FSJ Media Mister, I combined one squirt of FSJ Sweet Berry Splash and one squirt of FSJ Blue Lagoon Splash and filled with water to create the purple mist. I spritzed the paper with the purple mist and immediately applied a paper towel to the stencil to soak up any excess liquid. This created another stained glass effect for the card.

I used FSJ Deep Lilac for the back mat. I layered the patterned mat on top. I adhered the cross with FSJ Foam Squares (medium). I stamped the sentiment onto FSJ Pretty Amethyst cardstock and die cut a circle from the stamped cardstock. I placed a loose loop of black twine behind the circle sentiment and adhered the sentiment with FSJ Foam Squares (medium) as well. For the final touch, I punched two small flowers from the FSJ Summer Pretties punch. I curled the edges and applied a peal accent to the middle. They were adhered to the card project with FSJ liquid glue.

Here is the final project.

Supplies:

Fun Stampers Journey (click here to order)

Stamps: Color Cross Bundle, Be Happy
Cardstock: Whip Cream, Pretty Amethyst, Deep Lilac
Inks: Black Licorice, Bubble Gum, Pool Party, Pretty Amethyst, Banana Cream, Sweet Pear
Accessories: Black Twine, Journey Glaze, Pearl Accents, Circle Die, Starburst Stencil, Media Mister, Sweet Berry Splash, Blue Lagoon Splash

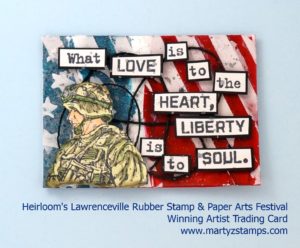
This past weekend a few of my fellow stampers and I attended Heirloom’s Lawrenceville Rubber Stamp & Paper Arts Festival. It began with the Design & Treasure Make-n-Take Friday night. We made four cards, visited with a favorite vendor “Pink & Main”, used new products, experienced new techniques, and had a great time. When we were leaving, I noticed a notebook on display with ATC (Artist Trading Card) on display and announcing the ATC contest. I remembered reading about it and wanting to create an entry when I registered, but I had forgotten about it. I decided to make a couple of ATCs which were to reflect the theme of Freedom and enter them the next day.

Saturday morning came bright and early. I had set my alarm the night before, but it didn’t go off; so, I was in a little bit of a rush before my friend, Cheyenne, got here with some stamp sets that were Freedom themed. We were to  head toward the weekend’s shopping event where we were to meet some other friends at the event by 10:00 a.m. Just a note to the alarm issue, I did set it, but for the weekday. LOL

I began the creation process half awake and a head full of cotton, but that could have been a plus since I couldn’t overthink the process. Really, I could barely think. I took the 3 1/2 x 2 1/2 pieces of cardstock and pulled out my Fun Stampers Journey Sweet Berry Splash, Blue Lagoon Splash, Cranberry Bliss silk, Sparkle Dust, Black Licorice Twine, Journey Medium paste along the FSJ spatula applicator along with some post-it note tape. I pulled out my SU! stripes and stars stencils; thus began the card base process.

In a container, I spritzed some Sweet Berry with a mist of water. I used a paint brush and applied a swipe of Sweet Berry across the cards. It wasn’t brillant enough; so, I thought why don’t I add some Cranberry Bliss silk and that did the trick. I reapplied the mixture to the card and it looked gorgeous. Then, I took the Blue Lagoon Splash and did the same process.  I did try to add some Dark Roast to create a more navy blue color and it was a little too much which created a blackish blue. All I did was add more Blue Lagoon splash and pulled a small, small dot of the blackish blue color into it, mixed it a little, and Bob’s your uncle; it looked great. On the soldier ATC I added full blue color, but on the eagle ATC, I masked off some stripes and added the color to this area to provide a little interest.

Next, I applied the medium paste using the stencils to the card base and sprinkled Sparkle Dust onto the wet medium to create some sparkle and glitz. The final embellishment was several loops of Black Twine. I sat the emerging ATC pieces to the side to work on the stamped images.

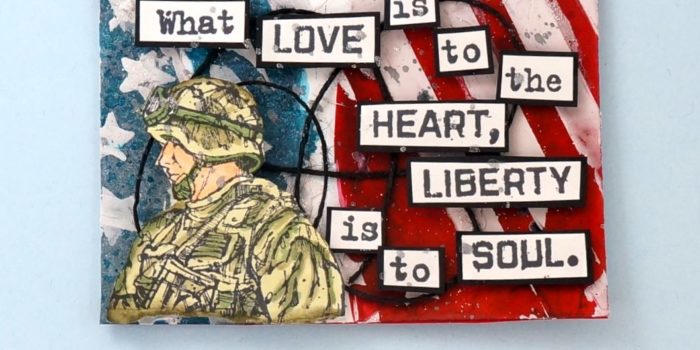
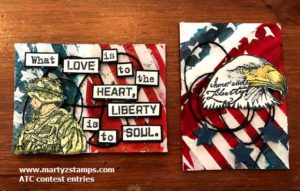
By this time, Cheyenne arrived with the SU! stamps. I didn’t have any stamps that reflected the Freedom theme, but she had two SU! retired stamp sets (they are very, very retired). They were perfect. I took the soldier stamp and coordinating words from one stamp set and stamped them onto FSJ Whip Cream cardstock using Memento ink. I colored the soldier using Spectrum Noir markers. Each of the words I cut out individually and matted on FSJ Black Licorice cardstock. I took a very light gray Spectrum Noir marker and went over the words to tone down the brightness of the Whip Cream cardstock. I popped the soldier and words out using FSJ Foam squares; and, as a final touch, I sprinkled a little Silver silk onto the ATC. Here is Cheyenne’s iPhone pictures. She liked them better with a woodgrain background:

The cards were judged by the vendors at the show. Here is the winning ATC card:

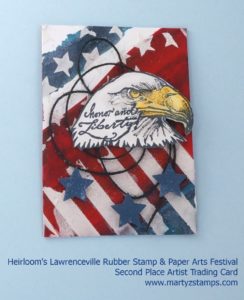
I created the eagle card by stamping the eagle onto FSJ Whip Cream cardstock using FSJ Black Licorice ink. Cheyenne suggested stamping the coordinating words directly onto the eagle. I thought that was a GREAT idea, and as you can see, it looks gorgeous. I colored the eagle with Spectrum Noir markers. The eagle is popped up using FSJ Foam squares. I punched out three small stars from FSJ Denim Days cardstock. Even though they didn’t have a first, second, and third place winner, the eagle ATC card was the second most chosen card by the vendors.

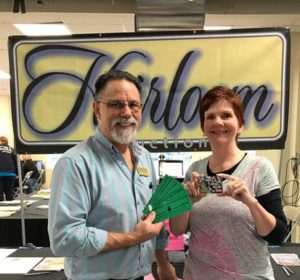
I think they both turned out beautifully. I won $25 show bucks which meant I could go and purchase products from any of the vendors. Here I am receiving the Show Bucks:

I went back to Creek Bank Creations and purchased two more 3D embossing folders from We R Memory Keepers Next Leveling Embossing folders. These are awesome; they create a 3D embossed look to your cardstock, which adds wonderful dimension and interest to your card. I have three posts coming up featuring these folders. The rest of my winnings I spent at Pink and Main. I purchased a cute, cute frog stamp set (it’s one of the upcoming card creation posts) and a pirate set just for my little buddies to create some cute cards.

Thanks Cheyenne for your stamp sets and your critiques during the creating process.

I made this card Wednesday using the supplies from Fun Stampers Journey November Bloom Box. Their design is quite different from the one me and my Bloom Box Girls created. When I saw Paper Craft Crew #221 Color Challenge today, the light bulb kicked on and I knew this card creation was the perfect fit. Here is the challenge:


pcc221


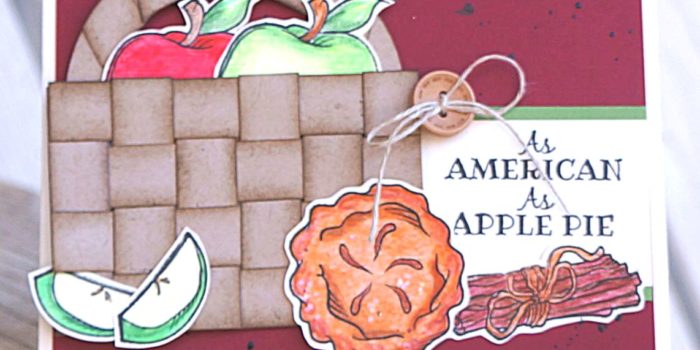
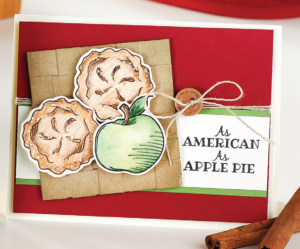
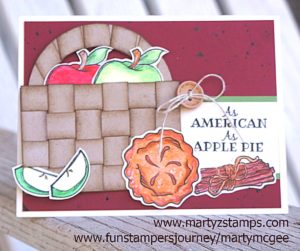
Using the supplies for the November Bloom Box card design listed as “As American As Apple Pie”, here is their design (to the left, we began making our woven mats. Of course, I did not read the directions, I just jumped right in and sponged the edges november-promotional-flyerof my paper strips and began weaving right away – not really paying attention to the shape of my mat. After about five minutes of weaving, Debbie held up her mat and said, “My mat is more of a rectangle. I think I did something wrong.” The minute I looked up and saw her mat, I knew what we could make out of a more rectangular than square mat – a BASKET!!! When a great idea happens, I tend to act as though I am on an overdose of caffeine. I jumped up, found some Oatmeal Cookie cardstock, cut a handle using FSJ circle dies, I took my last strip of paper for the mat and placed it along the handle to give it a woven look and voila – the super cutest basket you could ever lay your eyes on with apples overflowing was sitting there for us to use on our cards.

On the extra piece of FSJ Butter Cream cardstock, we stamped three apples (we used only two), two apple slices, one pie, and the bunch of wrapped cinnamon sticks. We colored the stamped images using our FSJ Color Burst Pencils (yes, all of us have purchased them and they are awesome. Some of the penciled areas needed to be blended better, and we did this using the FSJ Fusion Blend and Blending stumps.

We stamped the sentiment with FSJ Black Licorice ink and began to adhere all of our pieces to the mat cut out of FSJ Cranberry Bliss cardstock. The card is so cute. Now, here’s how the FSJ Dark Roast Silk was added to the card. I took the card to show my husband, and when I went to put it back up, there was a spot of grease on the base mat. Hmmmmm…. all was not lost. I took the Dark Roast Silk and splashed some on the base making sure to cover the other areas of the card with a sheet of copy paper.

And……here is the finished card. I just love it. And, I love my Bloom Boxes I get every month.

novemberbloombox2016


If you are interested in ordering any Fun Stampers Journey products or subscribing to the Bloom Box kit (the kit is a six month commitment), please click here .

This past September three friends and I went to the Stamp Scrap Art Tour held in Duluth, GA. Pink and Main was one of the vendors at this show. The owner and illustrator for Pink and Main, Michelle Currie, was at the Friday night make-n-take, and we were able to complete an awesome card, purchase a discounted die set (only available during the make-n-take), and have a great time enjoying her company. We also had the opportunity to see her the next day while shopping for all sorts of goodies. My friend and co-crafter, Cheyenne, purchased their scarecrow stamp set and coordinating dies.

We spent a whole afternoon stamping the scarecrows and coloring them with our Spectrum Noir alcohol markers. We had a great time. Cheyenne ended up putting her card together that evening, but when I am tired I know better than to try to pull together something important. It usually spells disaster. I finally put mine together this weekend. AND, it is gorgeous.

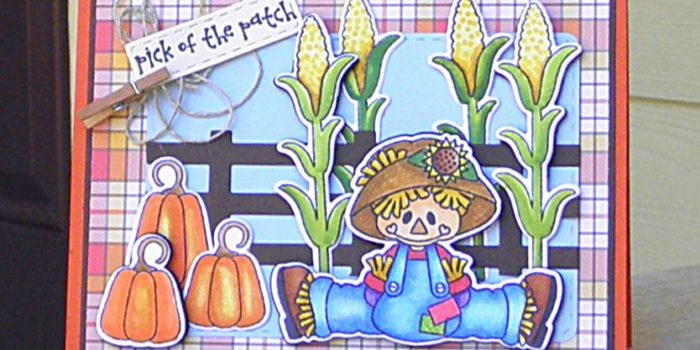
When I saw the Paper Craft Crew #215 challenge today, I knew my Pink and Main Scarecrow card was the perfect match for this challenge. Here is the card challenge:

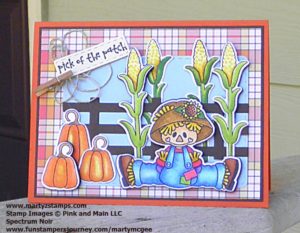
For our scarecrow card, we stamped the images on Spectrum Noir paper with Tuxedo Black Memento Ink. The images were colored with our Spectrum Noir alcohol markers. See the end of this post for the color combos. Several of the images are raised using black foam. I believe we used Lawn Fawn’s 6×6 plaid paper pack for the printed mat. The blue mat is SU! Bashful Blue (a very retired cardstock), the plaid mat is on FSJ Hazelnut cardstock and the base is a SU! paper (Cheyenne’s paper wasn’t listed but I think FSJ Orange Rave or Tangerine Fusion would work really well). The mini-clothes pin and twine are from Fun Stampers Journey (FSJ). Here is the card:

Spectrum Noir Color Combos (the ones I wrote down):

Jeans – TB5, TB2, TB4, GG1
Corn – CT1, GB9, GB6
Straw – CT4, GB6
Hat – Fl Yellow, TN3, FS1 and Color Burst pencils for crosshatch texture
Pumpkins – CT1, OR2, OR3
Corn stalks – can’t remember the lighter green but I did palette blending with the lighter one and DG3

Supplies:

Pink and Main – Scarecrows and dies, stitched rectangular (rounded corner) dies
Lawn Fawn – plaid paper stack
FSJ – Tangerine Fusion, Hazelnut cardstocks, Color Burst Pencils, twine, clothes pin
Inks and Markers – Memento Black, Spectrum Noir alcohol markers
Misc – Black Fun Foam sheets, fence die (bought a long time ago from My Favorite Things)

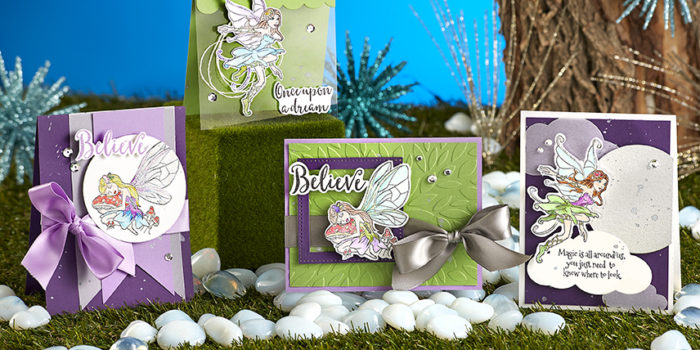
I can hardly wait for this month’s Bloom Box. It’s all about fairies. How adorable! September’s Bloom Box was my first Bloom Box, and I didn’t know what to expect. I was delighted with the stamp set, pre-cut card packs, and detailed in-color instruction booklet. My Bloom Box girls meet together to enjoy making the cards together, and we are counting down the days until we have October’s Bloom Box in our hands. Here is October’s Bloom Box:

octoberbloombox

The Bloom Box is::

SIMPLE: Each month enjoy an exclusive red rubber stamp set, pre-cut elements, coordinating embellishments and step-by-step instructions.

FAST: Create 4 eye-catching, unique greeting cards using the supplies we’ve provided. Just add your inks and a few tools, and you’re ready to go!

FUN: Share your creations with friends and family, give a set as a gift, or keep in your personal inspiration library. Better yet, use it to host your own crafting party!

If you would like to order a Bloom Box, please click here to be directed to my Fun Stampers Journey website.

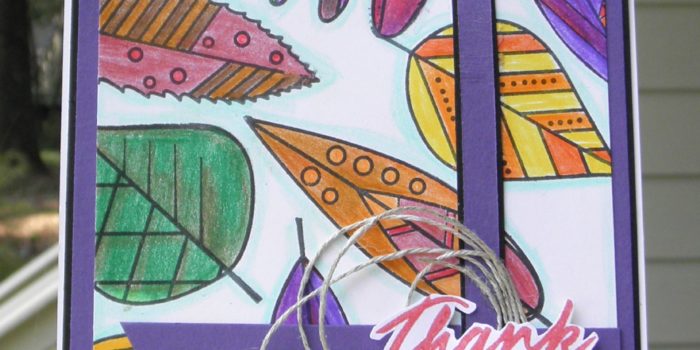
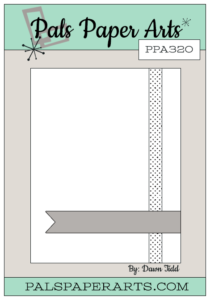
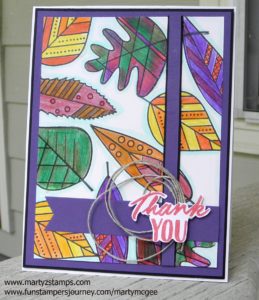
I recently purchased the Fun Stampers Journey (FSJ) Artsy Leaves out of their mini-Trend Catalog (it has since retired as of September 30th). Even though I knew it would not be a stamp set I could demo at parties, I still wanted it. I LOVE the whole collection and it came with a die set that I purchased as well. When I saw the Pals Paper Arts Card Sketch Challenge #320, I thought this set would make a perfect background stamped card with a Thank You sentiment.

ppa-320-sep29I stamped the leaves using FSJ Black Licorice ink. This ink is very versatile. It is a “true” black ink, it doesn’t smear (it’s dry in about 30 seconds), you can use watercolor mediums with it, and it can be used on plastic, glass, etc (some surfaces require the ink to be set with a heat using a heat gun.
I colored the leaves using FSJ Color Burst Pencils. These pencils do not require Gamsol to blend them together; they are infused with oil to make blending without a liquid medium easy. You can purchase blending stubs from FSJ and dry blend them, but I didn’t use the stubs on this project. I outlined each leave with a light blue pencil to make them pop. I used FSJ – Whipped Cream as the base and matted the leaves on FSJ – Black Licorice and FSJ – Deep Lilace cardstocks. The stips of paper accents are in FSJ – Deep Lilac and FSJ – Black Licorice as well. I highlighted the sentiment with FSJ – Twine and stamped the sentiment from one of the Bloom Benefit ATS – Thanks Much. I stamped the “Thank You” in FSJ – Candy Apple Fusion Ink and fussy cut only the “Thank You” out of the full image. The “Thank You” is popped up on dimensionals.

PPA320Supplies:
FSJ – Whipped Cream, Black Licorice, and Deep Lilace cardstocks, Black Licorice and Candy Apple Fusion Inks, Color Burst pencils, twine, dimensionals, liquid glue, white liner tape, and glue dots.

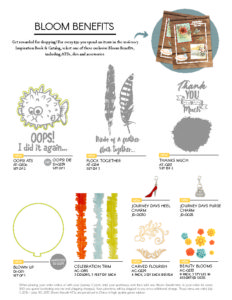
All my close friends know I have transitioned over to Fun Stampers Journey (FSJ) this past September. One of the amazing benefits of purchasing through FSJ are their Bloom Benefits. For every $50 spent, you will receive a Bloom Benefit FREE! This includes ATS (Artist Trading Stamps) as well as dies and embellishments. I have attached a flyer showcasing some of the Bloom Benefits (there are Bloom Benefits in the main catalog as well as the mini-Trends catalogs):

thumbnail of bloom-benefitsv2

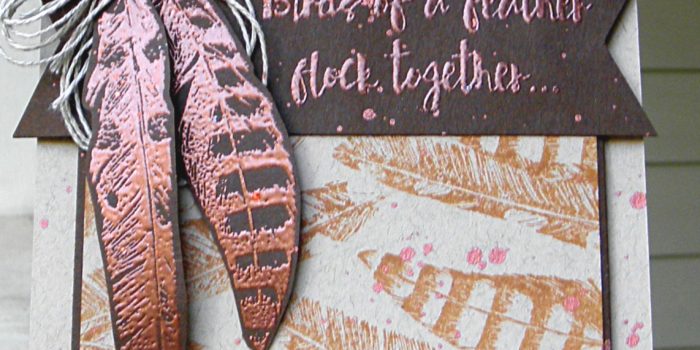
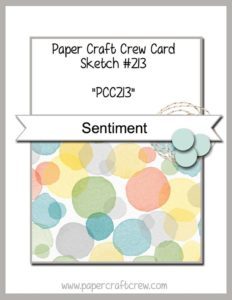
I have all the ATS Bloom Benefits from the 2016-2017 catalog. When I saw Paper Craft Crew Card Sketch #213, I knew the Flock Together ATS from the Bloom Benefits would make a perfect card for this sketch.

pcccs213

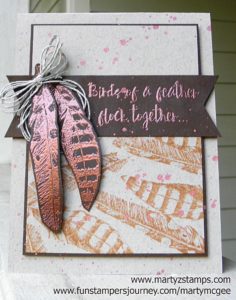
I used what I had from my FSJ starter Kit and my first order, which is very limited. For the base of my card and the mat I stamped on, I used FSJ – Oatmeal cardstock and matted the stamped portion onto FSJ – Dark Roast cardstock. I used the FSJ – Dark Roast cardstock for the banner and base of the embossed feathers. I stamped the feathers and sentiment in Versa-Mark and embossed with SU! copper embossing powder. I stamped the feathers in FSJ – Pumpkin Bread fusion ink onto the Oatmeal cardstock.  I fussy cut the embossed feathers. I adhered everything together using FSJ – white liner tape and a glue dot. I then added FSJ – twine and sprinkled the Bronze silk onto the card to give it that extra pop. The matted portion of the card is raised with SU! dimensional.

Flock Together

FSJ – Flock Together

Supplies:

Fun Stampers Journey – Oatmeal cardstock, Dark Roast cardstock, Twine, Pumpkin Bread Fusion Ink, Bronze Silk
Stampin’ Up! – Copper Embossing Powder, dimensionals

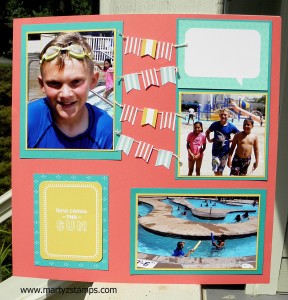
This scrapbook page was a page I made for my friend as an example of a traditional scrapbook page using Project Life cards. I didn’t want traditional scrapbookers to feel limited by Project Life’s photo sheets, but rather the card sets could be used on a more traditional page.

Her son had gone to some type of swim park with his friend’s and she had captured the moment with pictures she wanted to place in a scrapbook. I didn’t have any 12×12 SU! new 2015-2017 in-color paper (Watermelon Wonder); so, I took a piece of Very Vanilla 12×12 and adhered the solid side of the new envelope paper to the Very Vanilla base. Hey, it worked. I used Project Life cards to add commentary areas and sentiments. I then wanted a 3D effect. I took baker’s twine and punched out banner shapes from the Project Life cards and adhered them to the twine (some with glue dots others with dimensionals. I used Bermuda Bay, Daffodil Delight, and Pool Party card stock as coordinating colors for the mats.

Summer Fun

Supplies:

PAGE TOP
[dealsbar preview] Amazing Deals: !!toolbar-deal-title!! - !!toolbar-deal-merchant!!