Tag : Spectrum Noir

22 posts

I have had the privilege to teach two classes featuring Spectrum Noir Alcohol Markers at Pink and Main’s store in Athens, GA. I am so excited to share the cards created for this class.

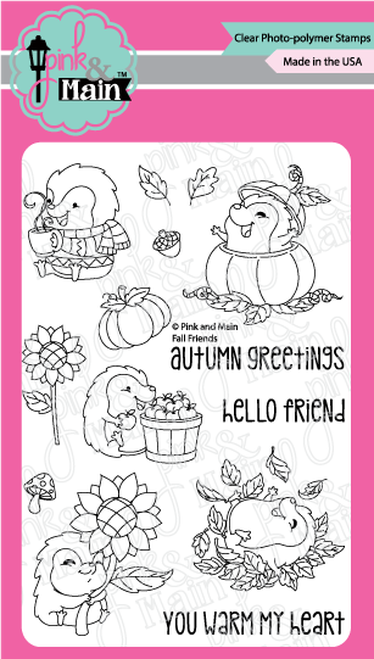
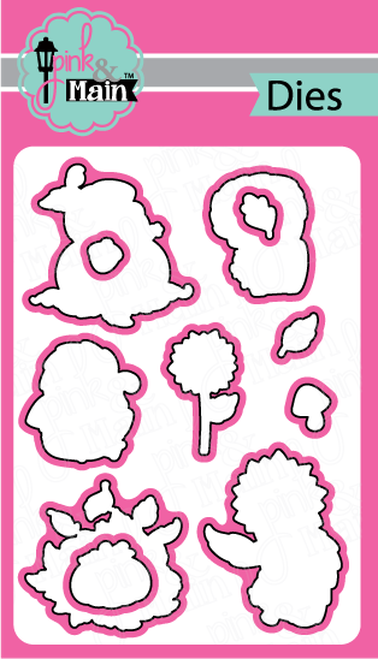
Everyone who attended the class received the Fall Friends stamp and coordinating die.

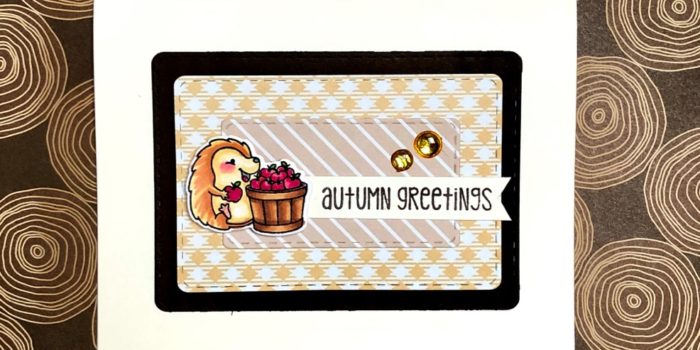
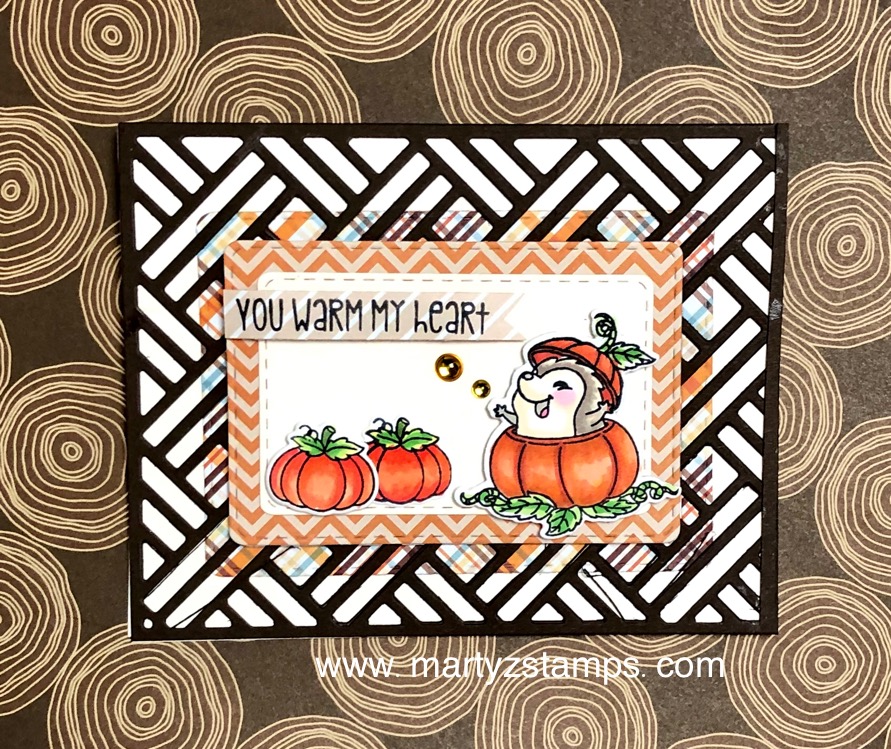
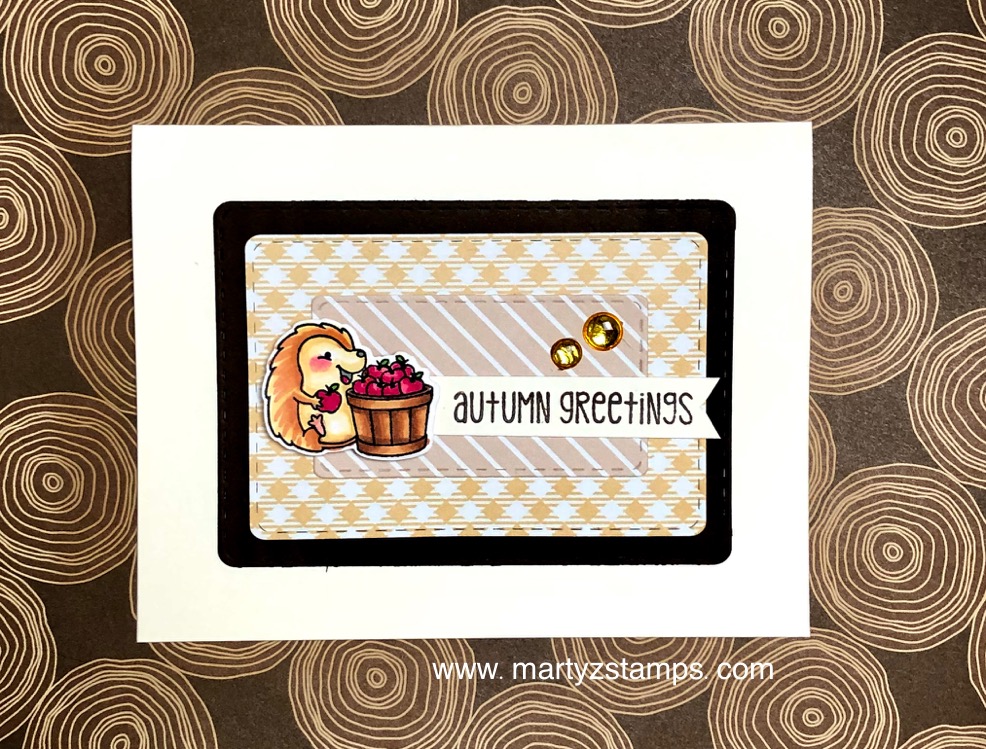
Each card featured an adorable hedgehog from the stamp set. Here are the cards with the Spectrum Noir colors.

Hedgehog: BG1, BG2, BG4 and BG1 to blend on face
Leaves: LG5, LG1
Stem: B03, TN7, TN5
Pumpkin: B04, B03, OR2, B01 to blend and B03 shading

Hedgehog: TN1, TN2, TN3, TN4, Blender
Apples: DR4, DR1, FS8
Leaves: LG5
Basket: TN7, TN6, TN3
Cheek: CR2

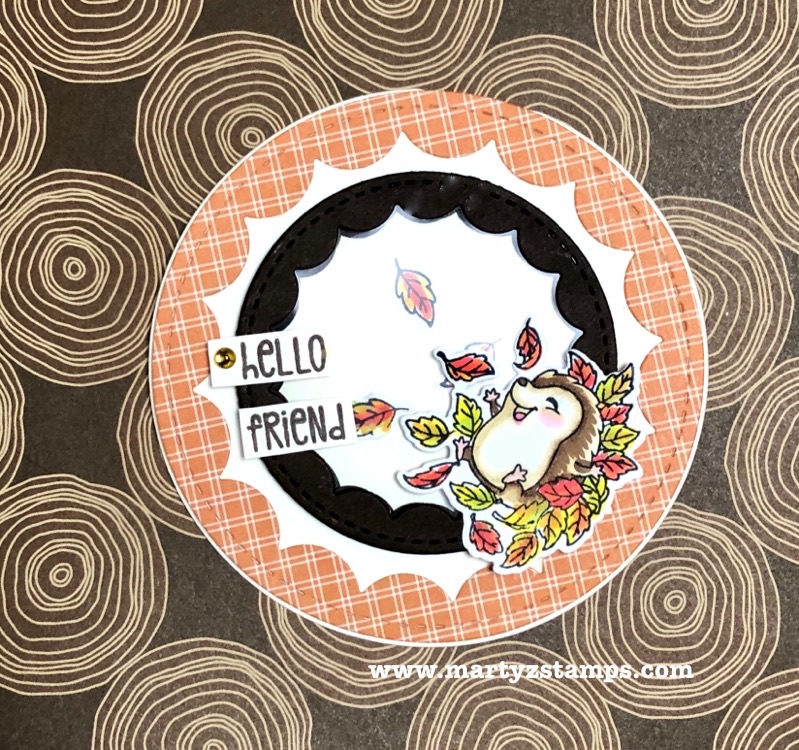
Hedgehog: EB1, EB2, EB3, Blender
Leaves: OR3, OR1 and CT4, LG3, B02 and OR2, B02

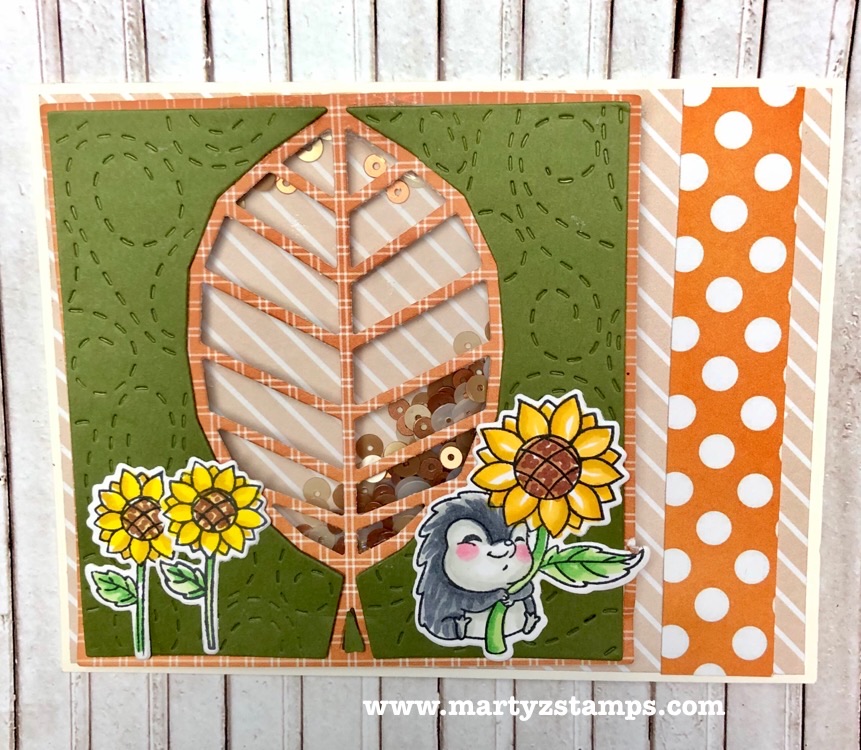
Hedgehog: IG2, IG4, IG5 and IG1 for blending
Sunflower Petals: GB6, GB3, CT4
Sunflower Center: TN5, TN3, and TN9 to shade lines and dot center
Stem and Leaves: LG3, LG5

You can visit Pink and Main website to purchase by clicking here or on the banner.

Supplies:

Pink and Main: Reverse Scallop Dies, Stitched Round Rectangle Dies, Basket Cover Die, Pumpkin Spice 6 x 6 paper pack, Birthday Boy Glossy Dots, Spectrum Noir Tri-Blend

Consumer Crafts – Spectrum Noir Markers (click on banner to shop)

Hello! I have just created my first post to the Little Blue Button Blog. I am so excited to share with you the card I created using Steam Punk Jessica

I colored Jessica using Spectrum Noir Alcohol Markers. Once she was colored and cut out, I collected two Gel Press pieces of cardstock from my stash to use in making the card.

Next, I gathered other supplies for this creation.

I wanted to incorporate gears onto the Gel Press pieces of cardstock and used a FSJ stencil to apply Pumpkin Bread and Haystack inks to the stencil leaving a faint impression of gears.

Gold glitter washi tape from the discount aisle at Tuesday Morning was placed under the die cut border. The final touch was a sprinkling of FSJ Bronze silk.

To complete the card, I placed Jessica on a Haystack cardstock oval mat. The card is finally accented with Candy Drops. This card turned out so beautiful. I hope you like it.

If you would like to watch the video where I colored Jessica (click here).

Supplies:

Spectrum Noir Alcohol Markers

Spellbinders + Fun Stampers Journey

If you checked out my previous post, you know a doughnut will make a kitty happy, but did you know a cup of cocoa will make a penguin happy? Oh, I forgot, only if it has marshmallows on top.

I created a no mat card for this happy penguin to meet Paper Craft Crew Card Challenge 328. See the challenge below:

This penguin and hot cocoa image is from one of my past Scrapping for Less kits, Stamping Bella’s Penguin with a Mug.

I colored the stamped image with Spectrum Noir alcohol markers and fussy cut the penguin and mug leaving a small white boarder. I folded a piece of Whip Cream cardstock in half, layered on two strips of Fun Stampers Journey’s Deco Layer Strips (black). The penguin and mug are popped up and the finishing touches are the Journey Sequins pink for a touch of bling.

Supplies: Click on the banners below to shop.

Spectrum Noir Alcohol Markers

Spellbinders + FSJ

My friend, Julie Hill, just had a birthday and I missed giving her a card on time, but I guess better late than never. Right?

I received the cutest stamp called Brew It Anya from The Greeting Farm in my January Flavor of the Month Kit from Scrapping for Less. Crystal Minkler had created some adorable cards with Anya on a circle mat.

I took the idea and went in a slightly different direction. I made the actual card from a scalloped circle.

Anya is colored using Spectrum Noir Markers and all the cardstock used was from the kit. Even the wooden glasses were part of the kit. They are just too cute (I stole this idea from one of the design team members if I remember correctly).

She’s just too stinkin’ cute!

Post-note – Anya may very well have to go on a regular A2 size card base. The glasses make her top heavy and she rolls to the side when set up for display! LOL Note how the card is positioned next to the dies. They are holding her upright!

To order Spectrum Noir alcohol markers, click the banner below:

To order the Nestabilities Fancy Edged Circle Dies, click the banner below:

This past week, one of my good friend’s daughter had emergency surgery and had to stay in the hospital for about 4-5 days. I met up with my co-colorist, Cheyenne Luken, and we wanted to stamp and color this cute fox holding a basket of flowers with our Spectrum Noir markers. After choosing the printed papers for the mats, cutting them out, and adding a sentiment. I thought this would be the perfect card to give someone on the mend.

Here is the card with the color choices following:

Stamp: Darcy’s (I don’t know the name). Cheyenne purchased this at a Stamp Show back this past fall. But it is a super cute set. It also has a chick and another critter that escapes my mind at the moment.

Spectrum Noir Markers:

Fox Fur: TN9, TN6, TN4, TN3 – TN3 and BP3 combined
Eyes: IG1 and Blender, FS8 with BG5 and blender
Paw: BG8
Leaves: LG5, LG4, LG2, CG2
Flowers: CT4 and OR1, OR3 and OR2, B1 and IB2 and GT1, BP3, PP4, PP1
Basket: IG1 and BT8

Dies: My Favorite Things dies (cross stitched rectangles, clouds, and grass)

Fun Stampers Journey: Glaze

Paper Pack: Pink and Main 6 x 6

I think this turned out to be soooo adorable.

I am making it under the wire, yet again, for a Paper Craft Crew (#233) challenge. This week’s challenge is a Tic-Tac-Toe Challenge. I chose the middle, vertical column (shimmer, Shabby Chic, flowers) for my card. Here is the sketch:

This image is a digi stamp I purchased from Sherri Baldy’s Etsy shop. The purchase gave me two digi stamps of the cutest girl. I have a blog post featuring the other image here.

I had decided to try and make dread locks/ringlets on my girl after watching a YouTube tutorial on coloring with alcohol markers (sorry, I didn’t make a note of the video). I will do my best to note the markers I used, but this was one of those creative moments where I was creating and not paying attention to the details of what I used. Anyway, I’ll pull out my Spectrum Noir Hex chart and do the best I can (it will be pretty close).

Spectrum Noir alcohol markers were used on the girl and the flowers. The hair – IG10, IG2, BG6, BG3; skin – HB2, FS2, FS7, BG4, TN3, TN5; lips and cheeks – FS8; dress/headband/pants – LG2, LG3, LG5, LY`, OR1, OR2; eye – LG2, LG5; flowers – CT2, OR2, OR3; leaves – LG2, LG3, LG5; and, the blender pen was used throughout.

The base cardstock is SU! Pistachio. The images were stamped on Spectrum Noir cardstock using Memento Tuxedo Black ink. The base mat is Pink and Main designer paper die cut with Fun Stamper Journey Persian Garden die, The orange mat is FSJ Creamsicle cardstock with a light green mat of designer paper from Heartfelt Creations Sweet Berry 12×12 paper pack (this explains all the flowers – I had to cover up all the strawberries on the mat – LOL), a Spellbinders die was used to create some FSJ Creamsicle swirls. Spectrum Noir clear glitter pen was applied to the hair and skirt to add the SHIMMER. FSJ Journey Glaze was applied to the flowers, skirt waist, skirt trim, and eye. Diamond rhinestones were added to the flower centers, and a triple bow from SU! lace Pistachio ribbon accented the card. Last but not least, everything is popped, popped, popped up. A lot of dimension is going on here.

It is a very busy card, but I like busy and it really yells Shabby Chic.

I really love the way this card turned out. It is one of my favorites.

Yesterday I had a Spectrum Noir Alcohol Marker coloring class, which focused on shading clothing. I had recently ordered from Etsy a Sherri Baldy digi stamp (there were two images to my surprise and delight). I thought this would be a great image to practice clothing coloring. A color palette of blues and pinks was chosen. When she was finished, I knew I had to submit another card to the Fusion Card Challenge – Pretty in Pink Card Challenge.

She was so much fun to color. Here are the markers we used: Hair – base from roots to midway of hair GB11 then GB4 to the ends. TN3, GB 10, TN5, EB4, EB5 (dots throughout hair); skin – EB1, FS7, FS9 and FS8 for cheeks and lips; dress and headband- TB1, TB4, TB5; Pants – LY1, CT4; Flowers PP1 and PP3 and Blender throughout project.

The flowers are from the Heartfelt Creations – Botanical Rose. The base of the card is FSJ Whip Cream with FSJ Watermelon Fusion and FSJ Bubble Gum cardstocks as mats. The oval was cut from Heartfelt Creations Strawberry Fields 12 x 12 paper pack. The pearl accents are FSJ pearls and they were colored with Spectrum Noir PP2 marker to make them pink. A layer of Journey Glaze was added to all the flowers to make them shine and pop. And, finally the bow is SU! silk ribbon made into a double bow.

If you would like to order any products from Fun Stampers Journey, click here.

So excited to show off this Oldie But Cool truck in the Paper Craft Crew Challenge #232. I love the way PCC sketches inspire you to think outside the box. Here is this week’s sketch:

This card was created with a friend after a Make It party she had at her house. We went downstairs to her basement craft room. We were wanting to use our Spectrum Noir Alcohol Markers to color something in shades of red. We decided the Fun Stampers Journey Hit The Road stamp set was the perfect choice. As we began coloring, I can tell you several times I thought I had ruined my truck. But, as alcohol marker colorists know, you have to walk away and let it dry and voila it looks great. I did have to cut the truck out because I kept coloring out of the lines. You know, Mama said there would be days like this – LOL. Once we finished with the truck, the background came about by trial and error.

I began the background mat by wanting to stamp the route 66 outline stamp in FSJ Sour Lemon ink, but I used FSJ Electric Lime by accident (that’s where one of the errors came in). Instead of tossing the stamped background, I thought, “Why don’t I stamp the full coverage route 66 image offset and on top of the outlined route 66 image in FSJ lemon drop?” It looked great. Then, I made another error stamping the one way image and smeared some ink. Oh ho, that wouldn’t do. So, I thought, “Hmm, what would FSJ Huckleberry Fusion look like stamped on FSJ Electric Lime cardstock?” It looked great. Thus the one way stamped images adhered off of the stamped background mat. I finished the background stamping the gas pump in FSJ Candy Apple ink. The final touch was some splatters of FSJ Sour Lemon silk. I love this card! I hope you do too.


Supplies: Fun Stampers Journey supplies can be ordered by clicking here.

Here in Georgia, the weather is fine, the trees are blooming, the birds are building their nests, and wouldn’t you know the most adorable bunnies showed up in my craft room wanting to make a grand entrance as well. They hopped right over and posed for a Pretty in Pink Bunny Delight portrait.

This was perfect timing for the Fusion Card Challenge – Pretty in Pink. Fusion Card Challenges allow three variations to a crafter’s designs. First choice, you can choose just the template layout; second choice, you can choose the color theme; or, you can combine both into one design. I decided to stick with the color theme of PINK.

Once the bunnies were settled down and ready for me to create, I stamped their images onto Spectrum Noir cardstock using Fun Stampers Journey Spring Fling stamp set. I then colored them with the following Sprectrum Noir Alcohol Markers: The bunnies heads and bodies IG1 and IG2; their ears, feet, bellies, cheeks, and noses PP1. This was a very simple and easy coloring project. Great for beginners. They are just too cute.

The base of the card is Fun Stampers Journey Whip Cream cardstock, and the mat with a large oval cut out of it is FSJ Watermelon Fusion cardstock.  I stamped circles with FSJ Watermelon Fusion ink from the FSJ Planner Sketch stamp set. An acetate sheet was placed behind the Watermelon Fusion mat. The zig-zag accent mat is from Pink and Main Spring Fling 6×6 paper stack. The Watermelon Fusion mat is raised using a double layer of foam tape. The bunnies are popped-out using FSJ Foam Squares Medium. The sequins in the oval are assorted sequins from my stash (Note: a horizontal strip foam tape about a 1/2″ up from the bottom of the oval to keep the sequins from “disappearing” when the card is upright). The final touch is a double bow created from SU! pink ribbon.

Such a cute card.

Supplies:
Fun Stampers Journey supplies can be ordered through me – click here

This week’s Freshly Made Sketches #274 card sketch is the perfect sketch to showcase Pink and Main’s Bear Hugs Stamp Set. Here is the sketch:

When I am creating a card for a challenge, I first look at the card sketch and then go through my stamps to determine which stamp would best fit the card sketch design. As I mentioned in the opening paragraph, I chose Pink and Main’s Bear Hug stamp set featuring an adorable boy with his teddy bear.

I stamped the images onto Spectrum Noir cardstock using Memento Tuxedo Black ink. I colored the boy and bear with my Spectrum Noir markers. Here are the color combinations: Hair – LV1, CT4, GB3, GB6, GB10; Skin – Fs2, FS3, FS6, TN2 and FS8 for cheek color; Shirt – LV1, CG1, HB3, HB2; Bear – TN2, TN3, GB6, GB10, TN6, TN9; Pants – TB2, TB3, TB8; Shoes – TN4, TN7, TN9. He turned out so cute.

I cut a FSJ Whip Cream mat to 5 1/8″ X 3 7/8″ and ran it through my Big Shot with a diagonal stripe embossing folder (SU!). I cut a small mat out of FSJ Denim Days and stamped the sentiment on it using VersaMark ink and embossed using white embossing powder. I popped the boy and bear image out using FSJ Medium Foam square. A simply adorable card.

Supplies:

Fun Stamper Journey – www.funstampersjourney.com/martymcgee
Pink and Main – www.pinkandmain.com
Spectrum Noir Markers – www.consumercrafts.com

PAGE TOP
[dealsbar preview] Amazing Deals: !!toolbar-deal-title!! - !!toolbar-deal-merchant!!