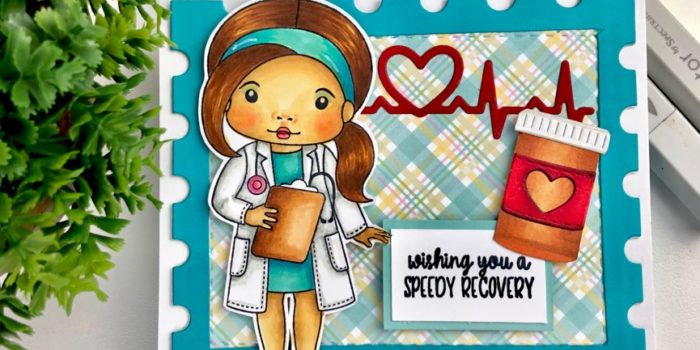
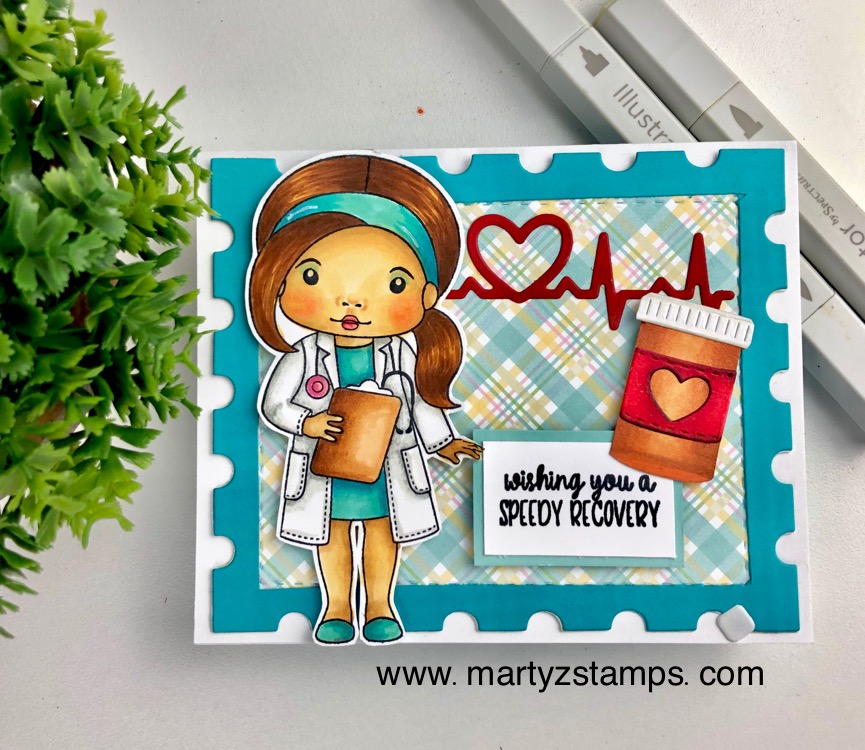
Recently, a friend’s husband had bypass surgery. A card featuring Dr. Marcie stamp and coordinating dies from a Club La-La Land Kit was the perfect set to create a get well soon card.
La-La Land Crafts has the most wonderful collection of stamps and dies to fit any occasion. Their stamps and dies combined with FSJ and Pink and Main supplies created the perfect card.
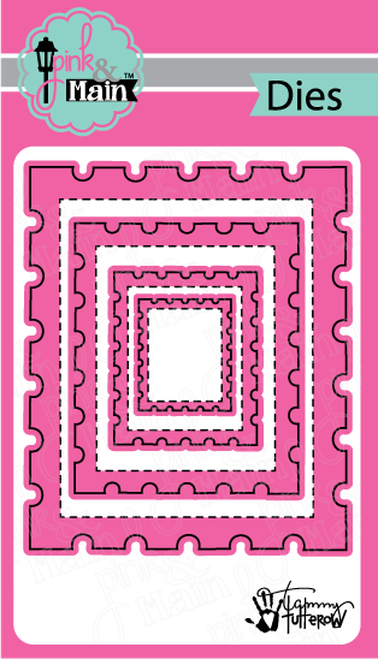
The base is FSJ Whip Cream CS with a FSJ Turbo Teal mat die cut using a Pink and Main die, the plaid mat is FSJ printed paper from my huge collection of printed paper, the EKG heart with beats is die-cut with one of the coordinating dies from the kit using FSJ Cranberry Bliss CS and the pill bottle is another of the coordinating die-cut using FSJ Whip Cream CS. Marcie and the pill bottle are colored with Spectrum Noir alcohol markers.
Here is a list of the markers I used for coloring (all colors are the original blend unless noted):
One of my favorite subscription kits is Scrapping for Less Flavor of the Month. I love that it includes 5 kits in one. This post features a card from the May 2019 FOTM Banana Split kit.
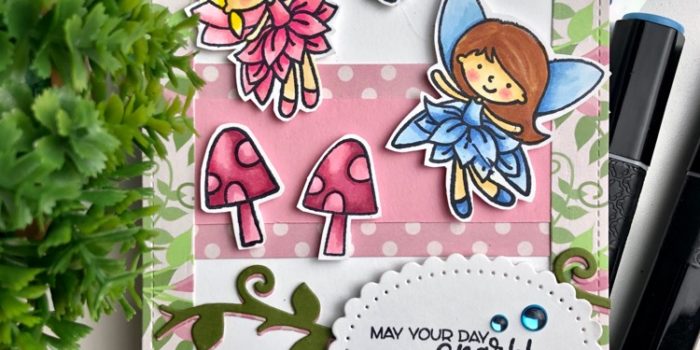
I created a sweet birthday card featuring two fairies. One dressed in pink and the other in blue with a tiny green butterfly floating above a bed of mushrooms. All images are colored with Spectrum Noir alcohol markers. The vine is a Fun Stamper Journey die and the oval is a Spellbinders die (see product list below).
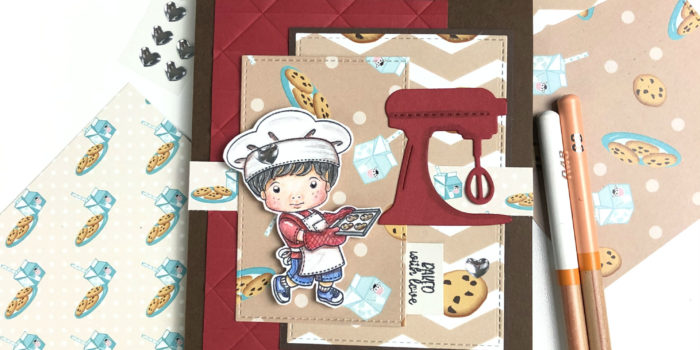
I have the most adorable little boy featured in this post. Not only is he super adorable, he loves to bake and his name is Luca.
Baking Luca stamped image is from La-La Land Crafts and it is part of Scrapping for Less, February Flavor of the Month kit called Whip It Up! The good news is there are some kits still available. You can click here to order the kit (I recommend the Banana Split kit).
I stamped Luca onto Spectrum Noir alcohol marker paper with Memento Tuxedo Black ink. I had planned to color him with my Spectrum Noir alcohol markers, but my friend brought her Faber-Castell Polychromos colored pencils and I used them to color Luca. They blend so well and allowed me to create fine details on Luca very easily.
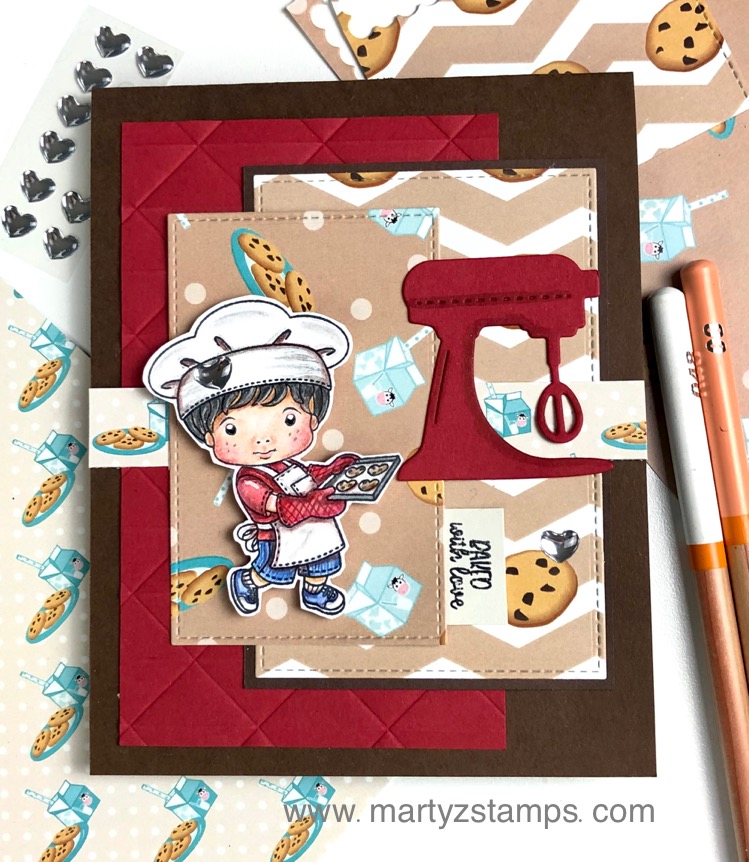
Here is Luca with some delicious chocolate chip cookies and ice cold milk. Yum!
Let me know in the comments your favorite baked treat or treats. My favorite baked treats are anything cake like (cake, brownies, muffins, etc.).
Supplies:
Click on the Consumer Crafts banner below to order Faber-Castell Polychromos (120 pencils) or Spectrum Noir Alcohol Markers. They are on sale this week 20% off art supplies and the Spectrum Noir Alcohol Markers are 6 for $6 or 24 pack for $22. If you miss out on this sale, they have 20%-25% site-wide sales at least every 4 weeks. These are the best prices I have found.
I am so excited you are hopping along with us for the December FSJ Creative Team Blog Hop! This month’s theme is anything but a card. I couldn’t wait to create a 3D Seasonal gift that works well for Christmas and into the Winter months. There are also a couple of tag ideas and I had to include a coordinating card.
If you get lost along the way, click the Creative Team Image below and you will be directed to the FSJ Blog.
If you’re not lost and just hopping along, follow the trail of designers below:
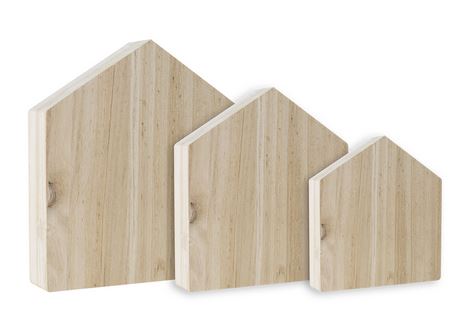
The first project features the medium and small house from the House To Home Wooden Houses.
House to Home Trio of Wooden Houses
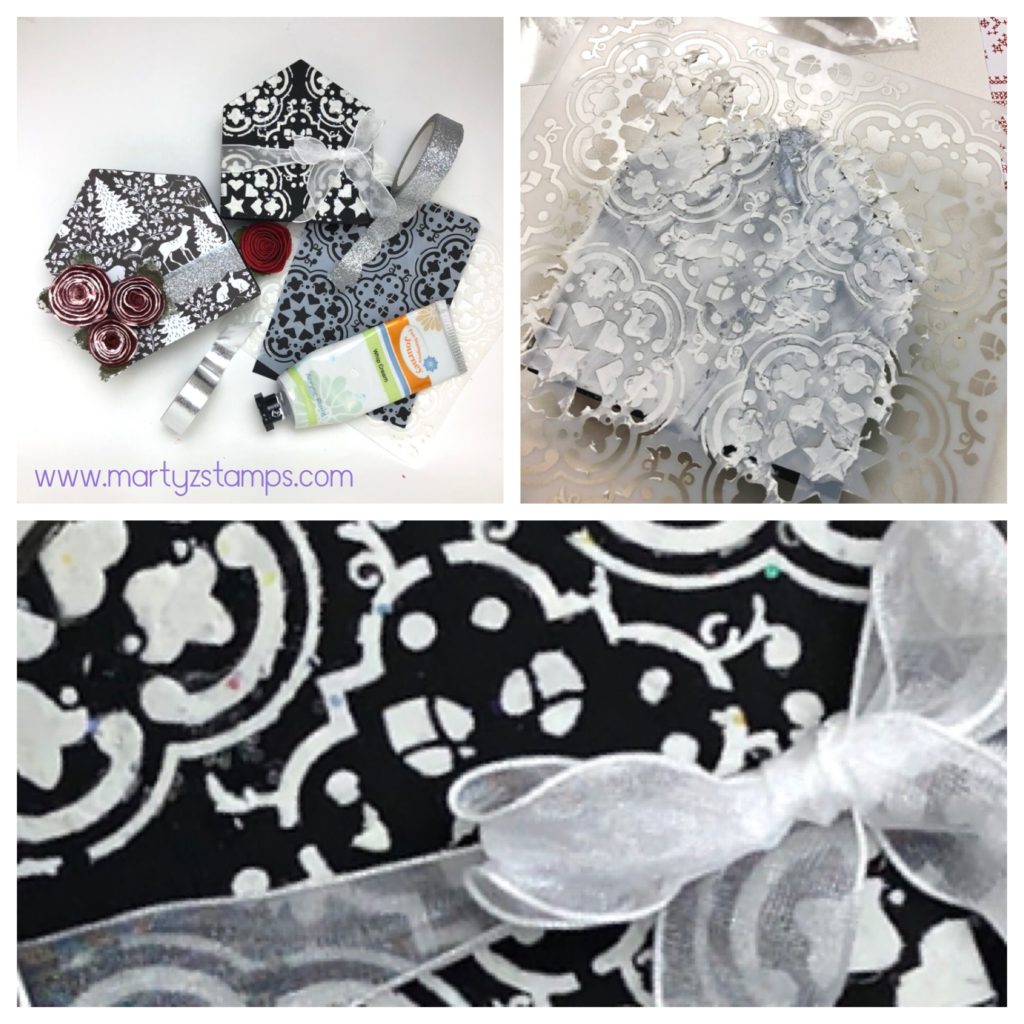
What a great gift for the mantle, dining table or side board. These were so easy to create. Here’s what you need. The Cozy Prints printed paper, Black Licorice and Whip Cream acrylic paint, Shimmer Silver Color Splash, Love Buds Paper Flowers, Cement Tile Stencil, Journey Modeling Paste, Sparkle Tape, Classic Elegance Washi Tape, Sparkle Cuts glitter, Journey Craft Glue, Square Paint Brush, Spatula, Crease Tool, Heat Gun and Special Day Organza Ribbon.
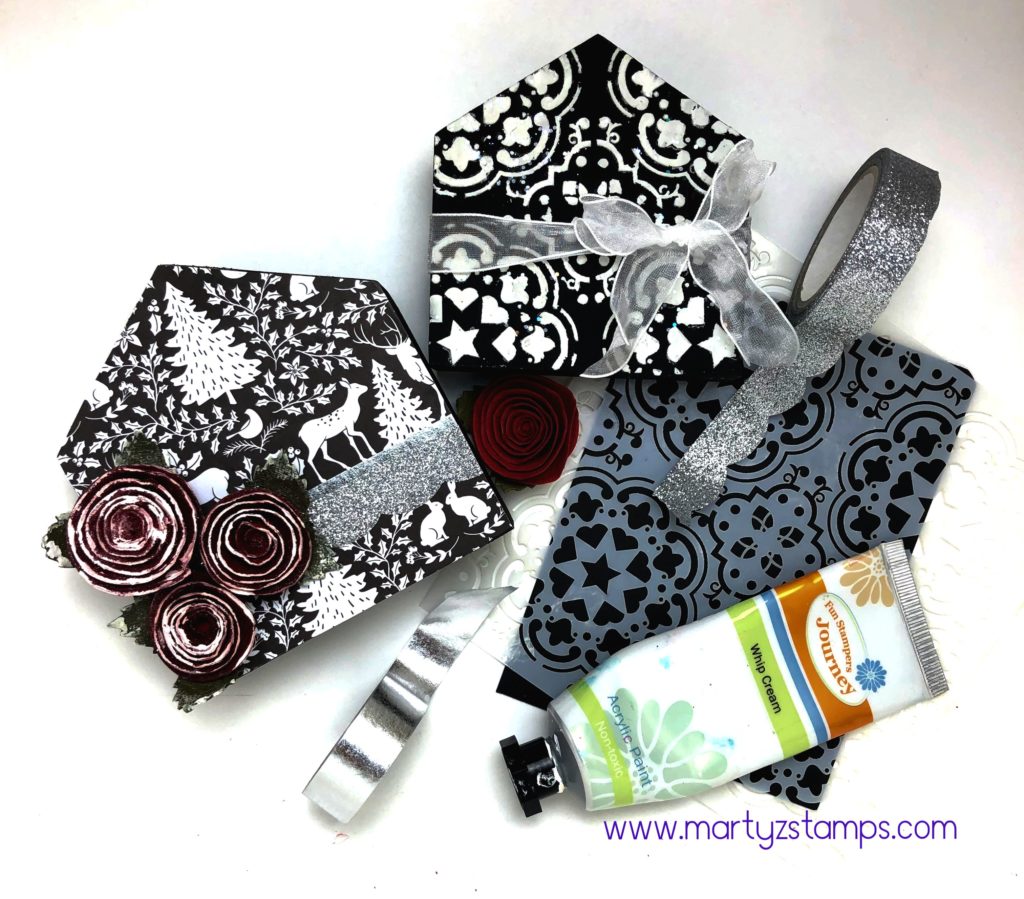
Make this gift by applying Black Acrylic paint to the wooden houses. Once they are dry, cut a piece of patterned paper a little bigger than the house you want to cover and gather your supplies to stencil the coordinating house.
Apply the patterned paper to the house using Journey Craft Glue.
Tip: To make spreading the glue easier, spritz with a little water.
Smooth the paper onto the house and using the edge of your crease tool, press out any trapped air pockets. Turn the house upside down and trim excess paper.
Tip: The glue dries really fast, make sure to position your paper quickly; otherwise, you’ll have a mess.
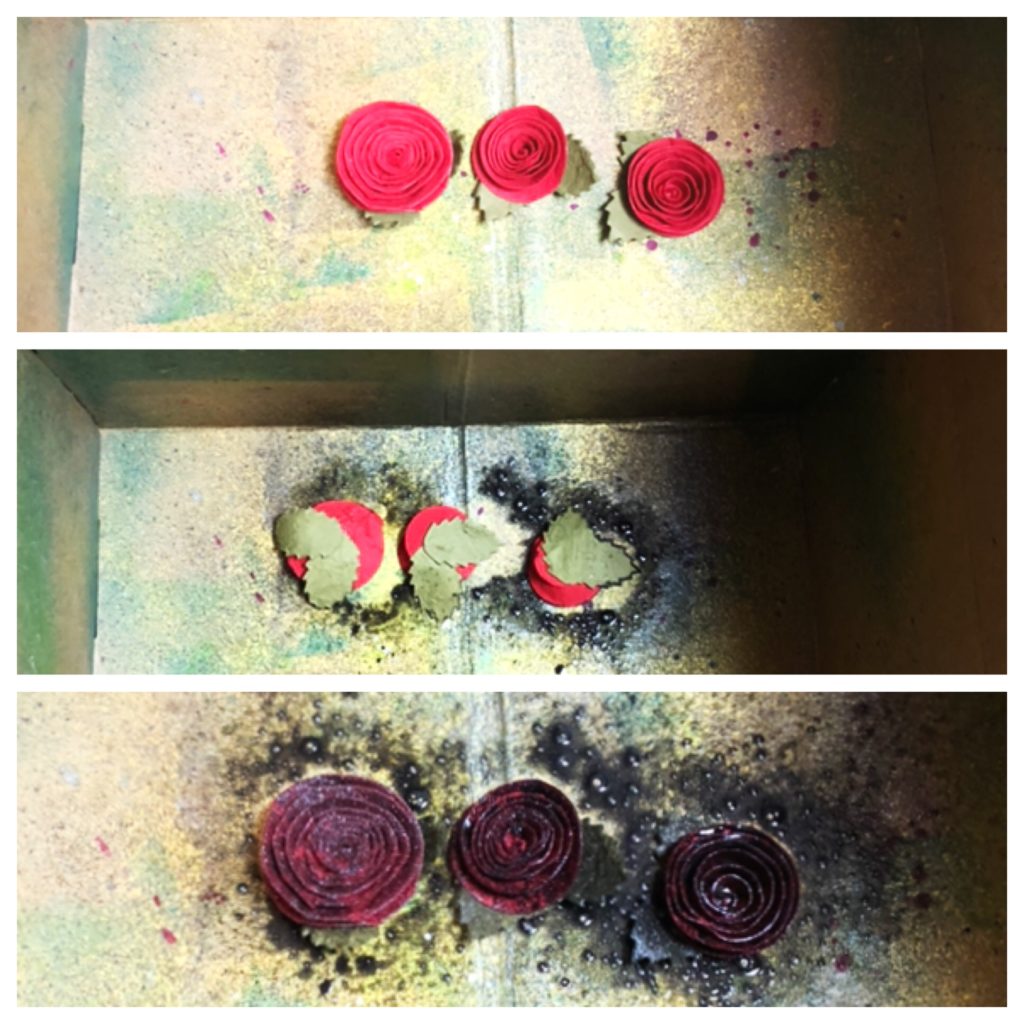
Choose three Love Buds Paper Flowers (large, medium and small). Place the flowers in a box to spray them with the Shimmer Silver Splash. Apply the Splash to the front and backsides of the flowers.
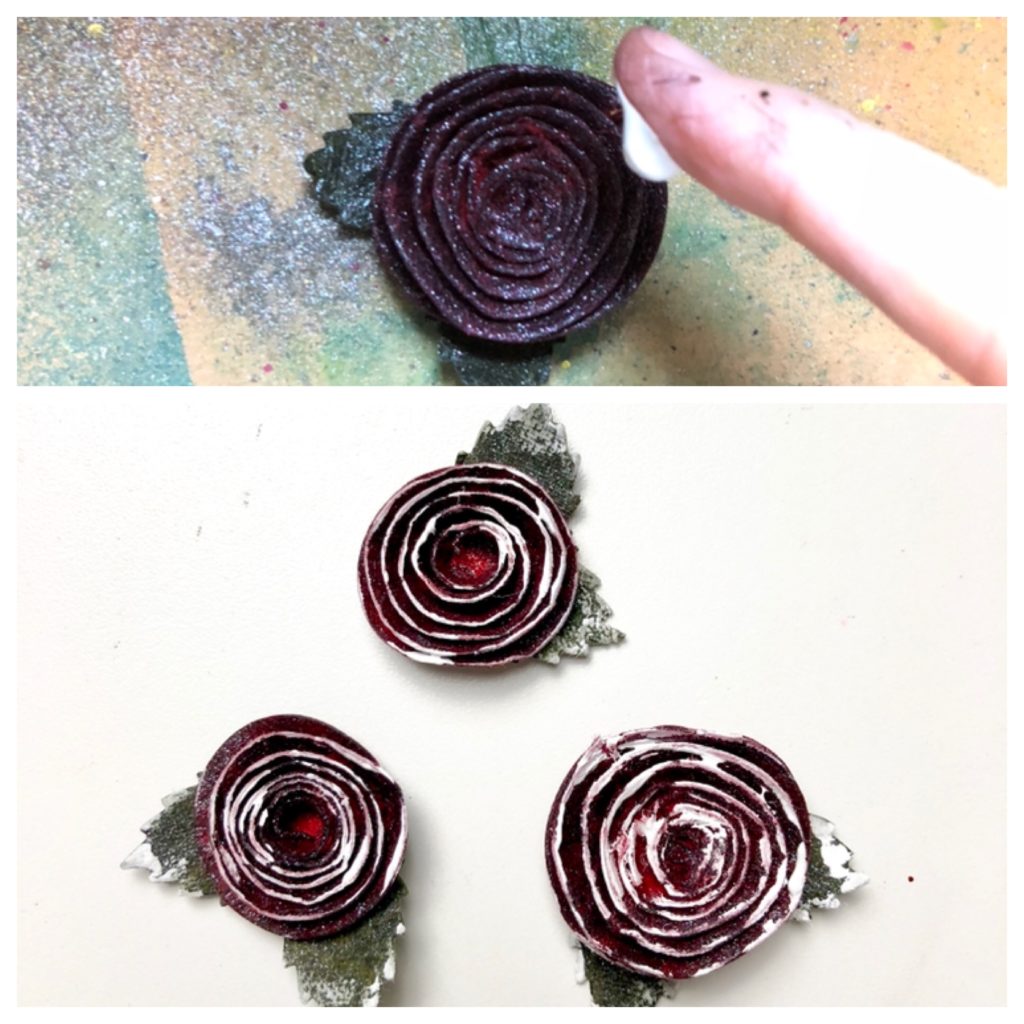
Once they are thoroughly dry (you may have to use your heat gun), place a small amount of White Acrylic Paint onto the tip of your finger and gently apply the paint to the edges of the flowers and leaves.
Take your silver and sparkle washi tapes and layer them onto the house. Adhere your flowers with Journey glue to the house and you’re done with the first house!
Moving to house number two, place some Journey Medium onto a non-stick surface that can be thrown away or cleaned. Mix in some Sparkle Cuts glitter.
Tip: Make sure to put the top back onto the Journey Modeling Paste to keep it from drying out.
Place the stencil onto the painted house. Apply the Journey Modeling Paste evenly over the stencil making sure to cover every opening. Pull the stencil off. You may want to apply more Sparkle Cuts directly to the paste. When the paste is a little dry, use the palm of your hand to gently tap the paste. This will create a smooth stencil look to the design.
Wrap the Special Days Organza ribbon around the house and tie a bow.
TIP: For a really cool look, apply heat using a heat tool which will cause the ribbon to crinkle in a delightful way.
So easy and so fun!
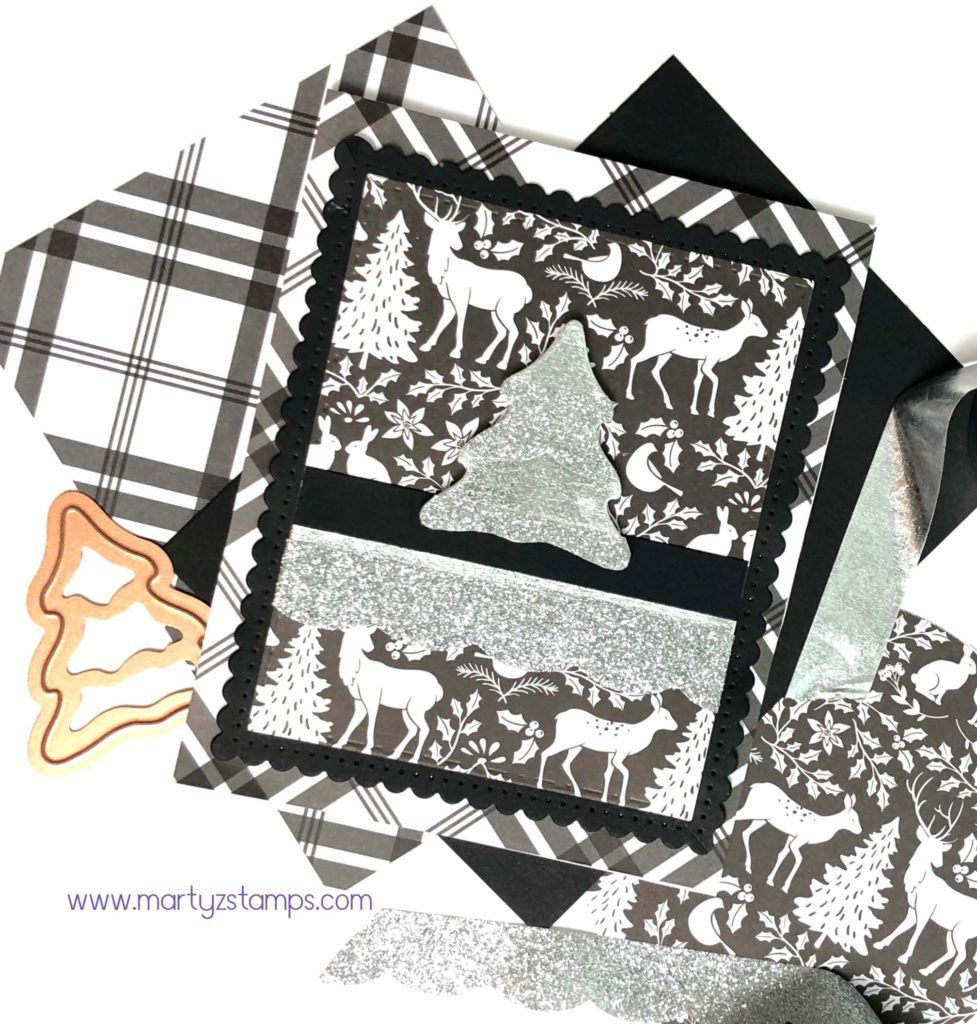
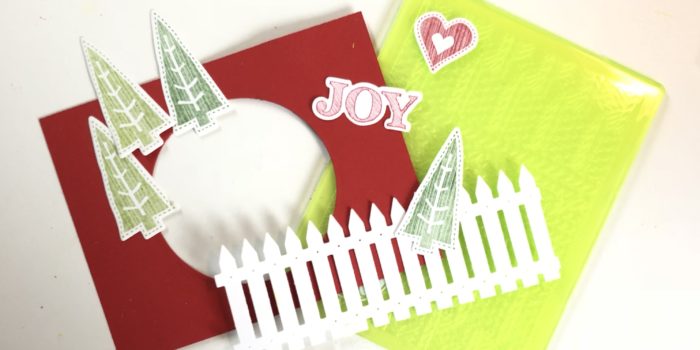
Coordinating Card
You shouldn’t give a gift without a card, right? How about a coordinating card for the gift? Let’s do it.
What a simple but elegant card to coordinate with the gift. This card uses a great technique to adjust the size of the scallop mat, but I’m getting ahead of myself. Start by cutting a base from Whip Cream cardstock 4 1/4″ x 10 1/2″. Next, cut a plaid mat from the Cozy Prints paper at 4 1/4″ x 10 1/2″ (it will cover the entire card front). Die cut a Black Licorice mat from Nestabilities Fancy Edged Rectangle Dies (second to largest). This is where we make an adjustment to the size of the mat.
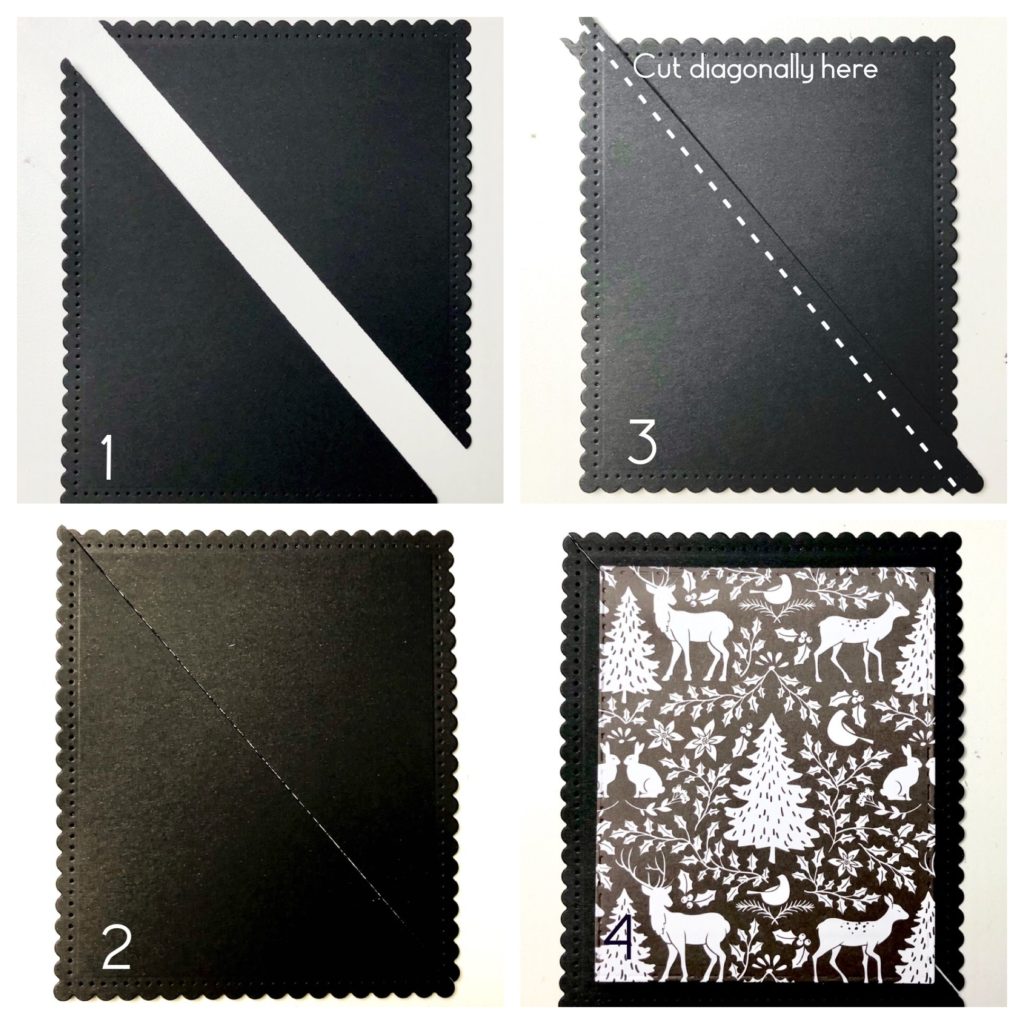
Place the Black Licorice scallop mat on a paper trimmer. Cut from one corner to the other (#1 & 2). Overlap the cut pieces to desired width or height (#3). Adhere the overlapped edges together. On the corners with the overlapped edges, cut diagonally.
TIP: Before cutting make sure the corner scallops line up to make one full scallop. This will allow a seamless mat. The printed mat was cut with FSJ Rectangles die (#4).
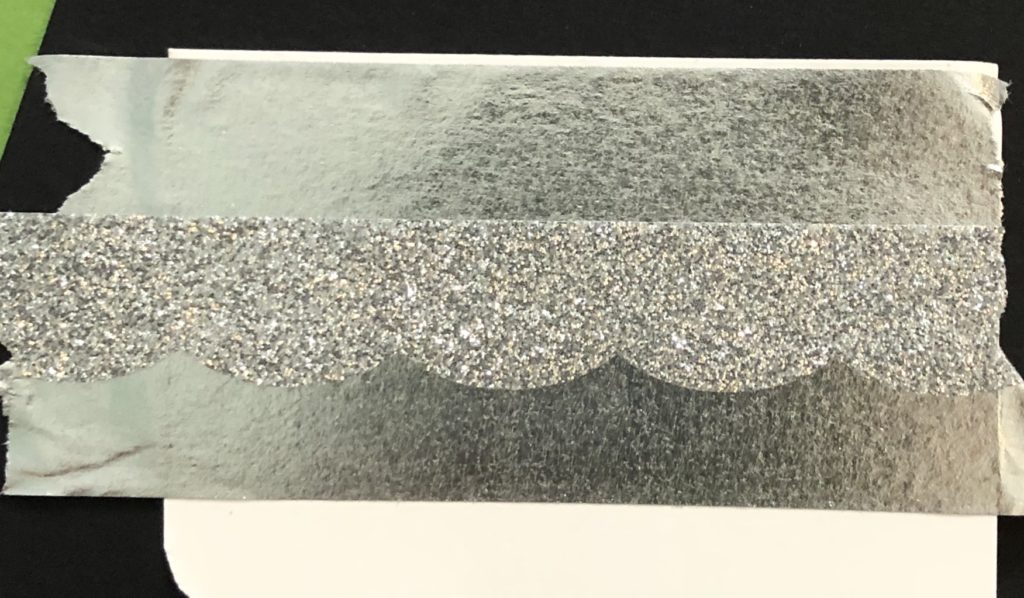
Adhere a black strip of Black Licorice cardstock to the top mat along with the silver and sparkle washi tape.
The last technique for this card is to create the Christmas tree. Apply strips of the silver and sparkle washi tape to a scrap piece of cardstock (overlap as necessary).
Create as many layers as needed.
I die cut a tree using a tree die from the Holiday/Christmas 2015 Card Making Kit. If you don’t have this kit, any tree or ornament die will work.
Adhere all mats with White Liner Tape. Pop up the Christmas Tree with FSJ Medium Foam Squares. Finally, add your personal sentiment inside the card.
Tag Time
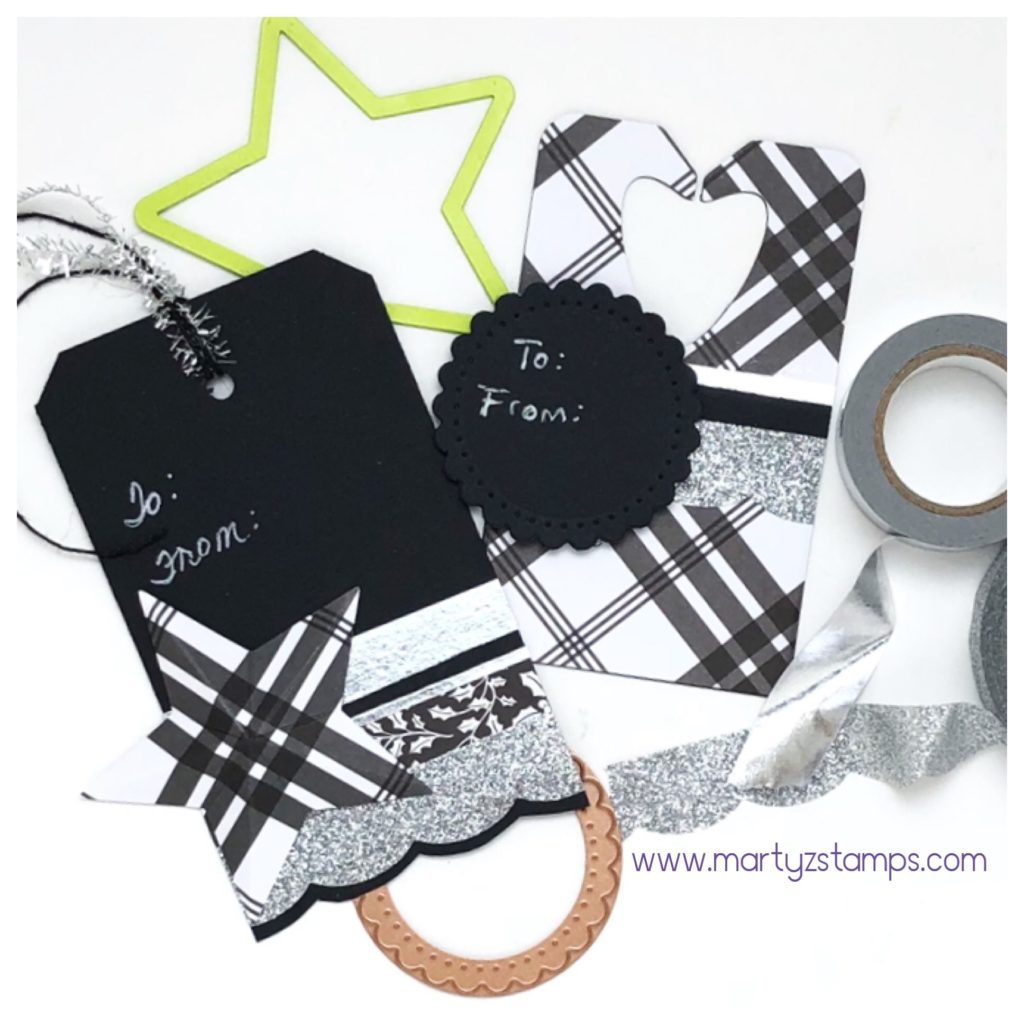
Last but not least are some incredible gift tags to set off your Christmas wrapping.
The Black Licorice tag is a rectangular piece of cardstock with trimmed corner and a hole punched at the top. A combination of washi tape and cardstock layers accent the bottom of the tag. The scalloped bottom was accomplished using Details Pro Shears and following the outline of the Sparkle Tape.
The accent piece is a 3D star cut from FSJ Star dies and scored from the top of the point straight down to the inverted point below. To create the 3D affect, crease each score line and manipulate the score lines into mountains and valleys. The top is adorned with Black Licorice Twine and Silver Sparkle Tinsel. It is as simple as that, really!
The plaid tag is cut from FSJ Bread Tag die. Strips of washi tape and Black Licorice cardstock break up the plaid pattern. The scalloped circle was die cut from Spellbinders Fancy Edged Circles. Both the “To and From” were written with a white gel pen.
All of these projects were such fun to make. Let me know in the comments what is your favorite out of the three projects.
Supplies:
Disclaimer – By clicking on an image you will be redirected to Spellbinders + FSJ website. When you purchase through my website link, I will receive a small commission. This helps to keep me crafting and inspiring others.
PJs and Papercrafting is OPEN for registration featuring the Gnome For The Holidays stamp set!
Grab your favorite PJs or comfy clothing, put them on, gather your supplies, prepare to wind down, relax and get ready to craft; because, YOU are invited to join me on November 11th, 7:00 p.m. EST for a Facebook Live to create 3 beautiful fancy fold card projects using the Gnome for the Holidays stamp set.
When you place your order, you will receive an invitation to my private Facebook group, PJs and Papercrafting. There you will have access to a printable PDF for the class projects and access to the Facebook Live video class.
You will need:
Basic supplies on hand to make these projects, such as adhesive, scissors, trimmer with scoring blade, foam squares, crease tool, coloring tools (pencils, watercolors, markers) and a multi-purpose tool. I have shared below what I will be using. I have listed several ink pad colors. For example, Candy Apple or Cranberry Bliss will work for these projects as well as two of the green inks. Use what you have or click on the images to purchase exactly what I am using (note: all pieces will be embossed or die cut).
PJs and Papercrafting will be held LIVE on the PJs and Papercrafting Facebook group, Sunday, November 11th at 7:00 p.m. EST. If you cannot make the LIVE event, the video will be available for viewing after the event in this group. You will be added to the group about one week prior to the LIVE class. If we are not currently friends on Facebook, send me a friend request when you sign up.
Registration Options
NOW through October 29th, Friday, 11:59 p.m. EST for Option 1 or 2 Class
NOW through November 2nd, Friday, 11:59 p.m. EST for Option 3 Class.
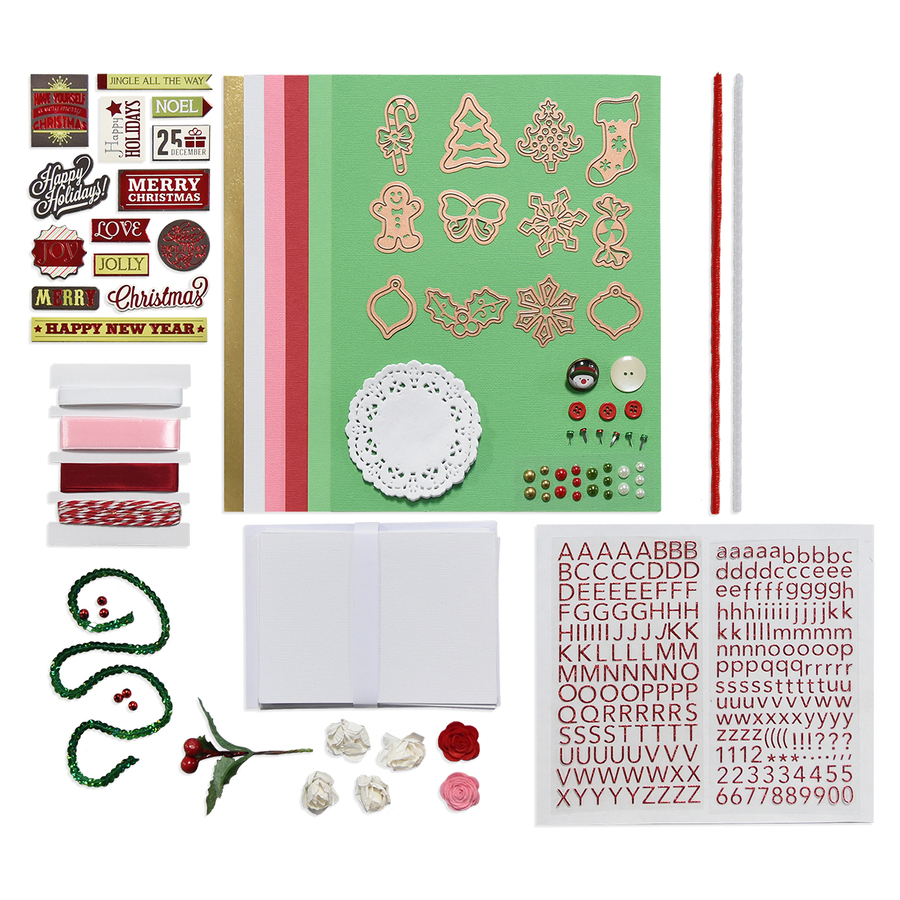
Included in the Gnome for the Holidays Nov./Dec. 2018 Kit:
Option 1: Full Kit (Bundle) – $65.00 Includes the Gnome for the Holidays (Bundle) stamp and coordinating die along with all supplies (excluding basic supplies), PDF and online content.
Option 2: Full Kit (Stamp set only) – $47.00 Includes the Gnome for the Holidays stamp set only along with all supplies (excluding basic supplies), PDF and online content.
Option 3: Materials Only – $23.00 3 fancy fold card project kit ONLY (does not include the stamp or die), PDF and online content. This is a great option if you already own the Gnome for the Holidays stamp set and/or dies. Coaches are welcome to participate with this option.
All products for the kits will be ordered and prepared by me after the registration deadline of October 29th for product orders and November 2nd for class only orders, 11:59 p.m. EST. If for some reason during the transition from FSJ to Spellbinders + FSJ the stamp set/bundle are backordered, I will stamp your images and send them with the kit so you will be able to partake in the FB Live event. Your order will be shipped to you at a later date. Class kits can only be mailed within the United States (additional charge may apply for Hawaii and Alaska).
Expected shipping date of all kits is November 4th.
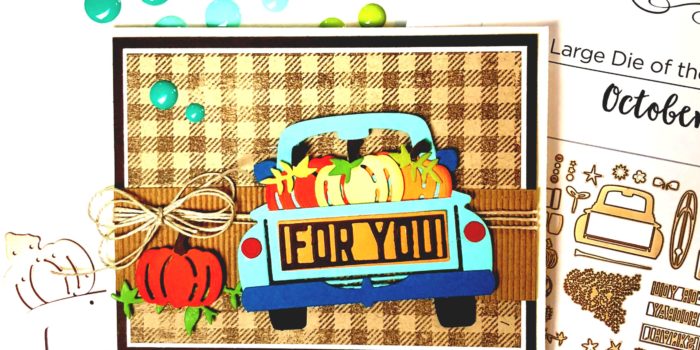
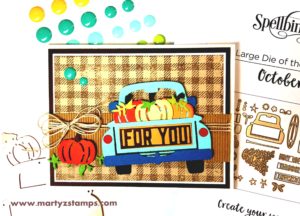
Do you love dies as much as I do? I confess I am a die addict and if you love dies like I do, then you are one too. When FSJ partnered with Spellbinders, I couldn’t get enough viewing time of their die selections. One of Spellbinders biggest Wow products, to me, is their Die of the month club. This month’s Large Die Club features an adorable truck with a truck load of accessories.
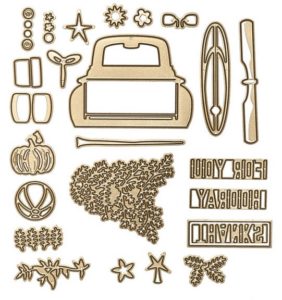
Here is a look at all the dies:
There are endless possibilities as to what you can make with with this set. My friend, Debbie Kissel, joined the Large and Small Die Cutting Club (a much better price point) and she was so gracious to bring both sets over for us to create a card project (we had no more than two hours of creating time; therefore, one card). She thought pumpkins would be good and I agreed.
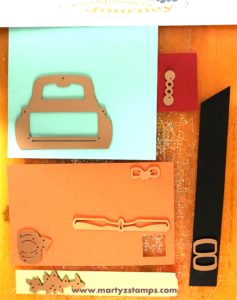
The process began with me choosing the color combinations and cutting out the pieces on my Platinum die cutting machine.
Such a great use of scraps and it saved on cutting time as well.
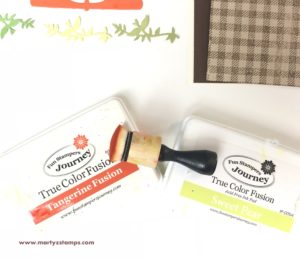
As you can see in the picture below, I have a base of Butter Cream CS, a Hazelnut Blend base mat, a Buttercream mat (not shown) and an Oatmeal Cookie mat. The truck is Cool Pool with a fender and side view mirrors cut from Blue Lagoon CS (photo shows Tangerine Fusion, but as we put the truck together the side view mirrors blended in with the pumpkins – time to rethink those colors). The pumpkins are Sweet Pear, Tangerine Fusion, Citrus Cooler with Hazelnut Blend stems. The sentiment “For You” is cut from Hazelnut Blend and matted on Citrus Cooler. Of course, there are red tail lights and black tires. Last but not least is the greenery, it is Limeade Splash, Sweet Pear and Green Olive cardstocks. The stamp set is Flannel Life and the inks are Hazelnut Blend, Tangerine Fusion and Sweet Pear.
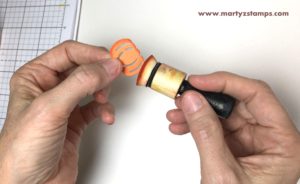
Before I began the assembly process, I sponged the edges of the pumpkins with their coordinating ink and I stamped the Flannel Life onto the Oatmeal Cookie with Hazelnut Blend.
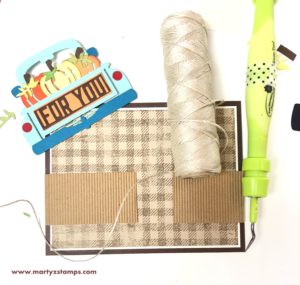
Now comes the fun part, putting the truck together! Once the truck is assembled, it is time to bring the card together. I wanted to keep this rustic and “fallish”; so, I grabbed a piece of Corrugated cardstock and trimmed it. As you can see it wasn’t wide enough, but no problem, I just cut it in half and glued it down knowing the truck would cover up the gap. Some loops of Natural Twin with a triple ribbon with tie everything together.
Last but not least is a final accent piece. I placed a couple of Candy Drops in the upper left hand corner.
It is just too cute! Such a fun and relaxing project.
As we move toward November and the final transition to the new Spellbinders + FSJ team, I hope this inspires you to check out Spellbinders today. The FSJ products will not be available on the Spellbinders website until November 1st. I have those supplies below the Spellbinders Banner. Click on a product from there and you will be taken to my FSJ website where you can order.
In this new transition of partnering with Spellbinders, I have become a part of the Spellbinders + FSJ affiliate program. If you would like to purchase a Spellbinders product, please click on the banner below. It will take you to their site. I will receive a commission on anything you purchase at NO ADDITIONAL cost to you. This helps me to continue creating inspiring products for you.
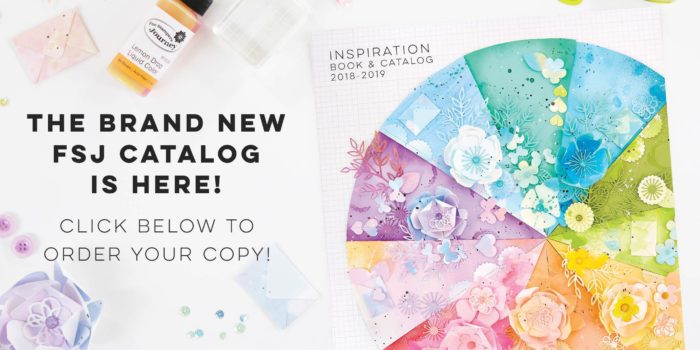
July is Fun Stampers Journey’s New Year and bringing in our new year, means a new Inspiration Book and Catalog (all 331 pages and over 500 ideas and photos) along with some sweet surprises.
FSJ Flip Catalog is here. Check it out! Or, click here to order one.
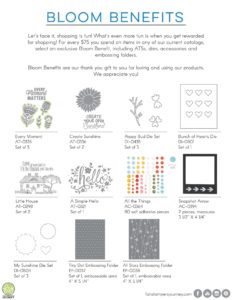
With the new catalog, comes all new Bloom Benefits. Yes, for every $75.00, you receive a FREE gift from Fun Stampers Journey. You can choose from stamps, dies, embellishments and embossing folders. Check them out:
NEW COLORS! Rustic Rose, Peaches and Cream, Tin, Chambray Shirt, Haystack and Fresh Sage.
AMAZE MACHINE – new and improved debuting in August. It will fold up for more compact storage like our Platinum die cutting machine.
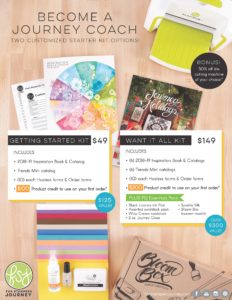
JOIN MY TEAM with one of two new Starter Kits. They have been updated and provide each new coach the ability to choose the products they want in their kit!!!!! That means no more limited, pre-selected products. You can choose between the $49 kit which includes $100 of product on top of the kit itself or choose the I WANT IT ALL KIT for $149 with $200 of product. You have the opportunity to purchase one of our amazing die cutting machines for 50% off. If you are interested in joining the journey, contact me at martyzstamps@gmail.com or click on the picture below.
NEW LOGO to start off the New Year! It’s clean and simple and I love it! What do you think???
Last but not least, are all the new stamp sets, dies, pan pastels, liquid colors, embellishments etc., . . . . I know you will love them.
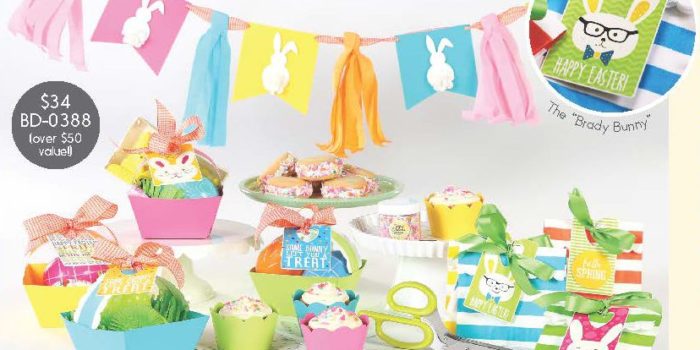
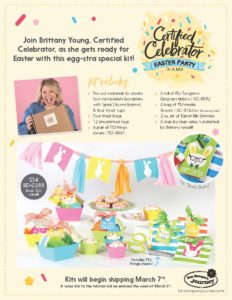
Celebrate with Fun Stampers Journey and Brittany Young, Certified Celebrator with Easter Party in a Box (BD-0388)!
This kit includes everything you need to create a gorgeous themed party.
Contents include:
Pre-cut materials to create four mini-baskets [complete with “grass”], bunny banner, & four treat cups
Four Treat bags
16 pre-printed tags
A pair of FSJ Fringe Shears (TO-0081)
FSJ Tangerine Gingham Ribbon (AC-0092)
FSJ Media Flowers (AC-0162) for the bunny tails
2 oz. jar of Easter Mix Sprinkles
A step-by-step video tutorial by Brittany Young
This kit is only $34.00 (plus shipping and tax) and valued over $50.
I have already ordered my kit and plan on completing the projects with my kiddos. I know we are going to have an awesome time creating the decorations for our party. Shhhh. . . they only think we are playing and crafting which they love to do. They are going to be super excited when we celebrate with cupcakes and ice cream sandwiches sprinkled with Brittany’s Easter Mix Sprinkles.
You can order you kit at www.funstampersjourney.com/martymcgee click the shop tab and order your box today (BD-0388). Hurry, there is a limited supply!
This website uses cookies to improve your experience. We'll assume you're ok with this, but you can opt-out if you wish.AcceptRead More
Privacy & Cookies Policy
Privacy Overview
This website uses cookies to improve your experience while you navigate through the website. Out of these, the cookies that are categorized as necessary are stored on your browser as they are essential for the working of basic functionalities of the website. We also use third-party cookies that help us analyze and understand how you use this website. These cookies will be stored in your browser only with your consent. You also have the option to opt-out of these cookies. But opting out of some of these cookies may affect your browsing experience.
Necessary cookies are absolutely essential for the website to function properly. This category only includes cookies that ensures basic functionalities and security features of the website. These cookies do not store any personal information.
Any cookies that may not be particularly necessary for the website to function and is used specifically to collect user personal data via analytics, ads, other embedded contents are termed as non-necessary cookies. It is mandatory to procure user consent prior to running these cookies on your website.


 Such a great use of scraps and it saved on cutting time as well.
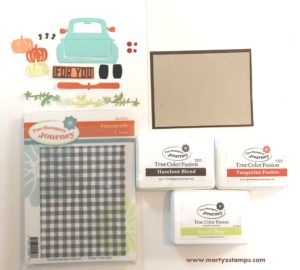


")