Tag : stamps

8 posts

It is Day 3 of the FSJ + Spellbinders launch. So many awesome products and so many ways to bring paper to life!
I decided to do something a little different than a regular A2 size card.

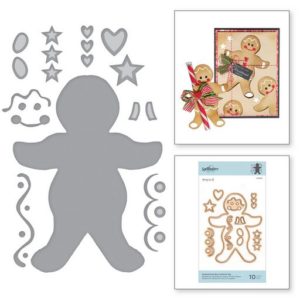
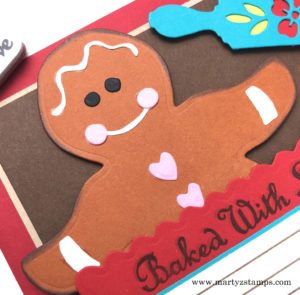
Today’s inspiration showcases Spellbinders Gingerbread Boy Garland Tag and Recipe Card set by Sharyn Sowell.
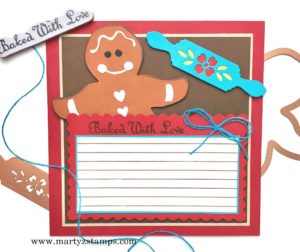
I featured a 6 x 6 recipe card because they hold a special place in my heart. For over 10 years, I held a Christmas In The Woods Stamp Camp, each participant created a 6 x 6 recipe card swap and made the dish featured on the swap. So many wonderful dishes were enjoyed over the years. I still have every swap safely stored in 6 x 6 scrapbook albums.

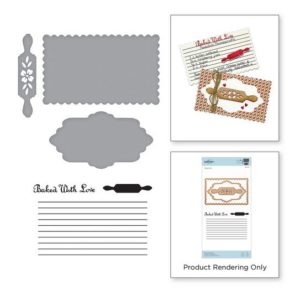
Here are the stamps and dies I used on this project:

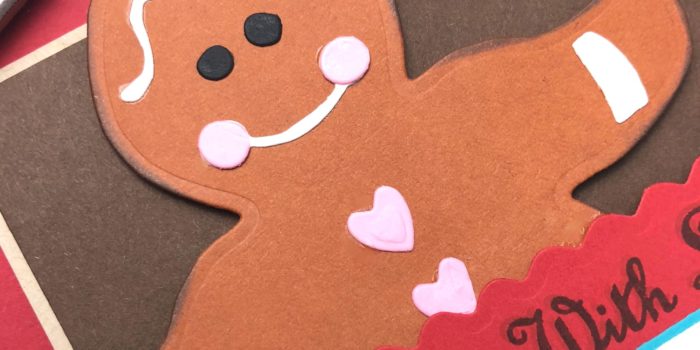
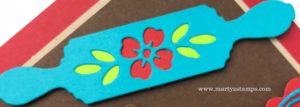
There are no special techniques used to create this project, just die cutting and a little stamping. Cardstock used on the Gingerbread Boy are Pumpkin Bread, Whip Cream, Bubble Gum and Black Licorice with the edges of the “boy” sponged with Pumpkin Bread Fusion adding depth to the die cut figure. The Candy Apple rick-a-rack mat has a Butter Cream mat with Hazelnut Blend stamped lines. The sentiment “Baked With Love” is stamped first with Pumpkin Bread Fusion Ink and then offset slightly and stamped with Hazelnut Blend Ink. The absolutely adorable rolling pin is cut from Turbo Teal cardstock with a Candy Apple red flower and Electric Lime leaves. I adhered a double bow from the Beach Breeze Twine onto the rick-a-rack mat. All die cuts are popped out with medium Foam Squares. The mat dimensions are 5″ x 5″ Hazelnut Blend mat, 5 1/8″ x 5 1/8″ Oatmeal Cookie mat and a
5 7/8″ x 5 7/8″ Candy Apple base mat.

I hope this inspires you to create recipe cards to give to family and friends or to start your own recipe album.

Click on the images below to order:

Gingerbread Boy Recipe Card

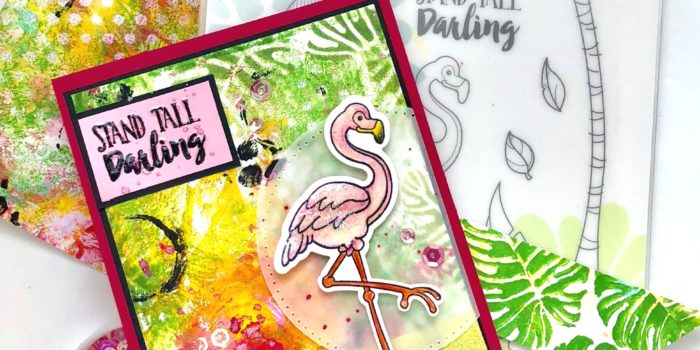
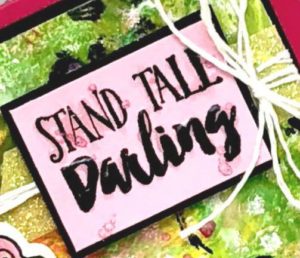
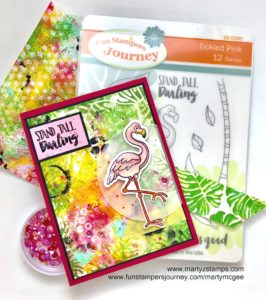
I love incorporating FSJ mixed media products to create one-of-a-kind designs. The flamingo cards are a submission requirement to becoming part of the FSJ Creative Team. I hope you are inspired to create and bring paper to life!

Important read all instructions. Gather supplies (products at end of blog).

TIP: Clean Gel Press with damp towel before changing to new color/color combo.

Pull – each time cardstock is applied to Gel Press, smoothed out and pulled up.

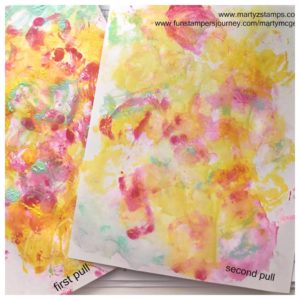
TIP: All pulls are made on two pieces of Whip Cream 8 ½ x 11 cardstock. The first pull is the initial application of paint; second pull is created from leftover paint from first pull (may need to lightly mist Gel Press with water).

Place Gel Press on table.
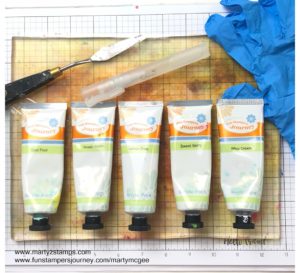
Apply Sweet Berry and Whip Cream paint, mist with water (picture 1).
Mix with fingers as shown (picture 2).
Initial pull with first sheet and another pull with second sheet.

Repeat with Cool Pool, Pineapple Smoothie and Lemon Drop paints. Don’t incorporate Cool Pool with the yellow paints (picture 3).
Repeat pull instructions.

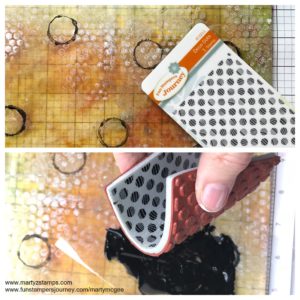
Place Vintage Screen stencil on Gel Press, add Whip Cream paint onto top of stencil. Brayer paint over entire stencil. Repeat covering Gel Press (picture 4).
Repeat pull.

Dilute Black Licorice paint with water. Take a small bottle, press into paint and transfer image onto the Gel Press (picture 5).
Repeat pull.


Apply Limeade Splash and Whip Cream. Brayer covering press. Apply Wallpaper stencil (leaves portion) to press – VERY IMPORTANT TO READ – Use SECOND pull cardstock on top of the stencil, rub transferring image onto cardstock. Repeat over entire Gel Press.

Mist the press with water. Use FIRST pull cardstock, make a pull of the entire press. *Aim for hints of green on cardstock.

Bend Deco Dots ATS slightly dip Black Licorice paint.
Stamp randomly onto both cardstocks.

Cut dry cardstock into fourths (4 – 5 ½ x 4 ¼ pieces).

Sponge Limeade Splash and Kiwi Slice using Wallpaper Stencil adding hints of green leaves around edge of mat.

Stamp flamingo image; color with Color Burst Pencils. Die cut.

Card base – Sweet Berry cardstock.
Black mat – 5 ¼  x 4.
Mixed media mat – 5 1/8 x 3 7/8.
Circle dies – Pierce vellum and cut circle.

Position flamingo on vellum circle (do not adhere).
Turn circle over, place adhesive where it won’t show once card is finished. Place foam squares onto flamingo, set aside.

Adhere mats and vellum circle to card base.

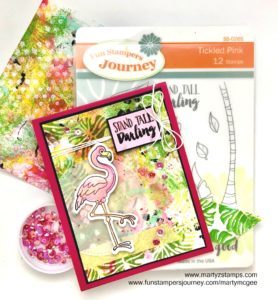
REMIX CARD, wrap white thread onto mixed media base before adhering to Black Licorice mat.

Stamp sentiment onto Bubble Gum cardstock with Black Licorice ink.
Mat onto Black Licorice cardstock.
Add Lemon Sparkle tape and adhere sentiment.

Sprinkle with Bubble Gum and Sparkle Silk.
Adhere flamingo.
Add sequins and Journey Glaze to sentiment and flamingo (dust flamingo with Sparkle Dust).  Allow to dry.


Original:


The REMIX CARD uses Color Splash Pencils.

REMIX CARD – make a double bow from White Thread and adhere using glue dot.

Remix:

Product List

Spatula

$3.95

Brayer

$7.96

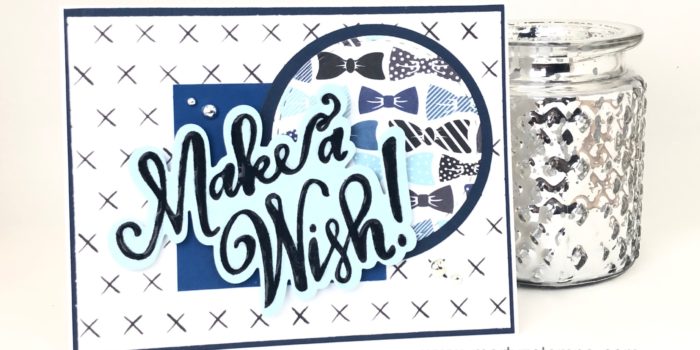
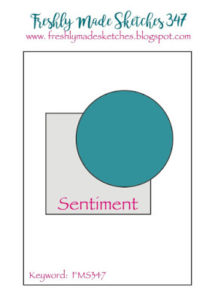
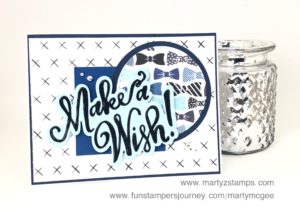
If there is one stamp set and die that I truly love, it is the Make A Wish stamp and die bundle! In fact, I love it so much it is my August Featured “A” Team Bundle. To bring in this featured stamp set, I wanted to showcase it as a blue and bow tie birthday card on Freshly Made Sketches #347 card challenge.

I turned the design to landscape position and went to work. If you are a paper crafter that likes quick, simple and clean creations, this card is for you! I began with a base of FSJ Whip Cream card stock with two base mats of Denim Days (5 3/8″ x 4 1/8″) and Through the Year Prints 12 x 12 paper (5 1/4″ x 4″). Using the same Denim Days card stock I cut a mat out of our circle dies and a circle out of Through the Years Prints. The square accent is cut from Huckleberry Fusion (2 1/2″ x 2 1/2″). The Make A Wish sentiment is stamped with Black Licorice onto Pool Play card stock using my MISTI to create a fully stamped image and then die cut with the coordinating die using our Amaze die cutting machine. Make A Wish is popped up with Medium Foam squares and Journey Glaze makes the words pop off the card stock. The final accent are the Fashion Silver accents.

So quick, so easy, so cute!

If you would like to order this bundle and any of the supplies used to create it, please click here or on any of the supplies below!

Product List

I know I can’t say enough about how much I love being a coach with Fun Stampers Journey. I particularly love their catalogs which feature amazing card and project ideas. This year for Christmas inspiration, I went straight to the catalogs for some card ideas. I re-imagined or Case’d card ideas straight from our catalogs and some from our group of wonderful coaches.

The first card featured is the Fresh Forest stamp set (SS-0487 or the bundle BD-0271) and Holiday Wishes (SS-0469). I gained inspiration from the card featured on page 56 of our main Inspiration Catalog. Since my group of stampers would be creating a lot of cards in one class, I wanted to make sure most of the cards were easy to recreate. I created a remixed version below.
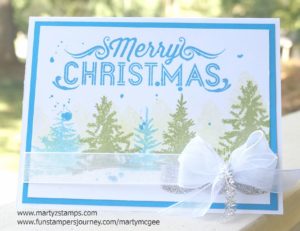
I used FSJ Whip Cream (CS-0040) as a base and the main piece of cardstock used for stamping. I stamped the Merry Christmas and two of the smaller trees with FSJ Beach Breeze fusion ink (IP-0044). The rest of the trees I used FSJ Lemon Grass fusion ink IP-0022). The shadowed affect behind the trees is created using one of the smaller trees stamped using FSJ Sweet Pear fusion ink (IP-0054). To create the snowy hills, I masked the lower portion of the card with a curvy piece of cardstock. This kept the bottom of the trees from making an ink impression and created the illusion of snow banks and smaller trees stamped with the same stamp. The flecks of blue on the card was created using FSJ Beach Ball acrylic paint (JM-0102) thinned down with water and flicked onto the card with a paint brush. The stamped piece of cardstock was adhered to a mat from FSJ Beach Breeze cardstock (CS-0088). The card was accented with Special Day Organza Ribbon (AC-0316) and Silver Tinsel (AC-0341). Last but not least is a strip of Silver Sparkle Tape (AC-0259). Super Cute, Super Easy, Wow!

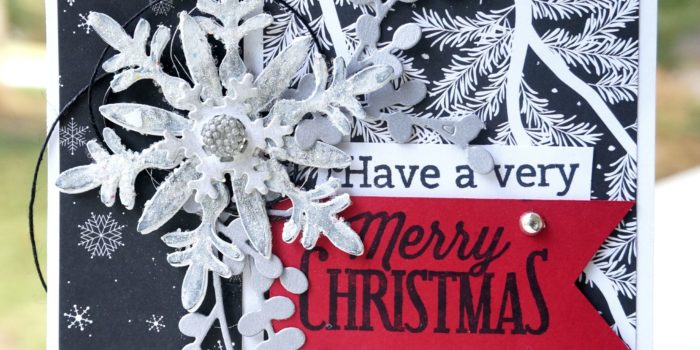
I feel in love with this next card, and I Case’d straight out of the catalog. I mentioned to Rose Curtis on FSJ Coach Connection Facebook Page; if I create a card way in advance of a class, I should make another sample of the card the night before the class so I can remember how I made it. I really had those ladies at this class working really hard to complete the textured snowflake. I helped one of the attendees with her stenciled image, and I thought, “I don’t remember this card being this hard to make.” Well, when I got home, I happened to look at the directions in the catalog and yes, I wanted to beat my head against the wall. I can really make something very simple, very complicated. LOL
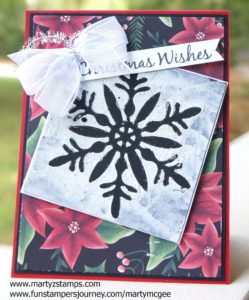
You can get the directions for this card by viewing the Journey Holiday catalog on-line (click here). Note: The sentiment was stamped from the Hostess Exclusive Night Star stamp set (SS-0518) – I cut off the Joyful portion because it was too long. I used the following cardstock: Cranberry Bliss (CS-0090), Black Licorice (CS-0003), Whip Cream (CS-0040), and the Christmas Cheer Prints (PP-0049). The snowflake mask was created using the Snow Blooms die set (DI-0253). Other supplies needed were Journey Gesso (JM-0072) – Note: the catalog references Journey Modeling Paste (JM-0073), but I didn’t have any and the Gesso worked just fine, a Spatula (TO-0089), Special Day Organza Ribbon (AC-0316) and Silver Tinsel (AC-0341).

I had the Black Licorice snowflake mask left over from creating the previous card (the catalog suggest using chip board, but I didn’t have any; therefore, the Black Licorice snowflake). I was thinking how could I use this instead of throwing it away and I saw the card idea featured on page 40 of the Journey Holidays catalog and decided to re-imagine this card idea. Here is my version below:
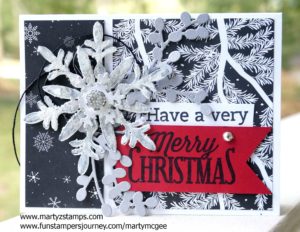
The base of this card is FSJ Whip Cream cardstock (CS-0040). I cut two mats from the Christmas Cheer Prints 12×12 paper (PP-0049). I must mention the Christmas Cheer Prints (PP-0049) contains 24 12×12 sheets, 4 each of 6 two-sided designs! What a deal. I cut two more large snowflakes from the Snow Blooms (DI-0253) out of Whip Cream cardstock (CS-0040). I glued the white together and the black one on top of the two white snowflakes. I added sparkle to the snowflake with FSJ Sparkle Dust (AC-0151). I die-cut the smallest snowflake out of Whip Cream cardstock, applied Silver Pan Pastel to it and adhered it to the other larger snowflakes. I accented the snowflake with a large Sparkle Drop (AC-0022). The sentiment was stamped using Black Licorice fusion ink (IP-0041) onto Whip Cream cardstock and Candy Apple cardstock (CS-0007). I added some interest and dimension to the card by die-cutting the Bloom Cluster (DI-0163) from Journey Brush Silver (CS-0135). The final accent is a Fashion Silver (AC-0293) drop of goodness. This is my favorite card!

If you are looking to create a super simple, super quick, quick, quick card for a mass mailing of Christmas Cheer, this is your card.
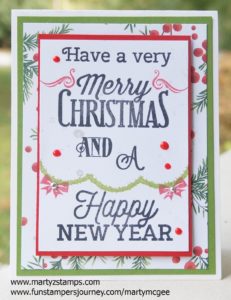
I was inspired by the card featured on page 41 of the Journey Holidays catalog. I took the word stamps from the Holiday Wishes stamp set (SS-0469) and placed them on one clear block. This made stamping the sentiment in Black Licorice fusion ink (IP-0041) onto the Whip Cream cardstock (CS-0040) really easy. The green bows were stamped using FSJ Lemongrass Fusion ink (IP0022). The bows and curly swirls were stamped using Candy Apple fusion ink (IP-0017). I used Fashion Silver (AC-0293) accents on the bows. The red dots are not FSJ because I did not have my most wonder Rainbow Drops (AC-0178), yet (they will arrive today) and I had to make due. The mats included the following cardstocks – Candy Apple cardstock (CS-0007), Limeade Splash cardstock (CS-0020), and the Christmas Cheer prints (PP-0049). There is a splash of Sparkle Silk (IP-0126) to finish it off.

The next beautiful card was Case’d straight from another coach Marcie Besecker. I tweaked it a little bit for my Christmas Buffet Make-It class. Here is my version below:
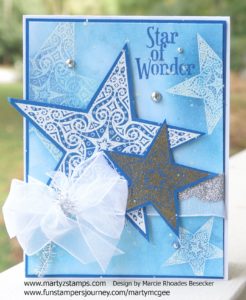
The tweaks were: Star of Wonder sentiment is stamped onto the embossed mat with Huckleberry Fusion ink (IP-0035), Silver Tinsel (AC-0341) instead of the Gold Tinsel (AC-0340), triple bow instead of a double bow from the Special Day Organza Ribbon (AC-0316), a large star with a medium star instead of two medium stars, and a Huckleberry Fusion cardstock base mat (CS-0015). The stamp set for this card is the Night Start (SS-0518) from the Journey Holidays catalog.

The next card I cannot find my inspiration for this layout, but I know I looked at something to create this because of the tree. This is what I get for not making notes as I create (like that will ever happen – once I get going, I’m off and running, no time to slow down and write down any notes). Anywhoo, I love this stamp set Snowmen Days (SS-0519) from the Journey Holidays catalog. I must have a snowman card every year for my Christmas card classes and this set was too cute to pass up.
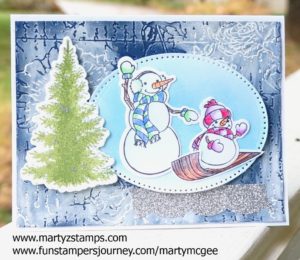
The base and all cardstock used for stamping is FSJ Whip Cream cardstock (CS-0040). The snowmen were stamped using Black Licorice Fusion Ink (IP-0041), the tree was stamped using Lemongrass fusion ink (IP-0022) with some Fresh Forest fusion ink (IP-0013) barely stamped onto the stamp down the middle. The tree was die-cut with a die from the Fresh Forest Bundle (BD-0271 found on page 86 of the Inspiration catalog. The oval mat was pierced and die-cut using the Journey Ovals (DI-0042). The background is sponged onto the oval using Pool Play and Beach Breeze fusion inks (IP-0051 and IP-0044). The base mat is cut from Denim Days cardstock (CS-0113) and embossed with the $100 level Bloom Benefit Love Letter Embossing Folder (EF-0025) NOTE: It’s free with a $100 purchase!! I turned the embossed piece of cardstock upside down (the de-bossed side) and using a little water to make the Journey Gesso (JM-0072) move easier, I smeared and rubbed the Gesso over the entire mat leaving a few places untouched. The snowmen were colored using the Journey Color Burst Pencils (JM-0077). The final touch was a piece of Silver Sparkle Tape (AC-0259). Love it!

These are all the cards I came up with using inspiration from other sources. I hope this gets your creative juices flowing. Fun Stampers Journey provides amazing card, scrapbook, and project ideas throughout both their catalogs. As a Journey Coach, I have access to a private Facebook page for Coaches only where we all share our ideas and encourage each other in our journey.
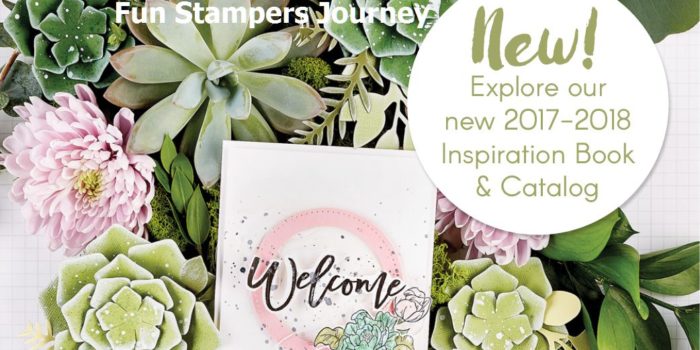
I am so excited to share the NEW Fun Stampers Journey Catalog. I know you will want to have this awesome 2017-2018 Inspiration Book & Catalog in your own hands. I cannot brag enough about how creative Richard Garay and the FSJ designers are at creating on-trend and beautiful cards, scrapbook pages, and 3D projects that Wow and Amaze. I have already sat down with my catalog and marked everything I “wish” to purchase in the next year. Well, let’s just say, if I had unlimited funds, I would purchase one of everything in the catalog and some things in multiples.

I have included a link to order the catalog below (click on the picture of the catalog and you will be redirected to the on-line catalog). I hope you enjoy this year’s inspiration as much as I have in the last two weeks.

If you are not redirected to the on-line catalog click here .


The theme challenge for Paper Craft Crew #230 is “LOVE”.

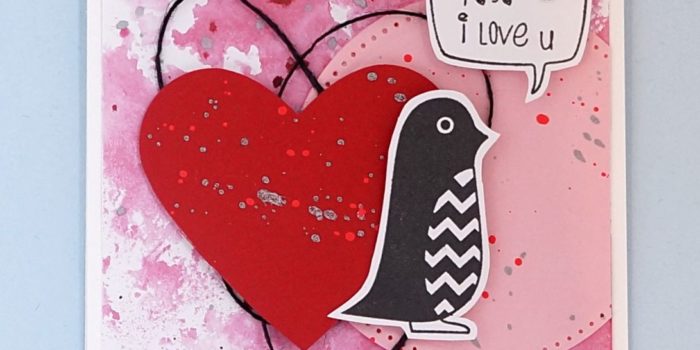
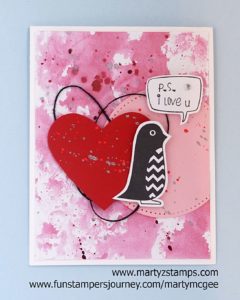
I have the perfect card for this theme. It is super cute and adorable. It features a cutie patootie peguin with the sentiment “P.S. i love u.”
This card was created for my Make-It Card Class, and it was a favorite design. The base of the card is FSJ Whip Cream. The background mat was created using FSJ Sweet Berry splash, Cranberry Bliss, Outrageous Pink, and Silver silks. To the background mat, I added a FSJ Bubble Gum pierced circle mat with a FSJ Cranberry Bliss die cut heart splattered with the same silks used on the background mat. The heart is accented with a looping of FSJ Black twine. The penguin is a FSJ P.S. ATS (Artist Trading Stamp). Both images were stamped using FSJ Black Licorice ink onto FSJ Whip Cream cardstock. They were both fussy cut leaving a 1/8″ border around the images. The heart, the penguin, and the sentiment are popped up with FSJ Medium Foam Squares.

This was a quick and simple Wow card creation.

Supplies:

Fun Stampers Journey products – To order click here.

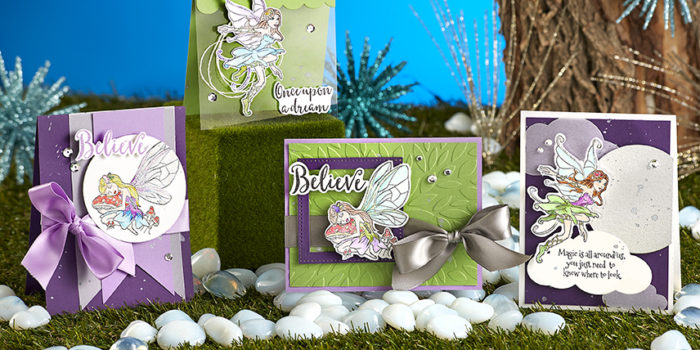
I can hardly wait for this month’s Bloom Box. It’s all about fairies. How adorable! September’s Bloom Box was my first Bloom Box, and I didn’t know what to expect. I was delighted with the stamp set, pre-cut card packs, and detailed in-color instruction booklet. My Bloom Box girls meet together to enjoy making the cards together, and we are counting down the days until we have October’s Bloom Box in our hands. Here is October’s Bloom Box:

octoberbloombox

The Bloom Box is::

SIMPLE: Each month enjoy an exclusive red rubber stamp set, pre-cut elements, coordinating embellishments and step-by-step instructions.

FAST: Create 4 eye-catching, unique greeting cards using the supplies we’ve provided. Just add your inks and a few tools, and you’re ready to go!

FUN: Share your creations with friends and family, give a set as a gift, or keep in your personal inspiration library. Better yet, use it to host your own crafting party!

If you would like to order a Bloom Box, please click here to be directed to my Fun Stampers Journey website.

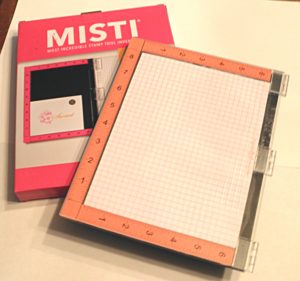
This is the last of my Scrapbook Expo posts. I know I can be addicted to papercraft shopping. O.k., that’s an understatement, but I do have some restraint. So, I planned before I arrived at the Expo to purchase a Misti. I have been watching numerous YouTube channels featuring many papercrafters using the Misti, and I just had to have one. During the Mega Make-n-Take, designated vendors set up shop and offered products at a reduced rate or with a special bundle price. One of the vendors offered such a great deal, I purchased my Misti that night along with the cleaning solution. It is WONDERFUL! You can check out the Mist at www.mysweetpetunia.com.

www.mysweetpetunia.com

www.mysweetpetunia.com

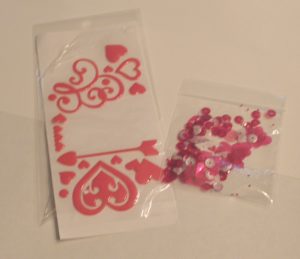
I, also, purchased that night some items from Queen and Company.  On a previous post I featured their make-n-take shaker card. Along with making the card, we had extra epoxy and sequin embellishments left over, enough to complete several more card or scrapbook page projects.

Queen and Company embellishments

Queen and Company embellishments

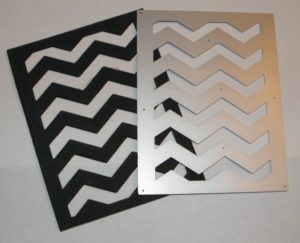
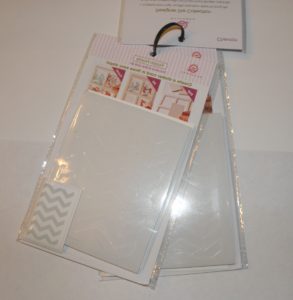
They offered a special on shaker card component purchases. I chose a zig-zag die which came with two foam shaker pre-cut card components. These are awesome. All you have to do is pull the adhesive off the backside of the shaker component and adhere it to your card. You can add embellishments or if the design allows, you could stamp images on the card stock before placing the foam. Next, you remove the adhesive from the front of the foam and place the window sheet (acetate) on top. Once this is completed, you apply adhesive to a pre-cut piece of thicker than regular cardstock and place it on top of the window sheet to finish the project. The cost for these complete kits minus the embellishments runs around $3.00. Instead of purchasing the shaker card components by themselves, I purchased a bundle which included the die. The die allows to me create as many cards as I would like. One way is to purchase “fun foam” sheets from a craft store. I was able to find some with adhesive on one side, and I purchased mine from Michael’s with a 50% off coupon. You would need to cut approximately three sheets of foam to have enough height to allow the embellishments to move around and shake.

Queen and Co. zig-zag die with black fun foam

Queen and Co. zig-zag die with black fun foam

Queen and Co. shaker card components

Queen and Co. shaker card components

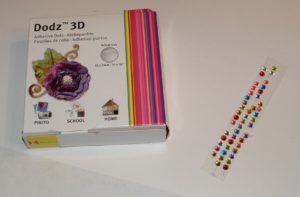
We received during the Mega Make-n-Take some adhesives and rhinestone embellishments. I cannot remember who supplied them, but it was a great freebie.

Glue dots, rhinestones, one bottle of adhesive not shown

Glue dots, rhinestones, one bottle of adhesive not shown

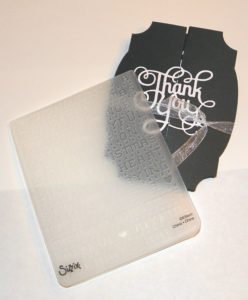
It’s Cheaper Than Therapy gave each make-n-take attendee a FREE embossing folder. My folder is Christmas themed.

It's Cheaper Than Therapy embosing folder

It’s Cheaper Than Therapy embossing folder

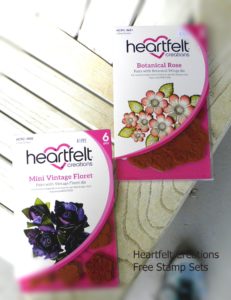
The next two days after the Mega Make-n-Take are designated workshop and shopping days at Scrapbook Expo. Most of the workshops offer free products when you take a vendor’s workshop. Heartfelt Creations offered a free stamp set up to a $19.95 value for each of their workshops. I took two workshops with them; therefore, I received two stamp sets.

Heartfelt Creation Free Stamps

Heartfelt Creation Free Stamps

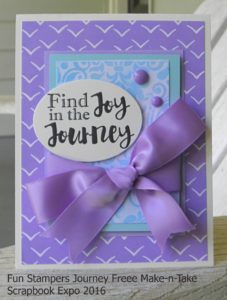
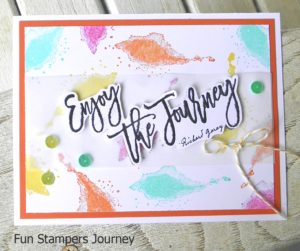
There are various vendors in the exhibit hall offering free make-n-takes as well as make-n-takes with a nominal charge. I had been looking forward to Fun Stampers Journey exhibit all year. We had to wait about 30 minutes for a seat to come available, but it was worth it. We made a cute card and received a stamp set for FREE! I have pictured the make-n-take card along with an extra design they offered. I made that card for my make-n-take class.

Fun Stampers Journey Card

Fun Stampers Journey Card

FSJ Card 2

FSJ Card 2

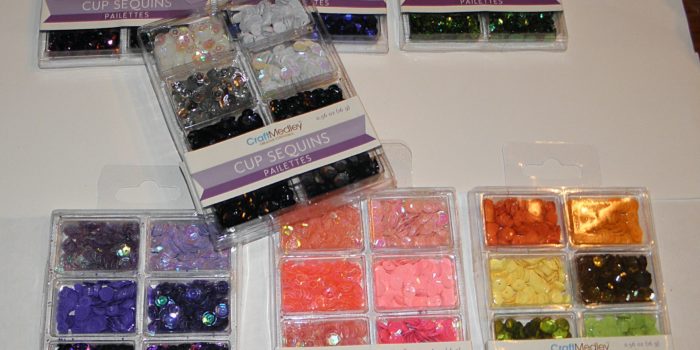
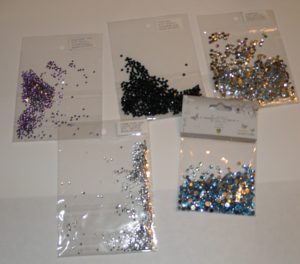
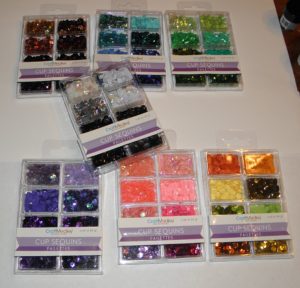
After making the shaker card the night before at the make-n-take, I wanted to purchase some sequins, but I didn’t want to spend a lot of money. I stopped by the Tall Mouse booth www.cre8tiveartz.com and purchased a selection of sequins along with some rhinestones all under $20.00.

www.cre8tiveartz.com

www.cre8tiveartz.com

www.cre8tiveartz.com

www.cre8tiveartz.com

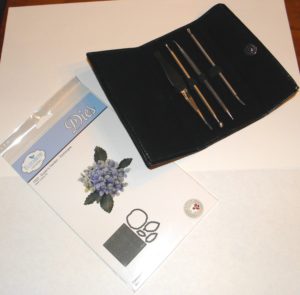
After a wonderful experience with Heartfelt Creations and their flower shaping class, I went by a booth that offers 3D dies for flowering creations. I wanted a hydrangea die and Elizabeth Craft Designs had one. I had my friend, Debbie, go back the next day and purchase the flower shaping tool kit.
Elizabeth Designs

Elizabeth Craft Designs

Last but not least, Debbie went back to the Heartfelt Creations booth and purchased the Berry Cafe 12×12 paper pack (not pictured). All in all I had a great time and came away with some great products and new papercrafting skills. Next year, I plan on taking more workshops and attending the exhibit hall two days in a row. We didn’t have time to stop at all the booths to compare prices and purchase more crafting supplies. I hope you enjoy this post.

PAGE TOP
[dealsbar preview] Amazing Deals: !!toolbar-deal-title!! - !!toolbar-deal-merchant!!