Category : Uncategorized

20 posts

Hello to all you animal lovers! I am sharing Little Blue Button Stamps’ Girl with Kitty digital image.

I fell in love with the Girl with Kitty digital stamp and knew I would feature this image as part of the LBBS design team. Everything about this image screams cute, cute, cute!

When I started to color the image with my Spectrum Noir Alcohol Markers, PINK jumped into my head. So, I had to include pink in my color choices.

Once I colored her, I decided to go with a Turbo Teal square card measuring 4 1/4″ x 4 1/4″ with a Pool Play mat. I matted the image on a Sweet Berry scalloped circle with a Whip Cream die cut mat.  I think this card turned out well.

Supplies: Click on image or company name to shop.

Little Button Stamps

Spellbinders + FSJ:

Consumer Crafts:

Spectrum Noir Alcohol Markers (all are regular version unless noted)

Skin: FS2, FS3, FS4, FS9 (Illustrator)
Hair: IG2, IG5, IG6, IG8, IG10 highlights – TB2
Shirt: FS8, PP1, PP4, CR4 Flowers – BT2, BT4, BT5
Pants: BT2, BT4, BT5
Kitty-cat: LY2, CT4, GB4, GY5


Spring time brings us so many wonderful flowers and to celebrate Spring flowers, I am featuring Little Blue Button Stamps, Tulips digital stamp.

What a beautiful digital stamp and so much fun to color. I used Spectrum Noir alcohol markers and FSJ Color Burst Pencils to create a stunning card. I think this digi stamp will brighten anyone’s day.

Here are some in progress pictures taken at the table in the screened-in porch from our condo in St. Augustine, FL.

These digital images (see below) were brought to life using a variety of coloring mediums. The purple pink tulips (upper left hand corner) were colored with the Tombow Dual Brush markers using a blender pen. The leaves were colored using the Dual Brush markers and Spectrum Noir Alcohol Markers. The pink tulips (upper right hand corner) were colored with Spectrum Noir markers and FSJ Color Burst Pencils. The magnolia blossoms (lower center) were colored with Fun Stampers Journey Color Burst Pencils.

Although I had a rough start with the pink tulip card, it turned out beautifully. The Tammy Tutterow Tiny Sentiments Stamp from Happy Grams is perfect for any occasion. The card is accented with FSJ Special Day Organza Ribbon and Crystal Clear Nuvo Drops (can’t see them in the picture).

Supplies (click on images to order):

Little Blue Button Stamps:

Spellbinders + FSJ:

Consumer Crafts (click on banner and then search for Spectrum Noir Alcohol Markers):

Amazon:

It’s time for Little Blue Button Stamps April digi stamp release. I can’t wait for you to see all the wonderful projects created by LBBS Design Team (click on the LBBS logo at the end of my blog for the hop).

My card features LBBS Easter Kids. They are so sweet and cute and make the perfect Spring or Easter card.

I colored the image with Spectrum Noir alcohol markers. The die cut background was created with a Spellbinders die set.

Supplies:

No images: Little Blue Button Stamps Easter Kids, FSJ Pretty Plaid Embossing Folder

Spectrum Noir Alcohol Markers @ Consumer Crafts (click on banner below):


Welcome, to the FSJ Creative Design Team Blog Hop. Did you see the word Giveaway in the title of this post? Well. . . . .

Spellbinders+FSJ are going to give away a $25 gift certificate for each of the design team members participating in this blog hop! Yep, you read it correctly. That means 4 lucky winners will receive $25 to spend with Spellbinders+FSJ online store. All you have to do to enter the giveaway, is comment below on this post.

Would you like extra entries? Go to my Instagram post featuring this giveaway, @martyzstamps and follow the directions for extra entries. Visit my Facebook Page, martyzstamps, and comment on the post featuring this blog hop and make sure to share with your friends. Giveaway closes on Sunday, March 17th 11:59 pm CT.

For this month’s blog hop, the design team are sharing our favorite die or die set.

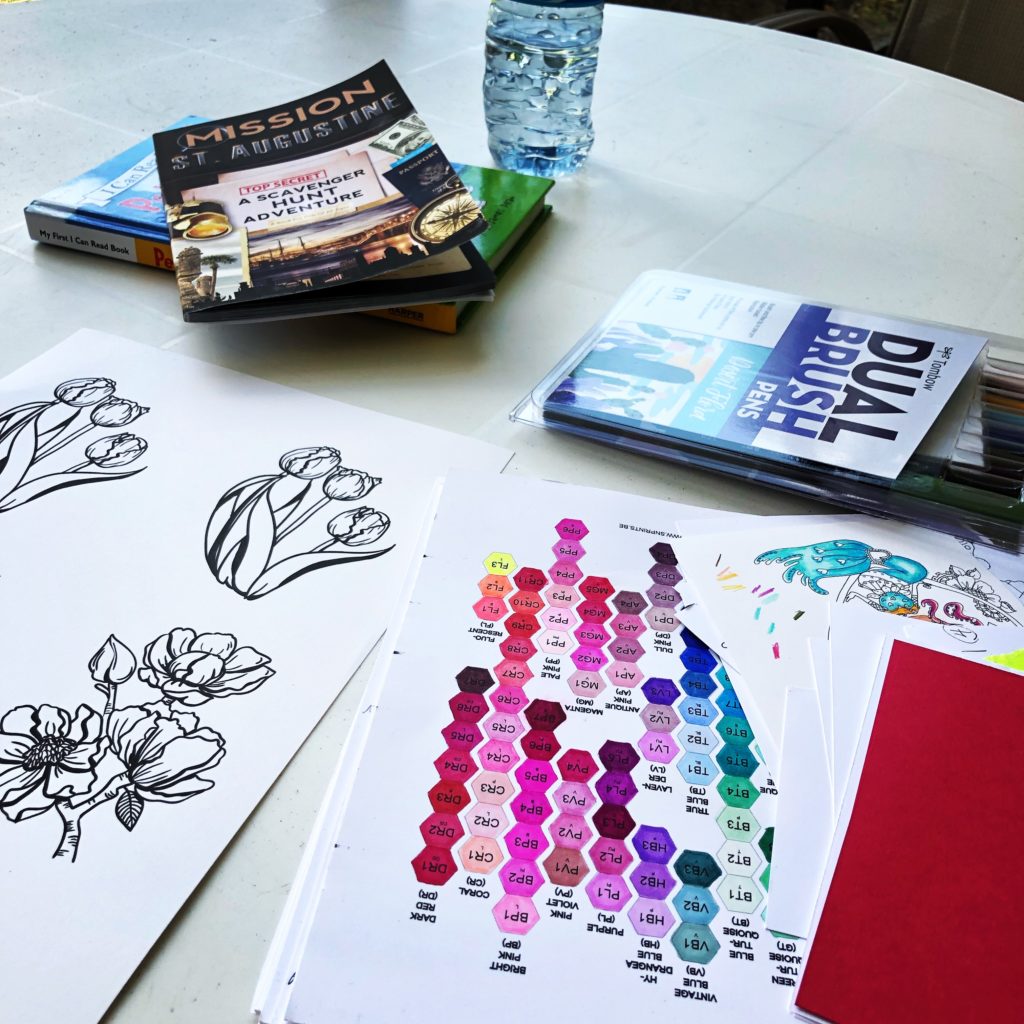
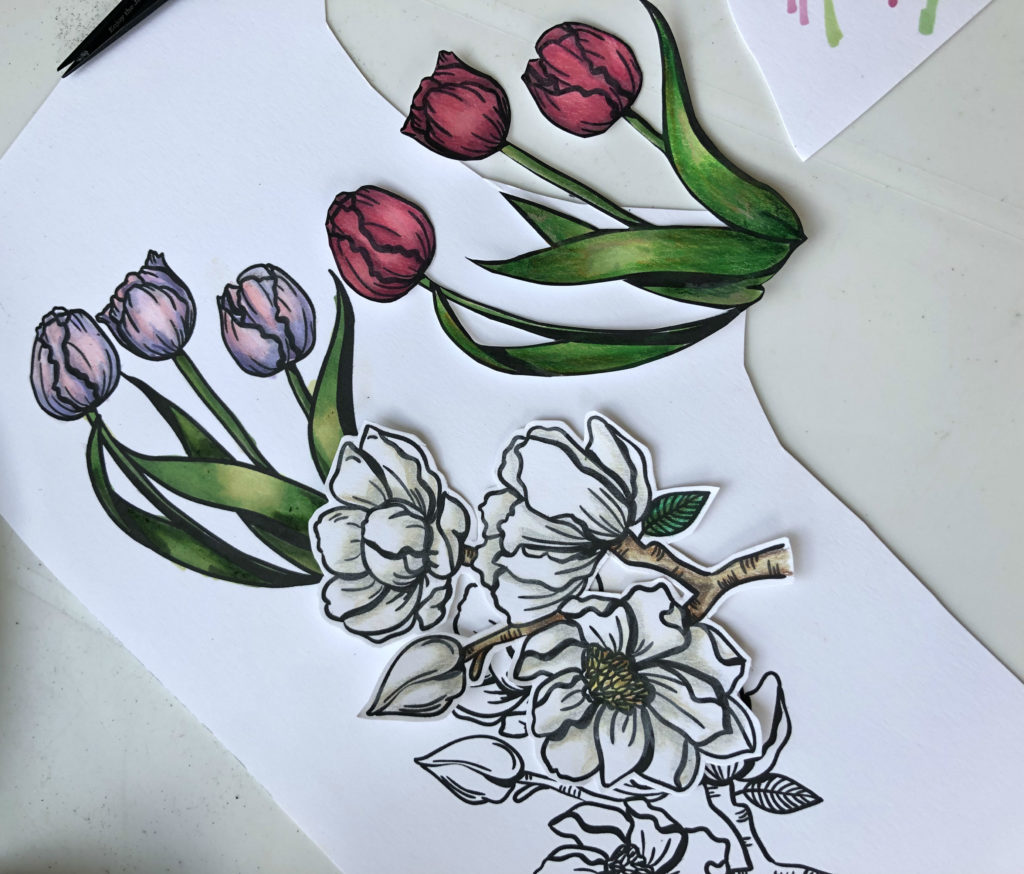
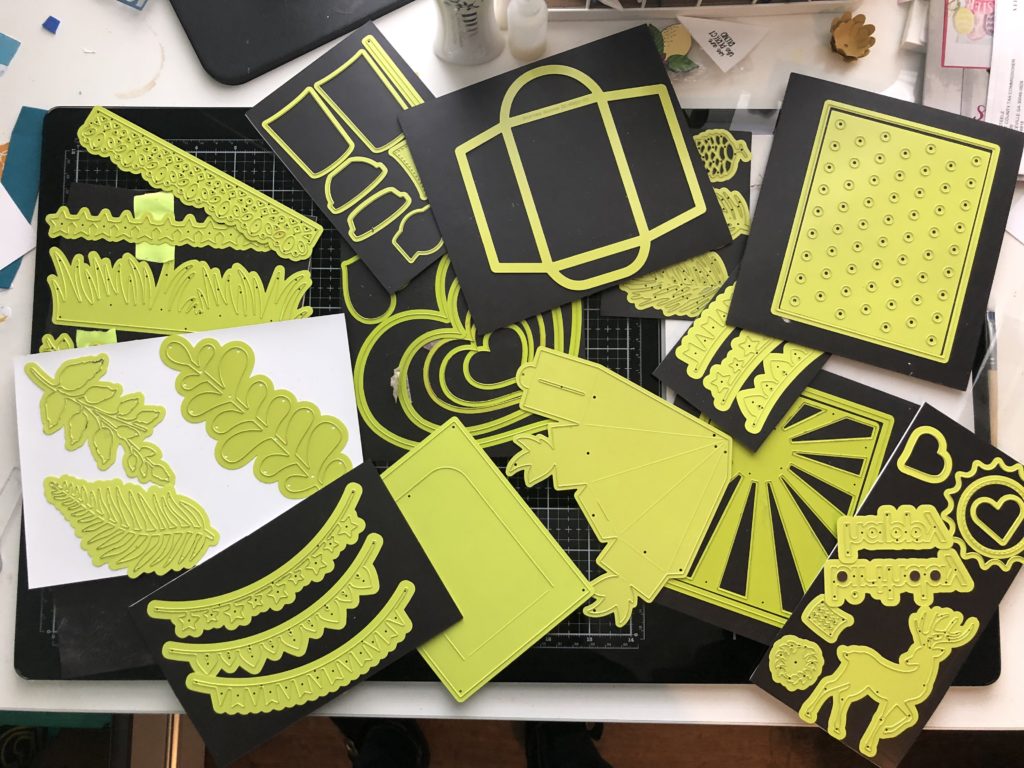
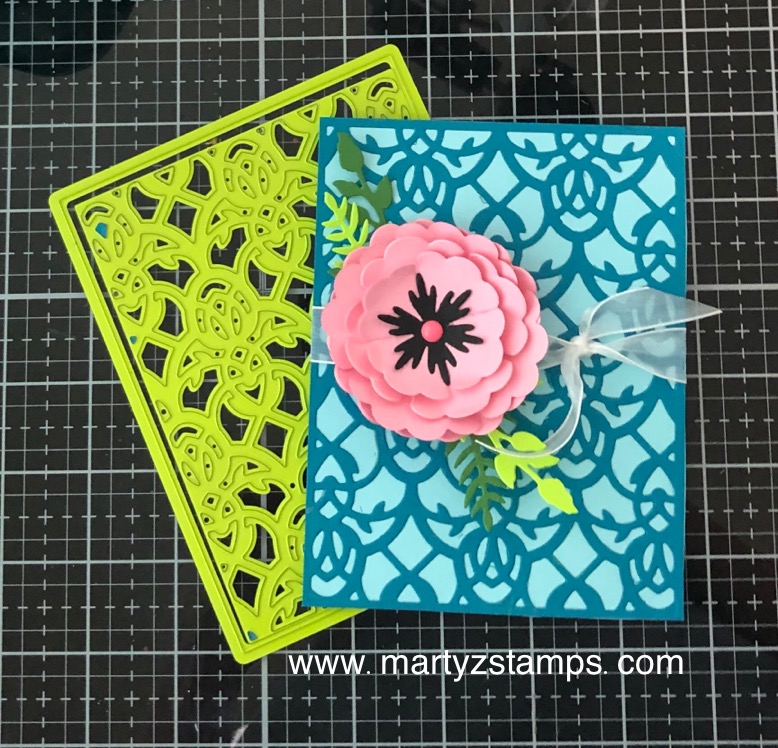
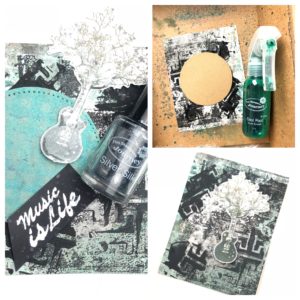
I had quite the dilemma and here is a picture of it.

I tried really hard to narrow down my favorite to one die or die set and I just couldn’t do it. So, I decided to make two projects using as many of my dies as I could.

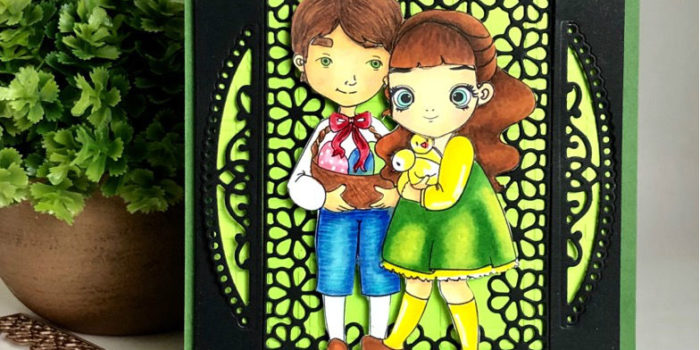
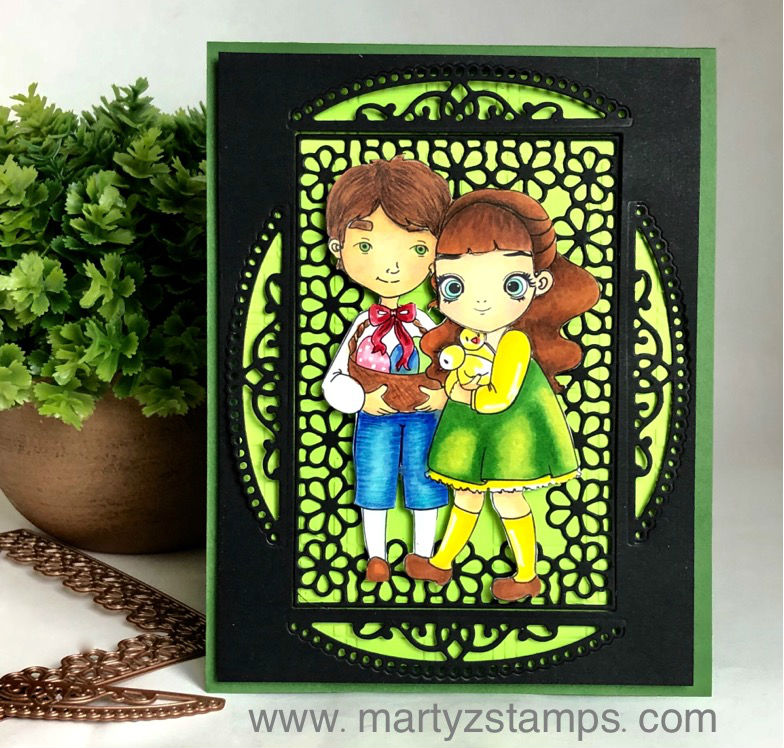
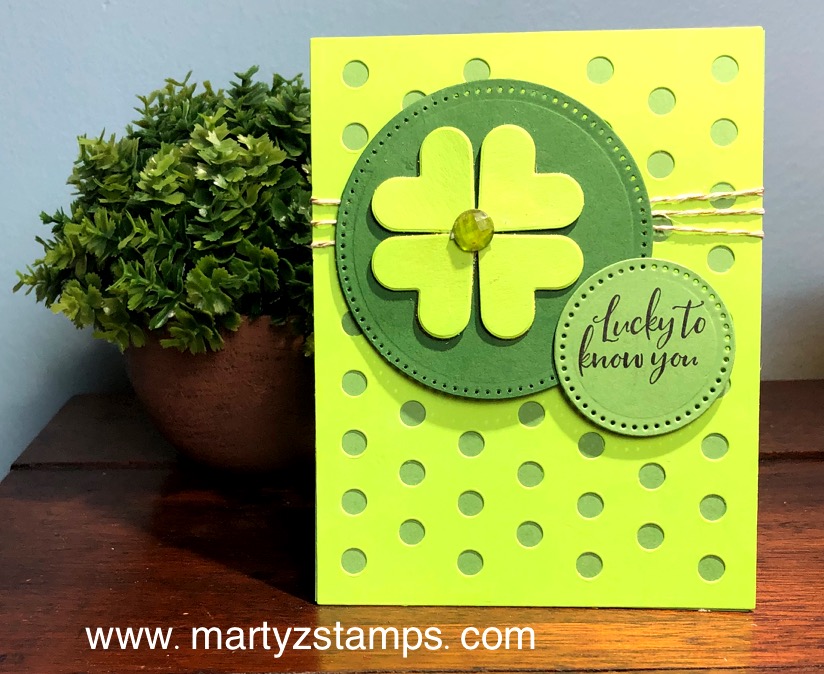
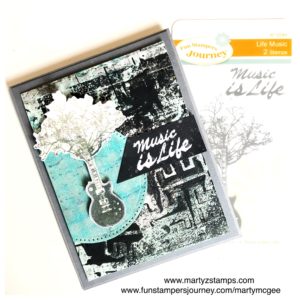
The first project is a St. Patrick’s Day themed card.

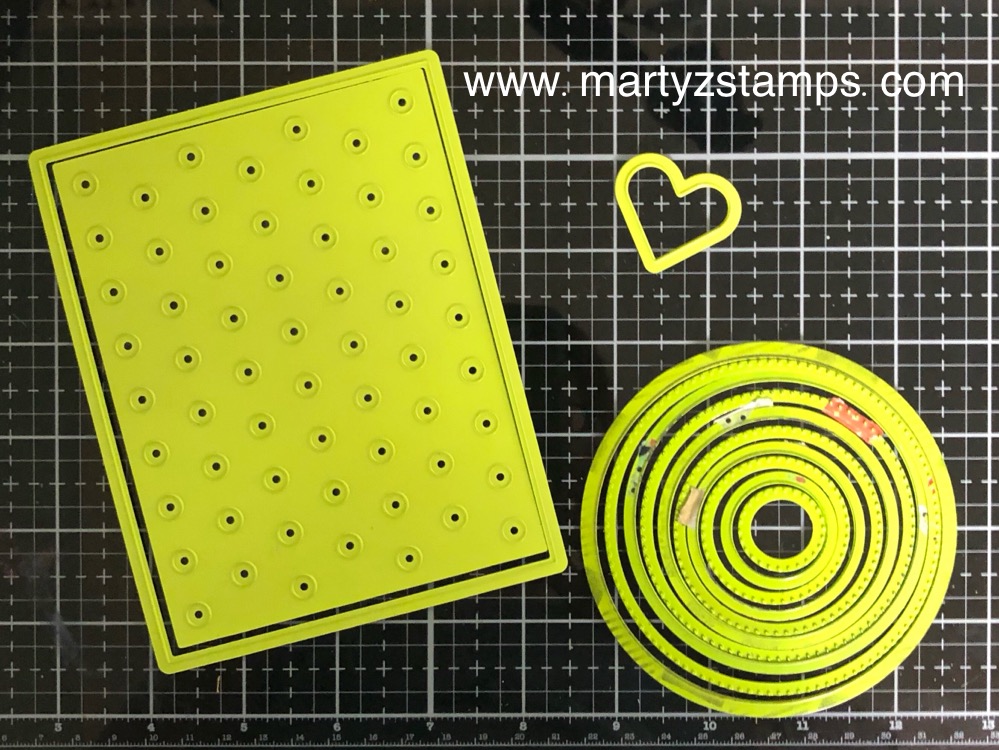
I began with the Lotsa Dots and Journey Circle Dies. The small heart is part of a retired set, but any small heart can be used to create a four-leaf clover.

I die cut the Lotsa Dots and heart dies using Electric Lime cardstock. Kiwi Slice and Lemongrass cardstocks were used with the Journey Circle dies.

Once the Lotsa Dots mat was adhered to the Lemongrass base, I wrapped the Gold Thread three times around the card and tied it in a knot. The large circle is popped up with two medium foam squares on top of the knotted thread. I stamped the sentiment using Black Licorice ink from the All Year Long stamp set onto the small Lemongrass circle. Finally, the Electric Lime hearts were glued to the large circle and accented with a green Rainbow Drop.

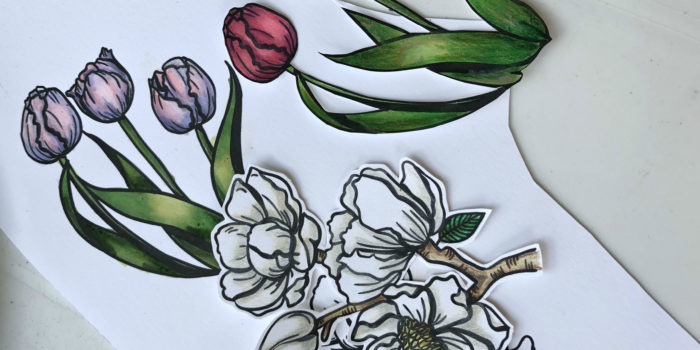
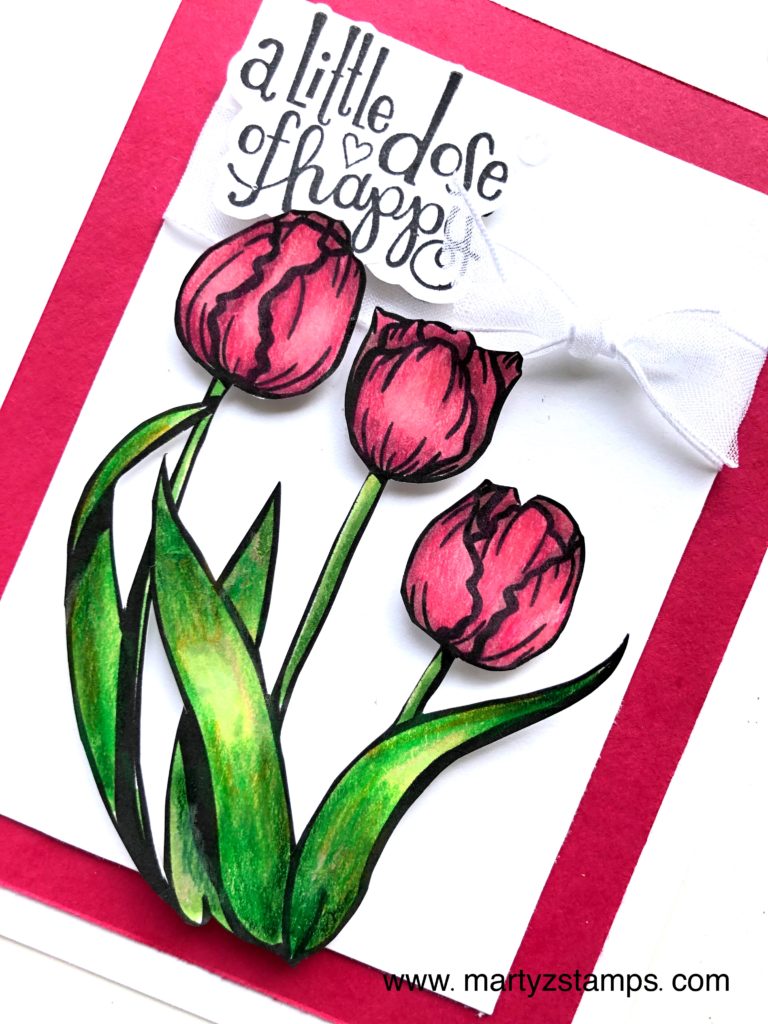
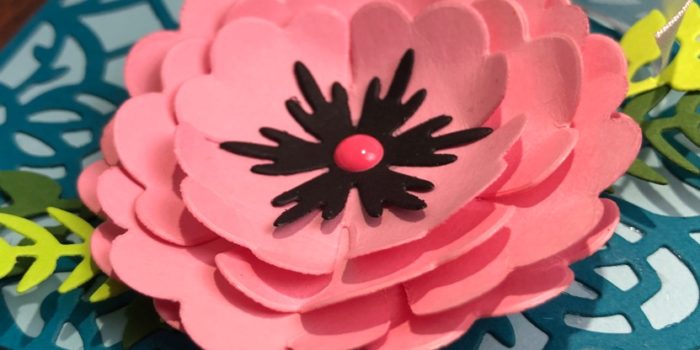
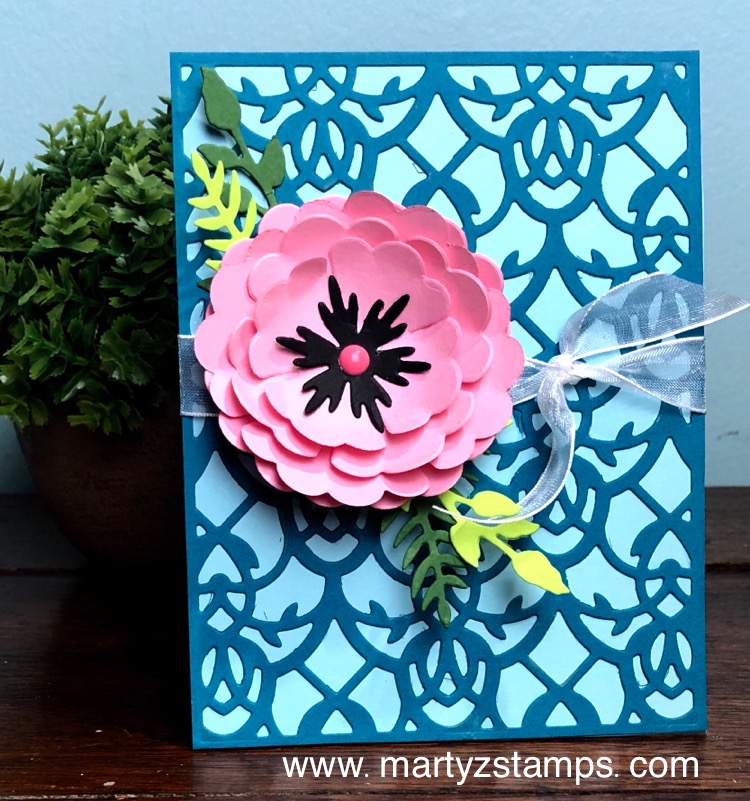
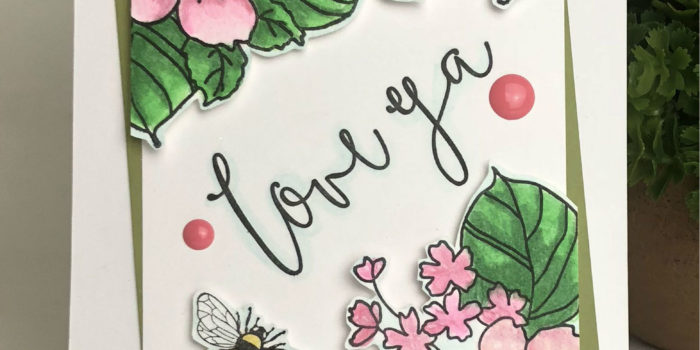
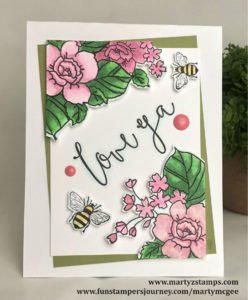
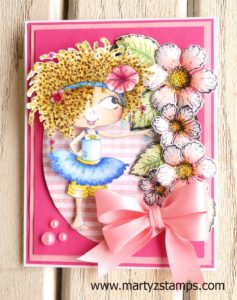
The second project is a sweet floral card.

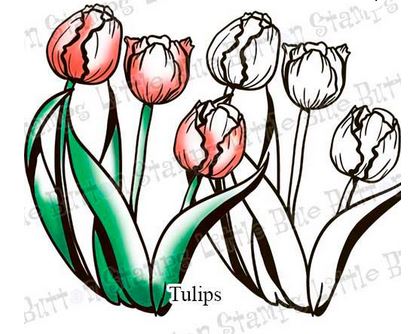
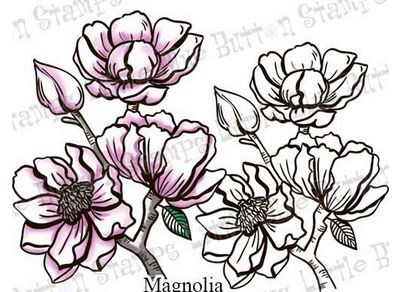
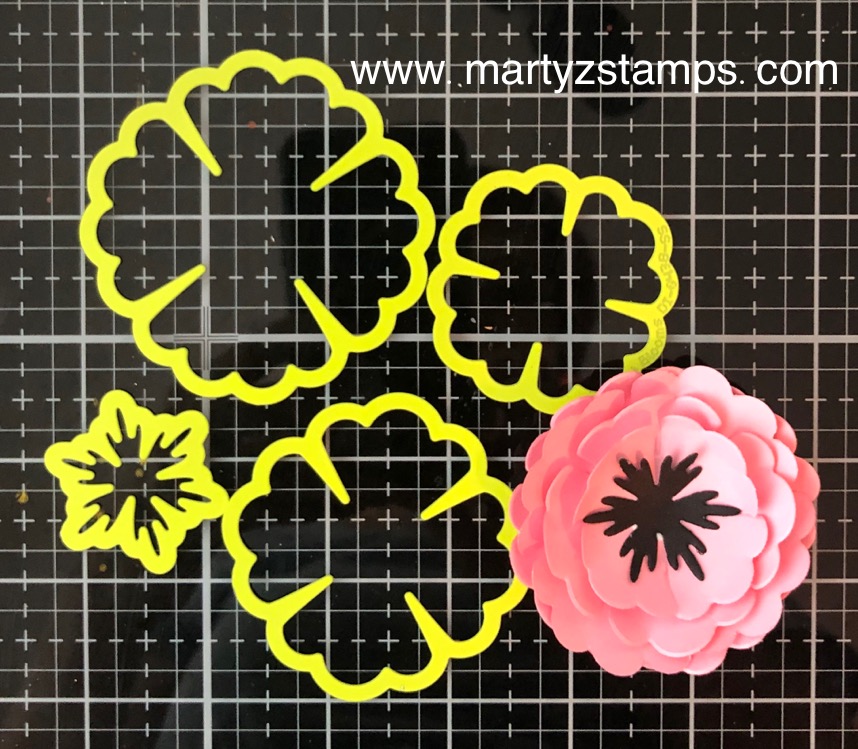
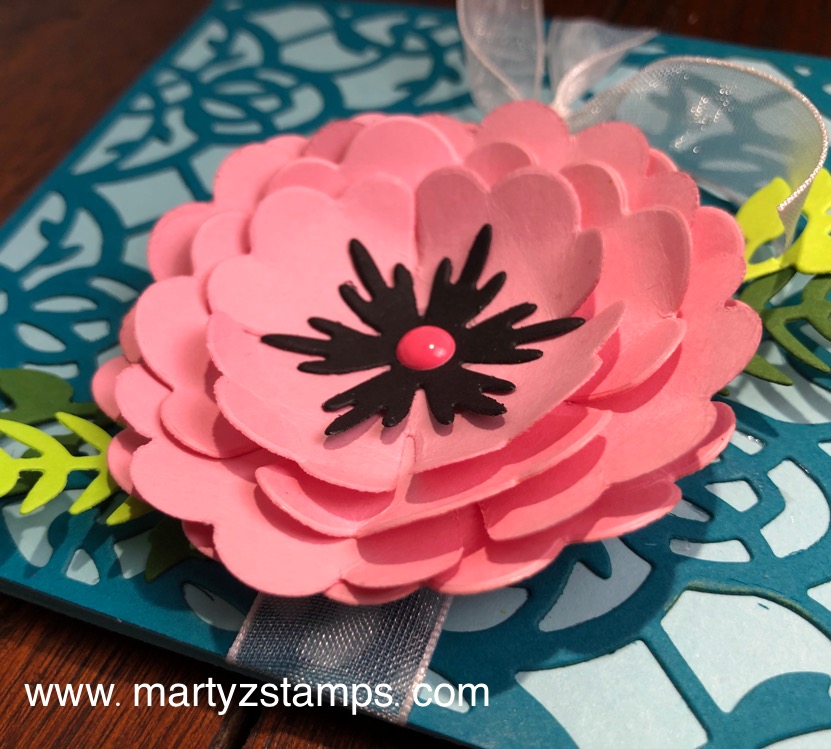
For the flower, I used the Clover Bloom die set using Bubble Gum and Black Licorice cardstocks.

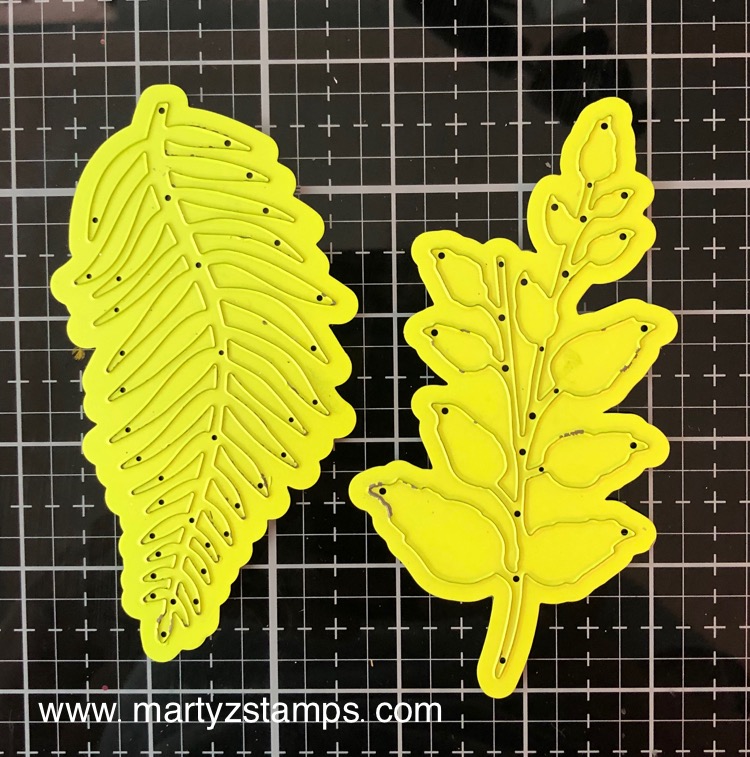
For the leaves, I used the Mystic Fern and Summer Branch dies using Fresh Forest and Electric Lime cardstocks.

The last die I used is Persian Garden with Catalina Splash cardstock.

To create this card, I did a little something different. Instead of adhering the Persian Garden die cut directly to the Pool Play card base, I adhered it to a 5 1/2″ x 4 1/4″ piece of Pool Party cardstock. Next, I wrapped the Special Day Organza Ribbon around this mat tying it in a simple knot. I adhered the Persian Garden mat to the Pool Party base.

To create the flower, I cut two of each petal and curled the petals using my crease tool. I adhered two of the largest petals together, offsetting them so the petals were not exactly aligned. Next, I layered one medium petal and a smaller one on top of it. The fringed center piece was cut from Black Licorice giving the flower a nice contrast between the pink and black. A small Candy Drop was applied to the center

The leaves were layered onto the base and the flower glued on top of them.

Hop along to the other blogs. All you have to do is click on the FSJ banner to check out FSJ’s blog or click on a name to hop over to another blog. Leave your comments on each blog to increase your chances of winning the $25 GIVEAWAY!

Marty McGee (you are here)!

Jill Hilliard

Carrie Rhoades

Lezlye Lauterbach

Supplies:


My friend, Julie Hill, just had a birthday and I missed giving her a card on time, but I guess better late than never. Right?

I received the cutest stamp called Brew It Anya from The Greeting Farm in my January Flavor of the Month Kit from Scrapping for Less. Crystal Minkler had created some adorable cards with Anya on a circle mat.

I took the idea and went in a slightly different direction. I made the actual card from a scalloped circle.

Anya is colored using Spectrum Noir Markers and all the cardstock used was from the kit. Even the wooden glasses were part of the kit. They are just too cute (I stole this idea from one of the design team members if I remember correctly).

She’s just too stinkin’ cute!

Post-note – Anya may very well have to go on a regular A2 size card base. The glasses make her top heavy and she rolls to the side when set up for display! LOL Note how the card is positioned next to the dies. They are holding her upright!

To order Spectrum Noir alcohol markers, click the banner below:

To order the Nestabilities Fancy Edged Circle Dies, click the banner below:

It is time for PJs & Papercrafting Virtual Stamp Class. This month’s featured stamp set is Spellbinders Feathers Holiday Shading Stamp Set.


SKU DSC-024

I had a great time creating this month’s cards and I know you will have a great time making them along with me. Register for PJs & Papercrafting virtual stamp class and prepare to wind down, relax and get creating! We will come together for this virtual stamp class on Sunday, February 3rd, 7:00 p.m. EST for a Facebook LIVE to create 4 beautiful feather inspired cards.

Don’t worry if you can’t be present for the Facebook LIVE. You will have access to PJs & Papercrafting private Facebook group for one month to go back and watch the video over and over again. Once the month is up, I will send you a private YouTube link where you can access the video indefinitely.

Wait, it gets even better, you will receive via email a printable PDF for the class projects with step-by-step instructions as well as supplies you will need for each card.

You will need:

Basic supplies on hand to make these projects, such as adhesive, scissors, trimmer with scoring blade, foam squares, crease tool, coloring tools (pencils, watercolors, markers) and a multi-purpose tool. I have shared below what I will be using for these cards just in case you want to stock up to create multiple cards from these designs. If you don’t have some of the supplies, use what you have or click on the images to order exactly what I am using (if you are a previous coach, do not click my links, go to the Spellbinders website and login using your account). Note: All kits contain embossed and die cut pieces.

Registration Options

NOW through January 21st, Monday, 11:59 p.m. EST for Option 1 Class.

NOW through January 29th, Tuesday, 11:59 p.m. EST for Option 2 Class.

Included in the Feathers Holiday Shading Stamp Set Kit:

Option 1: Full Kit (Bundle) – $34.00
Includes the Feathers Holiday Shading stamps with all supplies (excluding basic supplies), PDF and online content.

Option 2: Materials Only – $23.00
4 card project kits ONLY (does not include the stamp set), PDF and online content. This is a great option if you already own the Feathers Holiday Shading stamp set. Coaches are welcome to participate with this option.

Supplies (Spellbinders + FSJ):

  • Price: $8.99
  • Sku:DSC-024
  • Price: $19.95
  • Sku:SS-0634
  • Price: $19.95
  • Sku:SS-0576
  • Price: $19.99
  • Sku:S4-905
  • Price: $17.99
  • Sku:S4-909
  • Price: $5.95
  • Sku:EF-0019
  • Price: $6.95
  • Sku:CS-0147
  • Price: $6.95
  • Sku:CS-0031
  • Price: $6.95
  • Sku:CS-0094
  • Price: $6.95
  • Sku:CS-0023
  • Price: $6.95
  • Sku:CS-0091
  • Price: $6.95
  • Sku:CS-0082
  • Price: $6.95
  • Sku:CS-0040
  • Price: $7.95
  • Sku:IP-0010
  • Price: $7.95
  • Sku:IP-0050
  • Price: $7.95
  • Sku:IP-0009
  • Price: $5.95
  • Sku:IP-0098
  • Price: $5.95
  • Sku:IP-0097
  • Price: $5.95
  • Sku:IP-0100
  • Price: $5.95
  • Sku:IP-0101
  • Price: $79.95
  • Sku:JM-0077
  • Price: $59.95
  • Sku:JM-0078
  • Price: $4.95
  • Sku:AC-0293
  • Price: $5.95
  • Sku:AC-0205

Supplies (Pink and Main): Hugs Die set , Stitched Rectangle Set 1 Dies , Stitched Rectangle Set 2 Dies (note - the other rectangle dies I used were from my stash and I'm not sure where I bought them. I think the Pink and Main rectangle dies will work well). Disclaimer - I will receive a small commission on any products purchased through Pink and Main if you click on the items listed above.

Here is Round Two of the Gel Press Throwdown between Carrie Rhoades and myself. Just a brief review, we sent each other what we considered “ugly” Gel Press pulls and our challenge was to make something beautiful out of the “ugly ducklings”. So, make sure to check out her blog carriestamps.com to see the creations she has made from my “ugly” Gel Press pulls. Here is the link for Round one on my blog http://martyzstamps.com/2018/08/27/gel-press-challenge-round-one-fms351-sketch-challenge/.

I forgot to take a picture of the pull before I started adding to it. Carrie was gracious enough to send me a photo of a piece of the original pull. It is not the actual piece but it will give you and idea of what I started with. Here it is.

I took the original pull and placed it in my spraying box (a box to use silks, splashes and splattering to contain any over mist). I placed our Vintage Screen on top of the pull. I then spritz it with our Shimmer Silver Splash. You can see the design on the bottom photo.  


I stamped the guitar/tree with River Stone at the top and Rock Candy at the bottom using my Misti to get the right amount of ink onto the paper. I used Journey Glaze to create a sheen on the guitar and once the glaze was dry, I painted some Sparkle Silk onto the guitar and tree branches for a hint of glitz. I placed the guitar on the Gel Press background to decide what I wanted to do next. Since there was already a hint of Cool Pool acrylic paint on the pull, I decided to spritz the card with the Cool Pool Splash. At first I wanted to keep a circular space in the middle free of Cool Pool color; so I placed a piece of scrap paper on the background and spritzed the paper. Once this was dry, I happened to spy some Cool Pool cardstock and thought that would make an awesome mat. I grabbed it and put some Blue Lagoon ink on the Flannel Life background stamp and stamped the image on the circle which I ran through the die machine with the piercing die to give it some interest. I took the circle and spritzed it with the Shimmer Silver Splash. While all of this was drying, I stamped the sentiment in Whip Cream onto Black Licorice cardstock and embossed with White Embossing Powder. Then, a little splatter of Silver Silk.

After everything was dry, I began assembling the card. I chose River Stone as the base with a Rock Candy mat. I cut down the Gel Press background, added the circle and sentiment with the guitar popped up using foam squares. This was adhered to the base with foam squares. I think this turned into an amazing card. Remember, there are no “ugly” pulls!!!!

What do you think of this card?

Product List

Who doesn’t love a big party? It’s Fun Stampers Journey’s Retirement Party, up to 50% off over 500 items, including our Journey Girl tote, Amaze machine, jewelry, accessories, stamps and dies! This party lasts until June 30, 2018!
To celebrate this party, I am featuring the Summer Garden stamp set (SS-0078) in Freshly Made Sketches #336 card challenge. The FMS336 sketch is below:
The card base is FSJ Whip Cream Card stock with a base mat from FSJ Lemongrass card stock. The stamped portion of the card is Whip Cream with images stamped using Black Licorice Fusion ink. I used FSJ Color Burst Pencils to color the stamped images in shades of pink, green, yellow, and highlighting around the images with light blue.
The sentiment is stamped on the Whip Cream mat using Black Licorice Fusion ink. All the other stamped images are popped out with foam squares. The card is accented with Sweet Candy Drops and there’s a little sparkle dust on the bee’s wings.
Summer Garden is the perfect stamp set for any occasion. If you would like to purchase this stamp set or other products, please click here.

I am so excited to let my readers know, I am the Guest Designer on The Paper Girls Challenge Blog featuring a Rainbow Theme designed card. The challenge begins the week of April 15th.

Before I created the card I submitted as a guest designer, I had fun creating a rainbow cake happy birthday card, which is featured below:

I really love this card, but I wasn’t satisfied with the results. So, I moved on to another idea. I went to my collection of stamps and chose the “A Better Place” stamp set (this was featured in a previous post, Black and White – A Better Place). It is our new host exclusive stamp set for parties that reach $600 or more dollars in orders. I sat and looked at all the stamps in this two set collection, I browsed many card collections on Pinterest and finally decided to create a floral card awash with the colors of the rainbow.

As many of you know, this month’s product promotion feature our silks and splashes. Since they are 20% off, I wanted to showcase what could be down with them. I went with the splashes since I had all the colors to create a rainbow on hand. I began with a large, clear block (think background sized) and drizzled a good amount of water from my media blender brush onto the block prior to adding the splash colors. Normally, you spritzed color with the splashes, but I unscrewed the cap and using the pipe that pulls the color through to the nozzle, placed each color in a vertical row making sure to keep each color separate from the next. I, also, screwed the cap back onto each bottle as I used it (trust me, you want to do this or you could have a “real” mess on your hands). After all the colors were on the block, I gently pulled the colors into the one beside it, keeping white space to a minimum. Next, I placed a piece of 5 1/4″ x 4″ Whip Cream card stock onto the rainbow of colors. I pulled the paper off and repeated the entire process with a second sheet. I let my paper air dry, or a heat tool can speed up the process.  I took two of the floral stamps from the set and stamped them several times onto one of the colored pieces of paper. I used  the Journey Rectangles Die and cut a frame and stamped the sentiment on the leftover piece. I used the Mystic Fern die to cut leaves out of several pieces of card stock. To create a more dimensional look, I fussy cut inner petal pieces and manipulated all the petals with an embossing tool (thing Heartfelt Creation flowers). I added foam squares to everything, popping them up off the card to create dimension. The color filled mat was adhered to a base of Pretty Amethyst card stock. The final touches included Rainbow Drops to the center of the flowers and Journey Glaze.

Thank you Paper Girls Challenge Blog for asking me to be your guest designer.

If you would like to order any of the supplies to create this card, please click here, or contact me through my Fun Stampers Journey website to host a party (www.funstampersjourney.com/martymcgee).


Yesterday I had a Spectrum Noir Alcohol Marker coloring class, which focused on shading clothing. I had recently ordered from Etsy a Sherri Baldy digi stamp (there were two images to my surprise and delight). I thought this would be a great image to practice clothing coloring. A color palette of blues and pinks was chosen. When she was finished, I knew I had to submit another card to the Fusion Card Challenge – Pretty in Pink Card Challenge.

She was so much fun to color. Here are the markers we used: Hair – base from roots to midway of hair GB11 then GB4 to the ends. TN3, GB 10, TN5, EB4, EB5 (dots throughout hair); skin – EB1, FS7, FS9 and FS8 for cheeks and lips; dress and headband- TB1, TB4, TB5; Pants – LY1, CT4; Flowers PP1 and PP3 and Blender throughout project.

The flowers are from the Heartfelt Creations – Botanical Rose. The base of the card is FSJ Whip Cream with FSJ Watermelon Fusion and FSJ Bubble Gum cardstocks as mats. The oval was cut from Heartfelt Creations Strawberry Fields 12 x 12 paper pack. The pearl accents are FSJ pearls and they were colored with Spectrum Noir PP2 marker to make them pink. A layer of Journey Glaze was added to all the flowers to make them shine and pop. And, finally the bow is SU! silk ribbon made into a double bow.

If you would like to order any products from Fun Stampers Journey, click here.

PAGE TOP
[dealsbar preview] Amazing Deals: !!toolbar-deal-title!! - !!toolbar-deal-merchant!!