Category : Events

7 posts

If you are like me, there are times a little encouragement from friends or family can help to carry you through a rough time. One way to encourage someone is sending them a card.

Join me and hop along for Courtney Kreeber, Mary Polanco and Jenn from Scrapbena Creations Encourgement Hop. I know you will be inspired to create your own cards of encouragement.

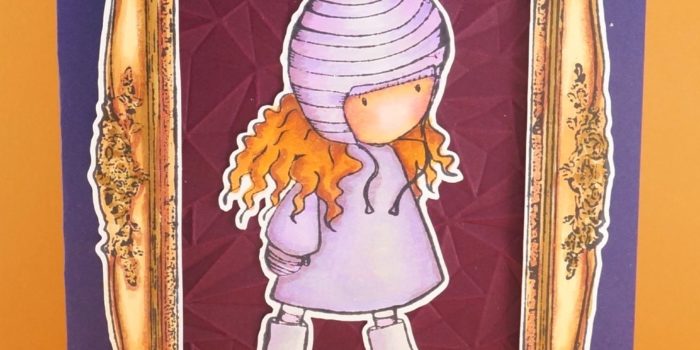
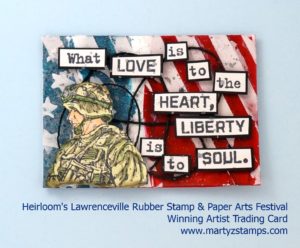
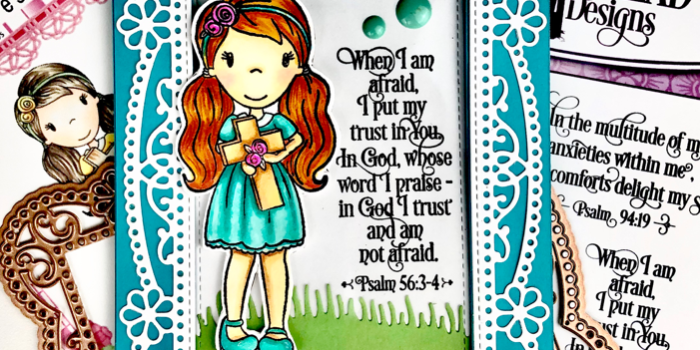
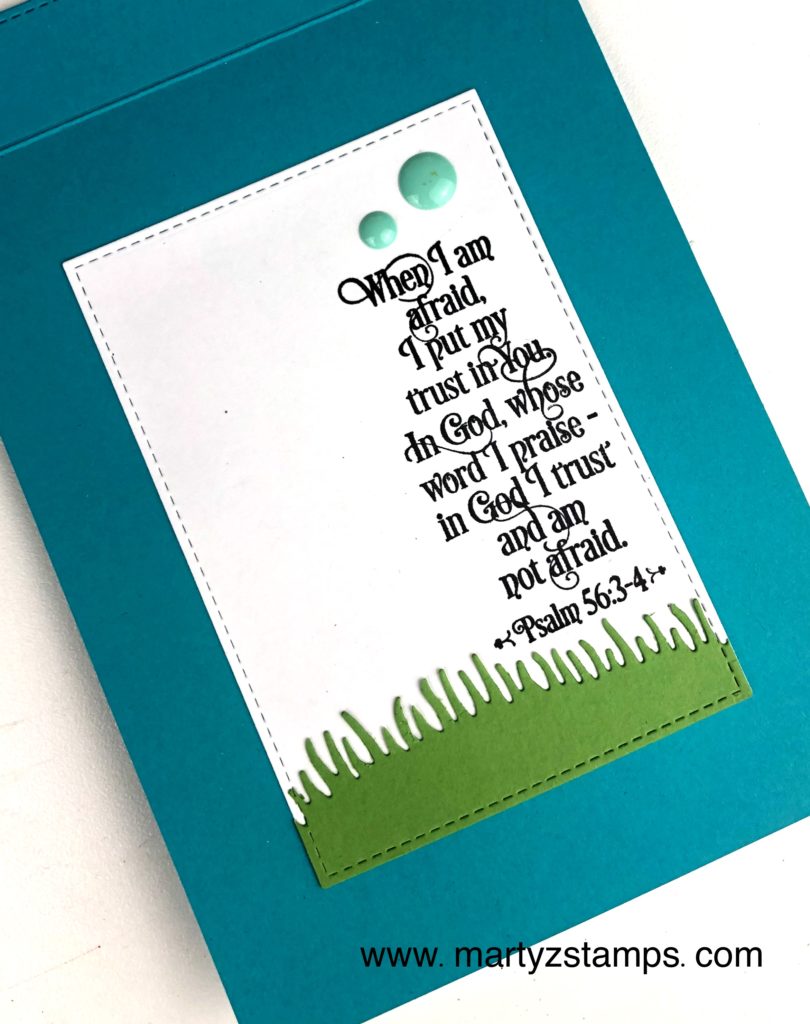
Encouragement comes to many of us through God’s Word. I chose Divinity Designs’ Grace’s Strength for the scripture encouragement (click here to check out their website).

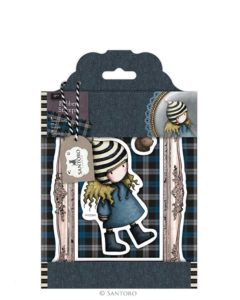
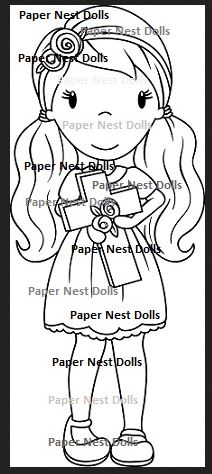
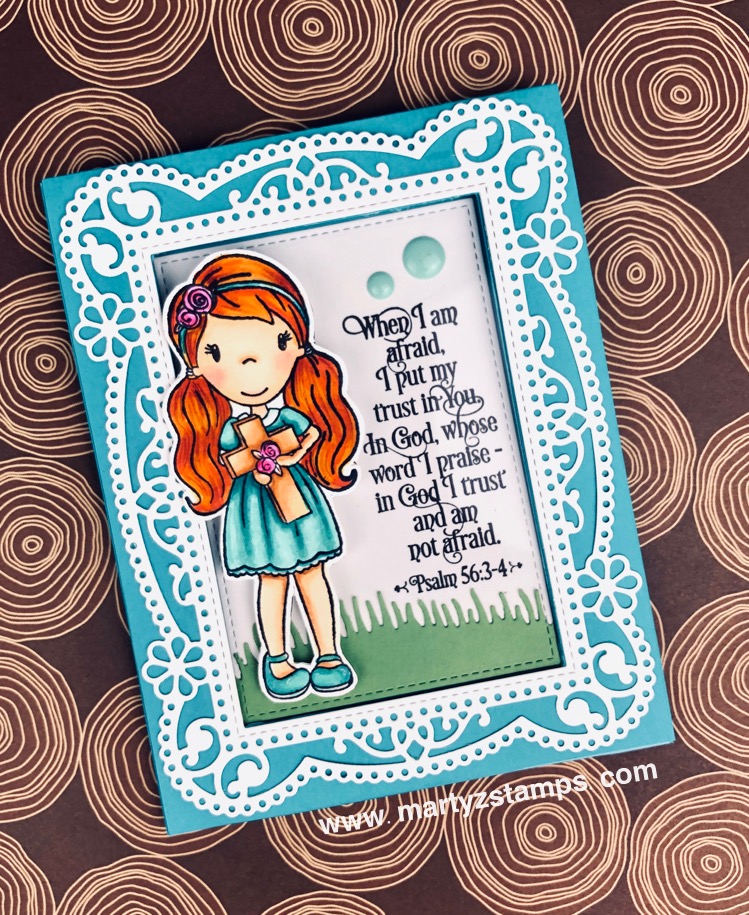
Paper Nest Dolls’, Avery with Cross added the cuteness factor. (click here to see their adorable stamps).

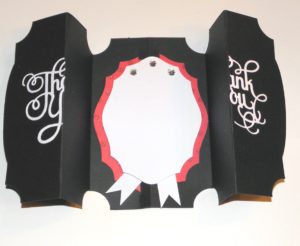
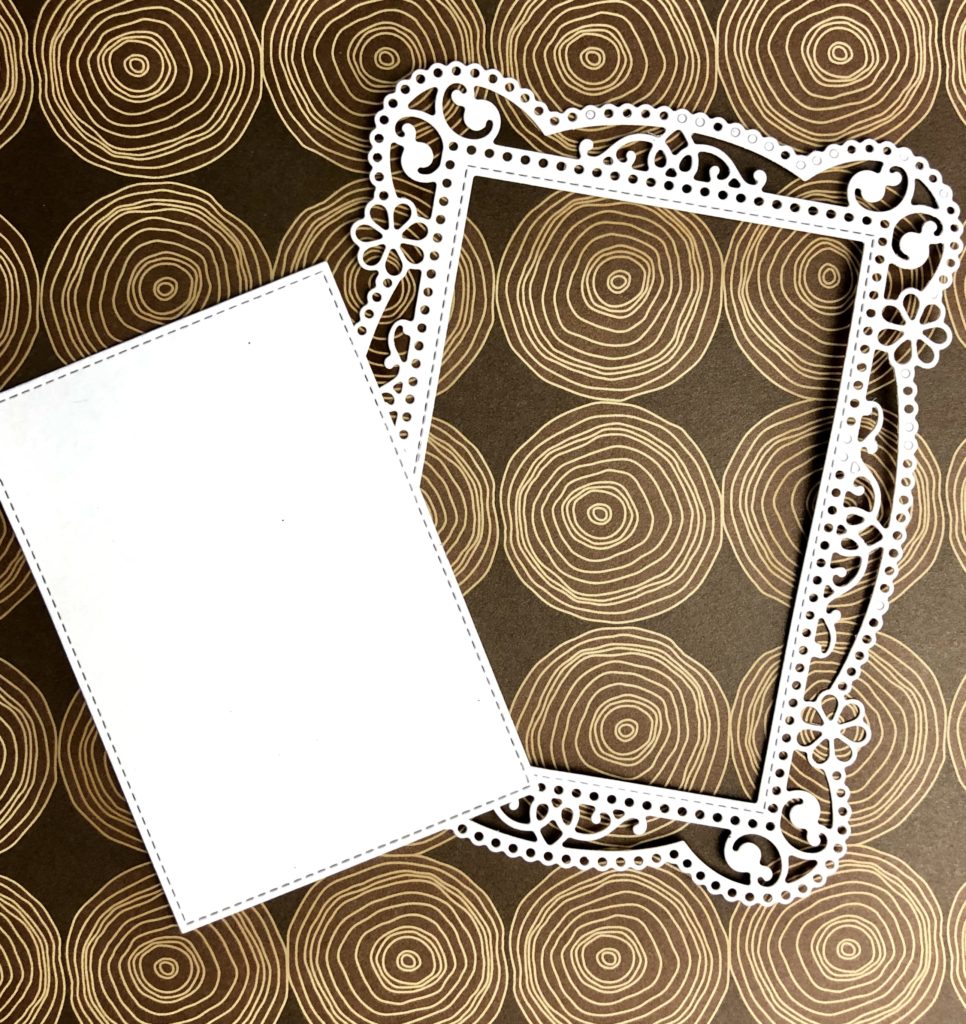
I chose FSJ Turbo Teal for the card base. I die cut a rectangle out of the front panel of the card base and a rectangle out of a piece of 5 1/2″ x 4 1/4″ Turbo Teal cardstock. I layered a 5 1/2″ x 4 1/4″ piece of acetate between the front panel and the additional piece of Turbo Teal cardstock and glued the panels together. This created a finished look on the backside.

This is the view from the backside of the panel. The extra pieces of cardstock as a frame and the extra white pieces of cardstock on the back of the colored image give the card a clean and finished look.

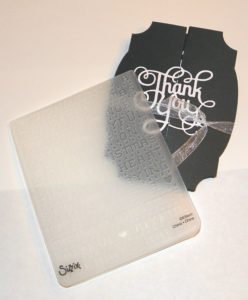
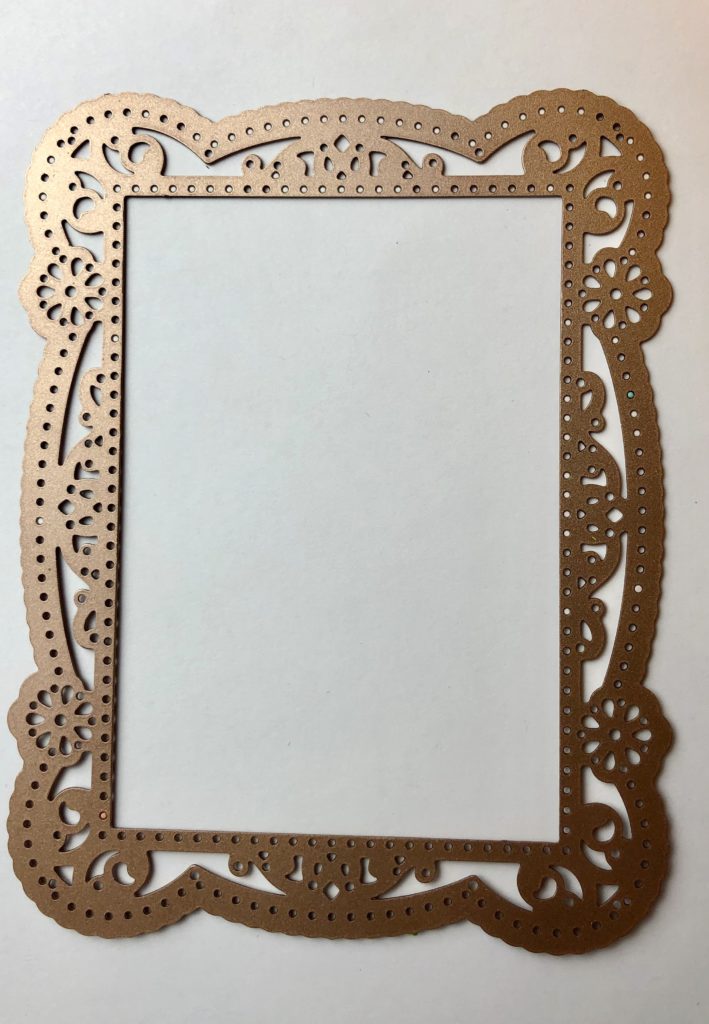
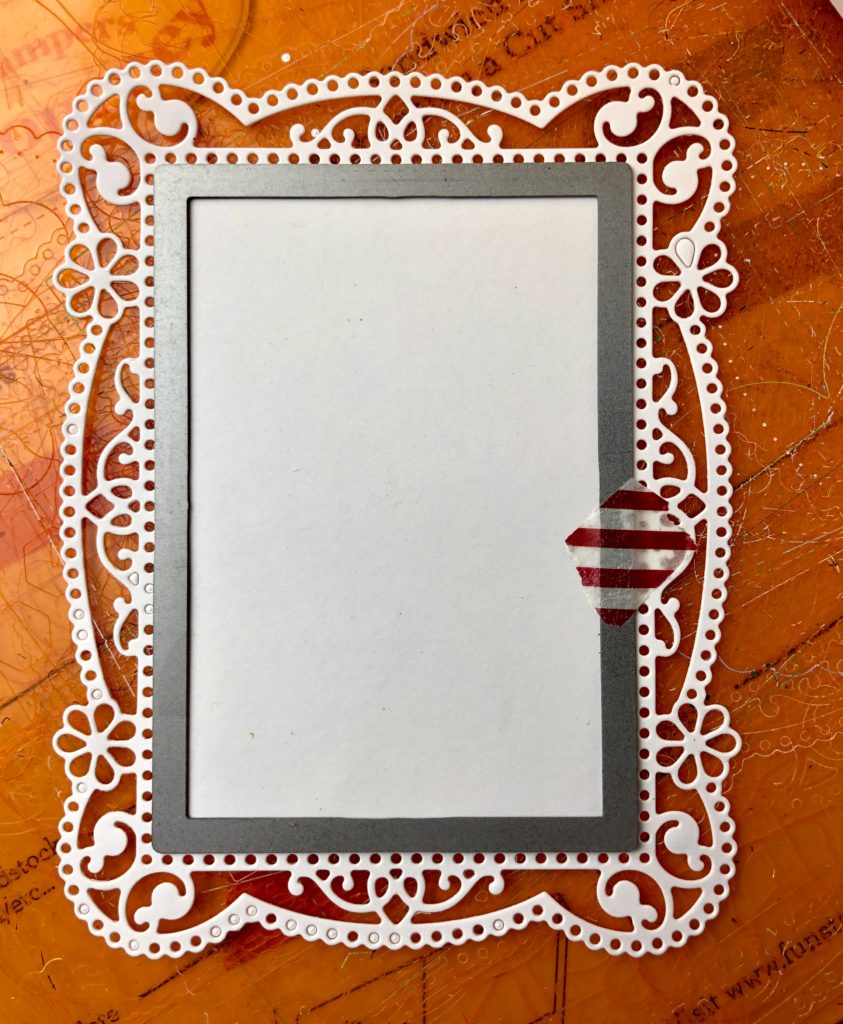
Next, I die-cut a frilly rectangle frame out of Whip Cream cardstock with Spellbinder’s Shapeabilities Tallulah Frill Layering Frame Small Etched Rectangle die (that’s a long name, wouldn’t you say?). I used the same stitched rectangle die to cut out the middle portion of the frilly frame.

I stamped the sentiment on the right-hand side of the cut-out piece of cardstock. The grassy hill was die cut with a Divinity Designs grass border die and the bottom and sides were die-cut with the stitched rectangle die I used earlier.

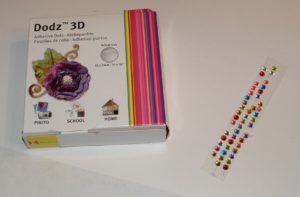
I added two candy dots to the top portion and adhered the rectangle onto the inside back flap.

I die cut a adhered the frilly frame to the front panel. Now, to color Avery. It was so much fun to pull out my Spectrum Noir markers and color this sweet girl.

Skin: FS2, FS3, FS4 SN Illustrator FS9 and FS2 (cheeks) and a touch of TN4
Hair: TN2, TN4, TN5, BO2, BO3
Roses: BP1, BP2, BP3
Cross: TN1, TN2, TN3, TN4
Dress: AB1, AB2, AB3
Hair and Dress Shading: FSJ Color Burst Pencils

I fussy-cut Avery leaving a small white border. To create a finished back (it can be seen when the front of the card is opened), I traced around her and cut out two more outlines of her using scrap white cardstock. I glued all the layers together and then adhered her to the front acetate panel using glue dots (you can see them but it’s not too noticeable).

Here is the finished card.

Next on the Hop is Christine Marino.

FSJ + Spellbinders:

We completed the first PJs and Papercrafting class last month and it was a blast! There’s was one hilarious mishap at the beginning of the FB Live presentation. Somehow, and I must say, this has never happened to me before, the base of the card I was working on got pulled into the steel rolling tubes (whatever you call them) of my Platinum die cutting machine and was crinkled to pieces. I had to leave the room and have my nephew help me clear out the mess before continuing with the FB Live class. TIP: Place die cutting machine on clean and clear of any paper table top before using. You just can’t plan for these types of things happening.

Now, it is time for September’s PJs and Papercrafting. This month’s stamp set is the Zen Leaves and Die Bundle along with the Thankful Friends set.

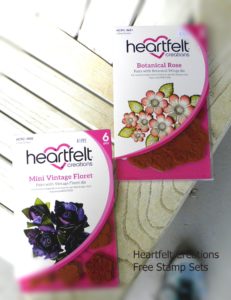
This is an ATS set with a coordinating die.

This is a full stamp set with coordinating die (see green outlined images).

This is the time of year that we begin to focus on giving thanks and being grateful for friends, family and the blessings we have received throughout the year. The color combos are all fall inspired with a little hint of winter month’s. I had so much fun creating this month’s projects.

I used our fabulous fusion inks and card stock (on sale this month 20% off) along with two must have embossing folders. If you sign up before September 16th, you will receive an extra special project to complete at the end of our Live class.

Class includes all cardstock, embellishments, ribbon and PDF instructions for four card projects with envelopes. It does not include inks, embossing powders, glaze, adhesives, liquid colors or pan pastels.

PJs & Papercrafting FaceBook Live Virtual Stamp Class – September 30th, 8:00 p.m. EST

There are three purchase options.

Option 1 – If you already own the stamp sets and embossing folders or you are a Coach, you may take the class  only.

Option 2 – The class, both stamp sets with coordinating dies and both embossing folders.

Option 3 – The class, both stamp sets without coordinating dies and both embossing folders.


Class Options


I have listed the supplies you will need to complete the 4 projects below. If you have a FSJ Coach you order from, please order these supplies right away with your Coach. You are welcome to order through me, please click on an item featured below and you will be directed to my FSJ website or you may contact me via email at www.martyzstamps@gmail.com . NOTE: All supplies used will be listed on the PDF instructions.

Product List

Celebrate with Fun Stampers Journey and Brittany Young, Certified Celebrator with Easter Party in a Box (BD-0388)!
This kit includes everything you need to create a gorgeous themed party.

Contents include:

  • Pre-cut materials to create four mini-baskets [complete with “grass”], bunny banner, & four treat cups
  • Four Treat bags
  • 16 pre-printed tags
  • A pair of FSJ Fringe Shears (TO-0081)
  • FSJ Tangerine Gingham Ribbon (AC-0092)
  • FSJ Media Flowers (AC-0162) for the bunny tails
  • 2 oz. jar of Easter Mix Sprinkles
  • A step-by-step video tutorial by Brittany Young

This kit is only $34.00 (plus shipping and tax) and valued over $50.

I have already ordered my kit and plan on completing the projects with my kiddos. I know we are going to have an awesome time creating the decorations for our party. Shhhh. . . they only think we are playing and crafting which they love to do. They are going to be super excited when we celebrate with cupcakes and ice cream sandwiches sprinkled with Brittany’s Easter Mix Sprinkles.

You can order you kit at www.funstampersjourney.com/martymcgee click the shop tab and order your box today (BD-0388). Hurry, there is a limited supply!


This past weekend I attended Heirloom’s Lawrenceville Rubber Stamp & Paper Arts Festival. Friday night I attended the Design & Treasure Make-n-Take with some friends. Saturday we went shopping! I was in search of some stamped images for my Spectrum Noir coloring class held at the end of this month which will feature coloring fabric/clothes. I came across the Santoro stamp sets at the Creek Bank Creations vendor booth. The stamps they featured were large with open areas to color and practice blending techniques. Here is the Santoro Tweed – The Friendly Hedgehog stamp set:

Four of us got together Sunday and made several creations using some of our recent stamp haul. While the other ladies finished their Pink and Main cards, I decided to work on my sample of this stamped image for the Spectrum Noir class at the end of the month. I also like to kill two birds with one stone, so I looked at the online card challenges available this week and decided to enter my card creation for CASology Week 234 – Youth challenge.

I had already stamped the images using my MISTI the night before. I chose Spectrum Noir cardstock and inked the images with Memento Tuxedo black ink. The ladies around the table wanted a sepia/lavender colored card; therefore, I chose the following colors. I began with the frame and used Spectrum Noir TN1, TN3, TN9, and GB10. Next, was the hat and clothing on the adorable girl. I used IG1, LV1, LV2, and HB1. As usual, I colored the hair a reddish/auburn color. I didn’t want to go too brunette because I felt the hair would blend in too much with the other colors. I wanted a little pop of color against the muted shades. I chose TN2, TN3, TN4, TN9, and OR1. Last but not least was her face. I used FS6, HB3, TN3, and FS8. The colored images are simply stunning.  Once everything was colored, I cut the images out using Cheyenne’s new Brother Scan and Cut 2. I did have to cut the inside of the frame by hand but I’m sure there’s a way to do this with the cutter.

The finished card ended up being a 5 x 7 card because the frame is almost that large. I took some SU! retired Grape cardstock for the base (I can’t remember the name other than Grape). The mat is SU! Rich Razzleberry which I embossed with one of my new We R Memory Keepers Next Leveling Embossing folder. I LOVE that folder design!!! Contact Creek Bank Creations to purchase one for yourself. The frame is popped up using two layers of foam tape and the girl is adhered using FSJ White Liner Tape.

Here is the finished card. It is just too cute.

Just for comparison, I’ve added Cheyenne’s photo taken with her iPhone before the card was assembled. It’s amazing how colored cardstock and lighting make a difference in the same completed image.

Thanks so much for dropping by!


This past weekend a few of my fellow stampers and I attended Heirloom’s Lawrenceville Rubber Stamp & Paper Arts Festival. It began with the Design & Treasure Make-n-Take Friday night. We made four cards, visited with a favorite vendor “Pink & Main”, used new products, experienced new techniques, and had a great time. When we were leaving, I noticed a notebook on display with ATC (Artist Trading Card) on display and announcing the ATC contest. I remembered reading about it and wanting to create an entry when I registered, but I had forgotten about it. I decided to make a couple of ATCs which were to reflect the theme of Freedom and enter them the next day.

Saturday morning came bright and early. I had set my alarm the night before, but it didn’t go off; so, I was in a little bit of a rush before my friend, Cheyenne, got here with some stamp sets that were Freedom themed. We were to  head toward the weekend’s shopping event where we were to meet some other friends at the event by 10:00 a.m. Just a note to the alarm issue, I did set it, but for the weekday. LOL

I began the creation process half awake and a head full of cotton, but that could have been a plus since I couldn’t overthink the process. Really, I could barely think. I took the 3 1/2 x 2 1/2 pieces of cardstock and pulled out my Fun Stampers Journey Sweet Berry Splash, Blue Lagoon Splash, Cranberry Bliss silk, Sparkle Dust, Black Licorice Twine, Journey Medium paste along the FSJ spatula applicator along with some post-it note tape. I pulled out my SU! stripes and stars stencils; thus began the card base process.

In a container, I spritzed some Sweet Berry with a mist of water. I used a paint brush and applied a swipe of Sweet Berry across the cards. It wasn’t brillant enough; so, I thought why don’t I add some Cranberry Bliss silk and that did the trick. I reapplied the mixture to the card and it looked gorgeous. Then, I took the Blue Lagoon Splash and did the same process.  I did try to add some Dark Roast to create a more navy blue color and it was a little too much which created a blackish blue. All I did was add more Blue Lagoon splash and pulled a small, small dot of the blackish blue color into it, mixed it a little, and Bob’s your uncle; it looked great. On the soldier ATC I added full blue color, but on the eagle ATC, I masked off some stripes and added the color to this area to provide a little interest.

Next, I applied the medium paste using the stencils to the card base and sprinkled Sparkle Dust onto the wet medium to create some sparkle and glitz. The final embellishment was several loops of Black Twine. I sat the emerging ATC pieces to the side to work on the stamped images.

By this time, Cheyenne arrived with the SU! stamps. I didn’t have any stamps that reflected the Freedom theme, but she had two SU! retired stamp sets (they are very, very retired). They were perfect. I took the soldier stamp and coordinating words from one stamp set and stamped them onto FSJ Whip Cream cardstock using Memento ink. I colored the soldier using Spectrum Noir markers. Each of the words I cut out individually and matted on FSJ Black Licorice cardstock. I took a very light gray Spectrum Noir marker and went over the words to tone down the brightness of the Whip Cream cardstock. I popped the soldier and words out using FSJ Foam squares; and, as a final touch, I sprinkled a little Silver silk onto the ATC. Here is Cheyenne’s iPhone pictures. She liked them better with a woodgrain background:

The cards were judged by the vendors at the show. Here is the winning ATC card:

I created the eagle card by stamping the eagle onto FSJ Whip Cream cardstock using FSJ Black Licorice ink. Cheyenne suggested stamping the coordinating words directly onto the eagle. I thought that was a GREAT idea, and as you can see, it looks gorgeous. I colored the eagle with Spectrum Noir markers. The eagle is popped up using FSJ Foam squares. I punched out three small stars from FSJ Denim Days cardstock. Even though they didn’t have a first, second, and third place winner, the eagle ATC card was the second most chosen card by the vendors.

I think they both turned out beautifully. I won $25 show bucks which meant I could go and purchase products from any of the vendors. Here I am receiving the Show Bucks:

I went back to Creek Bank Creations and purchased two more 3D embossing folders from We R Memory Keepers Next Leveling Embossing folders. These are awesome; they create a 3D embossed look to your cardstock, which adds wonderful dimension and interest to your card. I have three posts coming up featuring these folders. The rest of my winnings I spent at Pink and Main. I purchased a cute, cute frog stamp set (it’s one of the upcoming card creation posts) and a pirate set just for my little buddies to create some cute cards.

Thanks Cheyenne for your stamp sets and your critiques during the creating process.

This is the last of my Scrapbook Expo posts. I know I can be addicted to papercraft shopping. O.k., that’s an understatement, but I do have some restraint. So, I planned before I arrived at the Expo to purchase a Misti. I have been watching numerous YouTube channels featuring many papercrafters using the Misti, and I just had to have one. During the Mega Make-n-Take, designated vendors set up shop and offered products at a reduced rate or with a special bundle price. One of the vendors offered such a great deal, I purchased my Misti that night along with the cleaning solution. It is WONDERFUL! You can check out the Mist at www.mysweetpetunia.com.

www.mysweetpetunia.com

www.mysweetpetunia.com

I, also, purchased that night some items from Queen and Company.  On a previous post I featured their make-n-take shaker card. Along with making the card, we had extra epoxy and sequin embellishments left over, enough to complete several more card or scrapbook page projects.

Queen and Company embellishments

Queen and Company embellishments

They offered a special on shaker card component purchases. I chose a zig-zag die which came with two foam shaker pre-cut card components. These are awesome. All you have to do is pull the adhesive off the backside of the shaker component and adhere it to your card. You can add embellishments or if the design allows, you could stamp images on the card stock before placing the foam. Next, you remove the adhesive from the front of the foam and place the window sheet (acetate) on top. Once this is completed, you apply adhesive to a pre-cut piece of thicker than regular cardstock and place it on top of the window sheet to finish the project. The cost for these complete kits minus the embellishments runs around $3.00. Instead of purchasing the shaker card components by themselves, I purchased a bundle which included the die. The die allows to me create as many cards as I would like. One way is to purchase “fun foam” sheets from a craft store. I was able to find some with adhesive on one side, and I purchased mine from Michael’s with a 50% off coupon. You would need to cut approximately three sheets of foam to have enough height to allow the embellishments to move around and shake.

Queen and Co. zig-zag die with black fun foam

Queen and Co. zig-zag die with black fun foam

Queen and Co. shaker card components

Queen and Co. shaker card components

We received during the Mega Make-n-Take some adhesives and rhinestone embellishments. I cannot remember who supplied them, but it was a great freebie.

Glue dots, rhinestones, one bottle of adhesive not shown

Glue dots, rhinestones, one bottle of adhesive not shown

It’s Cheaper Than Therapy gave each make-n-take attendee a FREE embossing folder. My folder is Christmas themed.

It's Cheaper Than Therapy embosing folder

It’s Cheaper Than Therapy embossing folder

The next two days after the Mega Make-n-Take are designated workshop and shopping days at Scrapbook Expo. Most of the workshops offer free products when you take a vendor’s workshop. Heartfelt Creations offered a free stamp set up to a $19.95 value for each of their workshops. I took two workshops with them; therefore, I received two stamp sets.

Heartfelt Creation Free Stamps

Heartfelt Creation Free Stamps

There are various vendors in the exhibit hall offering free make-n-takes as well as make-n-takes with a nominal charge. I had been looking forward to Fun Stampers Journey exhibit all year. We had to wait about 30 minutes for a seat to come available, but it was worth it. We made a cute card and received a stamp set for FREE! I have pictured the make-n-take card along with an extra design they offered. I made that card for my make-n-take class.

Fun Stampers Journey Card

Fun Stampers Journey Card

FSJ Card 2

FSJ Card 2

After making the shaker card the night before at the make-n-take, I wanted to purchase some sequins, but I didn’t want to spend a lot of money. I stopped by the Tall Mouse booth www.cre8tiveartz.com and purchased a selection of sequins along with some rhinestones all under $20.00.

www.cre8tiveartz.com

www.cre8tiveartz.com

www.cre8tiveartz.com

www.cre8tiveartz.com

After a wonderful experience with Heartfelt Creations and their flower shaping class, I went by a booth that offers 3D dies for flowering creations. I wanted a hydrangea die and Elizabeth Craft Designs had one. I had my friend, Debbie, go back the next day and purchase the flower shaping tool kit.

Elizabeth Designs

Elizabeth Craft Designs

Last but not least, Debbie went back to the Heartfelt Creations booth and purchased the Berry Cafe 12×12 paper pack (not pictured). All in all I had a great time and came away with some great products and new papercrafting skills. Next year, I plan on taking more workshops and attending the exhibit hall two days in a row. We didn’t have time to stop at all the booths to compare prices and purchase more crafting supplies. I hope you enjoy this post.

In a previous post I had mentioned posting about my experience at the Scrapbook Expo 2016 in Duluth, GA. It was an awesome time of fun and shopping with some close friends. It all began Thursday afternoon at 3:00 p.m. The doors opened for the Mega Make-n-Take. We were there waiting in line to get in and save some tables for our group. The actual make-n-take didn’t start until 5:00 p.m. The cost was $45.00 and it was well worth the cost. Each attendee chose a free gift just for attending the make-n-take. I chose the glitter.

Mega Make-n_take glitter

My friend, Cheyenne, chose the glitter as well, but she received bold and bright colored glitter.

The friends at my table, Cheyenne Luken, Debbie Kissel, and Kevin Kesler got settled in to begin the make-n-take. The following pictures and descriptions are not in order of when they were made.

JustRite Stamps started off the night with a scrapbook page. I thought it turned out well even though these are not my favorite colors.

We made a laser cut All About the Mouse by Paper Wizard, Inc. It is adorable.

The next item is a fancy Fold-A-Long Thank you card by It’s Cheaper Than Therapy. This company sells Sizzix dies, machines, and anything Sizzix. I put my Thank You in the wrong place and when it opens up, it looks a little odd. We, also, received an embossing folder. My folder was Christmas themed.

We made another card from Scrap That! It came with a free chalk marker and a selection of sequins.

Krazy Kreations had a really cute gift purse with shoes accenting the front. Love it!

Last year Cheyenne, Kevin, and I attended the A to Z Scrapbook workshop and really loved their products. They were at the make-n-take and we created a scrapbook page entitled Enjoy. I ended up giving this page to a friend for her birthday along with one of the pages I made last year since the pages were from the same kit.

Craft Fantastic was here again this year. We made a pendant and a necklace. These are so easy to make and look so elegant.

I can’t show the Doo Dilly Design scrapbook page embellishment, because I messed mine up and then threw it away. Boo Hoo! It was really cute!

Shoestring Productions had a 6×6 coffee layout. This company has incredible laser cut page kits at a reasonable price.

Loved, Loved, Loved this Happy Birthday Easel Card by Craft Fancy.

Queen and Co. had a fantastic shaker card to make and we walked away with extra sequins and epoxy embellishments.

We did a Crazy Bird Birthday Card by Bee Creative. Everyone received a Spectrum Noir glitter/sparkle pen. My pen was purple!

All of this fun ended at 11:30 p.m. I didn’t get home until 12:00 midnight!

PAGE TOP
[dealsbar preview] Amazing Deals: !!toolbar-deal-title!! - !!toolbar-deal-merchant!!