Tag : stencils

2 posts

I love incorporating FSJ mixed media products to create one-of-a-kind designs. The flamingo cards are a submission requirement to becoming part of the FSJ Creative Team. I hope you are inspired to create and bring paper to life!

Important read all instructions. Gather supplies (products at end of blog).
TIP: Clean Gel Press with damp towel before changing to new color/color combo.

Pull – each time cardstock is applied to Gel Press, smoothed out and pulled up.

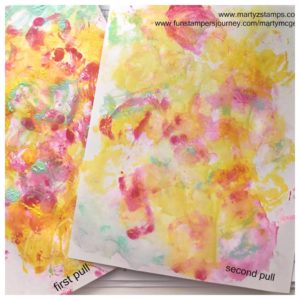
TIP: All pulls are made on two pieces of Whip Cream 8 ½ x 11 cardstock. The first pull is the initial application of paint; second pull is created from leftover paint from first pull (may need to lightly mist Gel Press with water).

Place Gel Press on table.
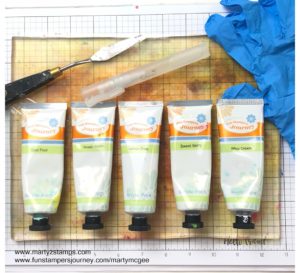
Apply Sweet Berry and Whip Cream paint, mist with water (picture 1).
Mix with fingers as shown (picture 2).
Initial pull with first sheet and another pull with second sheet.

Repeat with Cool Pool, Pineapple Smoothie and Lemon Drop paints. Don’t incorporate Cool Pool with the yellow paints (picture 3).
Repeat pull instructions.

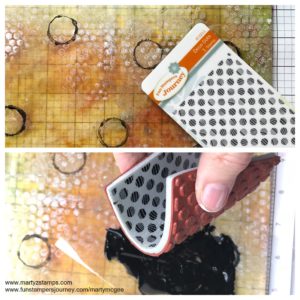
Place Vintage Screen stencil on Gel Press, add Whip Cream paint onto top of stencil. Brayer paint over entire stencil. Repeat covering Gel Press (picture 4).
Repeat pull.

Dilute Black Licorice paint with water. Take a small bottle, press into paint and transfer image onto the Gel Press (picture 5).
Repeat pull.


Apply Limeade Splash and Whip Cream. Brayer covering press. Apply Wallpaper stencil (leaves portion) to press – VERY IMPORTANT TO READ – Use SECOND pull cardstock on top of the stencil, rub transferring image onto cardstock. Repeat over entire Gel Press.

Mist the press with water. Use FIRST pull cardstock, make a pull of the entire press. *Aim for hints of green on cardstock.

Bend Deco Dots ATS slightly dip Black Licorice paint.
Stamp randomly onto both cardstocks.
Cut dry cardstock into fourths (4 – 5 ½ x 4 ¼ pieces).

Sponge Limeade Splash and Kiwi Slice using Wallpaper Stencil adding hints of green leaves around edge of mat.

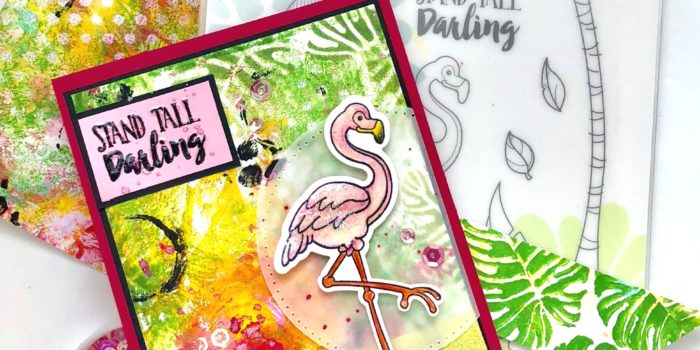
Stamp flamingo image; color with Color Burst Pencils. Die cut.

Card base – Sweet Berry cardstock.
Black mat – 5 ¼  x 4.
Mixed media mat – 5 1/8 x 3 7/8.
Circle dies – Pierce vellum and cut circle.

Position flamingo on vellum circle (do not adhere).
Turn circle over, place adhesive where it won’t show once card is finished. Place foam squares onto flamingo, set aside.

Adhere mats and vellum circle to card base.

REMIX CARD, wrap white thread onto mixed media base before adhering to Black Licorice mat.

Stamp sentiment onto Bubble Gum cardstock with Black Licorice ink.
Mat onto Black Licorice cardstock.
Add Lemon Sparkle tape and adhere sentiment.
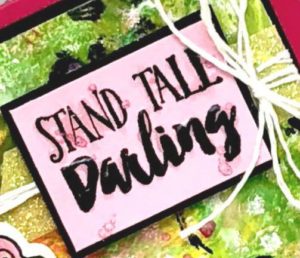
Sprinkle with Bubble Gum and Sparkle Silk.
Adhere flamingo.
Add sequins and Journey Glaze to sentiment and flamingo (dust flamingo with Sparkle Dust).  Allow to dry.


Original:
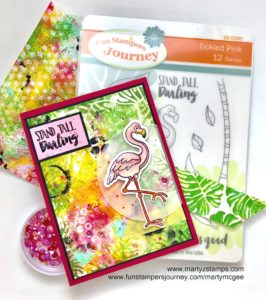
 

The REMIX CARD uses Color Splash Pencils.

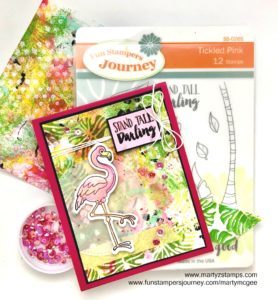
REMIX CARD – make a double bow from White Thread and adhere using glue dot.

Remix:
Product List

Spatula

$3.95

Brayer

$7.96

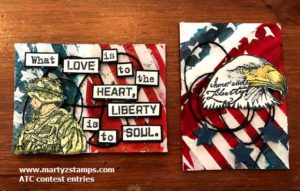
This past weekend a few of my fellow stampers and I attended Heirloom’s Lawrenceville Rubber Stamp & Paper Arts Festival. It began with the Design & Treasure Make-n-Take Friday night. We made four cards, visited with a favorite vendor “Pink & Main”, used new products, experienced new techniques, and had a great time. When we were leaving, I noticed a notebook on display with ATC (Artist Trading Card) on display and announcing the ATC contest. I remembered reading about it and wanting to create an entry when I registered, but I had forgotten about it. I decided to make a couple of ATCs which were to reflect the theme of Freedom and enter them the next day.

Saturday morning came bright and early. I had set my alarm the night before, but it didn’t go off; so, I was in a little bit of a rush before my friend, Cheyenne, got here with some stamp sets that were Freedom themed. We were to  head toward the weekend’s shopping event where we were to meet some other friends at the event by 10:00 a.m. Just a note to the alarm issue, I did set it, but for the weekday. LOL

I began the creation process half awake and a head full of cotton, but that could have been a plus since I couldn’t overthink the process. Really, I could barely think. I took the 3 1/2 x 2 1/2 pieces of cardstock and pulled out my Fun Stampers Journey Sweet Berry Splash, Blue Lagoon Splash, Cranberry Bliss silk, Sparkle Dust, Black Licorice Twine, Journey Medium paste along the FSJ spatula applicator along with some post-it note tape. I pulled out my SU! stripes and stars stencils; thus began the card base process.

In a container, I spritzed some Sweet Berry with a mist of water. I used a paint brush and applied a swipe of Sweet Berry across the cards. It wasn’t brillant enough; so, I thought why don’t I add some Cranberry Bliss silk and that did the trick. I reapplied the mixture to the card and it looked gorgeous. Then, I took the Blue Lagoon Splash and did the same process.  I did try to add some Dark Roast to create a more navy blue color and it was a little too much which created a blackish blue. All I did was add more Blue Lagoon splash and pulled a small, small dot of the blackish blue color into it, mixed it a little, and Bob’s your uncle; it looked great. On the soldier ATC I added full blue color, but on the eagle ATC, I masked off some stripes and added the color to this area to provide a little interest.

Next, I applied the medium paste using the stencils to the card base and sprinkled Sparkle Dust onto the wet medium to create some sparkle and glitz. The final embellishment was several loops of Black Twine. I sat the emerging ATC pieces to the side to work on the stamped images.

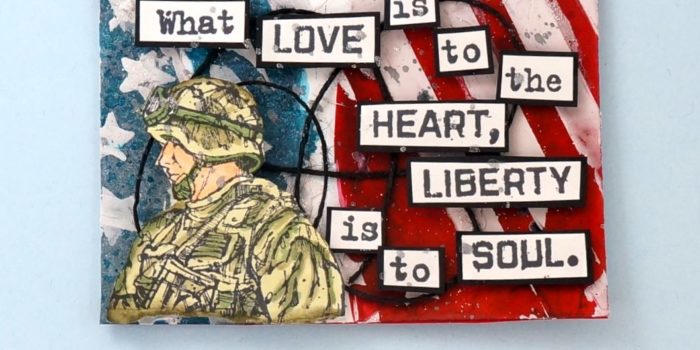
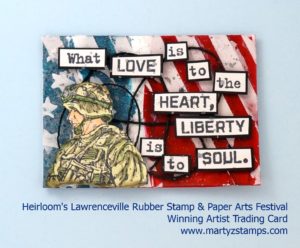
By this time, Cheyenne arrived with the SU! stamps. I didn’t have any stamps that reflected the Freedom theme, but she had two SU! retired stamp sets (they are very, very retired). They were perfect. I took the soldier stamp and coordinating words from one stamp set and stamped them onto FSJ Whip Cream cardstock using Memento ink. I colored the soldier using Spectrum Noir markers. Each of the words I cut out individually and matted on FSJ Black Licorice cardstock. I took a very light gray Spectrum Noir marker and went over the words to tone down the brightness of the Whip Cream cardstock. I popped the soldier and words out using FSJ Foam squares; and, as a final touch, I sprinkled a little Silver silk onto the ATC. Here is Cheyenne’s iPhone pictures. She liked them better with a woodgrain background:

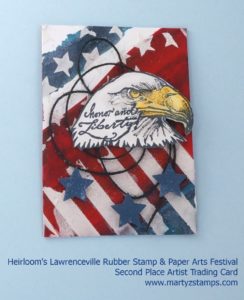
The cards were judged by the vendors at the show. Here is the winning ATC card:

I created the eagle card by stamping the eagle onto FSJ Whip Cream cardstock using FSJ Black Licorice ink. Cheyenne suggested stamping the coordinating words directly onto the eagle. I thought that was a GREAT idea, and as you can see, it looks gorgeous. I colored the eagle with Spectrum Noir markers. The eagle is popped up using FSJ Foam squares. I punched out three small stars from FSJ Denim Days cardstock. Even though they didn’t have a first, second, and third place winner, the eagle ATC card was the second most chosen card by the vendors.

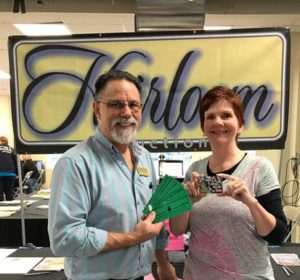
I think they both turned out beautifully. I won $25 show bucks which meant I could go and purchase products from any of the vendors. Here I am receiving the Show Bucks:

I went back to Creek Bank Creations and purchased two more 3D embossing folders from We R Memory Keepers Next Leveling Embossing folders. These are awesome; they create a 3D embossed look to your cardstock, which adds wonderful dimension and interest to your card. I have three posts coming up featuring these folders. The rest of my winnings I spent at Pink and Main. I purchased a cute, cute frog stamp set (it’s one of the upcoming card creation posts) and a pirate set just for my little buddies to create some cute cards.

Thanks Cheyenne for your stamp sets and your critiques during the creating process.

PAGE TOP
[dealsbar preview] Amazing Deals: !!toolbar-deal-title!! - !!toolbar-deal-merchant!!