Tag : thank you

4 posts

Can you create a one layer card? For those who like clean and simple this might be an easy task, but for me, it is a challenge. I love to create a lot of depth and dimension on my papercrafting projects. This means layer upon layer of mats and the stamped images are often raised using FSJ foam squares, not to mention embellishments such as Rainbow Drops, ribbon, twine, clips, etc. . .

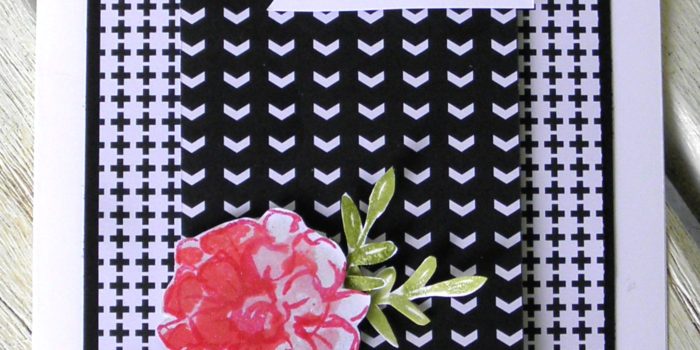
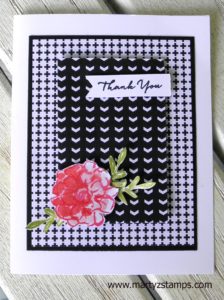
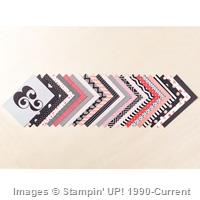
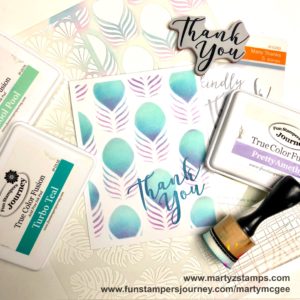
When Christine Pennington called her Bloomin’ Buddies to take part in a one layer card challenge, I jumped on board. I needed a quick and simple thank you card to place in the envelope with my Ebay sales of retired stamps and dies. I immediately knew our NEW Wallpaper stencil from our NEW Inspiration Book and Catalog would make a beautiful card (click here to order). To begin the project, I chose fusion inks which would blend together nicely. They are Cool Pool, Turbo Teal, and Pretty Amethyst (if you want a darker shade of purple, you can choose Lavender Fusion).

I began by cutting my Whip Cream cardstock into 5 1/2″ x 4 1/4″ rectangles.  I placed the stencil onto the cardstock and using my large dowels I began applying color.

TIP: To keep the cardstock and stencil from moving, place a rolled piece of washi tape on the backside of the cardstock and place onto your stamping surface, add washi tape onto the stencil to hold it in place.

TIP: Use the small dowels for better application management; otherwise, tilt the large dowel back towards you to apply a small amount of color at a time.

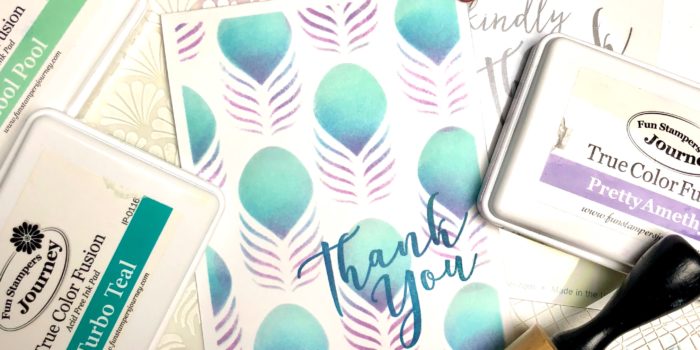
Apply the Pretty Amethyst with the sponge dowel starting from the bottom of the image and going up about a third of the way. Using a different sponge, apply the Turbo Teal from the top of the Pretty Amethyst and to a little above the mid-point of the image. Finish sponging the image with Cool Pool (use a different sponge). Go over the entire image with Cool Pool to help blend all colors seamlessly.

TIP: Since Turbo Teal is a deep, rich ink, dab off some of the ink before apply.

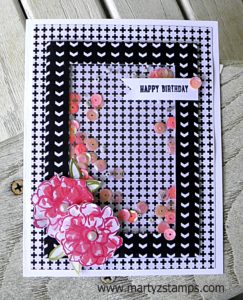
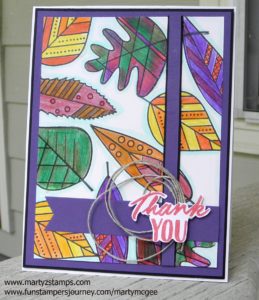
Once all the color has been applied, add a sentiment of your choice. That’s all there is to it. I was able to create approximately 20 cards in an hour. Here is the finished project.


Product List

I recently purchased the Fun Stampers Journey (FSJ) Artsy Leaves out of their mini-Trend Catalog (it has since retired as of September 30th). Even though I knew it would not be a stamp set I could demo at parties, I still wanted it. I LOVE the whole collection and it came with a die set that I purchased as well. When I saw the Pals Paper Arts Card Sketch Challenge #320, I thought this set would make a perfect background stamped card with a Thank You sentiment.

ppa-320-sep29I stamped the leaves using FSJ Black Licorice ink. This ink is very versatile. It is a “true” black ink, it doesn’t smear (it’s dry in about 30 seconds), you can use watercolor mediums with it, and it can be used on plastic, glass, etc (some surfaces require the ink to be set with a heat using a heat gun.
I colored the leaves using FSJ Color Burst Pencils. These pencils do not require Gamsol to blend them together; they are infused with oil to make blending without a liquid medium easy. You can purchase blending stubs from FSJ and dry blend them, but I didn’t use the stubs on this project. I outlined each leave with a light blue pencil to make them pop. I used FSJ – Whipped Cream as the base and matted the leaves on FSJ – Black Licorice and FSJ – Deep Lilace cardstocks. The stips of paper accents are in FSJ – Deep Lilac and FSJ – Black Licorice as well. I highlighted the sentiment with FSJ – Twine and stamped the sentiment from one of the Bloom Benefit ATS – Thanks Much. I stamped the “Thank You” in FSJ – Candy Apple Fusion Ink and fussy cut only the “Thank You” out of the full image. The “Thank You” is popped up on dimensionals.

PPA320Supplies:
FSJ – Whipped Cream, Black Licorice, and Deep Lilace cardstocks, Black Licorice and Candy Apple Fusion Inks, Color Burst pencils, twine, dimensionals, liquid glue, white liner tape, and glue dots.

As I was browsing through the card challenge websites, I was inspired to create a black and white card with a pop of color from SUO Challenges website. Since I have a TON of SU! Stacked with Love paper, and most of the paper is black and white, I thought what a great way to use up some designer series paper and make a really cute card in the process.

The card started out to be a regular two mat card with a couple of flowers (the pop) accenting the lower left corner. I had yet to use the Sale-a-bration set “What I Love” from Stampin’ Up! and I thought this flower would work really well for this design. I stamped and cut out the flowers along with some petals and began to place them on the mats (nothing was adhered) trying to find the perfect spot for them to “pop”. Then, it occured to me I could make a shaker card. I made a really, really cute shaker card. I used some sequins from my Scrapbook Expo haul this past July. The picture does not do them justice.


Sentiment and pearls

Sentiment and pearls


I had an extra flower and leaves along with the center portion of paper from the shaker card. So, I pulled out some more of the cross hatched paper for the first mat, placed the center of the cut out paper from the shaker card onto it using dimensionals. Then matted the first mat in black to make it stand out from the white cardstock. I added a sentiment banner to the top of the center mat and the extra flower to the bottom left corner (both are raised using dimensionals). I finished the card by brushing some clear Wink of Stella onto the flower and leaves.

Here is card number two:

SUO Challenge #153

Enjoy!!!

Daisy Thank You Card This was a thank you card I made for someone who gave me something very special. It was a really quick, simple, elegant, and cute card to make. I love it!


Discontinued Supplies: SU! Big Shot Die Flowers, Daisies #2, SU! large white brads, Pretty in Pink card stock.

PAGE TOP
[dealsbar preview] Amazing Deals: !!toolbar-deal-title!! - !!toolbar-deal-merchant!!