Tag : floral
24 posts
I am so excited to let my readers know, I am the Guest Designer on The Paper Girls Challenge Blog featuring a Rainbow Theme designed card. The challenge begins the week of April 15th.
Before I created the card I submitted as a guest designer, I had fun creating a rainbow cake happy birthday card, which is featured below:
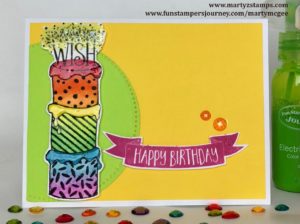
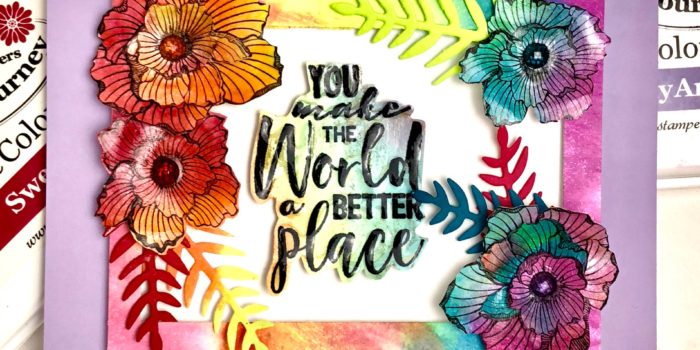
I really love this card, but I wasn’t satisfied with the results. So, I moved on to another idea. I went to my collection of stamps and chose the “A Better Place” stamp set (this was featured in a previous post, Black and White – A Better Place). It is our new host exclusive stamp set for parties that reach $600 or more dollars in orders. I sat and looked at all the stamps in this two set collection, I browsed many card collections on Pinterest and finally decided to create a floral card awash with the colors of the rainbow.
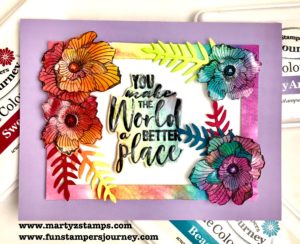
As many of you know, this month’s product promotion feature our silks and splashes. Since they are 20% off, I wanted to showcase what could be down with them. I went with the splashes since I had all the colors to create a rainbow on hand. I began with a large, clear block (think background sized) and drizzled a good amount of water from my media blender brush onto the block prior to adding the splash colors. Normally, you spritzed color with the splashes, but I unscrewed the cap and using the pipe that pulls the color through to the nozzle, placed each color in a vertical row making sure to keep each color separate from the next. I, also, screwed the cap back onto each bottle as I used it (trust me, you want to do this or you could have a “real” mess on your hands). After all the colors were on the block, I gently pulled the colors into the one beside it, keeping white space to a minimum. Next, I placed a piece of 5 1/4″ x 4″ Whip Cream card stock onto the rainbow of colors. I pulled the paper off and repeated the entire process with a second sheet. I let my paper air dry, or a heat tool can speed up the process. I took two of the floral stamps from the set and stamped them several times onto one of the colored pieces of paper. I used the Journey Rectangles Die and cut a frame and stamped the sentiment on the leftover piece. I used the Mystic Fern die to cut leaves out of several pieces of card stock. To create a more dimensional look, I fussy cut inner petal pieces and manipulated all the petals with an embossing tool (thing Heartfelt Creation flowers). I added foam squares to everything, popping them up off the card to create dimension. The color filled mat was adhered to a base of Pretty Amethyst card stock. The final touches included Rainbow Drops to the center of the flowers and Journey Glaze.
Thank you Paper Girls Challenge Blog for asking me to be your guest designer.
If you would like to order any of the supplies to create this card, please click here, or contact me through my Fun Stampers Journey website to host a party (www.funstampersjourney.com/martymcgee).
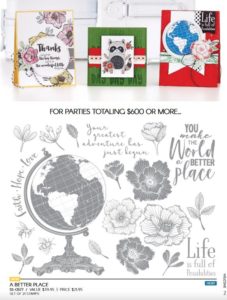
Fun Stampers Journey new Spring into Summer Trends Mini Catalog is LIVE!!! I am super excited to showcase one of the new Host Exclusive stamp sets. As a Journey Coach, I was able to order the host exclusives at retail price and I decided to order the $600 or more party host exclusive “A Better Place” SS-0577. An image of the stamp set from the catalog is featured below (click on the image to view the Spring into Summer Trends mini catalog).
This week’s Freshly Made Sketch #331 is shown below:
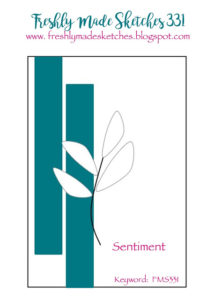
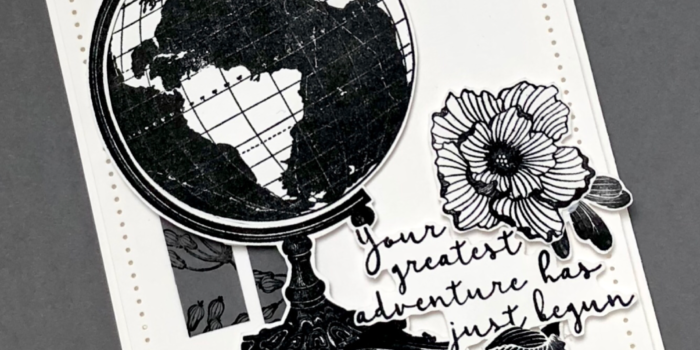
For the Freshly Made Sketches #331 Challenge, I chose to create a black and white card with just a little touch of gray. I took the globe with stand, sentiment, and floral pieces and stamped them onto Whip Cream card stock using Black Licorice fusion ink. I cut two strips of River Stone card stock and stamped the floral images with Black Licorice. The mat is Whip Cream cut and pierced using the Journey Rectangles Die Set and popped up using medium Foam Squares. The globe with stand, floral pieces and sentiment are all popped up using Foam Squares.
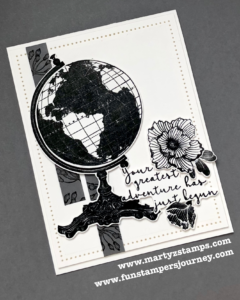
This is a super simple, clean card. Great for birthday, graduation, or a new job.
All products used are Fun Stampers Journey. Click here to shop.
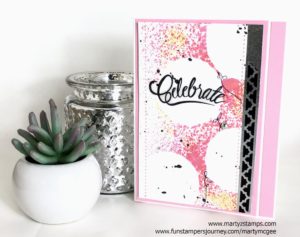
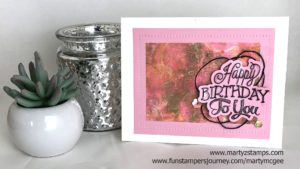
This past weekend I held a class to learn the basic “how-to’s” of creating simple backgrounds with the Fun Stamper’s Journey Gel Press. The class was full, and we had a funtastic time playing and creating some awesome backgrounds for cards.
Since this was a Keep It Sweet and Simple class, I did not feature any stencils or mixed media products. The main focus of our Gel Press fun was using Fun Stampers Journey’s fusion inks, acrylic paints, and liquid colors. In keeping with the simple theme, I chose to create interest in the backgrounds using common craft tools and items found in a papercrafter’s stash. This included paper cut with heart dies, a balloon die, a fern die, and a leaf die. We used the bottom of the Journey Glaze to create circles on the Gel Press (remember don’t use anything sharp, it will pierce the gel). Creativity is unlimited with this amazing product.
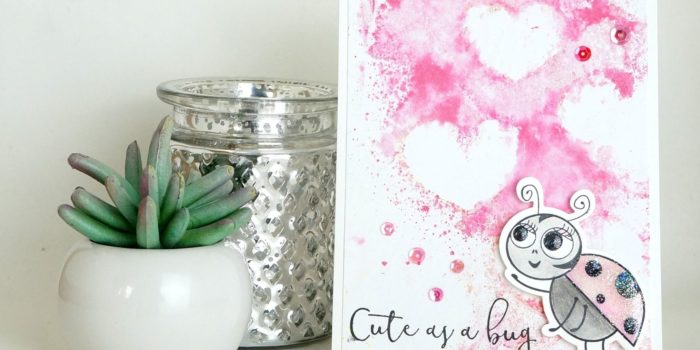
As you know Valentine’s Day is just around the corner, and the FSJ Bloom This Way trend catalog has the most adorable Host Exclusive stamp set with coordinating die called Bug Love (SS-0535 and DI-0393); therefore, the featured background for this class was hearts. I couldn’t help but make a card using this set with the third background pull I created from the Gel Press. I used the FSJ Sweet Berry Splash in a Media Mister along with a Media Mister filled with water, some die cut hearts, FSJ Gel Medium, FSJ sequins, and several pieces of white cardstock cut down to 4 1/4″ x 5 1/2″ (if you would like to purchase any of the supplies featured in this post, go to www.funstampersjourney.com/martymcgee).
Here is my “Cute As A Bug” card:
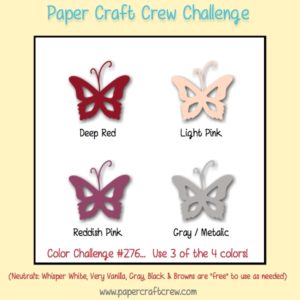
It’s so darn cute, I decided to enter it into the Paper Craft Crew Challenge #276. This week’s challenge is a color challenge:
Prior to the Gel Press class, I had created some background pulls to make samples for the class showing the versatility and uniqueness of backgrounds created using the Gel Press. Some of the pulls were just plain ugly; but, my number one rule of using the Gel Press is . . . . . Keep your mind open to making beautiful from the impossible.
Here are the cards I created with the various Gel Press backgrounds:
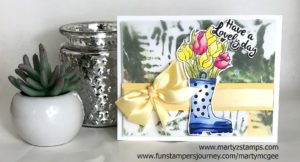
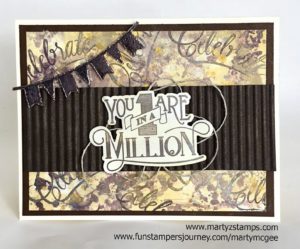
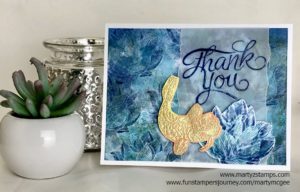
I hope this post inspires you to play, create and bring paper to life!
Last week I received my Fun Stampers Journey order and in that order was my new 8 1/2 x 11 FSJ Gel Press. Yes, Fun Stampers Journey has joined up with Gel Press to offer an exclusive to FSJ 8 1/2 x 11 Gel Press. It is so much fun! I love it!
This past Saturday I was demonstrating to a couple of my class attendees how you can create awesomely unique paper for card making. I played around with FSJ Limeade Splash and Pineapple Smoothie Acrylic paints along with the Starburst Lines stencil on the Gel Press. I made quite a few different designs with acrylic paint, splashes, and the Fusion ink pads. Once I had finished, I set them aside to use later.
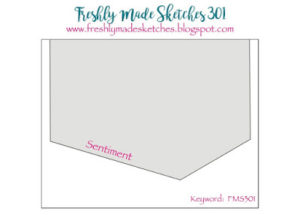
That being said, I looked at the Freshly Made Sketches Challenge 301 and decided one of those designs would make a clean card. Here is the sketch:
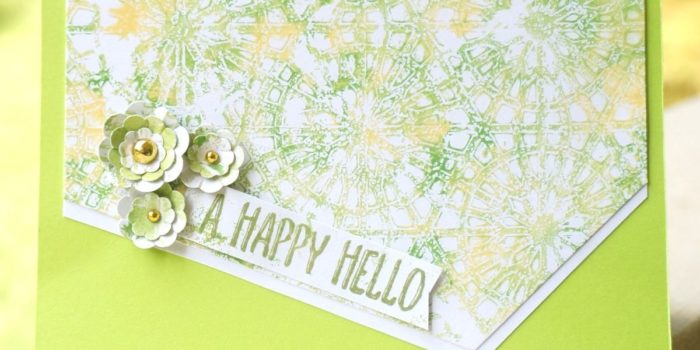
For the designed piece on my card, I took the design I created with the FSJ Limeade Splash (JM-0101) and Pineapple Smoothie (JM-0023) acrylic paints. To create this design, I placed several small dots of each color onto the Gel Press (JM-0107) and using my brayer (TO-0087), I tapped across them lighting to create a solid layer, BUT not blended enough to loose each separate color. I placed my FSJ Starburst Stencil (JM-0007) onto the paint then placed a piece of 5 1/4″ x 4″ FSJ Whip Cream card stock (CS-0040) and rubbed my hand across the back making sure to press firmly down so the card stock would pick up the paint between the plastic of the stencil. I pulled it off and there you go. It was just that easy. You can then pull the stencil up and get another impression off of the Gel Press. I made some flowers from the FSJ Summer Pretties punch (TO-0007) using left over impressions of this design. To accent the flowers I placed FSJ Fashion Gold (AC-0292) embellishments in their centers. The sentiment is from FSJ Punny Punny stamp set (SS-0421). A thin strip of FSJ Whip Cream card stock is showing below the designed paper. All of this is adhered to FSJ Electric Lime card stock (CS-0123).
If you would like to purchase any of these supplies, please click here.
Fun Stampers Journey is providing an amazing opportunity for its coaches to submit their projects in hopes of being given the honor of participating on the Designer Showcase team for the coming catalog year. The chosen designers will have their work showcased at FSJ events throughout the year. This means the design team will receive selected product before product launch to bring to life amazing projects that will inspire others to create.
Any FSJ coach can submit 2 cards and 1 scrapbook page. Once all entries are in by July 10th, Richard and the FSJ Crew will select 20 coaches to move on to the final selection (I don’t know how many are in the final selection). I have worked the last week on my projects. I wanted to share them with my readers the day I submit them to Fun Stampers Journey.
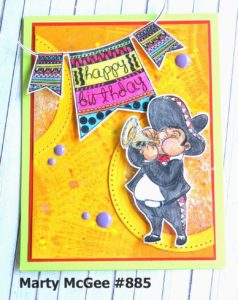
The first card is a birthday card featuring the following ATS sets AT-0156 Felicidades with the Mariachi trumpet player and AT-0195 Bday Banner. The base of the card is FSJ CS-0123 Electric Lime cardstock, the first mat is FSJ CS-0007 Candy Apple cardstock, and the final mat is FSJ CS-0042 Summer Days cardstock. To create the amazing background on the Summer Days cardstock, I took FSJ IP-0113 Orange Rave ink and applied the ink pad to the cardstock with a technique we learned from one of our Bloom Box kits (a sunburst effect is created). Then, I just had to flick as many FSJ silks as I thought reasonible (orange rave IP-0118, electric lime IP-0108, gold ip-0096, sour lemon IP-0110). The pierced open circle was in my scraps of Summer Days cardstock having been left over from a previous project. I started to make a shaker card but I didn’t want anything to disctract from the adorable Mariachi player. I remembered, when we were at the Orlando event, we made a card featuring a star with a sparkle cut center. I created the same thing but with the circle. I adhered a circle of acetate behind the open pierced Summer Days circle (DI-0039 Journey Circles); I took Journey Glaze and placed all over the acetate; then, I sprinkled FSJ AC-0151 Sparkle Cuts over the glaze and rubbed it into the glaze. I set it aside to dry. This technique just makes the card. I cut one end off the cirlce and placed them diagonally across from each other directly onto the background mat. I colored the Mariachi player and the banner with Journey Color Burst Pencils JM-0077. I accented the banner and the trumpet (after I sprinkled Journey Sparkle Dust AC-0013 onto the trumpet) with Journey Glaze AD-0002 4 oz. The banner and the Mariachi player were popped out using FSJ AD-0085 Medium Foam Squares. The final accent were a scattering of Lavender Candy Minis AC-0135. Oops, almost forgot the Sparkle Dust on the rim of the hat, seam of the pants, and the belt buckle. So cute, so adorable. Love it! It just a gorjamust-have card.
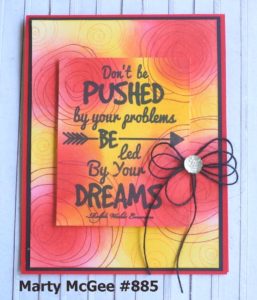
My second card is a quick and simple (very easy card) to bring to life. I started with a base of FSJ CS-0093 Rich Coral cardstock. I love this color. It is a bright red with a hint of orange. The first mat is made using FSJ CS-0003 Black Licorice cardstock. The background base and the raised smaller mat with the sentiment were created using the following: FSJ CS-0040 Whip Cream cardstock, FSJ IP-0114 Outrageous Pink ink, FSJ IP-0052 Rich Coral ink, FSJ IP-0043 Lemon Drop ink, FSJ IP-0042 Summer Days ink, FSJ IP-0041 Black Licorice ink, FSJ Dauber Dowel Large TO-0138, FSJ AC-0004 Journey Black Twine, FSJ AC-0022 Sparkle Drops, FSJ AD-0085 Medium Foam Squares, and FSJ AT-0146 Dreams ATS and last but not least FSJ SS-0454 Flower Swirls.
To begin the background process, I rubbed Outrageous Pink ink and Lemon Drop ink onto the Whip Cream cardstock with the Dauber Dowels. I added a touch of Rich Coral ink to the centers of the Outrageous Pink areas of color. I then took the various sizes of floral blooms from the Flower Swirls stamp set and stamped them onto the swirls of color using Rich Coral and Summer Days ink on the corresponding shade of color.The sentiment was stamped with Black Licorice ink (I used my Misti to stamp the sentiment several times so the black wording would pop). The finishing touch is the triple bow from the Black Twine accented with a Sparkle Drop. The sentiment mat is popped out with medium foam squares.
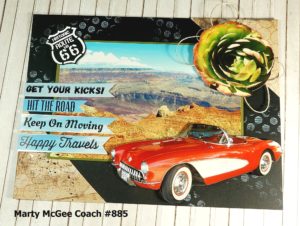
The last project is an 8′ x 6″ scrapbook page. I love the stamp set FSJ SS-0312 Hit The Road. I wanted to create a page featuring this stamp set based around Route 66 out in the Southwest part of our great nation. I knew my friend, Patsy Benson, had vacationed in that area; so, I called her up and asked if she had some pictures I could use. She said yes and I planned a day to drive over and look through her pictures to find the perfect one for my page. Before I went over to her house, I planned out my page. It started off with an 8″ x 6″ piece of Oatmeal Cookie that I distressed with Hazelnut Blend and Buttercream inks. I used a the FSJ SS-0438 Create a Dot background stamp for some interest on the background. I stamped and embossed in white trucks, signs, words in both Black Licorice and Hazelnut Blend cardstocks (I truly wish I had the new cactus stamp set; but alas, I did not). I wasn’t sure what would look great for the picture(s) I chose; therefore, the double color selection of stamped items.
Well, I got there and started looking at the pictures. I knew I wanted a desert/grand canyon type backdrop, and I found the perfect picture. As we were deciding what truck color looked the best on the page, I asked Patsy if there were any Route 66 pictures. She said yes, and we eventually found them. In one of the pictures, an antique convertible was parked at an old-timey gas station, which had multiple route 66 signs in the plate glass windows. As I looked at the convertible, I said, “EEeew (in a good way), what if I cut this convertible out and it looks like it’s driving off the page.” Once I get an inspiration, I’m off and running. Sort of like the Edward Scissor Hands of card making (there is a disaster all around where I was working, but the final outcome is very satisfying). I cut out the convertible and laid it on top of the picture in the right hand bottom corner. Then, I remembered seeing a picture featuring a succulent. I found it and my eyes got wide and I said, “EEeeww (again), I’m going to cut this out too!” Cut, cut, cut, and I’m off and running. Well, as the process usually goes, I change my mind about my first selections of cardstock; the Oatmeal Cookie cardstock did not make the page pop. I needed some color which would make the page truly come to life. think we went up and down her basement stairs twice to her craftroom each time thinking we had gathered all the supplies we needed to complete the page. I think she went up and down probably three more times getting items from the basement as the process developed. After looking through her selection of FSJ cardstock, I thought, Black Licorice would look great and make all the beautiful colors pop off the page. Done! I hated to lose the Oatmeal Cookie sheet because I had put so much effert into creating the background; so, I thought how ’bout I cut off the ends and make triangles. Snip, snip. Done! We tried embossing the route 66 stamp in black on red, Nooo that didn’t quite look right on the page. I tried sprinkling Sparkle Silk – you would think Sparkle Silk would go with anything – not so. I decided to wait until I got home to look through my stamps to find something to add interest to the background mat (I explain later the whole background process). I kept looking at the page and thinking, it needs something else. I then had a bright idea from a card swap I got in Orlando where a coach had stamped onto pictures. I tried the Black Licorice and it wouldn’t dry, but smeared terribly. I initially used Staz-On and it worked, but when I got home, I looked in the cataolog and we don’t have that product; so, I created my own skies using: FSJ CS-0092 Pool Play cardstock, Dowel Daubers, FSJ IP-0035 Huckleberry Fusion ink, FSJ IP-0051 Pool Play ink, and FSJ IP-0009 Whip Cream ink. I rubbed both shades of inks onto the Pool Play cardstock and went back and added white for clouds with the Whip Cream ink. I stamped the Hit the Road sentiments onto the pre-cut strips with Black Licorice ink (I used my Misti to get multiple stamped impressions – making the words crisp). I cut the banner portion of the sentiment strips, and then I added Journey Glaze and spread it out using my finger. It made the pieces look like they were straight from a picture. Voila. Patsy and I both had agreed it needed some twine, but she didn’t have FSJ twine or a background stamp I could use on the Black Licorice cardstock. I knew I could finish the page at home. I placed all the pieces of my project in my plastic bag and came home. That evening, I sat down and pulled the page together within minutes. I placed some looped FSJ AC-0006 Journey Twine Natural behind the succulent picture. I took the ATS Deco Dots AC-0211 and held it folded in half and dapped the rubber into the Buttercream ink IP-0031 and dabbed it in various places on the Black Licorice base. The Oatmeal Cookie corner triangle pieces are adhered onto the Black cardstock. Everything else is popped out. I really love how this page turned out. A picture does not do it justice.
I hope these projects inspire you to create something amazing. If you would like to create using Fun Stampers Journey products, please visit my website at www.funstampersjourney.com/martymcgee.
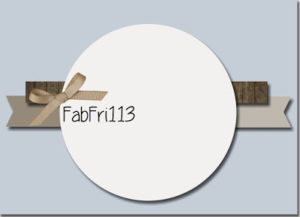
This post will feature another FSJ (Fun Stampers Journey) May 2017 Bloom Box card re-imagined for the Fab Friday Card Challenge 113. Here is the card sketch for this challenge:
The original design in the FSJ May Bloom Box featured an elegant doily themed Well Wishes card accented with a silk bow and neutral button with natural twine.
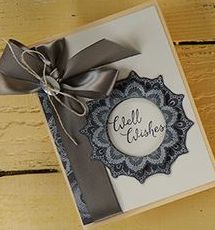
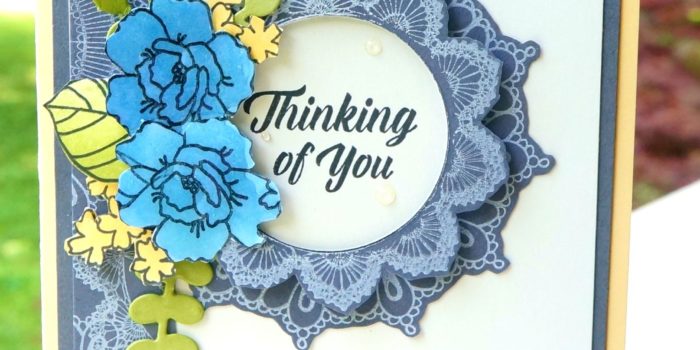
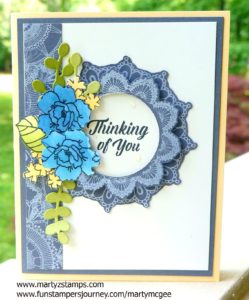
Again, I wanted to incorporate some flowers into the design. I created the blue flowers using the technique mentioned in this post Well Wishes Doily Elegance using FSJ Pool Party ink, FSJ Sweet Pear, FSJ Lemongrass, dauber dowels, and the FSJ stamp set Summer Garden. The doily images were stamped onto FSJ Rock Candy cardstock using Butter Cream ink. The base is FSJ Banana Cream cardstock, with FSJ Rock Cany, and FSJ Butter Cream mats. The “Thinking of You” sentiment was stamped onto the Butter Cream cardstock using FSJ Rock Candy ink.
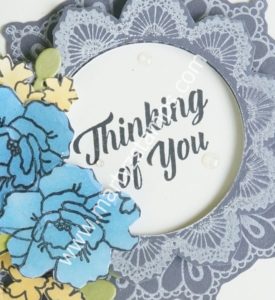
The second doily from the sentiment focal point, is raised up using FSJ Small Foam Squares. The circular center of this doily is die-cut out and the sentiment sits flush with the first doily (it’s hard to tell in the photo – I have a close-up below). The green leaves were created using FSJ Sweet Pear cardstock and the FSJ Bloom Cluster die. The flower bouquet was popped-up with Foam Squares. The final touch was adding FSJ Journey Glaze to the flowers (the sheen does not show up in the photo). I made a boo-boo and some of the glaze got onto the cardstock with the sentiment. Instead of freaking out, I decided to add some more dots of glaze to mimic dewdrops.
Supplies:
All supplies can be ordered by clicking here.
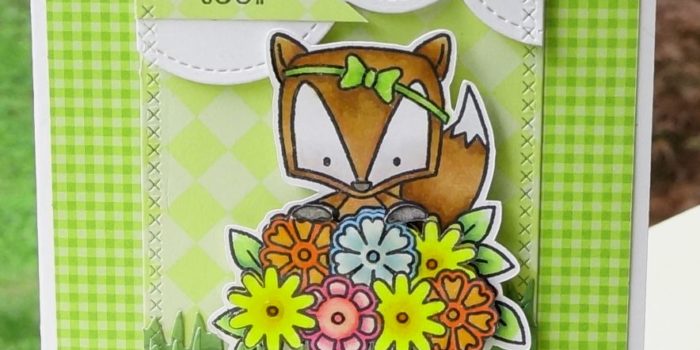
This past week, one of my good friend’s daughter had emergency surgery and had to stay in the hospital for about 4-5 days. I met up with my co-colorist, Cheyenne Luken, and we wanted to stamp and color this cute fox holding a basket of flowers with our Spectrum Noir markers. After choosing the printed papers for the mats, cutting them out, and adding a sentiment. I thought this would be the perfect card to give someone on the mend.
Here is the card with the color choices following:
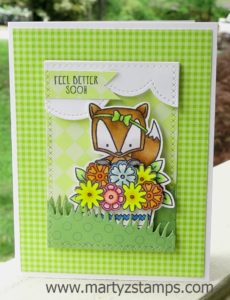
Stamp: Darcy’s (I don’t know the name). Cheyenne purchased this at a Stamp Show back this past fall. But it is a super cute set. It also has a chick and another critter that escapes my mind at the moment.
Spectrum Noir Markers:
Fox Fur: TN9, TN6, TN4, TN3 – TN3 and BP3 combined
Eyes: IG1 and Blender, FS8 with BG5 and blender
Paw: BG8
Leaves: LG5, LG4, LG2, CG2
Flowers: CT4 and OR1, OR3 and OR2, B1 and IB2 and GT1, BP3, PP4, PP1
Basket: IG1 and BT8
Dies: My Favorite Things dies (cross stitched rectangles, clouds, and grass)
Fun Stampers Journey: Glaze
Paper Pack: Pink and Main 6 x 6
I think this turned out to be soooo adorable.
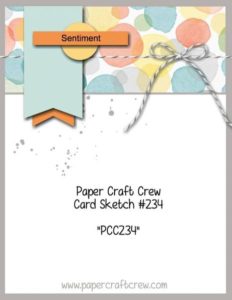
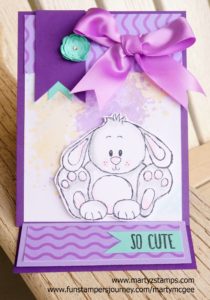
I just love the Bunny set from Fun Stampers Journey called Spring Fling. I thought it was the perfect set to create an easel card along with the Paper Craft Crew Sketch #234.
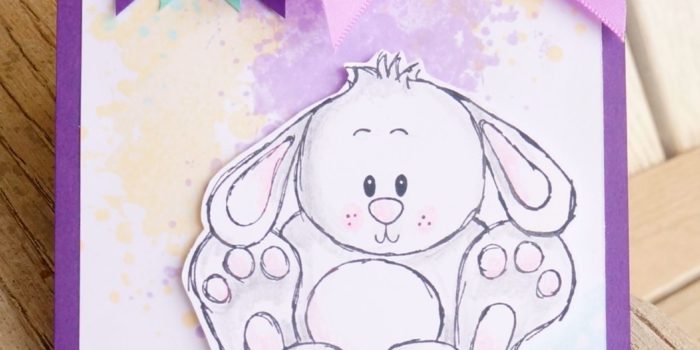
One of our Fun Stampers Journey Facebook Challenge for coaches is an easel card; so, I combined it with the Paper Craft Crew Challenge card sketch. The base of the card is FSJ Deep Lilac. The focal point of card is the large, super cute bunny. It is stamped in FSJ Black Licorice onto FSJ Whip Cream cardstock and colored with the Journey Color Burst Pencils. The mat it is adhered to was stamped with the FSJ ATS Ink Splat stamp in FSJ Bubble Gum, Banana Cream, Pool Party, and Pretty Amethyst inks. The top of the card and the Pretty Amethyst mat with the sentiment are accented with a strip of FSJ Eggcellent 6×6 paper pack cardstock. The banners were created out of FSJ Deep Lilac and Cool Pool cardstocks. The flower was punched out of FSJ Cool Pool and the Summer Pretties punch and accented with a diamond rhinestone. The sentiment on the FSJ Cool Pool banner was stamped in FSJ Black Licorice ink using the sentiment from FSJ ATS Pocket Pup stamp. The bunny and the sentiment mat are popped out with FSJ Foam Squares (medium). The final embellishment is the bow created from FSJ Lavendar Fusion Satin Ribbon.
I know anyone would love to receive this card.
Supplies:
Fun Stampers Journey (to order click here)
Stamps: Spring Fling, Ink Splat, Pocket Pup
Cardstock: Deep Lilac, Pretty Amethyst, Whip Cream, Cool Pool, Eggcellent paper pack
Inks: Black Licorice, Banana Cream, Bubble Gum, Pool Party, Pretty Amethyst
Accessories: Summer Pretties punch, diamond rhinestone, Foam Squares, Lavendar Fusion Satin Ribbon, Color Burst Pencils
For this week’s Freshly Made Sketches #278 challenge, I made a variation of this month’s Make It Class card to meet the sketch challenge (I will post this month’s Make It cards on another post). Here is the FMS #278 sketch:
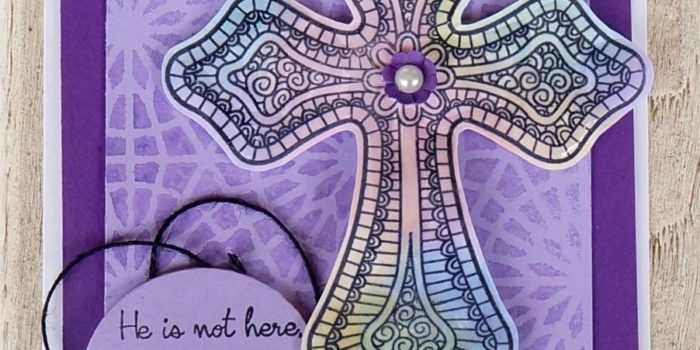
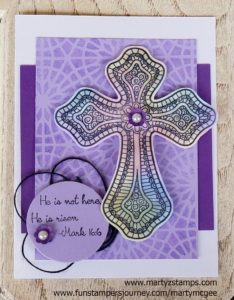
 I had created a cross card from a video/demo Richard Garay had for FSJ coaches using a special technique to create a stained glass effect. I began by stamping the cross from FSJ Color Cross stamp set onto FSJ Whip Cream cardstock using Black Licorice ink. After I stamped the image, I took the solid flower stamp from FSJ Be Happy stamp set (note: any solid shape would work) and stamped it into various colors of ink (one at a time) then stamping onto the cross (you can go out of the lines because the cross will be cut out). I used the following Fun Stampers Journey inks to create this stained glass effect (Bubble Gum, Sweet Pear, Banana Cream, Pool Party, and Pretty Amethyst). Note: If you try this technique, make sure to clean your stamp off after each inking because the black ink sometimes comes off onto the stamp. This will help eliminate any frustration if colors bleed and become muddy/murky). Once I finished stamping, I cut the cross out and applied Journey Glaze to give it a little shine. Set the cross aside to dry.
I created the patterned mat by placing the FSJ Starburst stencil on top of the piece of FSJ Pretty Amethyst cardstock. In a FSJ Media Mister, I combined one squirt of FSJ Sweet Berry Splash and one squirt of FSJ Blue Lagoon Splash and filled with water to create the purple mist. I spritzed the paper with the purple mist and immediately applied a paper towel to the stencil to soak up any excess liquid. This created another stained glass effect for the card.
I used FSJ Deep Lilac for the back mat. I layered the patterned mat on top. I adhered the cross with FSJ Foam Squares (medium). I stamped the sentiment onto FSJ Pretty Amethyst cardstock and die cut a circle from the stamped cardstock. I placed a loose loop of black twine behind the circle sentiment and adhered the sentiment with FSJ Foam Squares (medium) as well. For the final touch, I punched two small flowers from the FSJ Summer Pretties punch. I curled the edges and applied a peal accent to the middle. They were adhered to the card project with FSJ liquid glue.
Here is the final project.
Supplies:
Fun Stampers Journey (click here to order)
Stamps: Color Cross Bundle, Be Happy
Cardstock: Whip Cream, Pretty Amethyst, Deep Lilac
Inks: Black Licorice, Bubble Gum, Pool Party, Pretty Amethyst, Banana Cream, Sweet Pear
Accessories: Black Twine, Journey Glaze, Pearl Accents, Circle Die, Starburst Stencil, Media Mister, Sweet Berry Splash, Blue Lagoon Splash

