Category : Holiday

19 posts

It is time for another Creative Design Team Blog Hop. I am so excited to feature products found in the new Easter Blessings catalog. So many possibilities for creating incredible cards, gifts and just plain adorable projects. Grab a cuppa coffee, sit back, relax and hop along on a journey of inspiration. Here we go!

The Design Team was blessed to receive some exciting new products from FSJ + Spellbinders to inspire your creativity. I received the Carrot Treat Box Die DI-0521, Pretty Plaid Embossing Folder EF-0041 and samples of the Create and Bloom Prints PP-0067 and the Easter Blessings Tags PP-0069. We also received the mini-catalog and all the inspiration in the catalog is soooo cute!

I’m going to let you in on a little surprise. All of my featured products involve NO Stamping! So, for those of you that don’t have a huge selection of inks and stamps, these projects are for you.

Carrot Treat Box

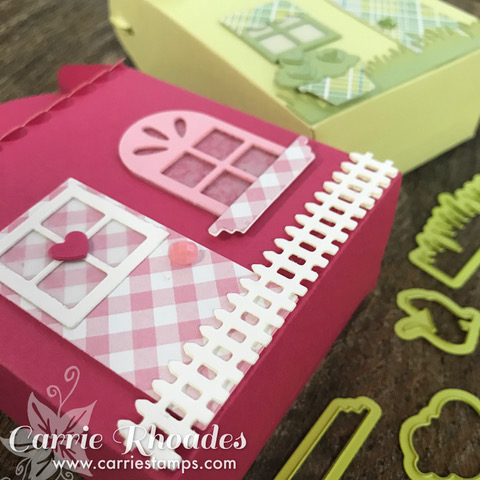
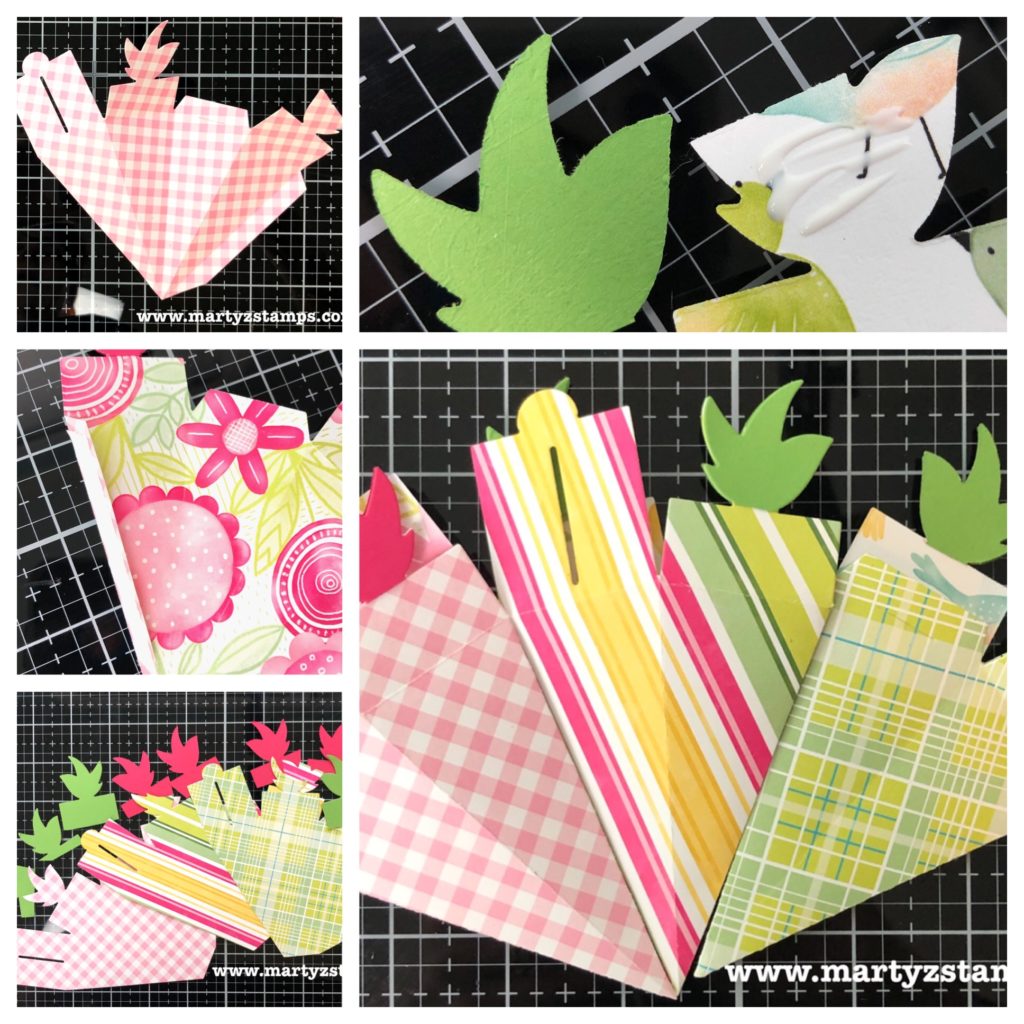
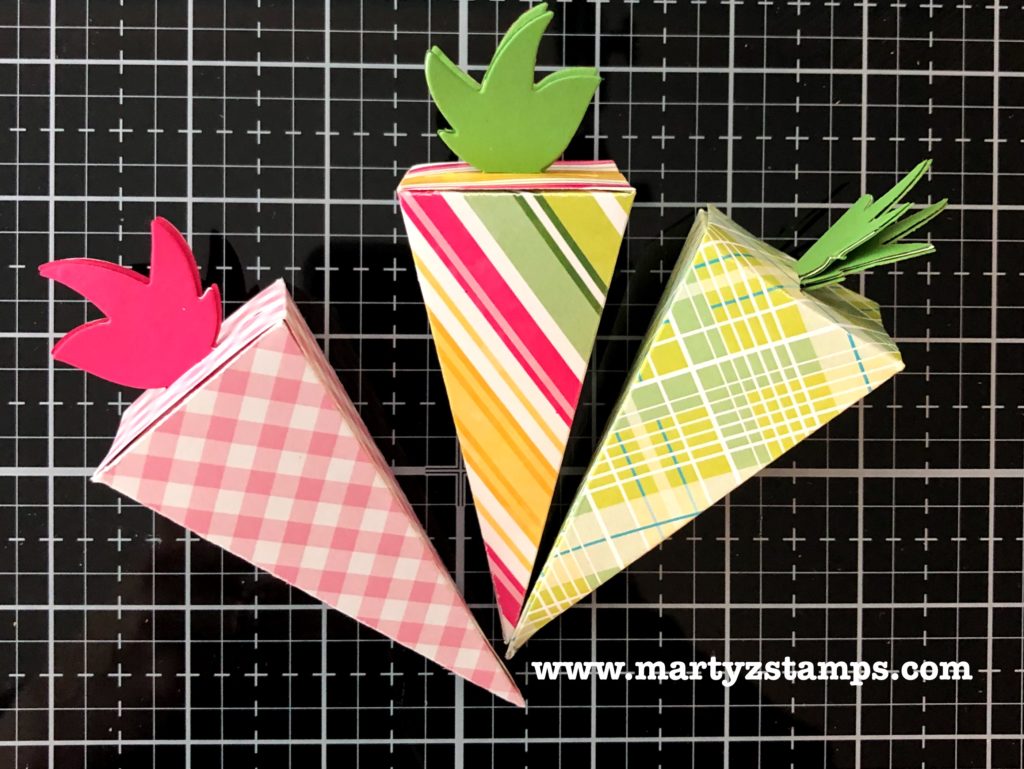
First up are some adorable Carrot Treat Boxes DI-0521. I used a variety of Create and Bloom Prints PP-0067 to inspire you to think outside the box. These carrot treat boxes are so uniquely cute they are sure to make someone you know hoppy. Check out the picture tutorial for how to create your own treat boxes.

Step 1 (top left hand corner) – Crease all score lines on of the die-cut carrot. Step 2 – Place adhesive on the side flap. Step 3 – Die-cut cardstock for the “green” portion of the carrot. Step 4 – Adhere the die-cut “green” portion to both sides of the carrot top. Step 5 – Adhere sides together.
Fancy Fold Some Bunny Loves You Card

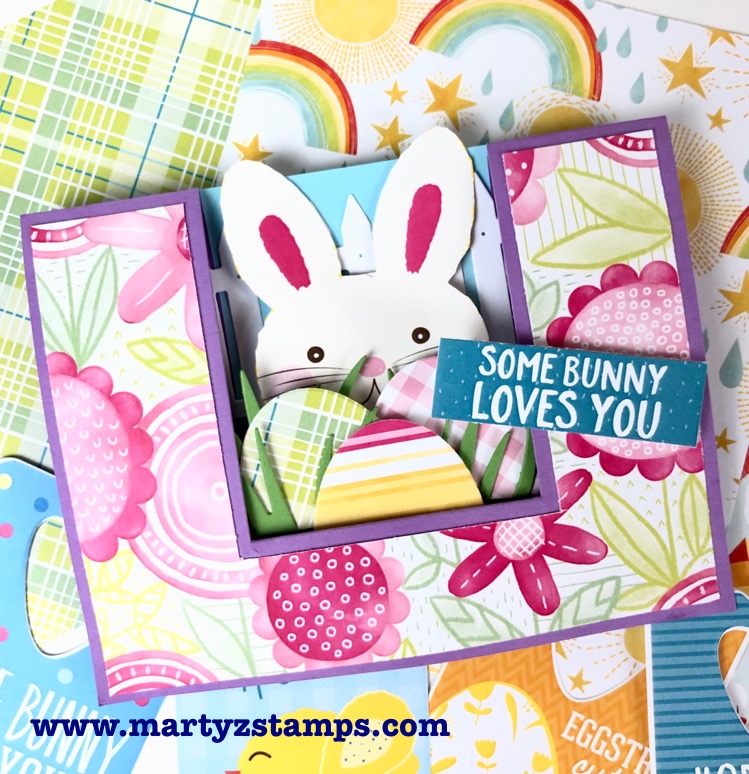
Ya’ll know fancy fold cards have a sweet spot in my creative heart. This one came together just like a rabbit hops, hops, hops.

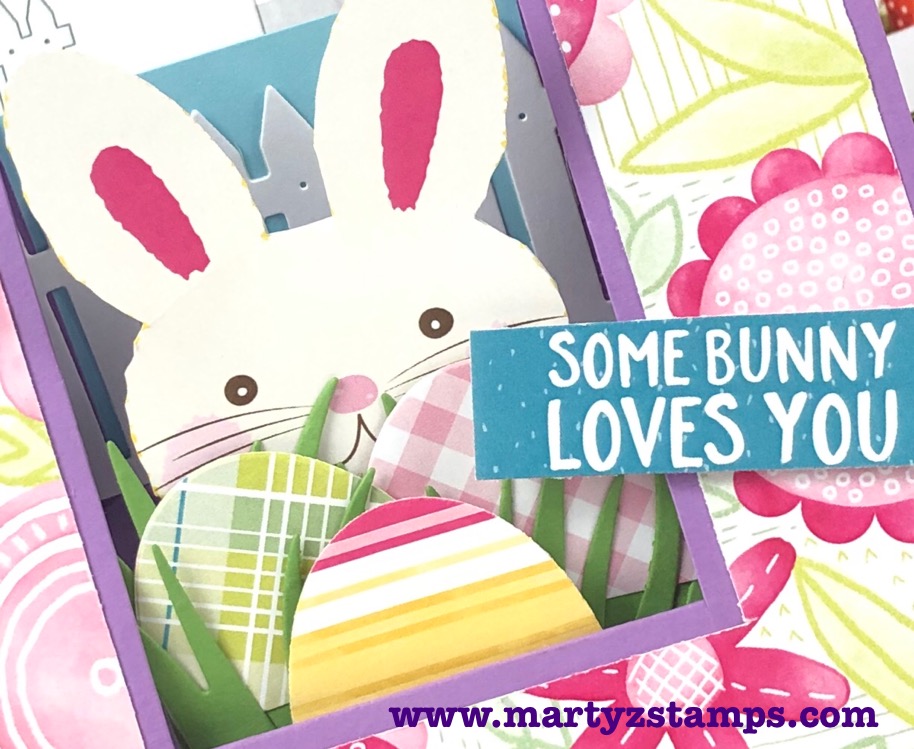
Begin with an Inner Stair Step Card. Choose a couple of Easter Blessing Gift Tags to use on your card project. I chose the Some Bunny Loves You for the sentiment and cut it down.
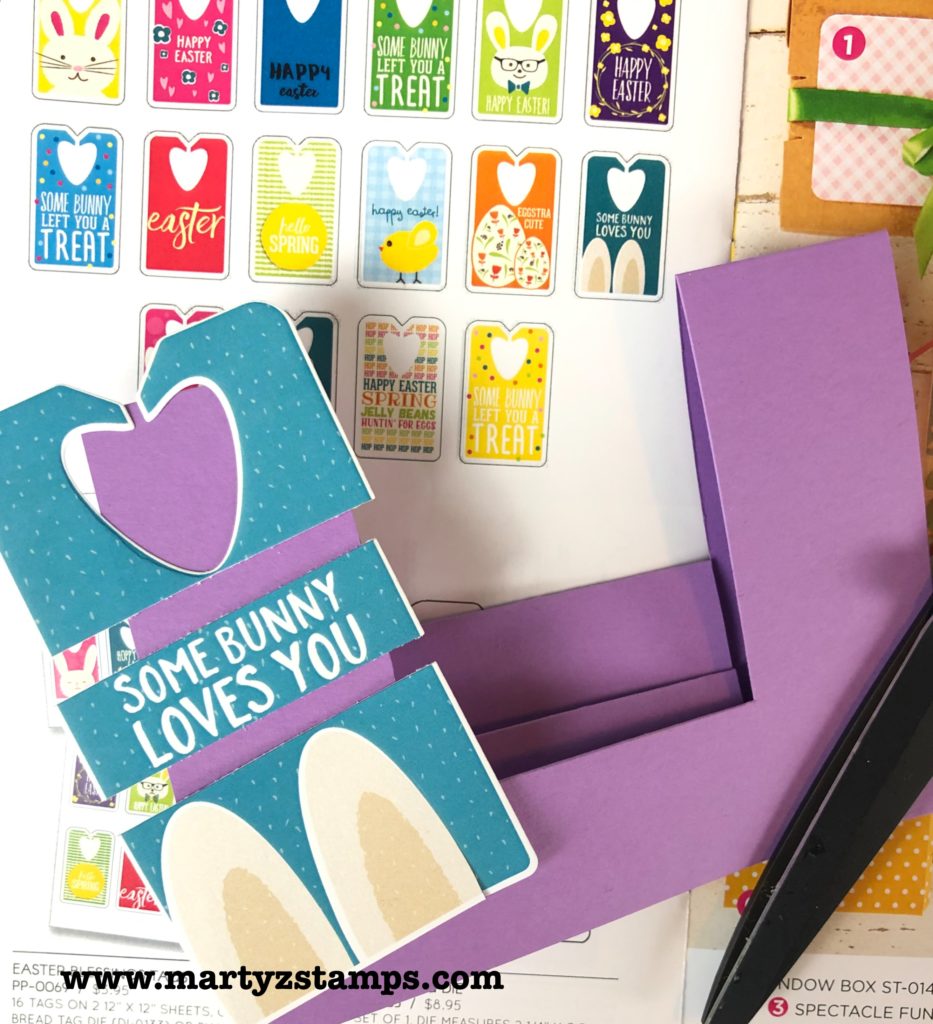
I took the bunny on the yellow background tag (see below) and cut him out.
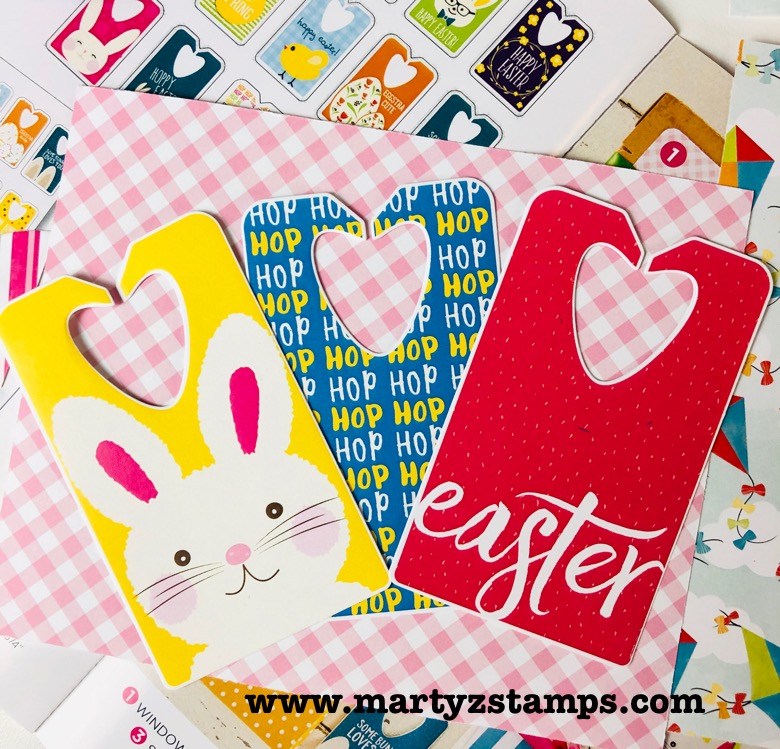
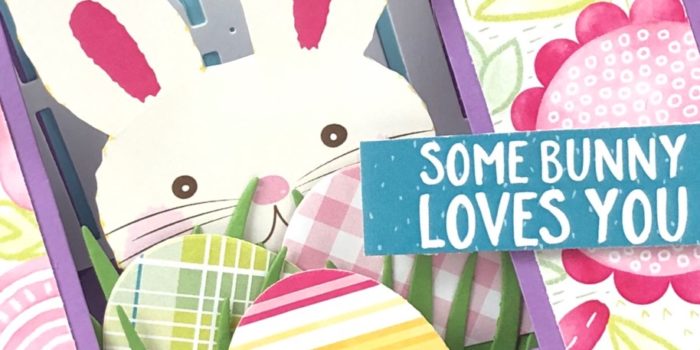
Here he is peeking out from stash of candy eggs! He’s so cute.
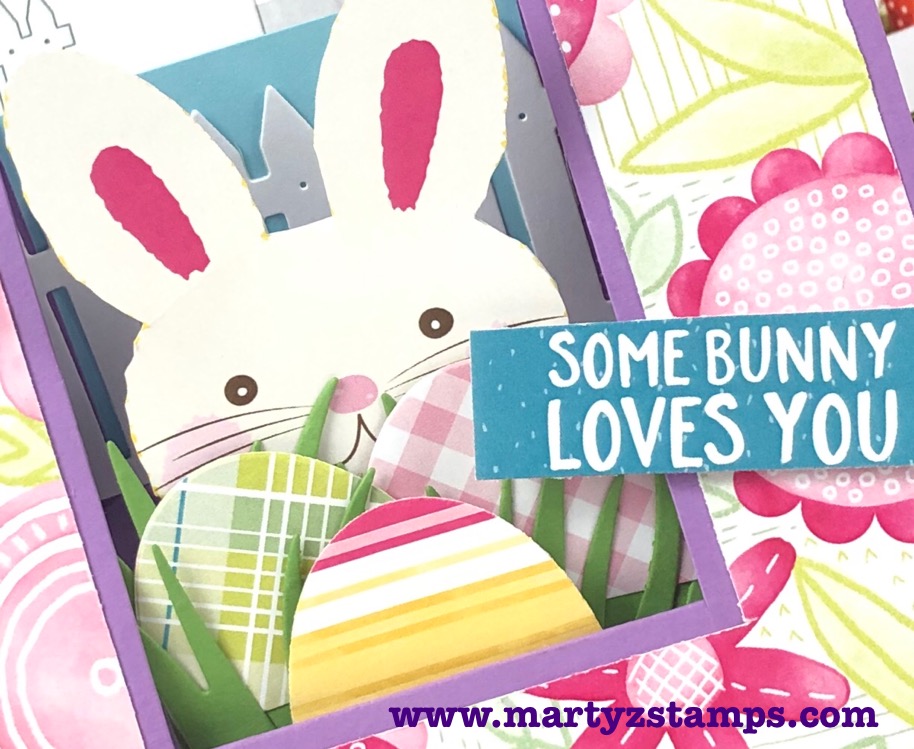
I placed a full 5 1/2″ x 4 1/4″ piece of Pool Play cardstock on the back of the main card for the sky. I adhered onto the back piece a Whip Cream Garden Fence DI-0485. The bunny is adhered to the back side of the middle panel. Tip: I had to add a piece of cardstock to the back of the bunny to give him height. I die-cut grass from the Border Details die set DI-0144 and the eggs from the Fancy Eggs Die DI-0512. To create the print paper mat. I laid the printed paper on top of the base and marked my cut lines with a pencil. I trimmed the printed paper on my trimmer and adhered to the base.
Easter Blessing Gift Card Holder

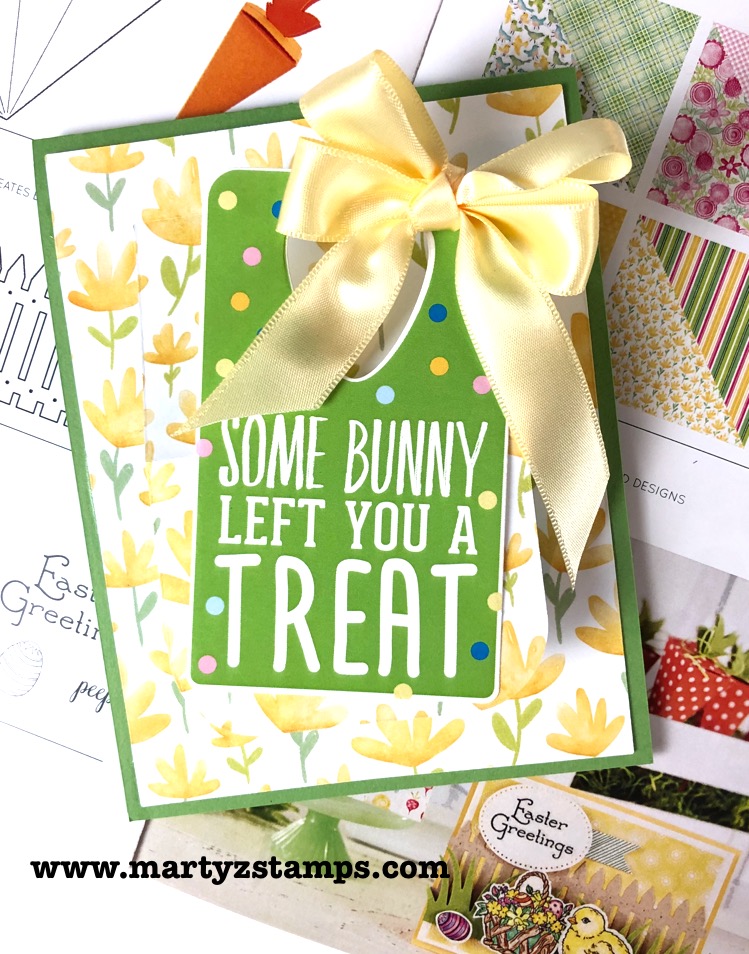
Many of you enjoy giving gift cards. This card is perfect for holding a gift card with a sweet Easter Blessings Tag.

I used the following for this project: Window Pop die DI-0389, Banana Cream Satin Ribbon AC-0184, Easter Blessings Gift Tags PP-0069, Create and Bloom Prints PP-0067, Lemongrass cardstock CS-2019 and Sweet Candy Drops AC-0275.
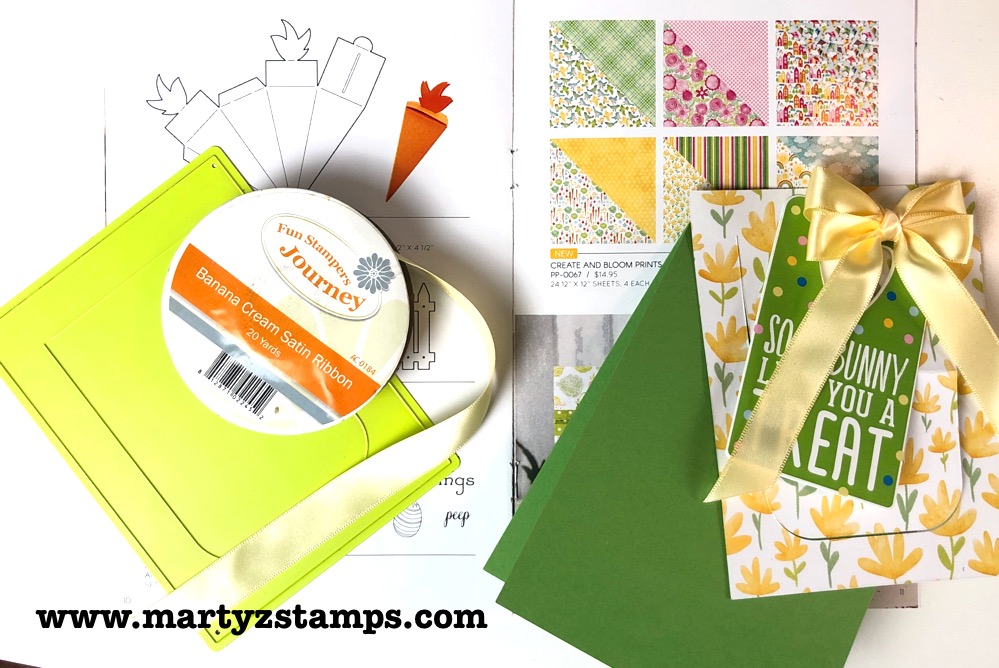
Die cut the printed paper using the Window Pop die. Create a double bow from the satin ribbon and choose a tag sentiment.
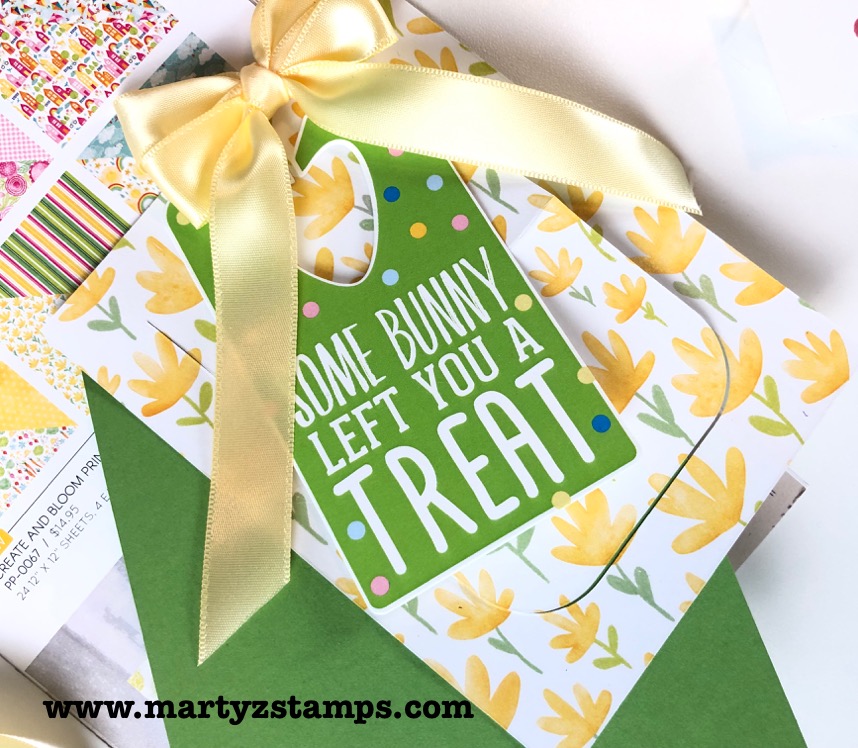
Adhere the die cut paper to the card base and fold the flap in half (this will create an easel effect for display purposes). Adhere the gift card to the card base and apply a Sweet Candy Drop on the bottom portion of the card base under the flap.
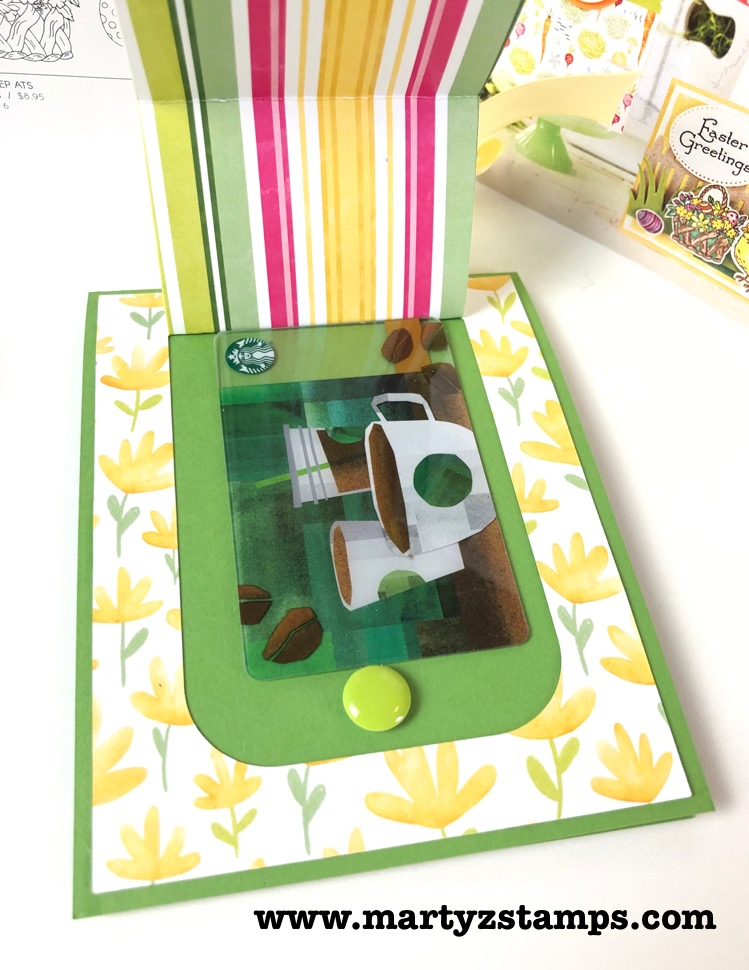
Adhere the tag to the bottom portion of the folded flap.
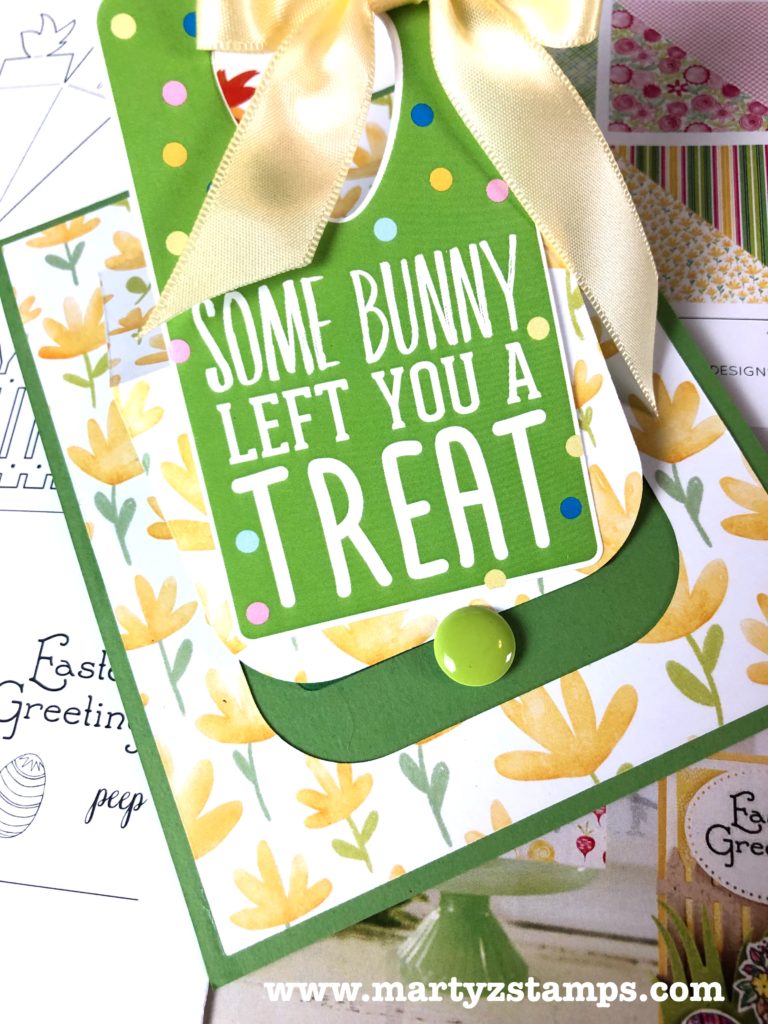
Adhere the bow to the card. It is just that simple!
Elegant Easter Card

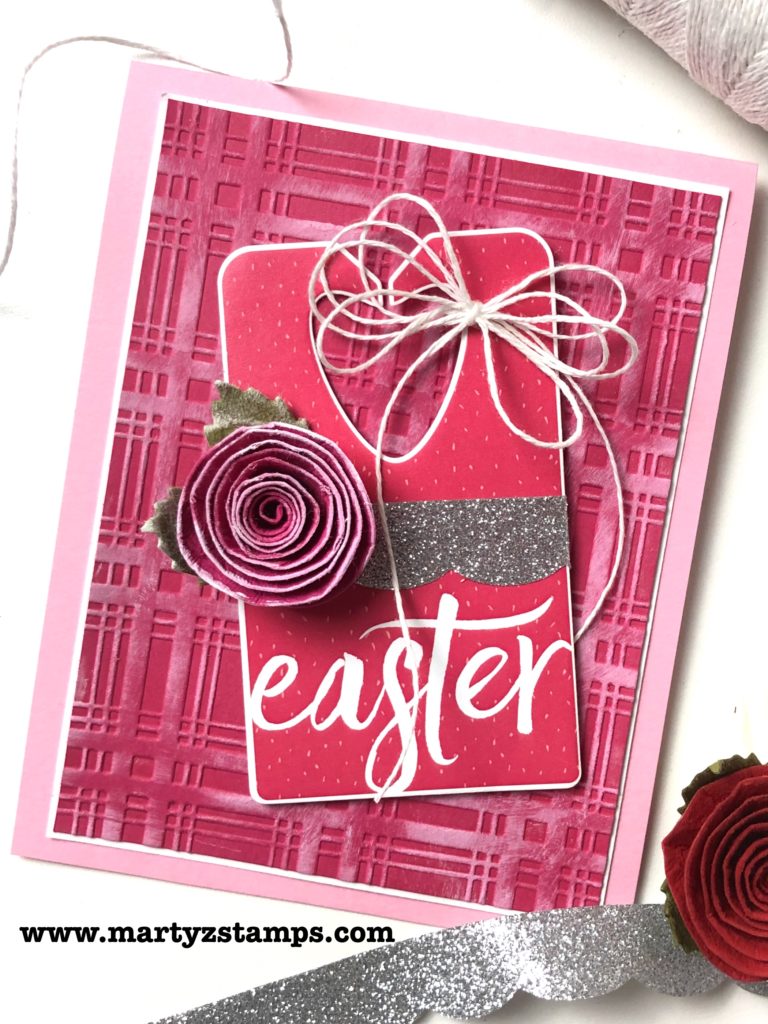
Last but not least, I used the Pretty Plaid Embossing Folder to create a background for this card project and placed another Easter Blessings Tag onto the card for the sentiment.
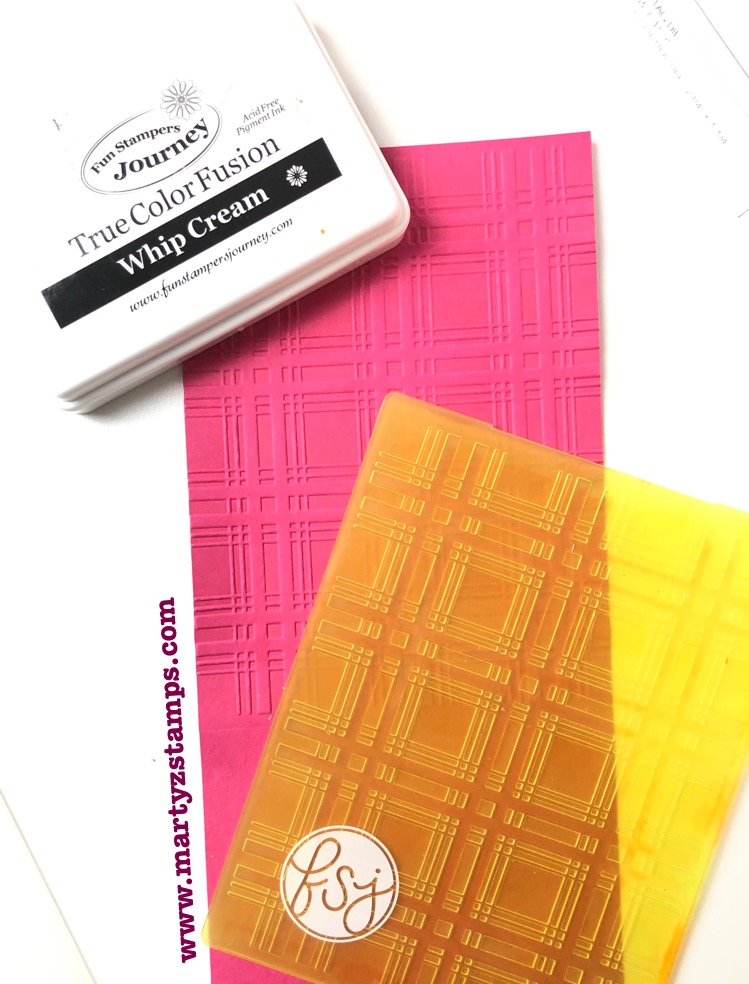
I applied Whip Cream Fusion Ink IP-0009 to the raised portion of the embossed Sweet Berry cardstock CS-0034.
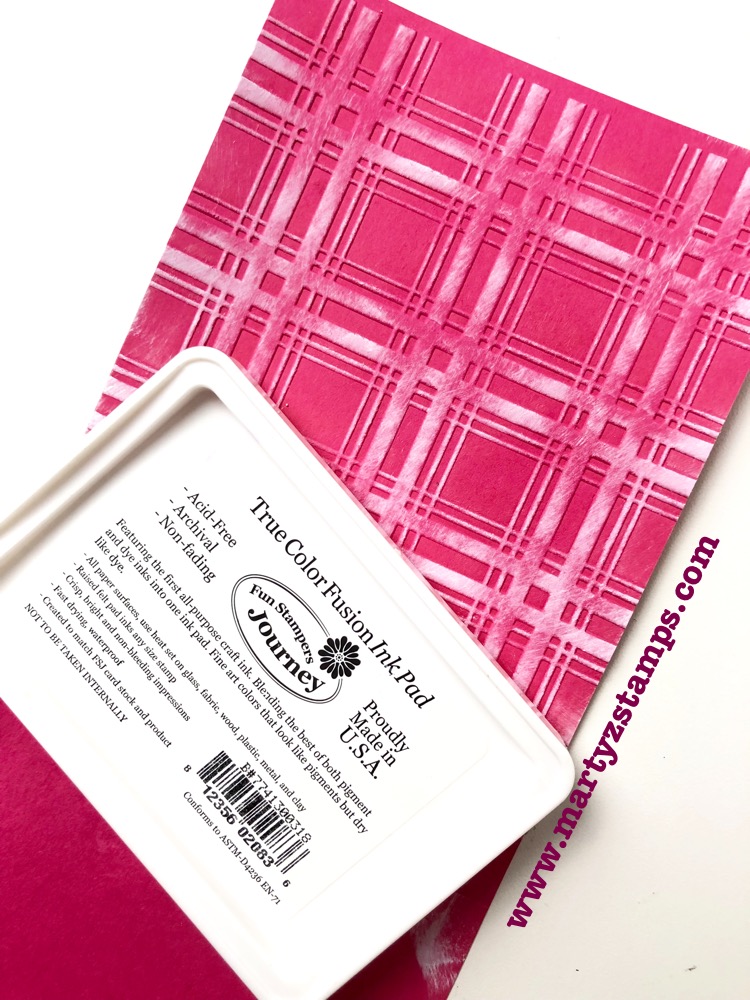
I pulled from my FSJ stash the following to create this card project: Love Buds AC-0177, Whip Cream Thread AC-0128 and Silver Sparkle Tape AC-0259.
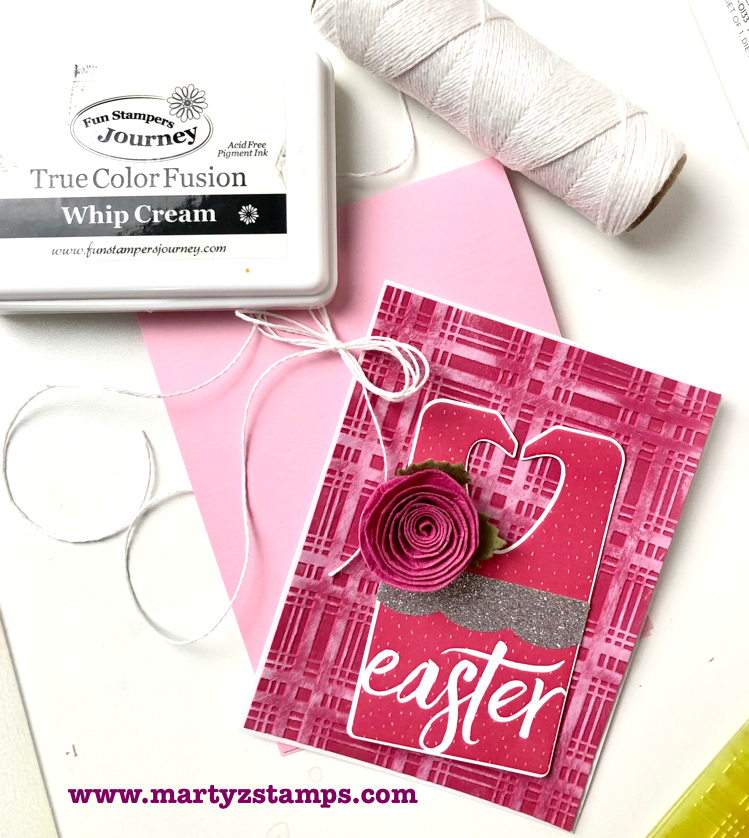
I applied the Whip Cream Fusion ink to the petal edges of a medium Love Bud, wrapped a piece of the Silver Sparkle Tape around one of the Easter Blessing Tags and created a quadruple bow from the Whip Cream Thread. I adhered everything to the card mat and base with the tag sentiment raised with Medium Foam Squares AD-0085.

What a WOW card that was quick and simple to make!
If you hop off the trail, hop right back on by clicking one of the Design Team names below or click on the FSJ banner to check out the official FSJ blog.
Marty McGee (You Are Here!)

Carrie Rhoades

Christine Chan

Jill Hillard

Lezlye Lauterbach

Kazan Clark

Alissa Hall

Supplies:

Note: For new release product, click on product name in blog to shop.

Y’all it’s time again for the FSJ + SB Creative Design Team Blog Hop and I have a surprise for you. I am stepping out of my comfort zone and creating some quick and simple cards that can be used for Valentine’s Day, Anniversary or just to say you care about someone special.

One of my favorite sets is in the spotlight, Perfect Atoms Stamp Set and Dies (SS-0457 and DI-0315), along with, You and Me die (DI-0159). There are endless possibilities with these sets. Where the fun of creating never stops!

The first card is all about lighting up someone’s world. I pulled out a scrap of Whip Cream cardstock, rubbed a little Lemon Drop Fusion ink onto two areas. I die cut one of the colored pieces with SB Nestabilities Fancy Edged Rectangles Dies (S4-905) and stamped the light bulb image onto the other using Black Licorice Fusion ink and die-cut it out with the coordinating die. Of course, the bulb had to have a little Journey Glaze to give it that sleek shiny look of glass. The base is Whip Cream with the die cut mat adhered directly to the base. The light bulb is popped out with FSJ Medium Foam Squares. I stamped the sentiment in the bottom right hand corner and highlighted the would light with a FSJ Color Burst pencil (any yellow will do).

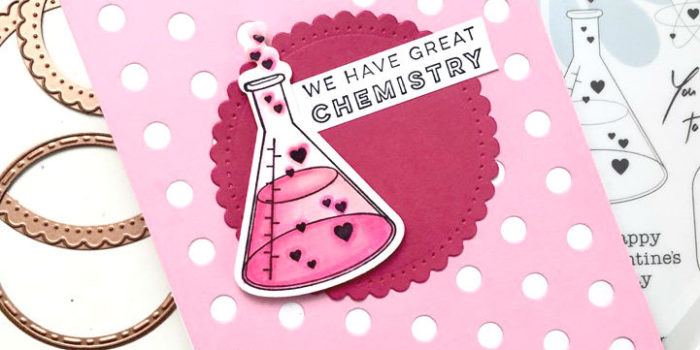
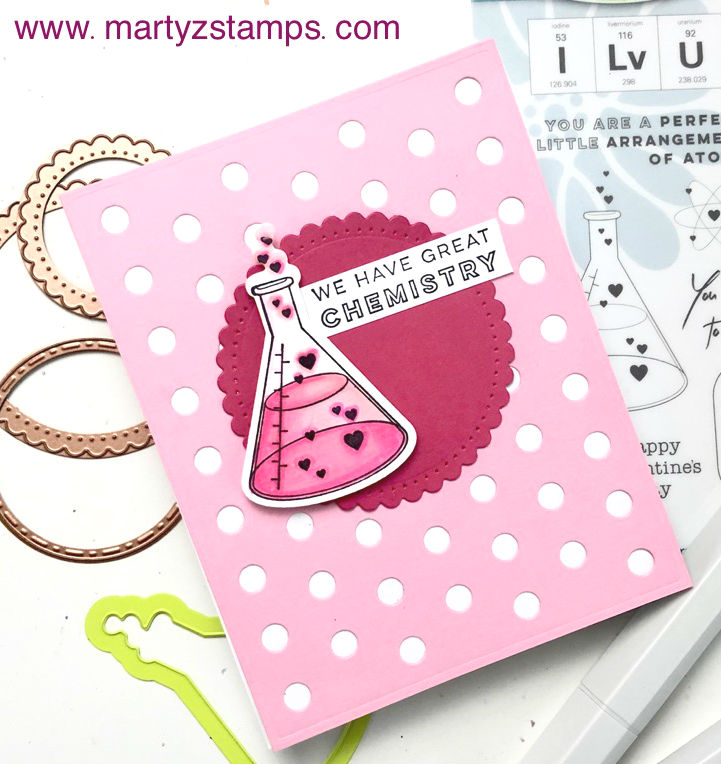
The next card is all pink. The base is Whip Cream with a Bubble Gum cardstock mat die-cut from Lots of Dots Die Set (DI-0424) and adhered directly to the base mat. The scalloped circle is die cut from Sweet Berry cardstock with the Nestabilities Fancy Edge Circle Dies (S4-903). The flask and sentiments were stamped with Black Fusion ink onto Whip Cream cardstock and the flask is colored with Spectrum Noir alcohol markers.

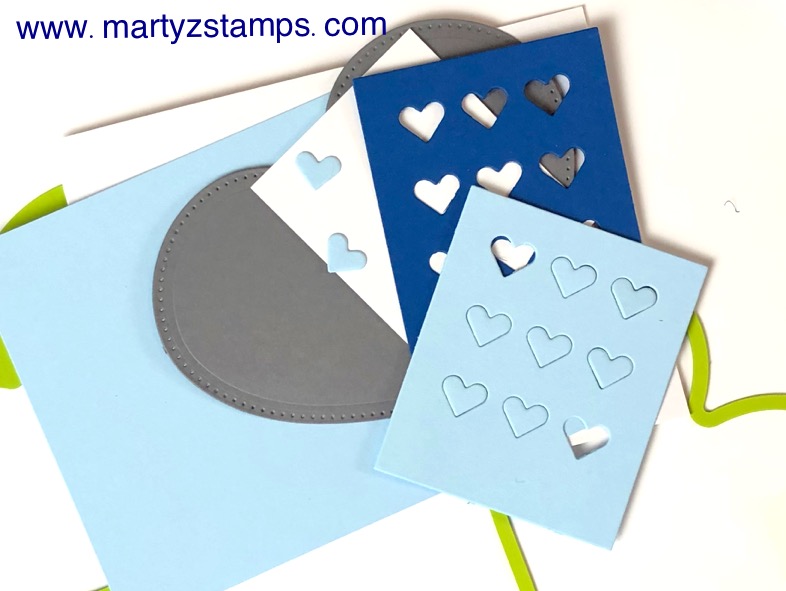
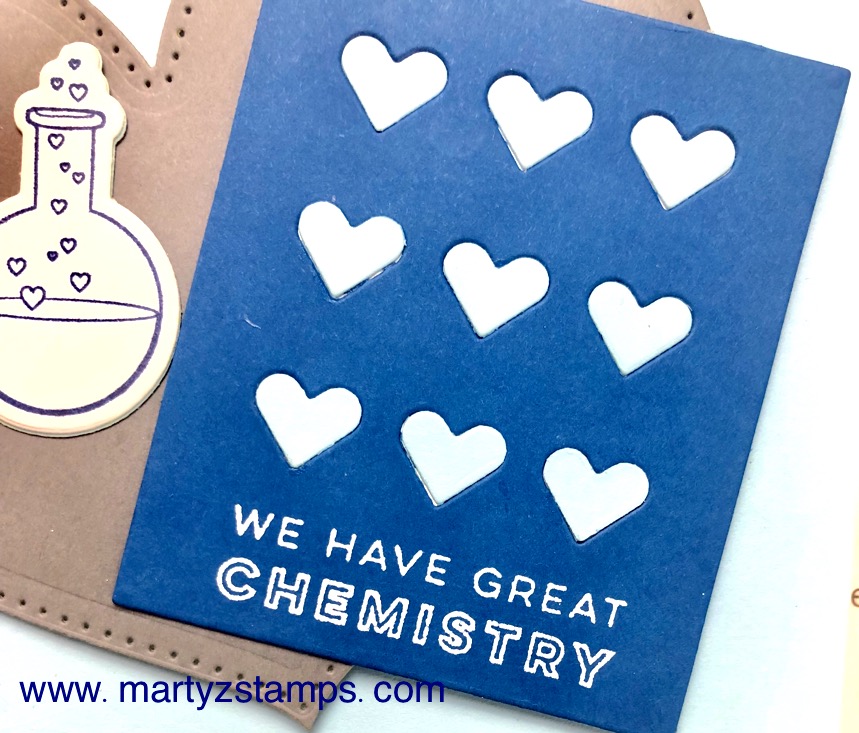
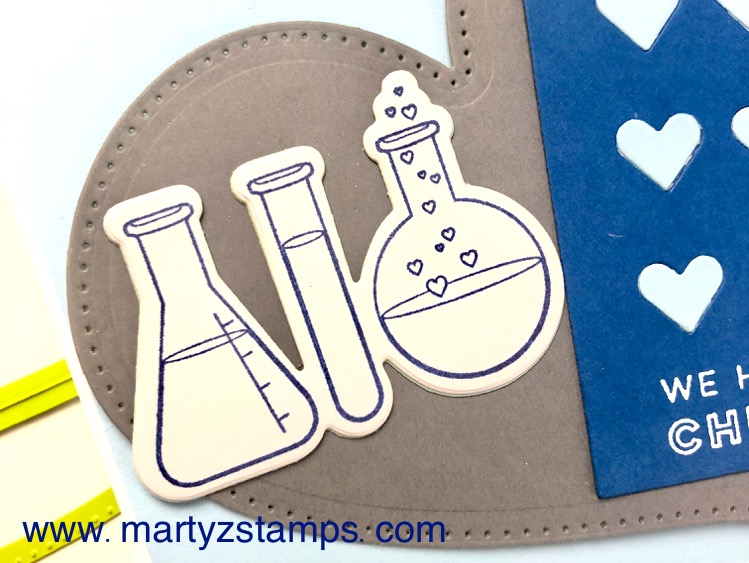
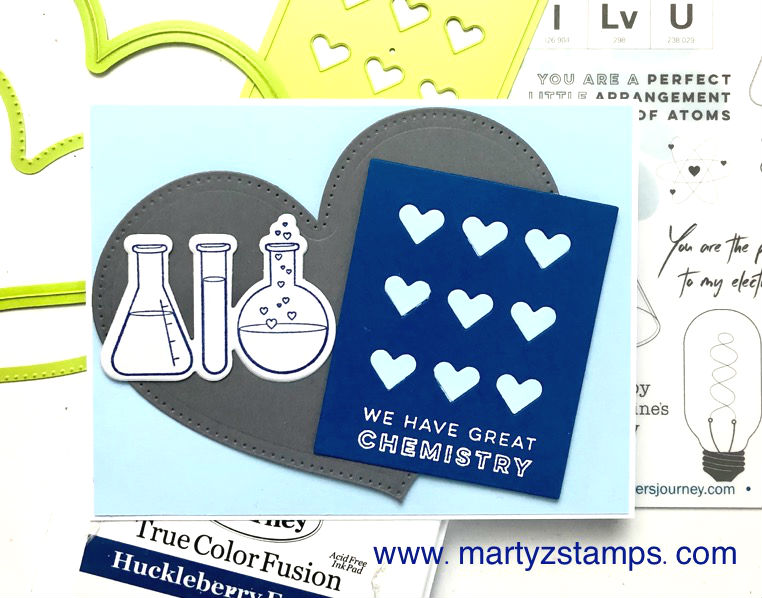
Now, we can’t have a pink card without a blue one, can we? This card is on a Whip Cream base with a Pool Play mat. The heart is die-cut with the Heart Felt Die and Piercing Elements Sets (DI-0033 and DI-0096) from Riverstone cardstock. The accent piece is die cut from Huckleberry Fusion cardstock using the Bunch of Hearts Die Plate (DI-0501). I adhered a piece of scrap white paper behind this die-cut piece and cut a second panel from Pool Play cardstock. I took the hearts from the second cut and enlaid them into the cut out hearts portion of the Huckleberry Fusion panel. The sentiment was stamped with Whip Cream ink and embossed with white embossing powder. The flasks were stamped using Huckleberry Fusion ink onto Tin Pail cardstock. The heart and panel are popped out with medium foam squares.

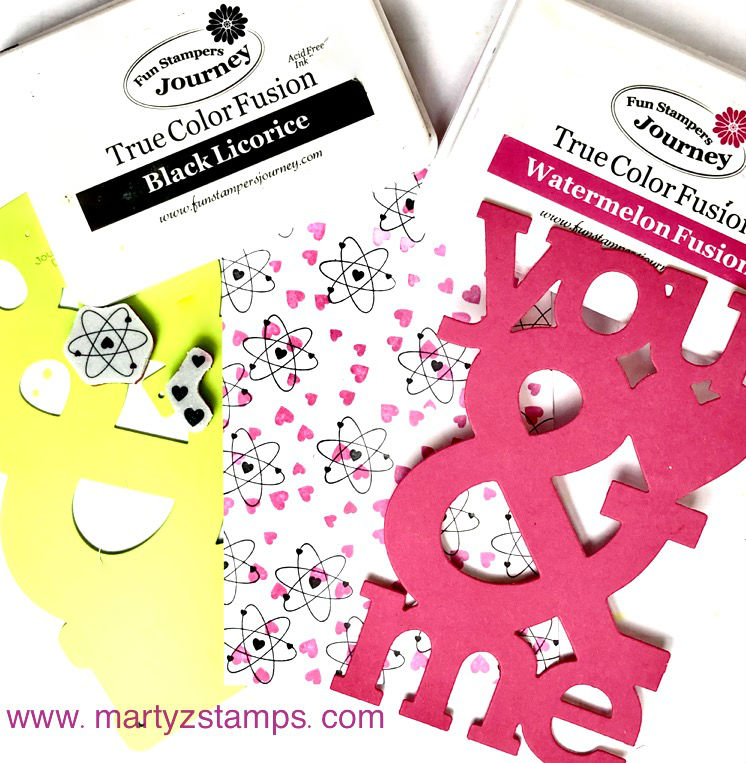
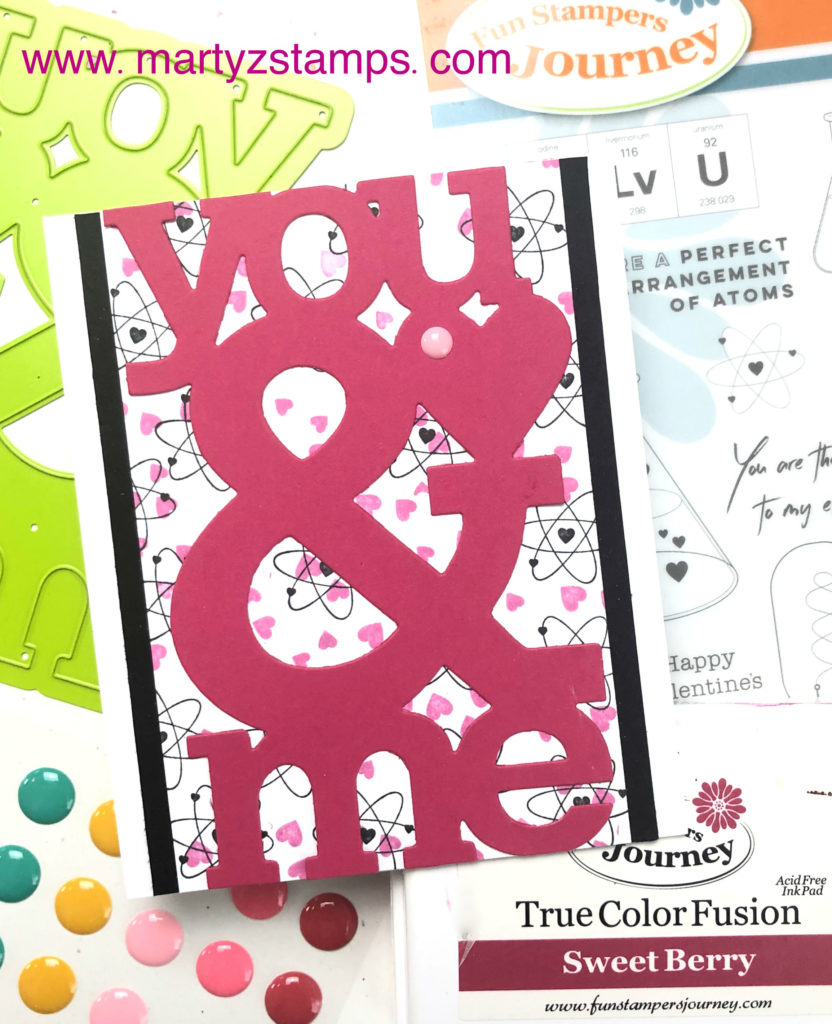
Last but not least is the adorable You and Me card. The base is Whip Cream cardstock with a Black Licorice Panel. To create the stamped background, I stamped the atom image onto Whip Cream cardstock using Black Licorice ink. I took the small cluster of hearts and stamped them all over using Sweet Berry ink. The You and Me sentiment is die cut from Sweet Berry Cardstock with a Bubble Gum pink Candy dot accenting the heart. All pieces are adhered directly to each other. No foam squares on this one! I can’t believe it, either. Note: This card is slightly shorter. I wanted the die cut sentiment to touch the top and bottom of the card. The finished dimensions of the card 5 1/8″ x 4 1/4″.

Let me know in the comments if this has inspired you to create some quick, simple and clean follow your heart cards for those special someones in your life.

If for some reason you get lost while hopping down the FSJ Creative Team Blog Hop trail, just click here and you will be directed to the FSJ blog.

Marty McGee (You are here!)

Carrie Rhoades

Christine Chan

Jill Hillard

Alissa Hall

Kazan Clark

Lezlye Lauterbach

Supplies:

  • Perfect Atoms Stamp Set
  • Price: $20.95
  • Sku:SS-0457
  • Price: $18.95
  • Sku:DI-0315
  • Price: $19.99
  • Sku:S4-911
  • Price: $19.99
  • Sku:S4-905
  • Price: $18.95
  • Sku:DI-0424
  • Price: $24.95
  • Sku:DI-0033
  • Heart-Felt Piercing Dies
  • Price: $19.95
  • Sku:DI-0096
  • Price: $12.95
  • Sku:DI-0159
  • Price: $6.95
  • Sku:CS-0040
  • Price: $6.95
  • Sku:CS-0003
  • Price: $6.95
  • Sku:CS-0099
  • Price: $6.95
  • Sku:CS-0034
  • Price: $6.95
  • Sku:CS-0092
  • Price: $6.95
  • Sku:CS-0015
  • Price: $6.95
  • Sku:CS-0094
  • Price: $6.95
  • Sku:CS-0147
  • Price: $7.95
  • Sku:IP-0043
  • Price: $7.95
  • Sku:IP-0041
  • Price: $7.95
  • Sku:IP-0035
  • Price: $7.95
  • Sku:IP-0009
  • Price: $7.95
  • Sku:IP-0029
  • Price: $79.95
  • Sku:JM-0077
  • Price: $7.95
  • Sku:TO-0138
  • Price: $5.95
  • Sku:IP-0098
  • Price: $5.95
  • Sku:AC-0275
  • Price: $9.95
  • Sku:AD-0002
  • Price: $2.95
  • Sku:AD-0085
  • Price: $6.95
  • Sku:AD-0001


Giftable, Card and Tag Ideas

I am so excited you are hopping along with us for the December FSJ Creative Team Blog Hop! This month’s theme is anything but a card. I couldn’t wait to create a 3D Seasonal gift that works well for Christmas and into the Winter months. There are also a couple of tag ideas and I had to include a coordinating card.

If you get lost along the way, click the Creative Team Image below and you will be directed to the FSJ Blog.

If you’re not lost and just hopping along, follow the trail of designers below:

Marty McGee (You are here!)

Carrie Rhoades

Christine Chan

Jill Hillard

Alissa Hall

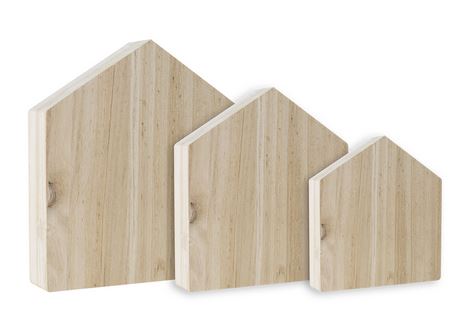
The first project features the medium and small house from the House To Home Wooden Houses.

Large, medium, small wooden houses. Great for mixed media art.
House to Home Trio of Wooden Houses


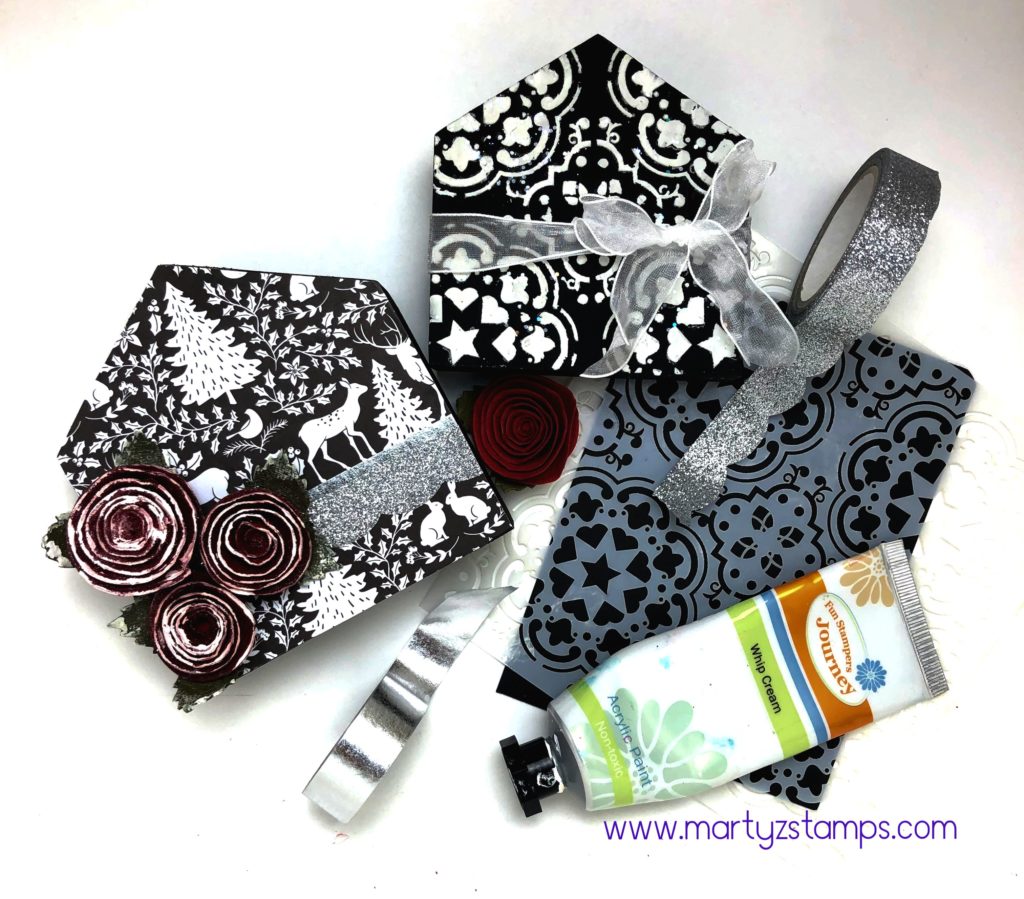
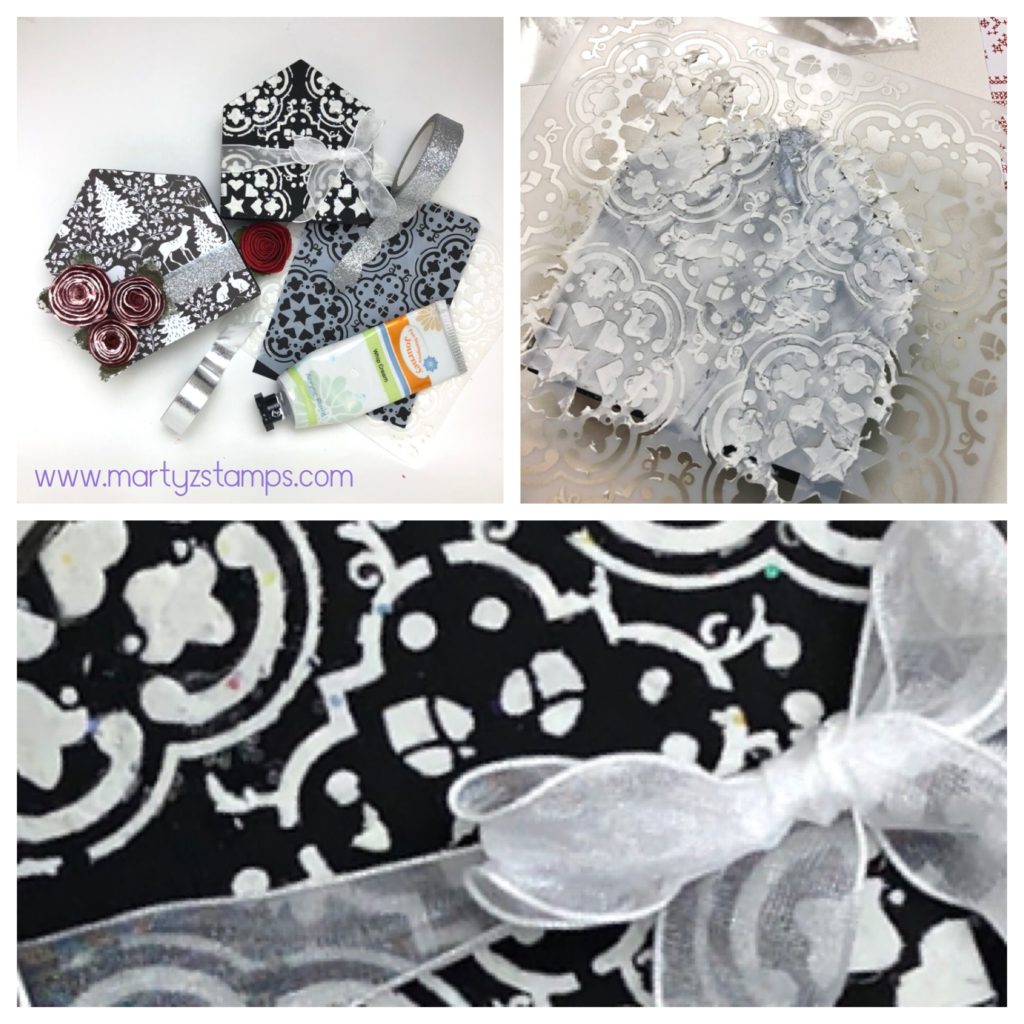
What a great gift for the mantle, dining table or side board. These were so easy to create. Here’s what you need. The Cozy Prints printed paper, Black Licorice and Whip Cream acrylic paint, Shimmer Silver Color Splash, Love Buds Paper Flowers, Cement Tile Stencil, Journey Modeling Paste, Sparkle Tape, Classic Elegance Washi Tape, Sparkle Cuts glitter, Journey Craft Glue, Square Paint Brush, Spatula, Crease Tool, Heat Gun and Special Day Organza Ribbon.

Make this gift by applying Black Acrylic paint to the wooden houses. Once they are dry, cut a piece of patterned paper a little bigger than the house you want to cover and gather your supplies to stencil the coordinating house.

Apply the patterned paper to the house using Journey Craft Glue.

Tip: To make spreading the glue easier, spritz with a little water.

Smooth the paper onto the house and using the edge of your crease tool, press out any trapped air pockets. Turn the house upside down and trim excess paper.

Tip: The glue dries really fast, make sure to position your paper quickly; otherwise, you’ll have a mess.

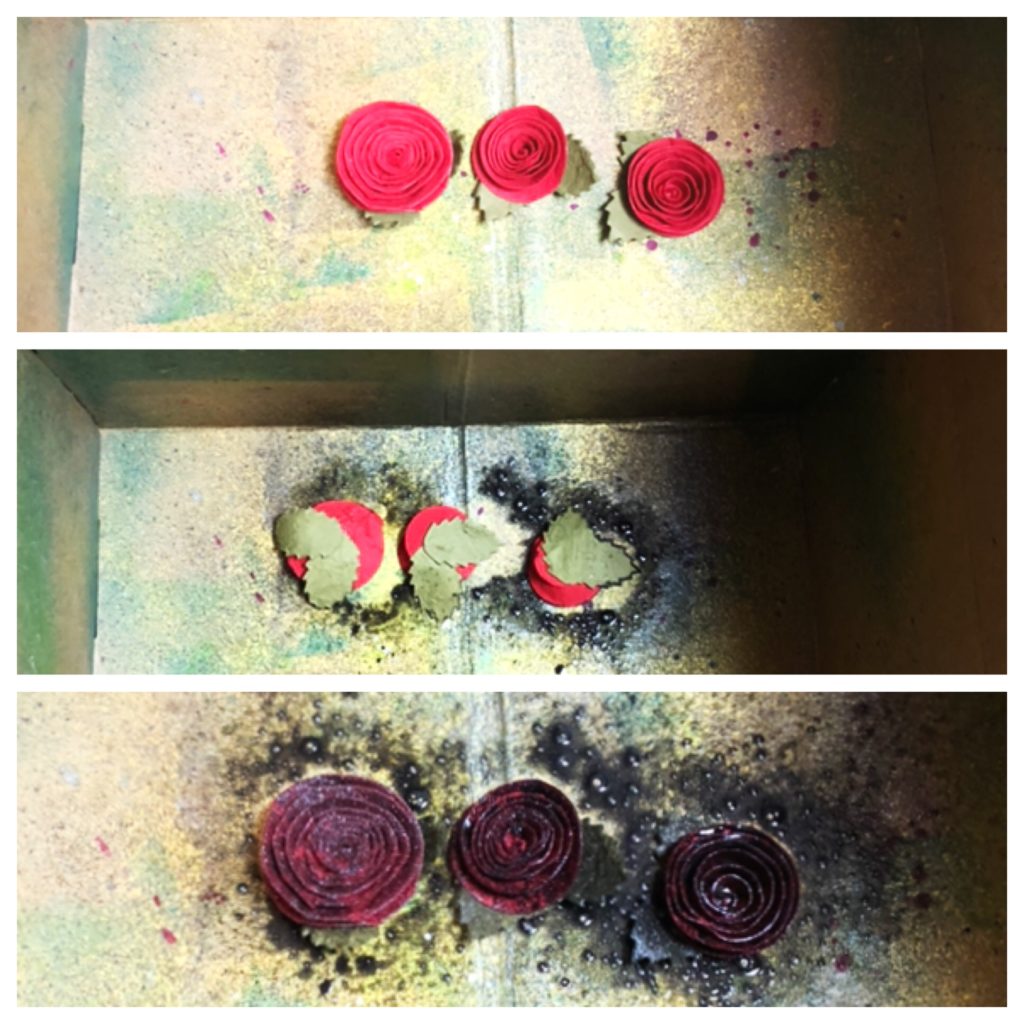
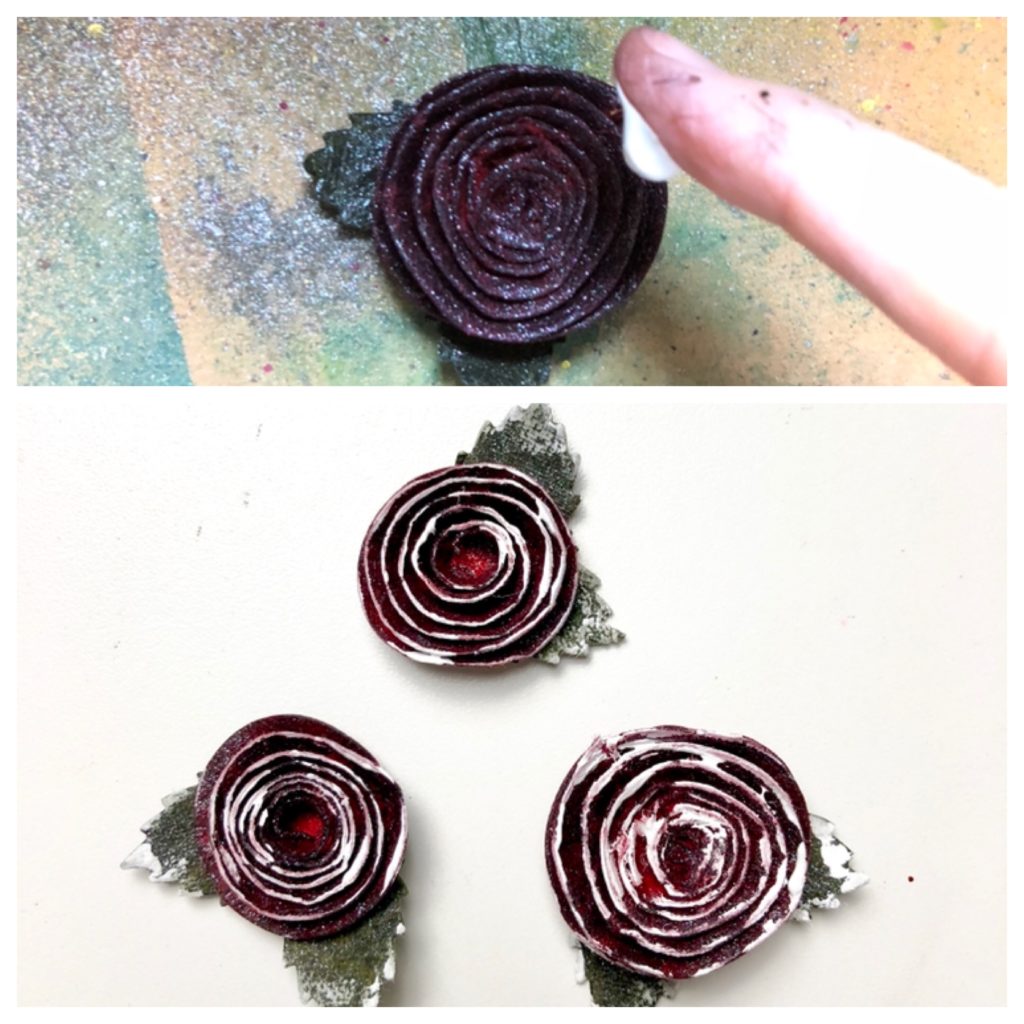
Choose three Love Buds Paper Flowers (large, medium and small). Place the flowers in a box to spray them with the Shimmer Silver Splash. Apply the Splash to the front and backsides of the flowers.

Once they are thoroughly dry (you may have to use your heat gun), place a small amount of White Acrylic Paint onto the tip of your finger and gently apply the paint to the edges of the flowers and leaves.

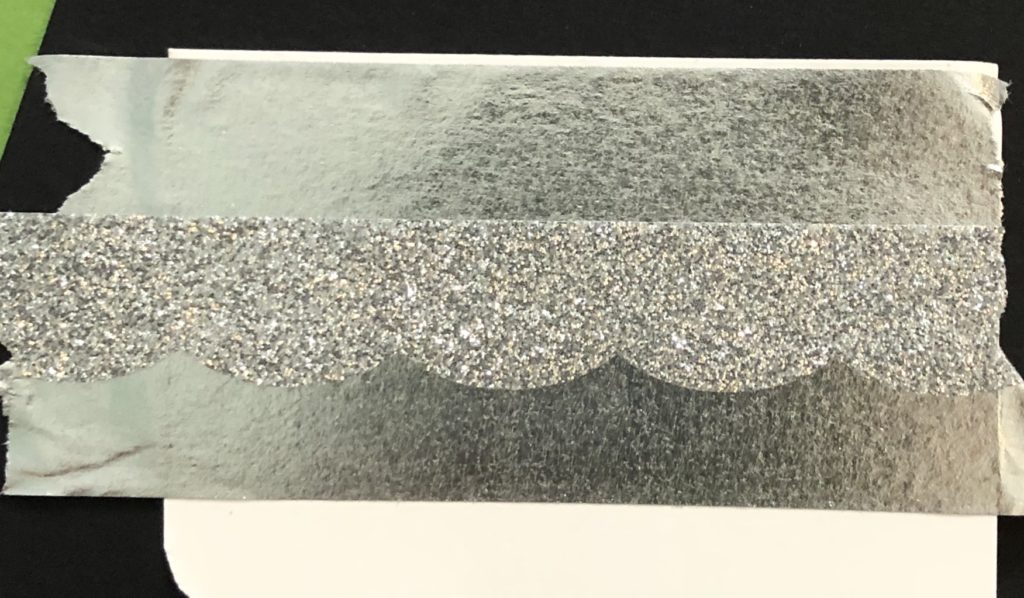
Take your silver and sparkle washi tapes and layer them onto the house. Adhere your flowers with Journey glue to the house and you’re done with the first house!

Moving to house number two, place some Journey Medium onto a non-stick surface that can be thrown away or cleaned. Mix in some Sparkle Cuts glitter.

Tip: Make sure to put the top back onto the Journey Modeling Paste to keep it from drying out.

Place the stencil onto the painted house. Apply the Journey Modeling Paste evenly over the stencil making sure to cover every opening. Pull the stencil off. You may want to apply more Sparkle Cuts directly to the paste. When the paste is a little dry, use the palm of your hand to gently tap the paste. This will create a smooth stencil look to the design. 

Wrap the Special Days Organza ribbon around the house and tie a bow.

TIP: For a really cool look, apply heat using a heat tool which will cause the ribbon to crinkle in a delightful way.

So easy and so fun!

Coordinating Card

You shouldn’t give a gift without a card, right? How about a coordinating card for the gift? Let’s do it.

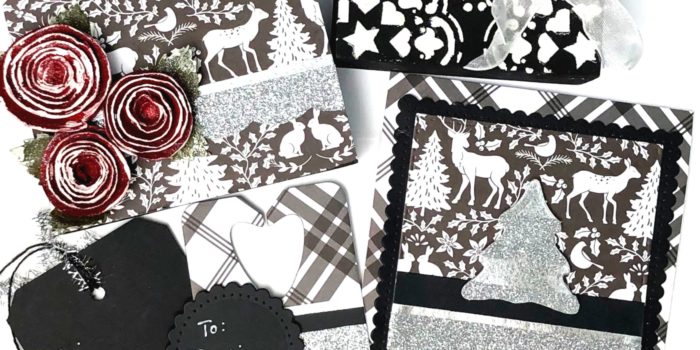
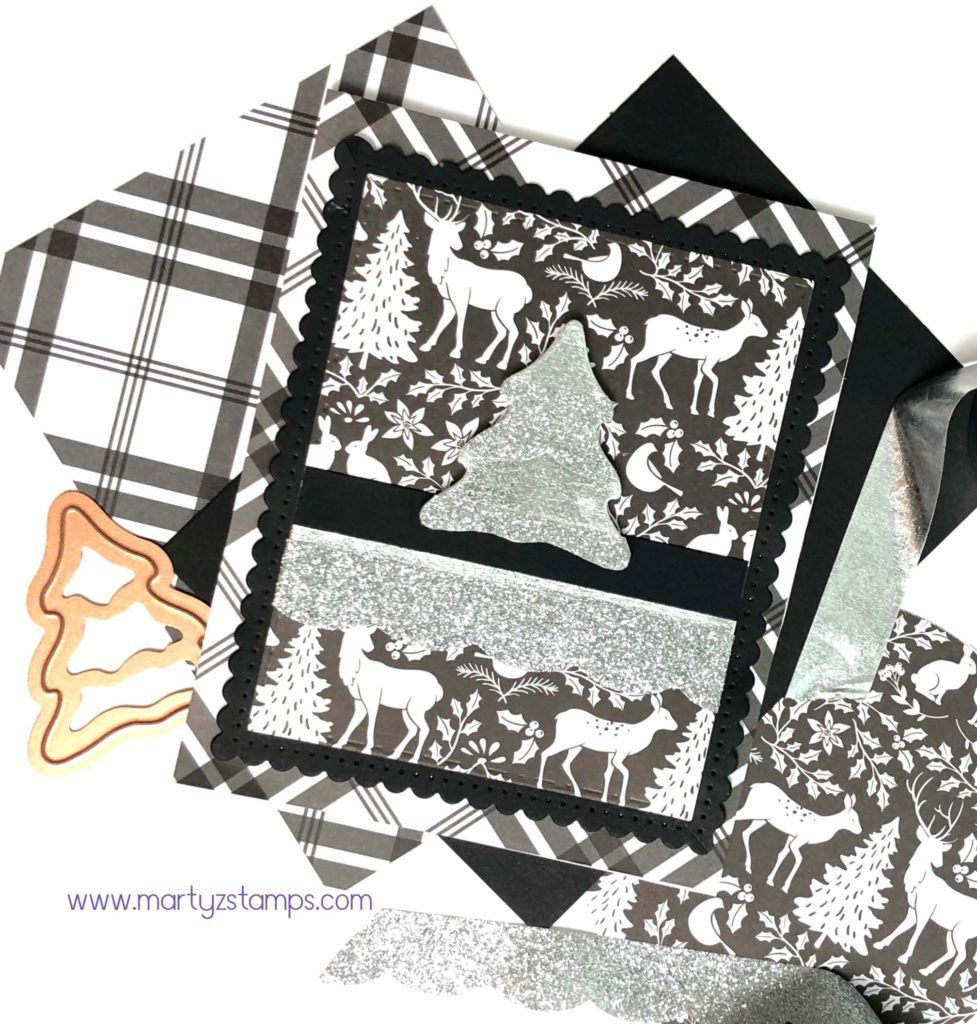
What a simple but elegant card to coordinate with the gift. This card uses a great technique to adjust the size of the scallop mat, but I’m getting ahead of myself. Start by cutting a base from Whip Cream cardstock 4 1/4″ x 10 1/2″. Next, cut a plaid mat from the Cozy Prints paper at 4 1/4″ x 10 1/2″ (it will cover the entire card front). Die cut a Black Licorice mat from Nestabilities Fancy Edged Rectangle Dies (second to largest). This is where we make an adjustment to the size of the mat.

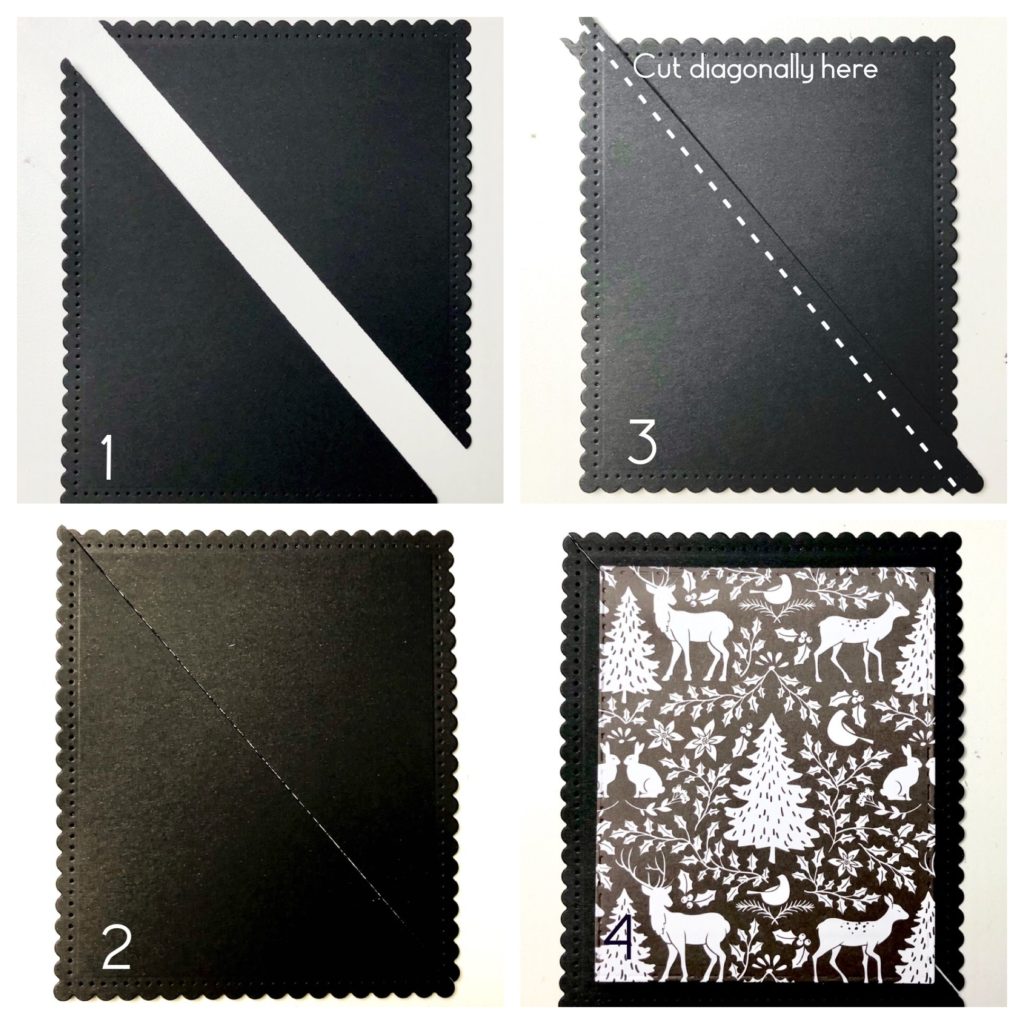
Place the Black Licorice scallop mat on a paper trimmer. Cut from one corner to the other (#1 & 2). Overlap the cut pieces to desired width or height (#3). Adhere the overlapped edges together. On the corners with the overlapped edges, cut diagonally.

TIP: Before cutting make sure the corner scallops line up to make one full scallop. This will allow a seamless mat. The printed mat was cut with FSJ Rectangles die (#4).                

Adhere a black strip of Black Licorice cardstock to the top mat along with the silver and sparkle washi tape.

The last technique for this card is to create the Christmas tree. Apply strips of the silver and sparkle washi tape to a scrap piece of cardstock (overlap as necessary).


Create as many layers as needed.

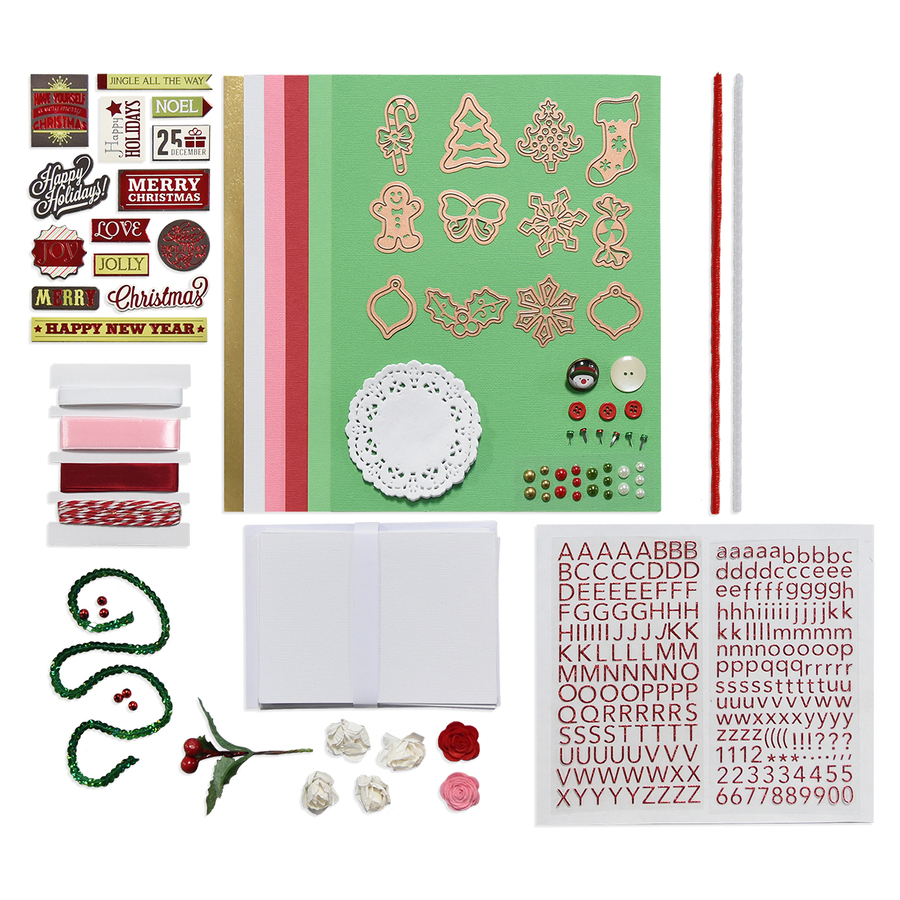
I die cut a tree using a tree die from the Holiday/Christmas 2015 Card Making Kit. If you don’t have this kit, any tree or ornament die will work.

Adhere all mats with White Liner Tape. Pop up the Christmas Tree with FSJ Medium Foam Squares. Finally, add your personal sentiment inside the card.

Tag Time

Last but not least are some incredible gift tags to set off your Christmas wrapping.

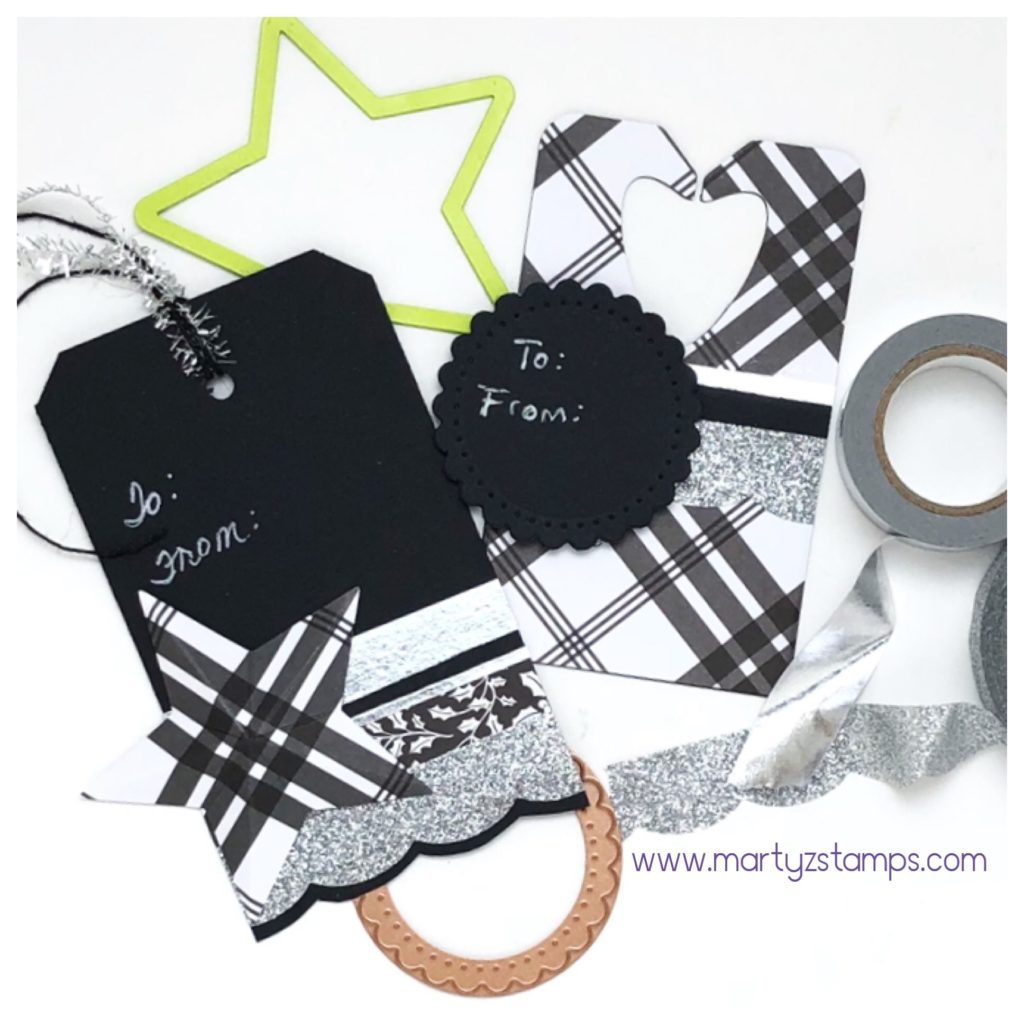
The Black Licorice tag is a rectangular piece of cardstock with trimmed corner and a hole punched at the top. A combination of washi tape and cardstock layers accent the bottom of the tag. The scalloped bottom was accomplished using Details Pro Shears and following the outline of the Sparkle Tape.

The accent piece is a 3D star cut from FSJ Star dies and scored from the top of the point straight down to the inverted point below. To create the 3D affect, crease each score line and manipulate the score lines into mountains and valleys. The top is adorned with Black Licorice Twine and Silver Sparkle Tinsel. It is as simple as that, really!

The plaid tag is cut from FSJ Bread Tag die. Strips of washi tape and Black Licorice cardstock break up the plaid pattern. The scalloped circle was die cut from Spellbinders Fancy Edged Circles. Both the “To and From” were written with a white gel pen.

All of these projects were such fun to make. Let me know in the comments what is your favorite out of the three projects.

Supplies:

Disclaimer – By clicking on an image you will be redirected to Spellbinders + FSJ website. When you purchase through my website link, I will receive a small commission. This helps to keep me crafting and inspiring others.

  • Price: $12.95
  • Sku:JM-0013
  • Price: $16.95
  • Sku:PP-0059
  • Price: $5.95
  • Sku:JM-0105
  • Price: $5.95
  • Sku:JM-0106
  • Price: $7.95
  • Sku:IP-0082
  • Price: $6.95
  • Sku:AC-0177
  • Price: $7.95
  • Sku:JM-0118
  • Price: $7.95
  • Sku:JM-0073
  • Price: $3.95
  • Sku:TO-0089
  • Price: $4.95
  • Sku:AC-0259
  • Price: $11.95
  • Sku:AC-0291
  • Price: $5.95
  • Sku:AC-0151
  • Price: $8.95
  • Sku:TO-0102
  • Price: $6.95
  • Sku:TO-0040
  • Price: $27.95
  • Sku:TO-0083
  • Price: $6.95
  • Sku:CS-0003
  • Price: $30.00
  • Sku:KOM-001A
  • Price: $24.95
  • Sku:DI-0052
  • Price: $19.99
  • Sku:S4-905
  • Price: $24.95
  • Sku:DI-0041
  • Price: $17.99
  • Sku:S4-903
  • Price: $8.95
  • Sku:DI-0133
  • Price: $5.95
  • Sku:AC-0004
  • Price: $10.95
  • Sku:AC-0341
  • Price: $34.95
  • Sku:TO-0039
  • Price: $13.95
  • Sku:TO-0063
  • Price: $14.95
  • Sku:TO-0073
  • Price: $2.95
  • Sku:AD-0084
  • Price: $2.95
  • Sku:AD-0085
  • Price: $4.95
  • Sku:AD-0111
  • Price: $6.95
  • Sku:AD-0001


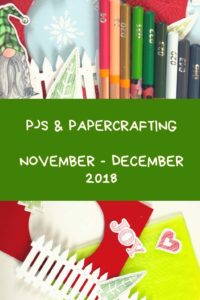
PJs and Papercrafting is OPEN for registration featuring the Gnome For The Holidays stamp set!

Grab your favorite PJs or comfy clothing, put them on, gather your supplies, prepare to wind down, relax and get ready to craft; because, YOU are invited to join me on November 11th, 7:00 p.m. EST for a Facebook Live to create  3 beautiful fancy fold card projects using the Gnome for the Holidays stamp set.

When you place your order, you will receive an invitation to my private Facebook group, PJs and Papercrafting. There you will have access to a printable PDF for the class projects and access to the Facebook Live video class.

You will need:

Basic supplies on hand to make these projects, such as adhesive, scissors, trimmer with scoring blade, foam squares, crease tool, coloring tools (pencils, watercolors, markers) and a multi-purpose tool. I have shared below what I will be using. I have listed several ink pad colors. For example, Candy Apple or Cranberry Bliss will work for these projects as well as two of the green inks. Use what you have or click on the images to purchase exactly what I am using (note: all pieces will be embossed or die cut).

Product List


PJs and Papercrafting will be held LIVE on the PJs and Papercrafting Facebook group, Sunday, November 11th at 7:00 p.m. EST. If you cannot make the LIVE event, the video will be available for viewing after the event in this group. You will be added to the group about one week prior to the LIVE class. If we are not currently friends on Facebook, send me a friend request when you sign up.

Registration Options

NOW through October 29th, Friday, 11:59 p.m. EST for Option 1 or 2 Class

NOW through November 2nd, Friday, 11:59 p.m. EST for Option 3 Class.

Included in the Gnome for the Holidays Nov./Dec. 2018 Kit:

Option 1: Full Kit (Bundle) – $65.00
Includes the Gnome for the Holidays (Bundle) stamp and coordinating die along with all supplies (excluding basic supplies), PDF and online content.


Option 2: Full Kit (Stamp set only) – $47.00
Includes the Gnome for the Holidays stamp set only along with all supplies (excluding basic supplies), PDF and online content. 


Option 3: Materials Only – $23.00
3 fancy fold card project kit ONLY (does not include the stamp or die), PDF and online content. This is a great option if you already own the Gnome for the Holidays stamp set and/or dies. Coaches are welcome to participate with this option.


All products for the kits will be ordered and prepared by me after the registration deadline of October 29th for product orders and November 2nd for class only orders, 11:59 p.m. EST. If for some reason during the transition from FSJ to Spellbinders + FSJ the stamp set/bundle are backordered, I will stamp your images and send them with the kit so you will be able to partake in the FB Live event. Your order will be shipped to you at a later date.  Class kits can only be mailed within the United States (additional charge may apply for Hawaii and Alaska).

Expected shipping date of all kits is November 4th.

Can’t wait to create with you!

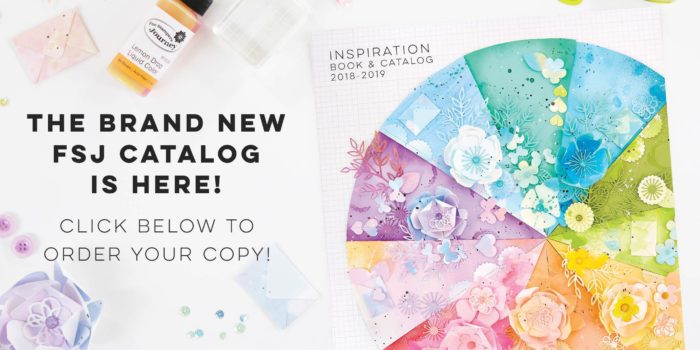
July is Fun Stampers Journey’s New Year and bringing in our new year, means a new Inspiration Book and Catalog (all 331 pages and over 500 ideas and photos) along with some sweet surprises.

FSJ Flip Catalog is here. Check it out! Or, click here to order one.

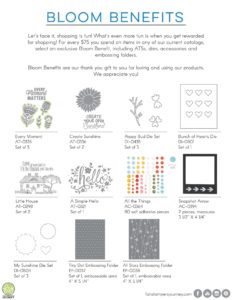
With the new catalog, comes all new Bloom Benefits. Yes, for every $75.00, you receive a FREE gift from Fun Stampers Journey. You can choose from stamps, dies, embellishments and embossing folders. Check them out:

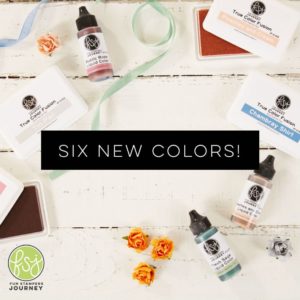
NEW COLORS! Rustic Rose, Peaches and Cream, Tin, Chambray Shirt, Haystack and Fresh Sage.

AMAZE MACHINE – new and improved debuting in August. It will fold up for more compact storage like our Platinum die cutting machine.

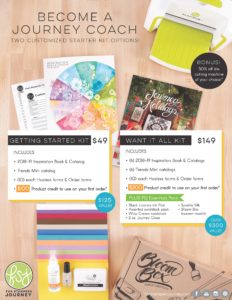
JOIN MY TEAM with one of two new Starter Kits. They have been updated and provide each new coach the ability to choose the products they want in their kit!!!!! That means no more limited, pre-selected products. You can choose between the $49 kit which includes $100 of product on top of the kit itself or choose the I WANT IT ALL KIT for $149 with $200 of product. You have the opportunity to purchase one of our amazing die cutting machines for 50% off. If you are interested in joining the journey, contact me at martyzstamps@gmail.com or click on the picture below.

NEW LOGO to start off the New Year! It’s clean and simple and I love it! What do you think???

Last but not least, are all the new stamp sets, dies, pan pastels, liquid colors, embellishments etc.,  . . . . I know you will love them.

Please subscribe to receive post notifications.

If you would like to place an order, click here.


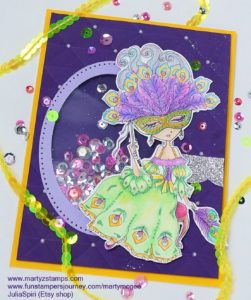
There is a background story to this creation. I have an Instagram account @martyzstamps, and I wanted to share an image I colored with the artist that (I thought) created a digi-stamp I had purchased several months ago. Well, it wasn’t her image; and boy, did I really feel embarrassed. So, I went back to Etsy and did a search for JuliaSpiri. Of course, I found several digi-stamps to use on future projects.  I’m sure you know where I’m going with this . . . . Yep, JuliaSpiri Etsy store had just the digi-stamp image I needed to complete this challenge.

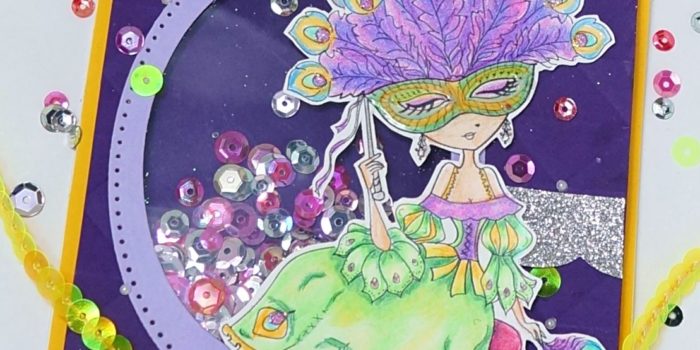
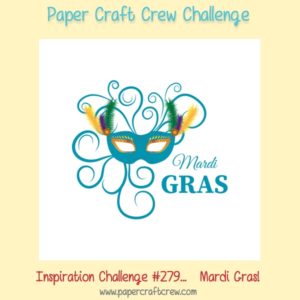
As luck would have it, Paper Craft Crew Challenge #279 this week is a Mardi Gras themed card and this girl from JuliaSpiri  Romantic Fantasy – The Venice Collection – The Mask of Peacock is perfect for this challenge.


Since Mardi Gras is all about the party with glitz and glamour, I created a shaker card to get the party started . . . shake, shake, shake . . . shake your . . . well, whatever you got shake it!  Let me just stop this party to say check out the card below. The featured color scheme are those traditional Mardi Gras colors of purple, green and yellow, which make her pop right off the card. The  Fun Stampers Journey Color Burst Pencils were the perfect coloring tool to create nice blended shading on the digi-stamp image.  She is just too elegantly adorable! So much fun!

Let me know in the comments if you have ever been to a Mardi Gras celebration and whether you liked it or not.

Supplies: juliaspiriart (Etsy Shop), We R Memory Keepers Next Level Embossing folder, all other supplies are Fun Stampers Journey (if you would like to order any of the FSJ supplies, please check out my website here and click on the Shop tab).

I know I can’t say enough about how much I love being a coach with Fun Stampers Journey. I particularly love their catalogs which feature amazing card and project ideas. This year for Christmas inspiration, I went straight to the catalogs for some card ideas. I re-imagined or Case’d card ideas straight from our catalogs and some from our group of wonderful coaches.

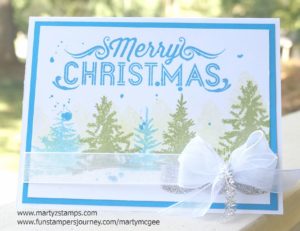
The first card featured is the Fresh Forest stamp set (SS-0487 or the bundle BD-0271) and Holiday Wishes (SS-0469). I gained inspiration from the card featured on page 56 of our main Inspiration Catalog. Since my group of stampers would be creating a lot of cards in one class, I wanted to make sure most of the cards were easy to recreate. I created a remixed version below.

I used FSJ Whip Cream (CS-0040) as a base and the main piece of cardstock used for stamping. I stamped the Merry Christmas and two of the smaller trees with FSJ Beach Breeze fusion ink (IP-0044). The rest of the trees I used FSJ Lemon Grass fusion ink IP-0022). The shadowed affect behind the trees is created using one of the smaller trees stamped using FSJ Sweet Pear fusion ink (IP-0054). To create the snowy hills, I masked the lower portion of the card with a curvy piece of cardstock. This kept the bottom of the trees from making an ink impression and created the illusion of snow banks and smaller trees stamped with the same stamp. The flecks of blue on the card was created using FSJ Beach Ball acrylic paint (JM-0102) thinned down with water and flicked onto the card with a paint brush. The stamped piece of cardstock was adhered to a mat from FSJ Beach Breeze cardstock (CS-0088). The card was accented with Special Day Organza Ribbon (AC-0316) and Silver Tinsel (AC-0341). Last but not least is a strip of Silver Sparkle Tape (AC-0259). Super Cute, Super Easy, Wow!

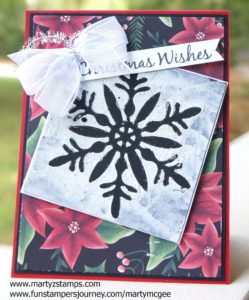
I feel in love with this next card, and I Case’d straight out of the catalog. I mentioned to Rose Curtis on FSJ Coach Connection Facebook Page; if I create a card way in advance of a class, I should make another sample of the card the night before the class so I can remember how I made it. I really had those ladies at this class working really hard to complete the textured snowflake. I helped one of the attendees with her stenciled image, and I thought, “I don’t remember this card being this hard to make.” Well, when I got home, I happened to look at the directions in the catalog and yes, I wanted to beat my head against the wall. I can really make something very simple, very complicated. LOL

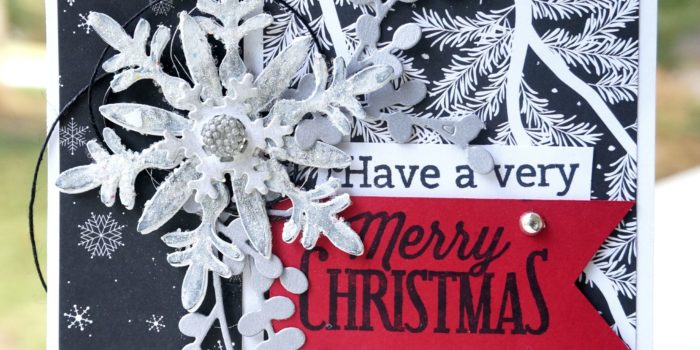
You can get the directions for this card by viewing the Journey Holiday catalog on-line (click here). Note: The sentiment was stamped from the Hostess Exclusive Night Star stamp set (SS-0518) – I cut off the Joyful portion because it was too long. I used the following cardstock: Cranberry Bliss (CS-0090), Black Licorice (CS-0003), Whip Cream (CS-0040), and the Christmas Cheer Prints (PP-0049). The snowflake mask was created using the Snow Blooms die set (DI-0253). Other supplies needed were Journey Gesso (JM-0072) – Note: the catalog references Journey Modeling Paste (JM-0073), but I didn’t have any and the Gesso worked just fine, a Spatula (TO-0089), Special Day Organza Ribbon (AC-0316) and Silver Tinsel (AC-0341).

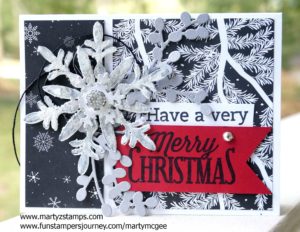
I had the Black Licorice snowflake mask left over from creating the previous card (the catalog suggest using chip board, but I didn’t have any; therefore, the Black Licorice snowflake). I was thinking how could I use this instead of throwing it away and I saw the card idea featured on page 40 of the Journey Holidays catalog and decided to re-imagine this card idea. Here is my version below:

The base of this card is FSJ Whip Cream cardstock (CS-0040). I cut two mats from the Christmas Cheer Prints 12×12 paper (PP-0049). I must mention the Christmas Cheer Prints (PP-0049) contains 24 12×12 sheets, 4 each of 6 two-sided designs! What a deal. I cut two more large snowflakes from the Snow Blooms (DI-0253) out of Whip Cream cardstock (CS-0040). I glued the white together and the black one on top of the two white snowflakes. I added sparkle to the snowflake with FSJ Sparkle Dust (AC-0151). I die-cut the smallest snowflake out of Whip Cream cardstock, applied Silver Pan Pastel to it and adhered it to the other larger snowflakes. I accented the snowflake with a large Sparkle Drop (AC-0022). The sentiment was stamped using Black Licorice fusion ink (IP-0041) onto Whip Cream cardstock and Candy Apple cardstock (CS-0007). I added some interest and dimension to the card by die-cutting the Bloom Cluster (DI-0163) from Journey Brush Silver (CS-0135). The final accent is a Fashion Silver (AC-0293) drop of goodness. This is my favorite card!

If you are looking to create a super simple, super quick, quick, quick card for a mass mailing of Christmas Cheer, this is your card.

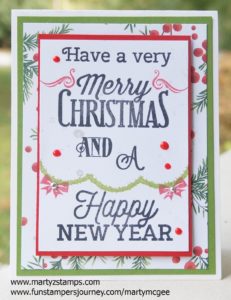
I was inspired by the card featured on page 41 of the Journey Holidays catalog. I took the word stamps from the Holiday Wishes stamp set (SS-0469) and placed them on one clear block. This made stamping the sentiment in Black Licorice fusion ink (IP-0041) onto the Whip Cream cardstock (CS-0040) really easy. The green bows were stamped using FSJ Lemongrass Fusion ink (IP0022). The bows and curly swirls were stamped using Candy Apple fusion ink (IP-0017). I used Fashion Silver (AC-0293) accents on the bows. The red dots are not FSJ because I did not have my most wonder Rainbow Drops (AC-0178), yet (they will arrive today) and I had to make due. The mats included the following cardstocks – Candy Apple cardstock (CS-0007), Limeade Splash cardstock (CS-0020), and the Christmas Cheer prints (PP-0049). There is a splash of Sparkle Silk (IP-0126) to finish it off.

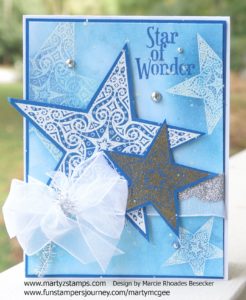
The next beautiful card was Case’d straight from another coach Marcie Besecker. I tweaked it a little bit for my Christmas Buffet Make-It class. Here is my version below:

The tweaks were: Star of Wonder sentiment is stamped onto the embossed mat with Huckleberry Fusion ink (IP-0035), Silver Tinsel (AC-0341) instead of the Gold Tinsel (AC-0340), triple bow instead of a double bow from the Special Day Organza Ribbon (AC-0316), a large star with a medium star instead of two medium stars, and a Huckleberry Fusion cardstock base mat (CS-0015). The stamp set for this card is the Night Start (SS-0518) from the Journey Holidays catalog.

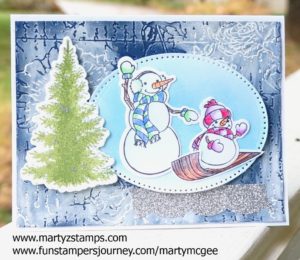
The next card I cannot find my inspiration for this layout, but I know I looked at something to create this because of the tree. This is what I get for not making notes as I create (like that will ever happen – once I get going, I’m off and running, no time to slow down and write down any notes). Anywhoo, I love this stamp set Snowmen Days (SS-0519) from the Journey Holidays catalog. I must have a snowman card every year for my Christmas card classes and this set was too cute to pass up.

The base and all cardstock used for stamping is FSJ Whip Cream cardstock (CS-0040). The snowmen were stamped using Black Licorice Fusion Ink (IP-0041), the tree was stamped using Lemongrass fusion ink (IP-0022) with some Fresh Forest fusion ink (IP-0013) barely stamped onto the stamp down the middle. The tree was die-cut with a die from the Fresh Forest Bundle (BD-0271 found on page 86 of the Inspiration catalog. The oval mat was pierced and die-cut using the Journey Ovals (DI-0042). The background is sponged onto the oval using Pool Play and Beach Breeze fusion inks (IP-0051 and IP-0044). The base mat is cut from Denim Days cardstock (CS-0113) and embossed with the $100 level Bloom Benefit Love Letter Embossing Folder (EF-0025) NOTE: It’s free with a $100 purchase!! I turned the embossed piece of cardstock upside down (the de-bossed side) and using a little water to make the Journey Gesso (JM-0072) move easier, I smeared and rubbed the Gesso over the entire mat leaving a few places untouched. The snowmen were colored using the Journey Color Burst Pencils (JM-0077). The final touch was a piece of Silver Sparkle Tape (AC-0259). Love it!

These are all the cards I came up with using inspiration from other sources. I hope this gets your creative juices flowing. Fun Stampers Journey provides amazing card, scrapbook, and project ideas throughout both their catalogs. As a Journey Coach, I have access to a private Facebook page for Coaches only where we all share our ideas and encourage each other in our journey.

For this week’s Freshly Made Sketches #278 challenge, I made a variation of this month’s Make It Class card to meet the sketch challenge (I will post this month’s Make It cards on another post). Here is the FMS #278 sketch:

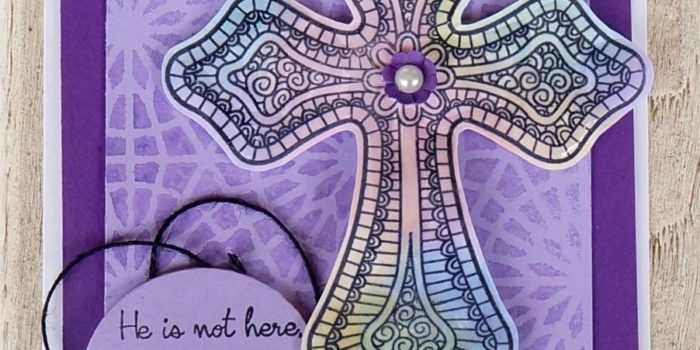
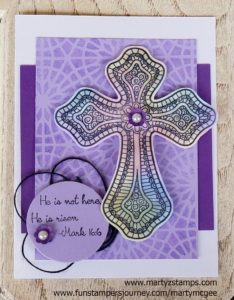
I had created a cross card from a video/demo Richard Garay had for FSJ coaches using a special technique to create a stained glass effect. I began by stamping the cross from FSJ Color Cross stamp set onto FSJ Whip Cream cardstock using Black Licorice ink. After I stamped the image, I took the solid flower stamp from FSJ Be Happy stamp set (note: any solid shape would work) and stamped it into various colors of ink (one at a time) then stamping onto the cross (you can go out of the lines because the cross will be cut out). I used the following Fun Stampers Journey inks to create this stained glass effect (Bubble Gum, Sweet Pear, Banana Cream, Pool Party, and Pretty Amethyst). Note: If you try this technique, make sure to clean your stamp off after each inking because the black ink sometimes comes off onto the stamp. This will help eliminate any frustration if colors bleed and become muddy/murky). Once I finished stamping, I cut the cross out and applied Journey Glaze to give it a little shine. Set the cross aside to dry.

I created the patterned mat by placing the FSJ Starburst stencil on top of the piece of FSJ Pretty Amethyst cardstock. In a FSJ Media Mister, I combined one squirt of FSJ Sweet Berry Splash and one squirt of FSJ Blue Lagoon Splash and filled with water to create the purple mist. I spritzed the paper with the purple mist and immediately applied a paper towel to the stencil to soak up any excess liquid. This created another stained glass effect for the card.

I used FSJ Deep Lilac for the back mat. I layered the patterned mat on top. I adhered the cross with FSJ Foam Squares (medium). I stamped the sentiment onto FSJ Pretty Amethyst cardstock and die cut a circle from the stamped cardstock. I placed a loose loop of black twine behind the circle sentiment and adhered the sentiment with FSJ Foam Squares (medium) as well. For the final touch, I punched two small flowers from the FSJ Summer Pretties punch. I curled the edges and applied a peal accent to the middle. They were adhered to the card project with FSJ liquid glue.

Here is the final project.

Supplies:

Fun Stampers Journey (click here to order)

Stamps: Color Cross Bundle, Be Happy
Cardstock: Whip Cream, Pretty Amethyst, Deep Lilac
Inks: Black Licorice, Bubble Gum, Pool Party, Pretty Amethyst, Banana Cream, Sweet Pear
Accessories: Black Twine, Journey Glaze, Pearl Accents, Circle Die, Starburst Stencil, Media Mister, Sweet Berry Splash, Blue Lagoon Splash

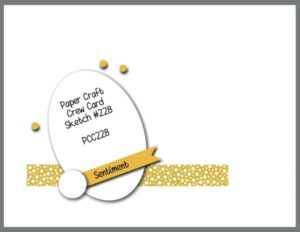
This week’s Paper Craft Crew Challenge #228 is such a great and unique card sketch. It really allows a papercraft artist to think beyond the box. I decided to enter two cards I recently designed for my January Make It based on is this week’s sketch:

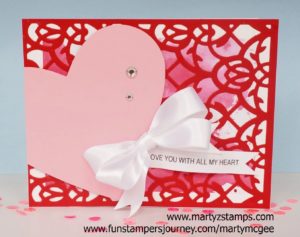
I had created a heart card for January’s Make It class, but one of my good friend’s, Julianne, really needed a card design for a friend on the mend. Her friend has been a garden club member for a long time, and we decided to take the heart card design, change the cardstock colors and change the stamped image.

Here is the Make It heart card:

The card base is Fun Stampers Journey Whip Cream, there is a 3 1/2″ x 4 3/4″ Whip Cream mat with a watered down application of FSJ Sweet Berry Splash. The red mat is cut from FSJ Cranberry Bliss cardstock using the FSJ Persian Garden die (note: it’s best to use a precision plate to have the die cut efficiently). The heart is die cut from FSJ Bubble GUM cardstock. The bow is SU! white silk ribbon tied into a double knot (yes, I love those double knots). The wording was printed onto Whip Cream cardstock from a Word documents and cut into a banner. The heart is accented with FSJ rhinestones.

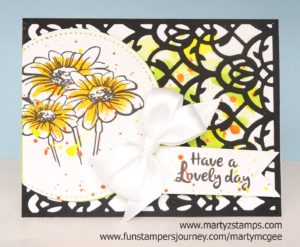
The Daisy card is below:

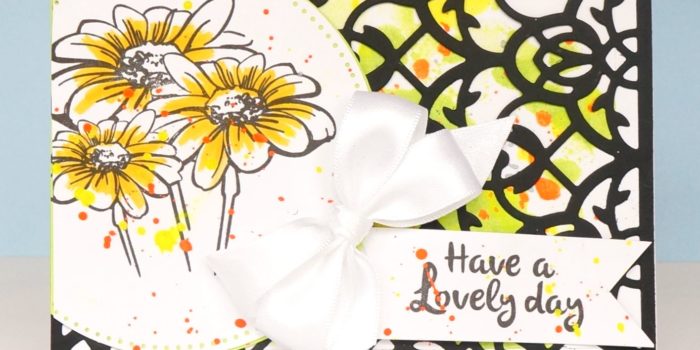
The base is FSJ Whip Cream with the same Whip Cream Mat mentioned in the heart description, but it was created using the FSJ Electric Lime Spash and then accenting with FSJ Sour Lemon and Orange Rave Silks. The cardstock used with the Persian die is Black Licorice. I stamped the Lovely Day Daisy in Black Licorice on Whip Cream cardstock and ran it throught the Platinum machine using the Pierced Circle dies. The double bow was created out of SU! white silk ribbon, and the sentiment was stamped onto Whip Cream and cut into a banner. The stamped images are accented with Orange Rave and Sour Lemon Silks. I LOVE those silks.

I know Julianne’s friend will love this card when she receives it.

If you would like to purchase any of these products, please click here.

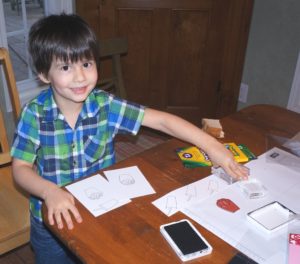
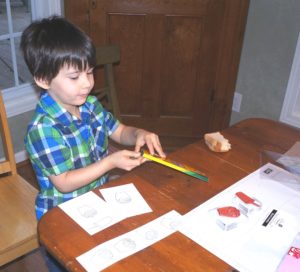
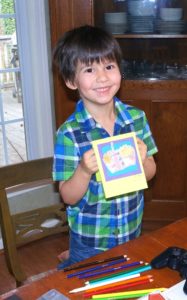
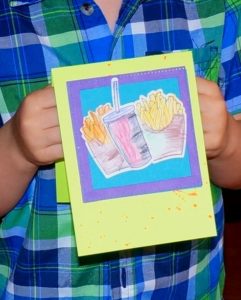
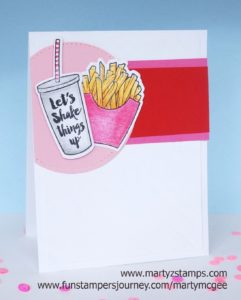
I have had this brand new bundle “Fry Friends” from Fun Stampers Journey sitting around for the last three weeks. Last night, my best bud spent the night, and when we got up this morning, I said, “Do you want to make a card?” Of course he said, “YES!” So, I pulled out Fry Friends and he chose the shake and fries along with the sentiment. He wanted to make his card for his friend, Gloria. Here he is working away.

Here is his finished card.

He is very excited to give her this handmade card.

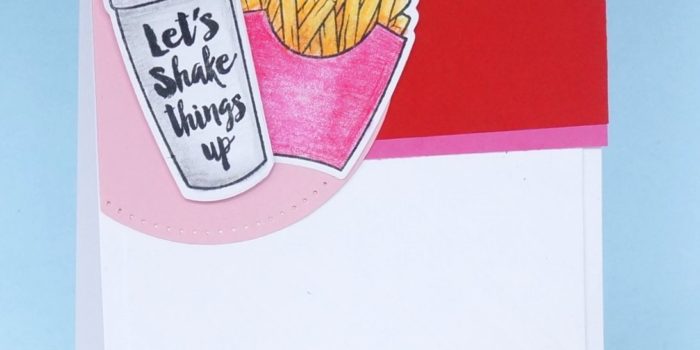
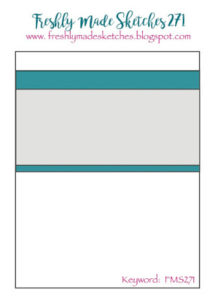
My card design was based on Freshly Made Sketches Card Challenge #271. Here is the card sketch:

I had some scraps let over from my recent Make It classes and pulled together a simple and cute card for someone special. The base of the card is FSJ Whip Cream as well as the 5 1/8″ x 3 7/8″ mat. The mat has been scored diagonally (my photography skills do not showcase the diagonally scored lines, but they are there). The strips of paper are cut from Watermelon Fusion and Cranberry Bliss FSJ cardstock. The pierced circle is cut from FSJ Bubble Gum cardstock with FSJ pierced circle dies. The fries and shake are colored with FSJ Color Burst Pencils. This is a super quick card to make on the go.

I think this would make a great Make It card for either a class or a party.

All supplies can be purchased from www.funstampersjourney.com/martymcgee

PAGE TOP
[dealsbar preview] Amazing Deals: !!toolbar-deal-title!! - !!toolbar-deal-merchant!!