Tag : foam squares

9 posts

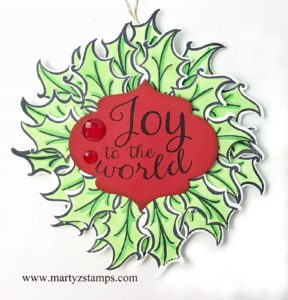
Y’all it is Day 4 of the FSJ + Spellbinders Better Together launch. I had a little time to whip up a gift tag project and once the recipient of the gift opens their package, the tag can be re-purposed as a tree ornament.

The following stamps and dies were used for the project:

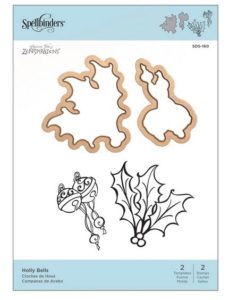
holly bells, gold embossed holly leaves

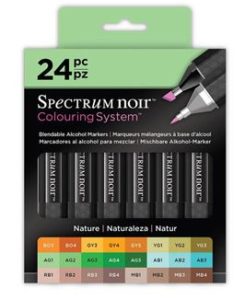
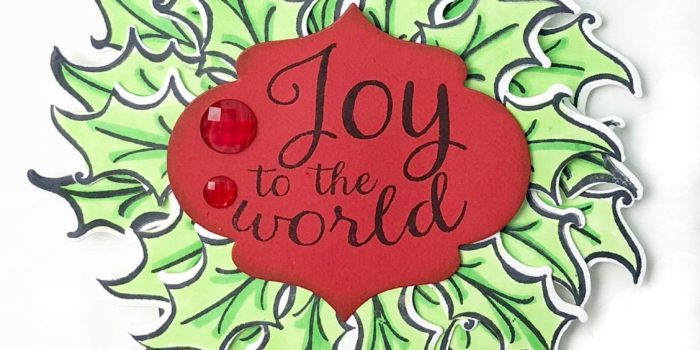
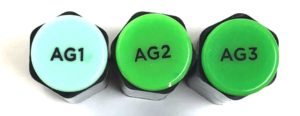
In celebration of the 30 Day Coloring Challenge, I decided to use my Spectrum Noir alcohol markers to color the holly leaves. I stamped them onto Spectrum Noir cardstock using Memento Tuxedo Black ink. Markers AG1, AG2, AG3 were used to color the leaves. Once colored, they were die cut with the Holly Bells coordinating die. I glued the leaves to a round scrap of cardstock creating multiple layers with medium foam squares.

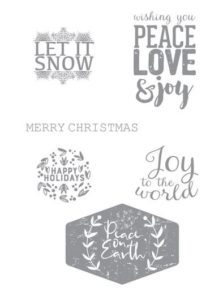
The center sentiment was stamped onto Candy Apple cardstock with Memento Tuxedo Black ink and cut with Holiday Joy’s coordinating die set Special Day Tags Die Set. Two red Rainbow Drops were added to the sentiment for a touch of bling.

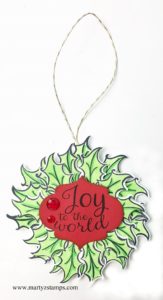
The final step was to create a twine loop to hang the ornament on a tree using Gold Thread. It was adhered to the wreath and a Candy Apple cardstock circle adhered to the back to give a finished look.

If you like coloring, this is definitely the project for you.

I hope this inspires you to create some Christmas Tags for those special gifts for family and friends.

Click on images below to order:

Holly Bells Wreath Gift Tag-2

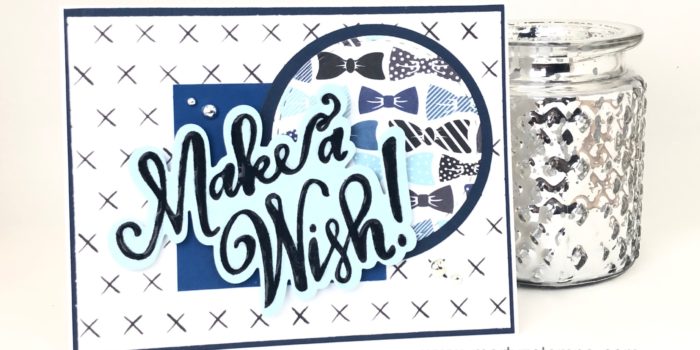
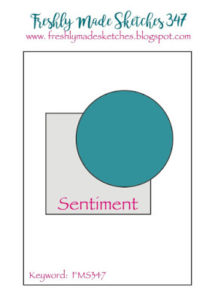
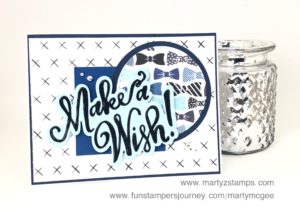
If there is one stamp set and die that I truly love, it is the Make A Wish stamp and die bundle! In fact, I love it so much it is my August Featured “A” Team Bundle. To bring in this featured stamp set, I wanted to showcase it as a blue and bow tie birthday card on Freshly Made Sketches #347 card challenge.

I turned the design to landscape position and went to work. If you are a paper crafter that likes quick, simple and clean creations, this card is for you! I began with a base of FSJ Whip Cream card stock with two base mats of Denim Days (5 3/8″ x 4 1/8″) and Through the Year Prints 12 x 12 paper (5 1/4″ x 4″). Using the same Denim Days card stock I cut a mat out of our circle dies and a circle out of Through the Years Prints. The square accent is cut from Huckleberry Fusion (2 1/2″ x 2 1/2″). The Make A Wish sentiment is stamped with Black Licorice onto Pool Play card stock using my MISTI to create a fully stamped image and then die cut with the coordinating die using our Amaze die cutting machine. Make A Wish is popped up with Medium Foam squares and Journey Glaze makes the words pop off the card stock. The final accent are the Fashion Silver accents.

So quick, so easy, so cute!

If you would like to order this bundle and any of the supplies used to create it, please click here or on any of the supplies below!

Product List

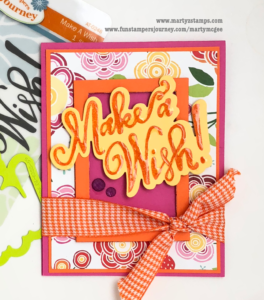
Have you every wanted a simple, versatile stamp and die set that can become whatever you want it to be? Well, let me introduce the Make A Wish ATC stamp set with coordinating die. What a great way to bring in the New Year, a special person’s Birthday, a great gift tag on a PRESENT, a CAKE TOPPER, . . .  I can go on and on!!!

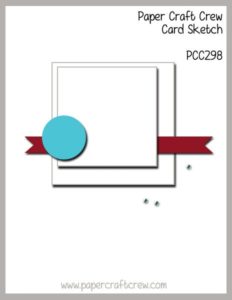
This post will feature a bright and cheery birthday card as one of the card challenge entries on Paper Craft Crew Sketch Challenge #298. Here is the featured sketch challenge:

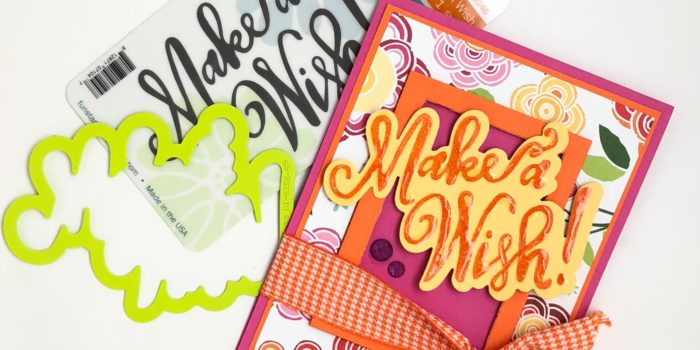
This card was so quick and simple to make. I started out with a Watermelon Fusion card base; then, placed a Tangerine Fusion mat on top. The designer paper (I hate to admit is retired – but, Colorful Journey or Playful Prints  will work – see supplies) has a rectangle shape cut from the middle using one of the Journey Rectangle dies. The Tangerine Fusion frame is next and it is popped up using Small Foam Squares.

TIP: Use the same rectangle die to cut out the middle portion of the designer paper as well as the center portion of the Tangerine Fusion cardstock to create the frame. This will allow your layers to line up easily.

The Make A Wish sentiment is stamped onto Pineapple Smoothie cardstock with Tangerine Fusion ink. The sentiment was die cut with the coordinating die and Journey Glaze was added to create a focal point. It is popped up with the Medium Foam Squares to add greater dimension to the card.

TIP: Use a positioning tool like the MISTI to stamp the image multiple times creating a deep, rich, vibrantly colored  sentiment.

The final touches are the Rainbow Drops just below the sentiment and the Tangerine Fusion Gingham ribbon.

Let me know what you think about this card in the comments:

To order, click here or click on any of the supplies listed below:

Product List

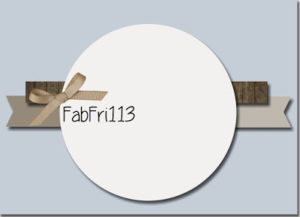
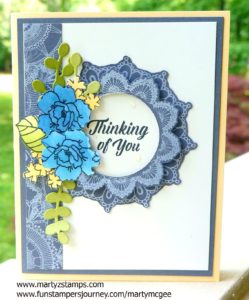
This post will feature another FSJ (Fun Stampers Journey) May 2017 Bloom Box card re-imagined for the Fab Friday Card Challenge 113. Here is the card sketch for this challenge:

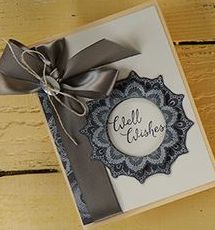
The original design in the FSJ May Bloom Box featured an elegant doily themed Well Wishes card accented with a silk bow and neutral button with natural twine.

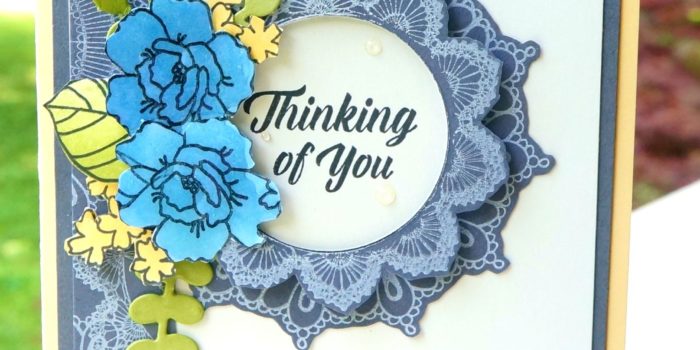
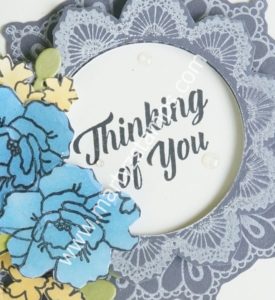
Again, I wanted to incorporate some flowers into the design. I created the blue flowers using the technique mentioned in this post Well Wishes Doily Elegance using FSJ Pool Party ink, FSJ Sweet Pear, FSJ Lemongrass, dauber dowels, and the FSJ stamp set Summer Garden. The doily images were stamped onto FSJ Rock Candy cardstock using Butter Cream ink. The base is FSJ Banana Cream cardstock, with FSJ Rock Cany, and FSJ Butter Cream mats. The “Thinking of You” sentiment was stamped onto the Butter Cream cardstock using FSJ Rock Candy ink.

The second doily from the sentiment focal point, is raised up using FSJ Small Foam Squares. The circular center of this doily is die-cut out and the sentiment sits flush with the first doily (it’s hard to tell in the photo – I have a close-up below). The green leaves were created using FSJ Sweet Pear cardstock and the FSJ Bloom Cluster die. The flower bouquet was popped-up with Foam Squares. The final touch was adding FSJ Journey Glaze to the flowers (the sheen does not show up in the photo). I made a boo-boo and some of the glaze got onto the cardstock with the sentiment. Instead of freaking out, I decided to add some more dots of glaze to mimic dewdrops.

Supplies:

All supplies can be ordered by clicking here.

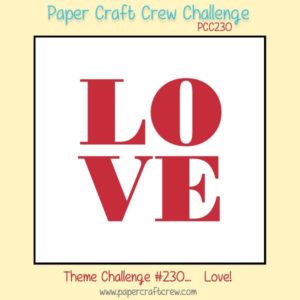
The theme challenge for Paper Craft Crew #230 is “LOVE”.

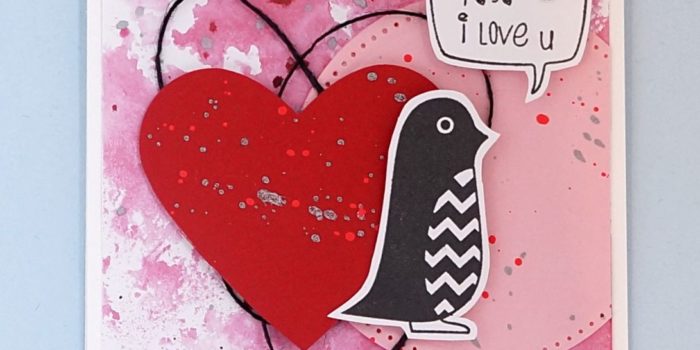
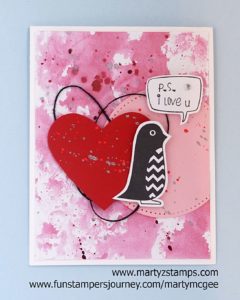
I have the perfect card for this theme. It is super cute and adorable. It features a cutie patootie peguin with the sentiment “P.S. i love u.”
This card was created for my Make-It Card Class, and it was a favorite design. The base of the card is FSJ Whip Cream. The background mat was created using FSJ Sweet Berry splash, Cranberry Bliss, Outrageous Pink, and Silver silks. To the background mat, I added a FSJ Bubble Gum pierced circle mat with a FSJ Cranberry Bliss die cut heart splattered with the same silks used on the background mat. The heart is accented with a looping of FSJ Black twine. The penguin is a FSJ P.S. ATS (Artist Trading Stamp). Both images were stamped using FSJ Black Licorice ink onto FSJ Whip Cream cardstock. They were both fussy cut leaving a 1/8″ border around the images. The heart, the penguin, and the sentiment are popped up with FSJ Medium Foam Squares.

This was a quick and simple Wow card creation.

Supplies:

Fun Stampers Journey products – To order click here.

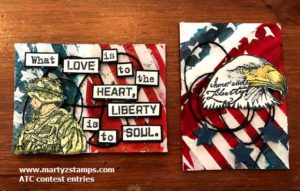
This past weekend a few of my fellow stampers and I attended Heirloom’s Lawrenceville Rubber Stamp & Paper Arts Festival. It began with the Design & Treasure Make-n-Take Friday night. We made four cards, visited with a favorite vendor “Pink & Main”, used new products, experienced new techniques, and had a great time. When we were leaving, I noticed a notebook on display with ATC (Artist Trading Card) on display and announcing the ATC contest. I remembered reading about it and wanting to create an entry when I registered, but I had forgotten about it. I decided to make a couple of ATCs which were to reflect the theme of Freedom and enter them the next day.

Saturday morning came bright and early. I had set my alarm the night before, but it didn’t go off; so, I was in a little bit of a rush before my friend, Cheyenne, got here with some stamp sets that were Freedom themed. We were to  head toward the weekend’s shopping event where we were to meet some other friends at the event by 10:00 a.m. Just a note to the alarm issue, I did set it, but for the weekday. LOL

I began the creation process half awake and a head full of cotton, but that could have been a plus since I couldn’t overthink the process. Really, I could barely think. I took the 3 1/2 x 2 1/2 pieces of cardstock and pulled out my Fun Stampers Journey Sweet Berry Splash, Blue Lagoon Splash, Cranberry Bliss silk, Sparkle Dust, Black Licorice Twine, Journey Medium paste along the FSJ spatula applicator along with some post-it note tape. I pulled out my SU! stripes and stars stencils; thus began the card base process.

In a container, I spritzed some Sweet Berry with a mist of water. I used a paint brush and applied a swipe of Sweet Berry across the cards. It wasn’t brillant enough; so, I thought why don’t I add some Cranberry Bliss silk and that did the trick. I reapplied the mixture to the card and it looked gorgeous. Then, I took the Blue Lagoon Splash and did the same process.  I did try to add some Dark Roast to create a more navy blue color and it was a little too much which created a blackish blue. All I did was add more Blue Lagoon splash and pulled a small, small dot of the blackish blue color into it, mixed it a little, and Bob’s your uncle; it looked great. On the soldier ATC I added full blue color, but on the eagle ATC, I masked off some stripes and added the color to this area to provide a little interest.

Next, I applied the medium paste using the stencils to the card base and sprinkled Sparkle Dust onto the wet medium to create some sparkle and glitz. The final embellishment was several loops of Black Twine. I sat the emerging ATC pieces to the side to work on the stamped images.

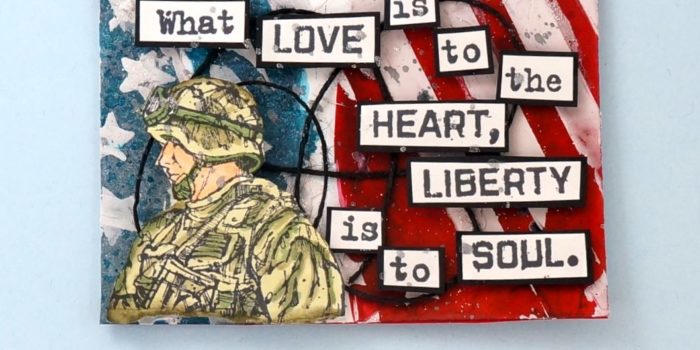
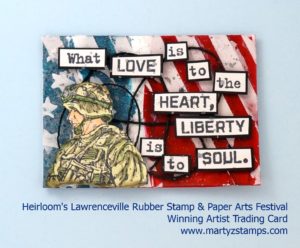
By this time, Cheyenne arrived with the SU! stamps. I didn’t have any stamps that reflected the Freedom theme, but she had two SU! retired stamp sets (they are very, very retired). They were perfect. I took the soldier stamp and coordinating words from one stamp set and stamped them onto FSJ Whip Cream cardstock using Memento ink. I colored the soldier using Spectrum Noir markers. Each of the words I cut out individually and matted on FSJ Black Licorice cardstock. I took a very light gray Spectrum Noir marker and went over the words to tone down the brightness of the Whip Cream cardstock. I popped the soldier and words out using FSJ Foam squares; and, as a final touch, I sprinkled a little Silver silk onto the ATC. Here is Cheyenne’s iPhone pictures. She liked them better with a woodgrain background:
The cards were judged by the vendors at the show. Here is the winning ATC card:
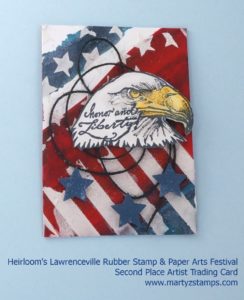
I created the eagle card by stamping the eagle onto FSJ Whip Cream cardstock using FSJ Black Licorice ink. Cheyenne suggested stamping the coordinating words directly onto the eagle. I thought that was a GREAT idea, and as you can see, it looks gorgeous. I colored the eagle with Spectrum Noir markers. The eagle is popped up using FSJ Foam squares. I punched out three small stars from FSJ Denim Days cardstock. Even though they didn’t have a first, second, and third place winner, the eagle ATC card was the second most chosen card by the vendors.
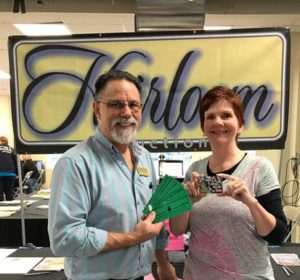
I think they both turned out beautifully. I won $25 show bucks which meant I could go and purchase products from any of the vendors. Here I am receiving the Show Bucks:
I went back to Creek Bank Creations and purchased two more 3D embossing folders from We R Memory Keepers Next Leveling Embossing folders. These are awesome; they create a 3D embossed look to your cardstock, which adds wonderful dimension and interest to your card. I have three posts coming up featuring these folders. The rest of my winnings I spent at Pink and Main. I purchased a cute, cute frog stamp set (it’s one of the upcoming card creation posts) and a pirate set just for my little buddies to create some cute cards.

Thanks Cheyenne for your stamp sets and your critiques during the creating process.
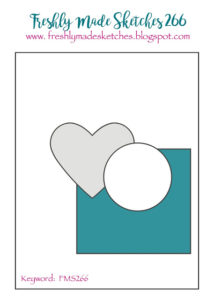
It is another week with a wonderful card sketch challenge from Freshly Made Sketches #266. Here is their challenge sketch:

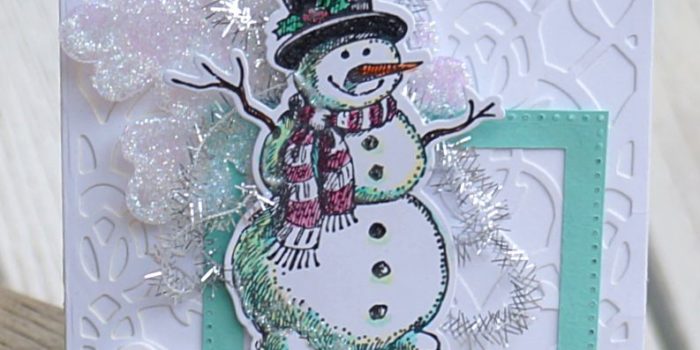
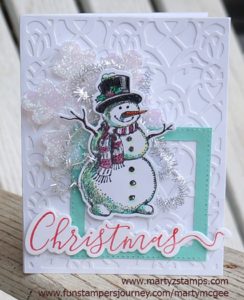
I wanted to take advantage of the Christmas season, yet again. I pulled out my Fun Stampers Journey (FSJ) Frosty Fun ATS and coordinating die to use on this challenge. As I was pulling this card together, I tried various colors of cardstock for the background, but every color I chose took away from the Frosty Snowman stamped image. I realized I had the perfect background die I received this past Friday from Fun Stampers Journey. It is the Persian Gardens die. I cut the base and the background die cut out of FSJ Whip Cream cardstock. I adhered the die cut onto the base using FSJ Craft glue which dries in a matte finish.

In place of the heart image, I took a large snowflake from the FSJ Snowflake Elements and applied Journey Glaze to the snowflake and then covered it with Sparkle Dust. I burnished the Sparkle Dust onto the snowflake with my finger. I cut the square piece out of FSJ Cool Pool cardstock with the FSJ Square pierced dies. I adhered both of these accents to the card with the FSJ craft glue. I stamped Frosty Fun onto FSJ Whip Cream with Black Licorice ink and colored him with FSJ Color Burst Pencils. For the circle element, I replaced it with some FSJ Tinsel Trim. I popped Frosty out with Journey Foam Squares (medium). I stamped the Christmas sentiment from FSJ Holiday Script with coordinating die in Cranberry Bliss ink and die cut it out. I adhered it with Journey Foam squares.

This is a cute card to give to a friend or family.


Supplies:

Fun Stampers Journey (all products used can be ordered through my FSJ website – click here).

Stamps: FSJ Frosty Fun (ATS – artist trading stamp) with coordinating die
Cardstock: FSJ Whip Cream, FSJ Coo Pool
Ink: FSJ Black Licorice, FSJ Cranberry Bliss
Dies: FSJ Square Pierced Dies, FSJ Persian Gard Die, FSJ Frosty Fun die
Coloring: FSJ Color Burst Pencils
Ribbon: FSJ Tinsel Trim
Miscellaneous: FSJ Foam Squares, FSJ Snowflake Elements, FSJ Craft Glue, FSJ Journey Glaze, FSJ Sparkle Dust

Next weekend, I along with three other friends will be at the Fun Stampers Journey – The Amazing Tour. We are super excited to go and experience all the “Amazing” energy and creativity. I have been to many papercrafting events throughout my 13 years of papercrafting, usually, involves taking cards I have made and trading them with other event participants. We call them swaps. The swaps should be exclusive to the company presenting the event. So, for this trip, my friend – Debbie Kissel – came over and we re-made some swaps we used for a Coach meeting.

I wanted to feature an Artist Trading Stamp (ATS) keeping the price point low for papercrafting beginners and those on a limited budget.  Although the card featured in this post looks labor intensive, it is a super simple and quick card to make. This card definitely has a WOW factor. Hello – you can create awesome cards without breaking the bank. 

OLYMPUS DIGITAL CAMERA


Here is how I made these cards:

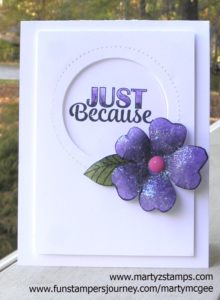
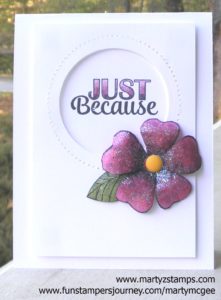
  1. I used Fun Stampers Journey (FSJ) Black Licorice ink to stamp the flower and leaf images. I stamped directly on Watermelon Fusion and Lavender Fusion cardstocks. I stamped the leaf on colored cardstock as well (Sweet Pear or Limeade Splash both would make a wonderful leaf).
  2. I used the Candy Apple ink pad for the Watermelon Fusion flower and the Lavender Fusion ink pad for the Lavender Fusion flower. Using sponge daubers (one for each color) and starting in the middle of the flower, I applied the ink in a circular motion and stopped about 1/4″ from the tip of the flower petals. Do this until you are satisfied with the shading.
  3. I fussy cut the flowers and the leaf (a die is available, but the flower and leaf need to be cut next to the stamped image for the best effect). 
  4. I placed the flowers on a foam mat that is firm but not too firm (you want it to have a little give). I took the large stylus on the Journey Bloom Tool; starting in the center of each petal, I applied pressure and moved the stylus in a circular motion out to the edges of the petal and back toward the middle of the flower until the petal began to curl in on itself. I did this to each petal. Note: For this second round of flowers, Debbie was the stylus operator.
  5. I turned the flower over, cut the petals apart about 1/4″ from the center. I placed the flower on the mat; using the stylus, I pressed down hard and move in a circular motion in the center only. Note: The petals should pull in toward the middle. You can squeeze and shape the petals with your fingers. The leaves are done the same way but only working on the backside of them.
  6. I placed all the flowers that were created (10 in all) in a box and made a solution of 1/2 Journey glaze and 1/2 water (I saw Richard Garay do this on a video to make a sparkling background for a snowman card). This solution was created in a spray bottle I had in my craft room. I sprayed the flowers; then, sprinkled them with Journey Sparkle Dust (I used a small glitter shaker bottle). I should have sprayed the flowers again to set the glitter, but so far the glitter hasn’t come off.
  7. I cut a circle in the top mat ( top mat measurement 5″ x 3 1/2″) using the pierced circle dies. I placed the pierced circle die on the outside of the circle I wanted to create, and nested the cutting circle die inside the pierced die. I saved the cut circle and set it to the side.
  8. I popped out the mat with the medium Journey Foam Squares and adhered it to the Whipped Cream cardstock base.
  9. I used the circle that was left over from cutting out the mat to stamp the sentiment. I colored the sentiment with the Color Burst pencils in a color that coordinated with the flowers. I placed liquid glue on the back of the circle and pressed it into the circle and directly onto the cardstock base.
  10. I adhered the flower and petal with liquid glue and placed a Spring Accent Dot in the middle of the flower.

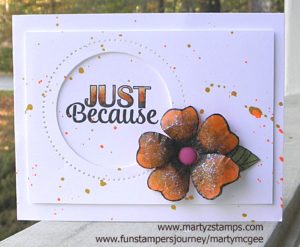
One of the mats had the circle cut off-center; so, instead of wasting the cardstock, I looked at it and thought . . . hmmmm. . . . I could make the same card in a horizontal position. I created an additional WOW factor using Orange Rave and Gold silk accents on this card. Note: I left the first two cards “clean”, because I didn’t have the silks I wanted to use with those flowers,. I think having two different ways to complete a card shows the versatility of our amazing products. Some of my stampers like “clean” and others do not – they want Wow, Wow, Wow.

Here is the mistake turned into a raving beauty:

Supplies:

All Fun Stampers Journey – all products can be purchased through my website.

Cardstock: Whipped Cream CS-0040, Lavender Fusion CS-0017, Watermelon Fusion CS-0039, Orange Creamsicle CS-0024
Ink: Black Licorice IP-0009, Lavender Fusion IP-0036, Candy Apple IP-0017, IP-0043
Die: Pierced Circle DI-0039    Use a Bloom Tool to separate the pierced die from the paper TO-0073
Adhesives: Journey Glaze AD-0003 or AD-0002, Journey Foam Squares AD-0085, Craft Glue AD-0111
Embellishments: Journey Sparkle Dust AC-0013, Spring Accent Dots AC-0179
Silks: Orange Rave IP-0118, Gold IP -0096
Suggested Silks for first two cards: Cosmic Grape IP-0117 and Outrageous Pink IP-0109

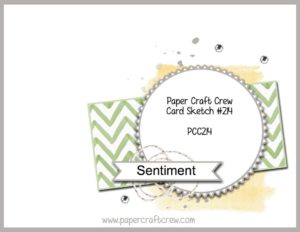
When I saw Paper Craft Crew sketch challenge, I was super excited because I had the perfect card to enter. I have been so busy I would have missed the deadline but PCC extended their usual one week deadline to two weeks. Woo hoo! This is their card sketch:

13925327_10209951237435388_6685491755259514637_n

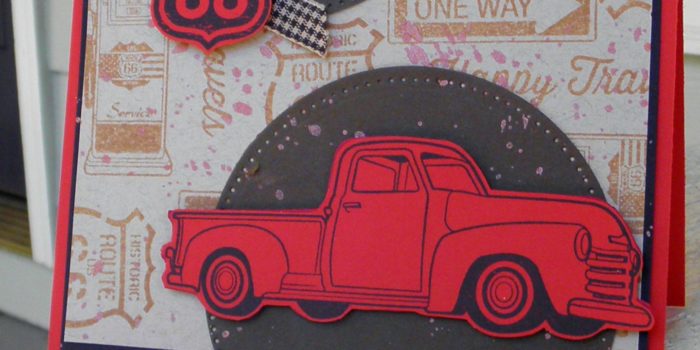
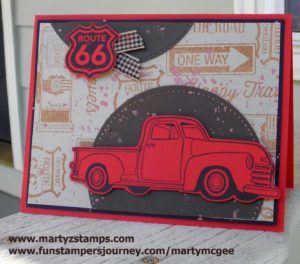
When you order a starter kit with Fun Stampers Journey, you choose three stamp sets and one ATS (Artist Trading Stamp). For one of my three regular stamps, I chose Hit The Road. My group of stampers are always in need of masculine cards, and this set fit the bill. I stamped the truck and road sign in Black Licorice ink onto Candy Apple card stock and fussy cut them out.  The road signs on the Oatmeal Cookie mat are stamped in Pumpkin Bread ink. The stitched partial circle was cut using the Journey Platinum Machine with the Journey Circle dies from Hazelnut card stock (I cut off part of the bottom circle once it was mounted to the Oatmeal Cookie mat and placed the leftover piece at the top of the mat). Before I added the truck, sign, and ribbon, I sprinkled some Bronze Silk onto my mat.  I popped the truck and sign up using small and medium Journey Foam Squares, and I added an accent of gingham cocoa ribbon to the sign with a glue dot.  I matted the Oatmeal Cookie mat onto a Black Licorice mat and then adhered these mats to the Candy Apple base. This card is perfect for a masculine birthday, thank you, get well, etc. I think the truck and sign really make the card pop.

PCC214

Supplies:

Fun Stampers Journey: (You can order any of the listed supplies to create your own Hit The Road card – click here)

Cardstock: CS-0007 Candy Apple, CS-0013 Hazelnut, CS-0023 Oatmeal Cookie, CS-0003 Black Licorice
Inks: IP0044 – Black Licorice, IP-0057 Pumpkin Bread, IP-0091 Bronze Silk
Dies: DI-0039 Journey Circles (these are a group of circles with stitched and plain circle)
Embellishments: AC-080 Gingham Cocoa Ribbon, AD-0084 Small Foam Squares, AD-00875 Medium Foam Squares

PAGE TOP
[dealsbar preview] Amazing Deals: !!toolbar-deal-title!! - !!toolbar-deal-merchant!!