Tag : cards

110 posts

One of my favorite subscription kits is Scrapping for Less Flavor of the Month. I love that it includes 5 kits in one. This post features a card from the May 2019 FOTM Banana Split kit.

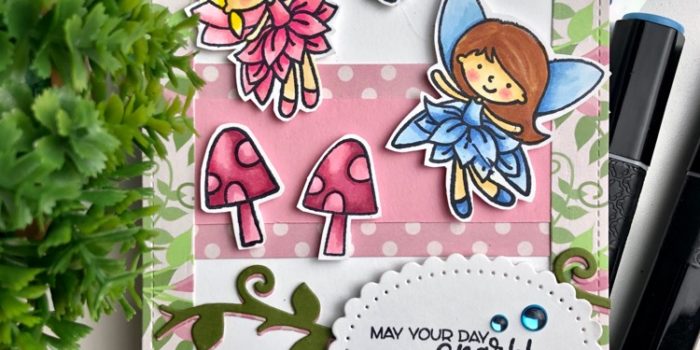
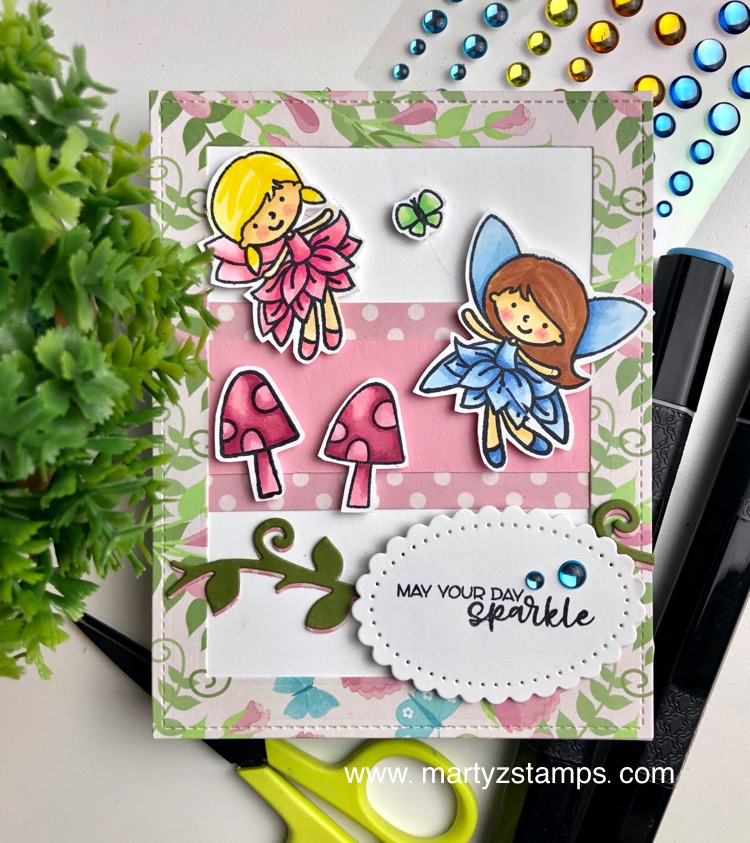
I created a sweet birthday card featuring two fairies. One dressed in pink and the other in blue with a tiny green butterfly floating above a bed of mushrooms. All images are colored with Spectrum Noir alcohol markers. The vine is a Fun Stamper Journey die and the oval is a Spellbinders die (see product list below).

Marker List:

Facebook Link for Coloring How-To (click here):

Pink Fairy – Dress: CR5, FS8, FS2 (Illustrator) Hair: LY1, LY2, CT4
Blue Fairy – Dress: TB1, TB2, TB3, TB4 Hair: TN2, RB2, RB1, TN5
Skin – FS9 Illustrator, FS4, TN2, FS8 or CR3 (cheeks)
Mushrooms – CR1, CR2, AP3, AP1
Butterfly – AG1, BT1

I sent this card to my niece for her birthday which is today! Happy Birthday, Cherie!

Products:

Pink and Main: Glossy Dots

Consumer Crafts: Spectrum Noir Alcohol Markers

I am so excited to announce a new partnership that begins Thursday, November 1, between Spellbinders and FSJ.  They are coming together to bring paper to life.

What does this mean for you? Great savings on awesome product lines. And, there’s more! Shipping is only $5.00 for orders up to $75 and “drum roll, please” . . . .  FREE shipping on orders over $75! If you live outside the US, you can now buy FSJ and Spellbinders. So easy to do, just click on any image on this post or one of the images in the sidebar.

Check out the new logo!

I can’t wait for you to experience some great deals. Let me tell you about one of my favorite programs, the Club Kits. What a deal? I especially like the Large and Small Die Club Kit. It’s only $30.00 a month plus shipping (tax may apply depending on where you live). Check them out the Club Kits here.

Spellbinders NEW Monthly Die Cutting Clubs

Y’all, it gets even better. Are you a paper crafter that likes to make beautiful cards from dies? There’s a new club starting up on November 1st called the Amazing Paper Grace Die of the Month membership. It features an exclusive die designed by Becca Feeken and the membership is only $30.00 plus shipping and tax. Here’s a sneak peek. Click on the image to get all the details.

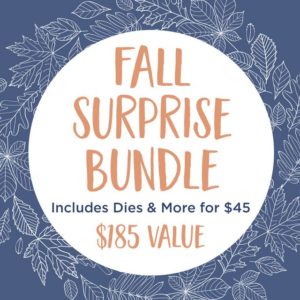
I have saved the best deal for last. It’s the Fall Surprise Bundle a $185 value for only $45! This bundle includes dies and more. This deal is while supplies last (note: all bundles are the same). Click on the picture to get the scoop on this extraordinary bundle.

I’m already loving this partnership and I know you will too.

Check back on Thursday for a blog post featuring one of Spellbinders’ stamps and dies combined with FSJ inks, cardstock and more.

Let me know what you think about this new partnership in the comments below.


PJs and Papercrafting is OPEN for registration featuring the Gnome For The Holidays stamp set!

Grab your favorite PJs or comfy clothing, put them on, gather your supplies, prepare to wind down, relax and get ready to craft; because, YOU are invited to join me on November 11th, 7:00 p.m. EST for a Facebook Live to create  3 beautiful fancy fold card projects using the Gnome for the Holidays stamp set.

When you place your order, you will receive an invitation to my private Facebook group, PJs and Papercrafting. There you will have access to a printable PDF for the class projects and access to the Facebook Live video class.

You will need:

Basic supplies on hand to make these projects, such as adhesive, scissors, trimmer with scoring blade, foam squares, crease tool, coloring tools (pencils, watercolors, markers) and a multi-purpose tool. I have shared below what I will be using. I have listed several ink pad colors. For example, Candy Apple or Cranberry Bliss will work for these projects as well as two of the green inks. Use what you have or click on the images to purchase exactly what I am using (note: all pieces will be embossed or die cut).

Product List


PJs and Papercrafting will be held LIVE on the PJs and Papercrafting Facebook group, Sunday, November 11th at 7:00 p.m. EST. If you cannot make the LIVE event, the video will be available for viewing after the event in this group. You will be added to the group about one week prior to the LIVE class. If we are not currently friends on Facebook, send me a friend request when you sign up.

Registration Options

NOW through October 29th, Friday, 11:59 p.m. EST for Option 1 or 2 Class

NOW through November 2nd, Friday, 11:59 p.m. EST for Option 3 Class.

Included in the Gnome for the Holidays Nov./Dec. 2018 Kit:

Option 1: Full Kit (Bundle) – $65.00
Includes the Gnome for the Holidays (Bundle) stamp and coordinating die along with all supplies (excluding basic supplies), PDF and online content.


Option 2: Full Kit (Stamp set only) – $47.00
Includes the Gnome for the Holidays stamp set only along with all supplies (excluding basic supplies), PDF and online content. 


Option 3: Materials Only – $23.00
3 fancy fold card project kit ONLY (does not include the stamp or die), PDF and online content. This is a great option if you already own the Gnome for the Holidays stamp set and/or dies. Coaches are welcome to participate with this option.


All products for the kits will be ordered and prepared by me after the registration deadline of October 29th for product orders and November 2nd for class only orders, 11:59 p.m. EST. If for some reason during the transition from FSJ to Spellbinders + FSJ the stamp set/bundle are backordered, I will stamp your images and send them with the kit so you will be able to partake in the FB Live event. Your order will be shipped to you at a later date.  Class kits can only be mailed within the United States (additional charge may apply for Hawaii and Alaska).

Expected shipping date of all kits is November 4th.

Can’t wait to create with you!

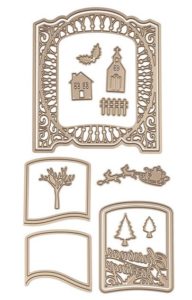
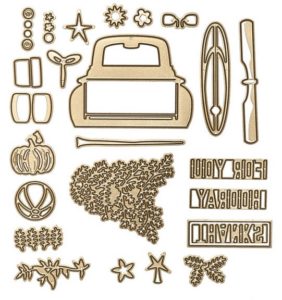
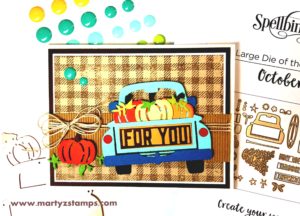
Do you love dies as much as I do? I confess I am a die addict and if you love dies like I do, then you are one too. When FSJ partnered with Spellbinders, I couldn’t get enough viewing time of their die selections. One of Spellbinders biggest Wow products, to me, is their Die of the month club. This month’s Large Die Club features an adorable truck with a truck load of accessories.

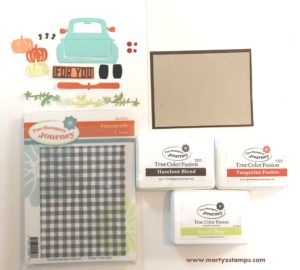
Here is a look at all the dies:

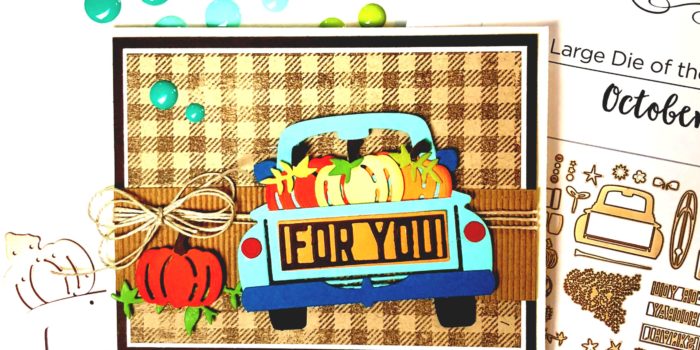
There are endless possibilities as to what you can make with with this set. My friend, Debbie Kissel, joined the Large and Small Die Cutting Club (a much better price point) and she was so gracious to bring both sets over for us to create a card project (we had no more than two hours of creating time; therefore, one card). She thought pumpkins would be good and I agreed.

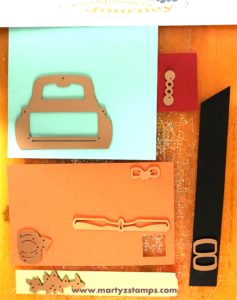
The process began with me choosing the color combinations and cutting out the pieces on my Platinum die cutting machine.

Such a great use of scraps and it saved on cutting time as well.


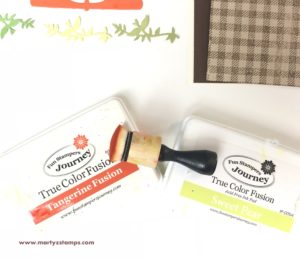
As you can see in the picture below, I have a base of Butter Cream CS, a Hazelnut Blend base mat, a Buttercream mat (not shown) and an Oatmeal Cookie mat. The truck is Cool Pool with a fender and side view mirrors cut from Blue Lagoon CS (photo shows Tangerine Fusion, but as we put the truck together the side view mirrors blended in with the pumpkins – time to rethink those colors). The pumpkins are Sweet Pear, Tangerine Fusion, Citrus Cooler with Hazelnut Blend stems. The sentiment “For You” is cut from Hazelnut Blend and matted on Citrus Cooler. Of course, there are red tail lights and black tires. Last but not least is the greenery, it is Limeade Splash, Sweet Pear and Green Olive cardstocks. The stamp set is Flannel Life and the inks are Hazelnut Blend, Tangerine Fusion and Sweet Pear.

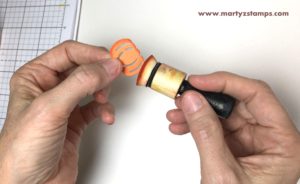
Before I began the assembly process, I sponged the edges of the pumpkins with their coordinating ink and I stamped the Flannel Life onto the Oatmeal Cookie with Hazelnut Blend.

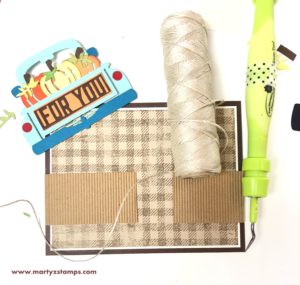
Now comes the fun part, putting the truck together! Once the truck is assembled, it is time to bring the card together. I wanted to keep this rustic and “fallish”; so, I grabbed a piece of Corrugated cardstock and trimmed it. As you can see it wasn’t wide enough, but no problem, I just cut it in half and glued it down knowing the truck would cover up the gap. Some loops of Natural Twin with a triple ribbon with tie everything together.

Last but not least is a final accent piece. I placed a couple of Candy Drops in the upper left hand corner.

It is just too cute! Such a fun and relaxing project.


As we move toward November and the final transition to the new Spellbinders + FSJ team, I hope this inspires you to check out Spellbinders today. The FSJ products will not be available on the Spellbinders website until November 1st. I have those supplies below the Spellbinders Banner. Click on a product from there and you will be taken to my FSJ website where you can order.

In this new transition of partnering with Spellbinders, I have become a part of the Spellbinders + FSJ affiliate program.  If you would like to purchase a Spellbinders product, please click on the banner below. It will take you to their site. I will receive a commission on anything you purchase at NO ADDITIONAL cost to you. This helps me to continue creating inspiring products for you.

Spellbinders NEW Monthly Die Cutting Clubs

Product List

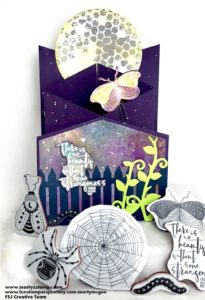
Hi there! So glad you are hopping along with the FSJ Creative Team on a wonderful journey of amazing projects. Make sure to subscribe to our blogs. This way you will be notified each month not only with our regular posts but with a colorful line up of uniquely Fun Stampers Journey projects brought to life by the FSJ Creative Team. I hope you enjoy the fancy fold cards I created for this hop. Let the team know what inspires you to craft by posting comments.

I know you will be amazed and inspired by the talent of these creative paper crafters. Our team’s blog post links are below. If for some reason you hop off the trail, go to Fun Stampers Journey Blog and pick up where you left off.
Kazan Clark 

Lezlye Lauterbach 

Carrie Rhoades 

Christine Chan 

Jill Hilliard 

Jenny Watson 

Marty McGee (you are here!)

Alissa Hall

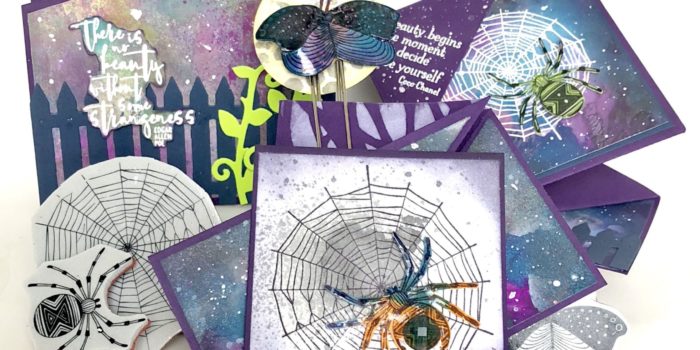
For this hop Strange Beauty is the featured stamp set, because I love insects. Yes, even spiders; although, I had to work on that one. I ordered this set a while ago and it sat unused and collecting dust because other sets kept calling my name, ya know what I mean. So, when the Creative Team was tasked to come up with some unique projects featuring each team member’s creative style, I immediately thought of this stamp set. I think all the “bugs” are just too cute.
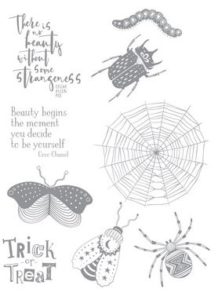
The decision to create three projects featuring fancy fold cards was made from a poll I created giving FSJ coaches three choices as to what they would like to see. Fancy Fold cards won! And, here they are:
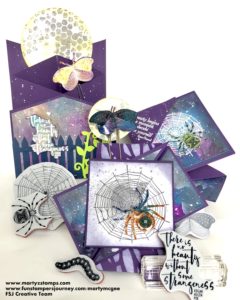
 

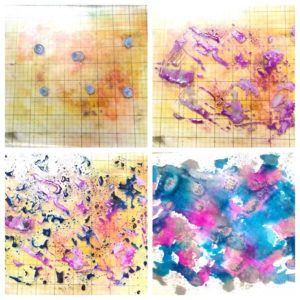
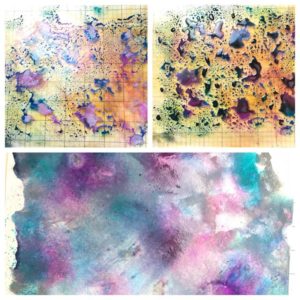
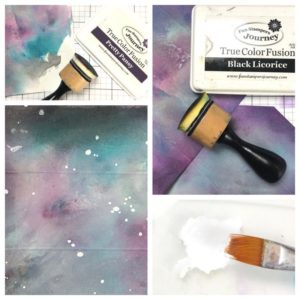
My vision was to create a night sky; so I pulled out one of my most favorite products, our Gel Press.  I created two background pulls (note: I did not use the brayer as shown in the picture below). Check out the pictures for the steps:
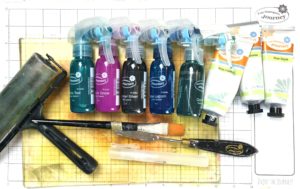
First pull:

Second pull:    

The first fold card is called a. . . .

Spring Card

5 1/4″ x 10 1/2″ piece of cardstock or printed paper
Scoring Tool (I used our trimmer)
Bone Folder
Pencil
Ruler
Scissors
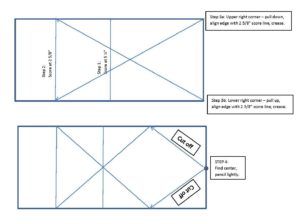
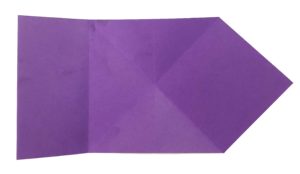
Step 1: Fold paper in half to create a
5 1/4″ square.
Step 2: Open the paper and fold the left side edge to the center.
Step 3: Grab the upper right hand corner, pull it down and over until the edge of the paper is aligned with the fold made in step 2. Open the paper and repeat with the lower right hand corner (you may need to turn the paper around as a preference).
Step 4: Open the paper. Mark the center on the right hand edge. You can use a ruler and mark at 2 5/8″.
Step 5: From the center point to the scored edge cut a diagonal line on both sides. You will have a diamond shape.

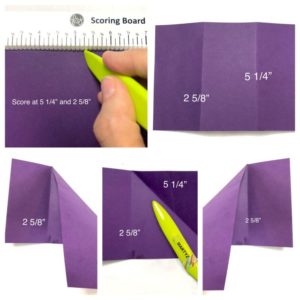
Here are a few pictures for reference.
       

Once the Gel Press backgrounds were cut down to size (for all projects), I took the small dowel sponges and sponged Pretty Pansy and Black Licorice Fusion inks around the edges of the mats lightly. I added sprinkles of Whip Cream acrylic paint (watered down using the Media Mister) with a paint brush.
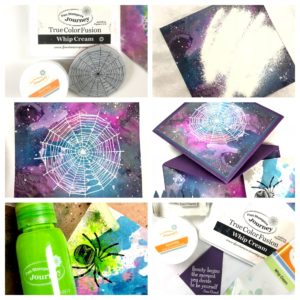


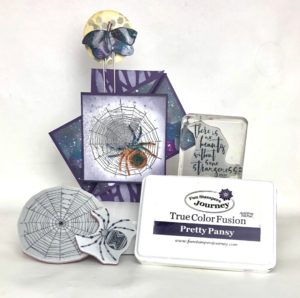
The spider web is stamped onto the Gel Press background mat in Whip Cream ink and embossed with White Embossing Powder. The spider was stamped using Black Licorice ink on a scrap of GelPress paper, spritzed with Electric Lime Splash and fussy cut. The sentiment was stamped in Whip Cream and embossed in white onto one of the corners cut off in step 5. It was sprinkled with diluted Whip Cream acrylic paint. The base portion of the card has the background mat with the picket fence cut out of Denim Days cardstock. The sentiment and the spider are popped up with foam squares. The final touch is Journey Glaze on the spider.

Just too stinkin’ cute!

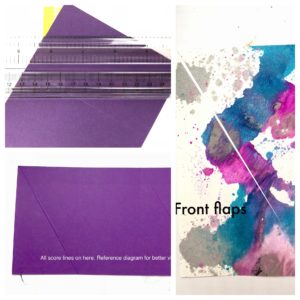
TIP: I placed a glue dot (see pictures below). Top left picture is underneath the card before adhering everything together. Top right picture shows placement of the glue dot. Bottom picture shows where the dot sits on the base. Otherwise, the top portion would flop around and not stand up.
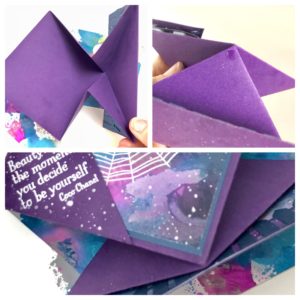
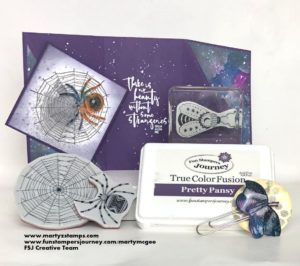
Here is the first of three projects – The Spring Fold Card featuring Strange Beauty
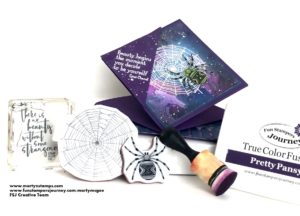
The second Fancy Fold card is a . . . .

Twist Gate Fold Card

7 1/2″ x 4 1/4″ piece of cardstock
2 pieces – 2 1/4″ x 3 7/8″ printed paper (I used only one piece of Gel Press Background paper for front panels)
TIP: on the 2 pieces above, make SURE your cut in the correct direction!!!!
Paper Trimmer
Bone Folder
For this card: paper clip,Designer Series stencil and Vintage Screen stencil
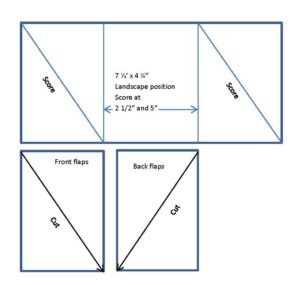
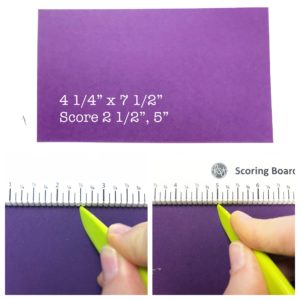
 Step 1: Place 7 1/2″ x 4 1/4″ cut cardstock in landscape position,
score at 2 1/2″ and 5″.
Step 2: Score the left panel diagonally from the upper left corner to the lower right corner. Repeat on the right panel, score diagonally from the upper left corner to the lower right corner.
Step 3: Fold score lines and crease with the bone folder.
Step 4: Cut printed paper or stamped paper diagonally for the front flaps from the upper left corner to the lower right corner.
Step 5: Cut printed paper or stamped paper diagonally for the back flaps from the upper right corner to the lower left corner.

Scoring diagram in pictures.
 

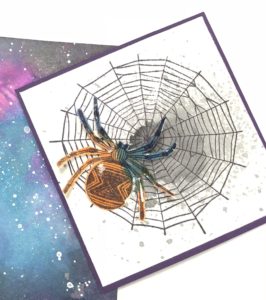
Front stamped image – Spritz Silver Shimmer onto a piece of Whip Cream Cardstock. Stamp the spider web on top of spritzed area using Black Licorice. Stamp the spider in Black Licorice onto Gel Press background scrap. Spritz a little Citrus Cooler onto the Spider and move around with a brush. Fussy cut the spider with detail shears. Adhere the spider to web with a foam square. Adhere the entire piece of cardstock to a Pretty Pansy mat. Sponge edges with Pretty Pansy and Black Licorice (remember to do this lightly). Add Journey Glaze to the spider and let it dry thoroughly. Add a blue Rainbow Drop to the spider’s back (Rainbow Drop shown on finished project).
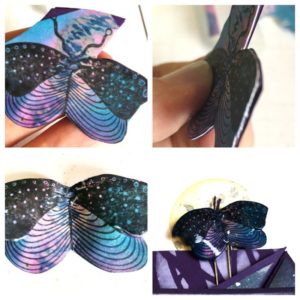
Stamp the moth onto a scrap piece of Gel Press background paper. Layer the image onto three pieces of Pretty Pansy cardstock with Journey Craft Glue. Fussy cut. Dye a small piece of twine (antennas) with Turbo Teal silk. Glue the antennas to the back of the moth. Add the moth to a paper clip with foam squares and adhere to the moon. Apply Journey Glaze and let dry. Once the moth was dry, the edges were brushed with Turbo Teal silk to color the white edges.
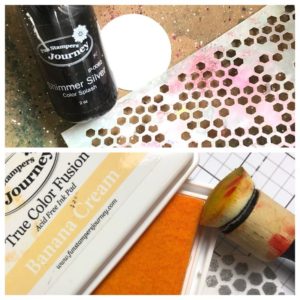
Moon – cut a circle with our Circle dies (I created a small one for this project and a large one for the last project). Place the honeycomb stencil over the top of the circle and spritz with Silver Shimmer Splash. Apply Banana Cream Fusion ink with a sponge onto the moon.
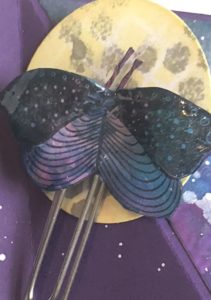
Adhere spider on web stamped image to the front flaps TIP: only adhere to one flap (this way the card will open). For the back flaps, on my card, I stenciled Whip Cream ink onto the flaps using the Designer Series stencil (tree portion). Stamp sentiment onto inside of the card with Whip Cream and emboss with White Embossing Powder. Clip the moth to the back panel when the card is closed. It will help to keep the card from popping open.

And here it is:
 

The last Fancy Fold card is a . . . .

Cascade Fold Card

2 pieces 5 1/2″ x 8″ cardstock
Trimmer with score blade
Bone Folder
Pencil
Scissors
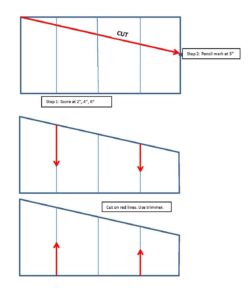
 

Step 1: Cut two pieces of 5 1/2″ x 8″ cardstock
Step 2: Score at 2″, 4″, 6″
Step 3: Pencil a mark 3″ up from bottom of card
Step 4: Cut both pieces from top left corner to pencil mark.
Step 5: See diagram. On one piece, cut down half way on the two outer score lines.
On the other piece, cut up half way on the two outer score lines. These will fit together.
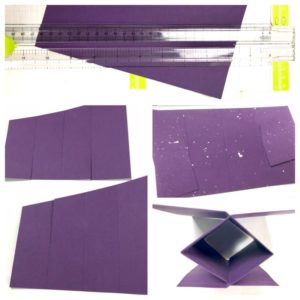


Top picture is Step 4.

Left picture is Step 5.

Middle right are the pieces fitting together.


Bottom right is top view.


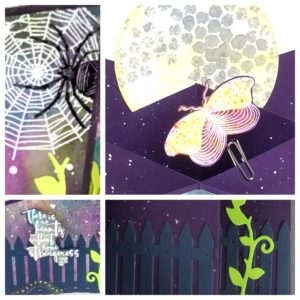
For the stamped images and background mats, I did the same techniques as shown in the first two card examples. Here are some  pics of various portions of the card. The background gel pressed paper on the back part of this card was created on Pretty Amethyst cardstock. To cut the front and back mats, I laid the panels onto the cascade fold portion marked lightly with a pencil and cut from those marks. I am definitely not someone that can measure and calculate my cuts!!!! I have to do it the hard way. What about you?
Here is the front and back of the Cascade Card.
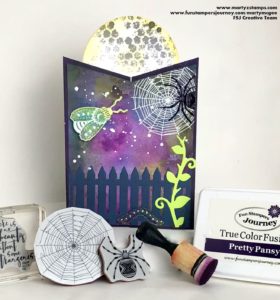
 

Happy Crafting!

Product List
Spatula

$3.95

Here is Round Two of the Gel Press Throwdown between Carrie Rhoades and myself. Just a brief review, we sent each other what we considered “ugly” Gel Press pulls and our challenge was to make something beautiful out of the “ugly ducklings”. So, make sure to check out her blog carriestamps.com to see the creations she has made from my “ugly” Gel Press pulls. Here is the link for Round one on my blog http://martyzstamps.com/2018/08/27/gel-press-challenge-round-one-fms351-sketch-challenge/.

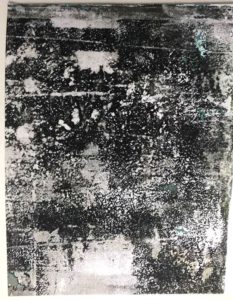
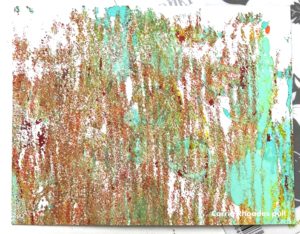
I forgot to take a picture of the pull before I started adding to it. Carrie was gracious enough to send me a photo of a piece of the original pull. It is not the actual piece but it will give you and idea of what I started with. Here it is.

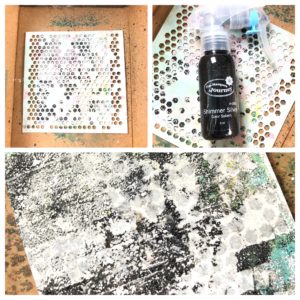
I took the original pull and placed it in my spraying box (a box to use silks, splashes and splattering to contain any over mist). I placed our Vintage Screen on top of the pull. I then spritz it with our Shimmer Silver Splash. You can see the design on the bottom photo.  


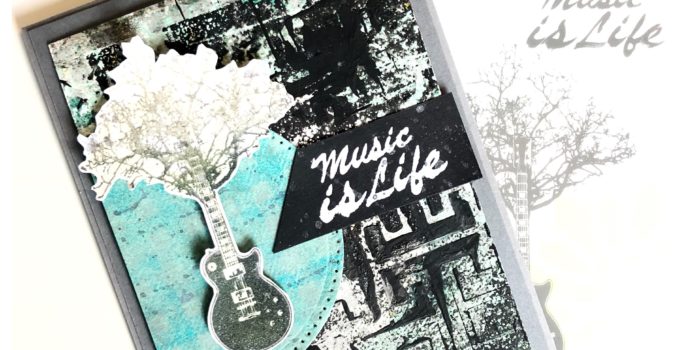
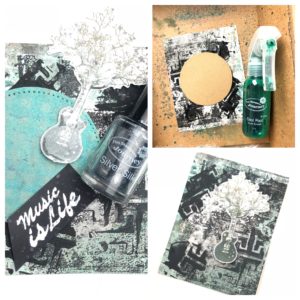
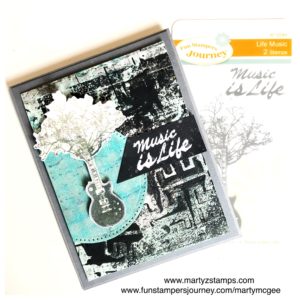
I stamped the guitar/tree with River Stone at the top and Rock Candy at the bottom using my Misti to get the right amount of ink onto the paper. I used Journey Glaze to create a sheen on the guitar and once the glaze was dry, I painted some Sparkle Silk onto the guitar and tree branches for a hint of glitz. I placed the guitar on the Gel Press background to decide what I wanted to do next. Since there was already a hint of Cool Pool acrylic paint on the pull, I decided to spritz the card with the Cool Pool Splash. At first I wanted to keep a circular space in the middle free of Cool Pool color; so I placed a piece of scrap paper on the background and spritzed the paper. Once this was dry, I happened to spy some Cool Pool cardstock and thought that would make an awesome mat. I grabbed it and put some Blue Lagoon ink on the Flannel Life background stamp and stamped the image on the circle which I ran through the die machine with the piercing die to give it some interest. I took the circle and spritzed it with the Shimmer Silver Splash. While all of this was drying, I stamped the sentiment in Whip Cream onto Black Licorice cardstock and embossed with White Embossing Powder. Then, a little splatter of Silver Silk.

After everything was dry, I began assembling the card. I chose River Stone as the base with a Rock Candy mat. I cut down the Gel Press background, added the circle and sentiment with the guitar popped up using foam squares. This was adhered to the base with foam squares. I think this turned into an amazing card. Remember, there are no “ugly” pulls!!!!

What do you think of this card?

Product List

I know all my followers are aware of how much I love my Gel Press. That being said another member of the FSJ Creative Team, Carrie Rhoades, loves the Gel Press as well. We decided to have a challenge throwdown to create cards from each other’s pulls and one of the throwdown stipulations was to include some not so pretty pulls; because, as I tell my crafters, “There are no ugly pulls!”

I received Carrie’s package of pulls this past Thursday; and, quite frankly, I didn’t see any ugly pulls but maybe I have conditioned my mind to see past the obvious and to envision the beautiful. Here is the one I chose to use for the Freshly Made Sketches Challenge 351. I think it is a gorgeous Gel Press pull. *** Carrie used yarn wrapped around her brayer and acrylic pain to create this Gel Press pull (see below). Here is Carrie’s link to the “ugly” pull I sent her and she used for Round 1’s throwdown Carrie Stamps, No Such Thing as a Bad Print blog post (click here).

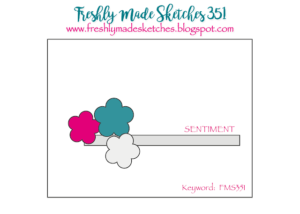
This set the stage for the FMS 351 sketch.

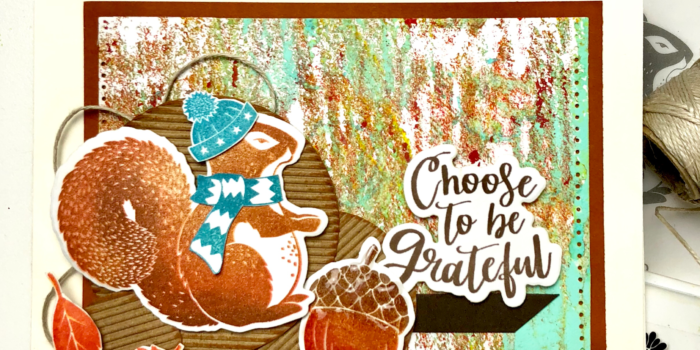
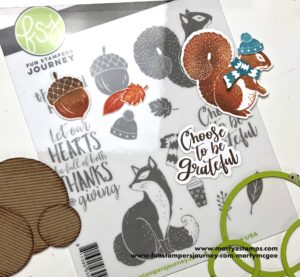
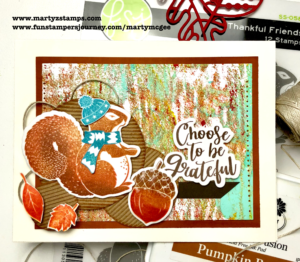
The minute I began working on putting a card together for this sketch, I knew this pull was a winner! I began with the Thankful Friends stamp set and incorporated some fall colors (Pumpkin Bread, Tangerine Fusion, Rich Coral, Hazelnut Blend and Turbo Teal):

The corrugated paper adds texture and dimension to the circle mats. To create a little depth to the circle mats, Pumpkin Bread ink was applied directly from the pad to the edges of the circles. A hint of twine peeking out from behind the mats adds a little fun to the card. I think the squirrel is just too adorable and makes a great focal point for this card. The sentiment says it all, “Choose to be Grateful.” Do you choose to be grateful? I do.

Product List

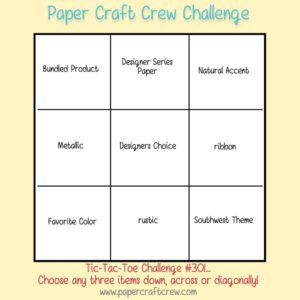
Have you ever heard of a Tic Tac Toe Challenge? If you haven’t, it is a design challenge where the designer chooses three design elements in a row, just like tic-tac-toe. The designer can go vertical, horizontal or diagonal. Once the choice is made, the design work begins. Here is Paper Craft Crew #301 design challenge for this week:

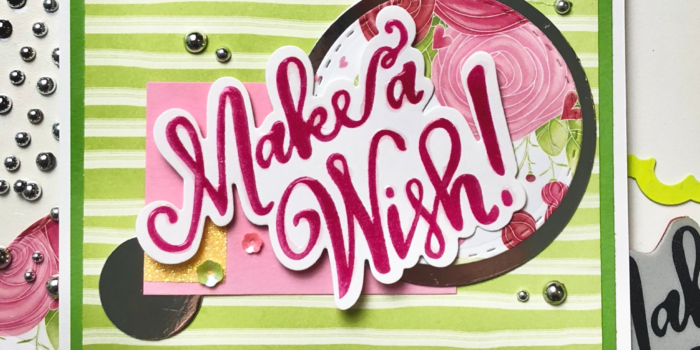
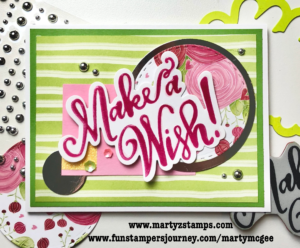
I chose the first vertical row, which included bundled products, metallic and favorite color. If you have been keeping up with my blog, Facebook and Instagram posts, you will know I’m all about the FSJ Make A Wish stamp and die bundle. So many great projects can be created from this one stamp and die. For the metallic design element, I had some Mirror Silver card stock and I grabbed some Watermelon Fusion card stock for my favorite color. Who can’t resist hot pink? I can’t.

The base is Whip Cream with a Limeade Splash base mat and a Through the Year Prints mat adhered on top. I die cut circles from the mirror silver (they look black due to lighting but they do shine in “real” life) and Through the Year Prints card stock along with a small rectangle of Bubble Gum card stock. The sentiment is popped up to create dimension as well as the addition of Fashion Silver embellishments with a couple of Bloom Time sequins. Let’s not forget the lemon sparkle tape and the Journey Glaze on top of the Make A Wish.

All supplies Fun Stampers Journey. If you would like to order supplies used in this project, please click an image below:

Product List

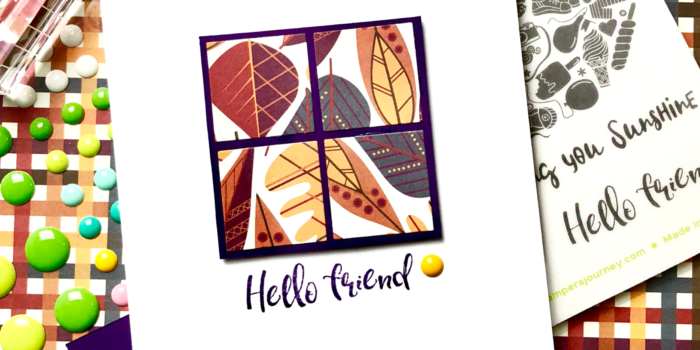
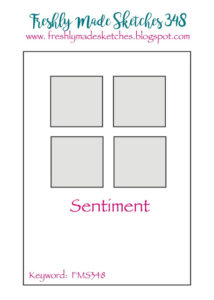
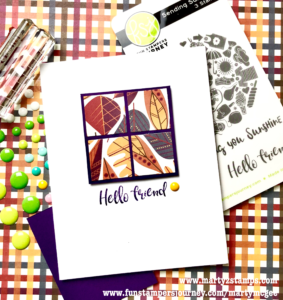
A simple and cute sketch this week from Freshly Made Sketches #348. It’s four squares and a sentiment. Really, that’s it in a nutshell.

I love it when a project just happens. Base of Whip Cream card stock, small Deep Lilac mat with Through the Year Prints die cut into four square and adhered to the mat. Sentiment stamped in Pretty Pansy Fusion ink. And, there ya go.

All materials used are Fun Stampers Journey. If you would like to order any of the supplies from this project, click on the image(s) below:

Product List

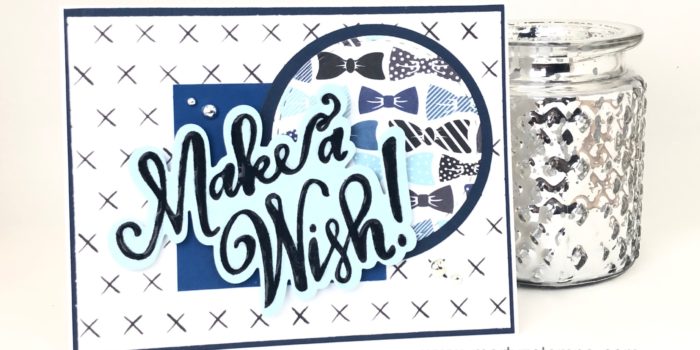
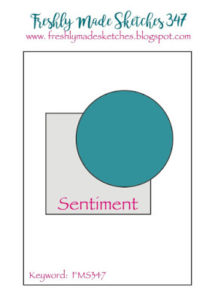
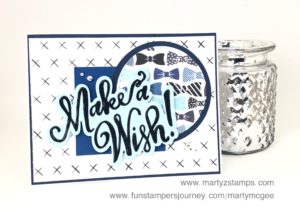
If there is one stamp set and die that I truly love, it is the Make A Wish stamp and die bundle! In fact, I love it so much it is my August Featured “A” Team Bundle. To bring in this featured stamp set, I wanted to showcase it as a blue and bow tie birthday card on Freshly Made Sketches #347 card challenge.

I turned the design to landscape position and went to work. If you are a paper crafter that likes quick, simple and clean creations, this card is for you! I began with a base of FSJ Whip Cream card stock with two base mats of Denim Days (5 3/8″ x 4 1/8″) and Through the Year Prints 12 x 12 paper (5 1/4″ x 4″). Using the same Denim Days card stock I cut a mat out of our circle dies and a circle out of Through the Years Prints. The square accent is cut from Huckleberry Fusion (2 1/2″ x 2 1/2″). The Make A Wish sentiment is stamped with Black Licorice onto Pool Play card stock using my MISTI to create a fully stamped image and then die cut with the coordinating die using our Amaze die cutting machine. Make A Wish is popped up with Medium Foam squares and Journey Glaze makes the words pop off the card stock. The final accent are the Fashion Silver accents.

So quick, so easy, so cute!

If you would like to order this bundle and any of the supplies used to create it, please click here or on any of the supplies below!

Product List

PAGE TOP
[dealsbar preview] Amazing Deals: !!toolbar-deal-title!! - !!toolbar-deal-merchant!!