Tag : embossing

8 posts

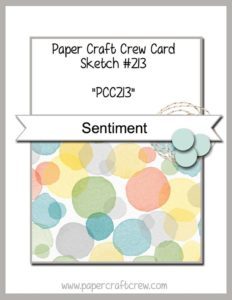
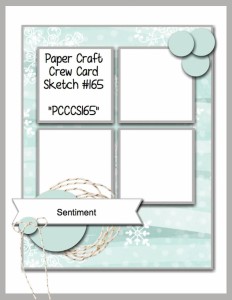
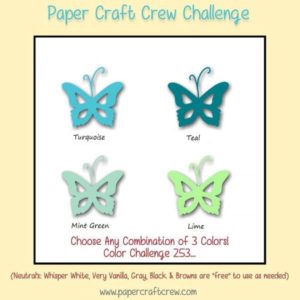
This week’s Paper Craft Crew Challenge is a color challenge using the following colors:

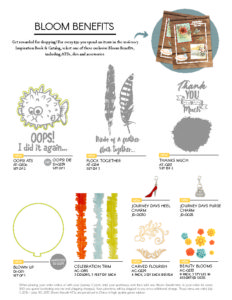
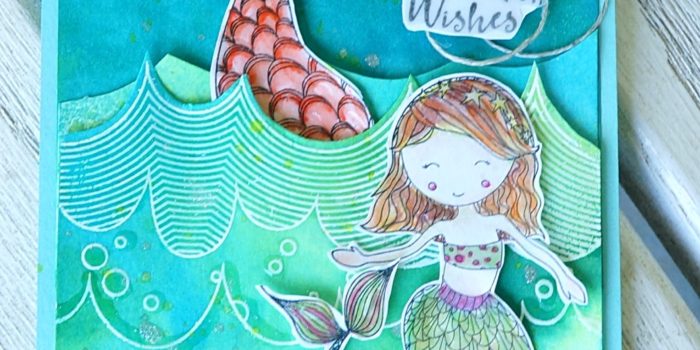
I received this stamp set in my July 2017 Bloom Box Kit.

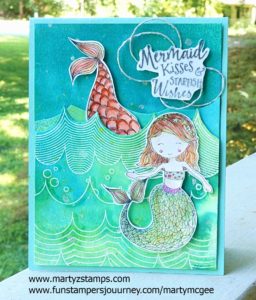
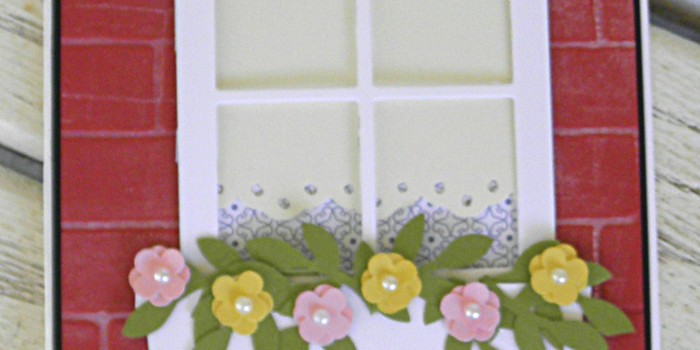
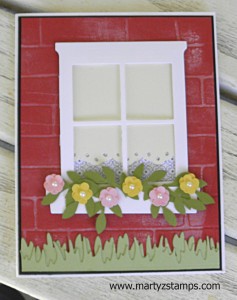
I fell in love with these adorable mermaids the moment the first images came out for this kit. I wanted to make a card that gave the feel of the ocean and the playfulness of the mermaids. I began with a base of FSJ Cool Pool cardstock. Both of the mats are Cool Pool cardstock as well. I took the smaller mat and embossed in white the retired FSJ background stamp Catching Waves. I cut out across the edge of one of the waves. To create the watery effect on both mats. I used my FSJ splashes (Blue Lagoon, Electric Lime, and Cool Pool). I gave each of the mats a good spray from each of the colors and moved the cardstock around to allow the different spalshes to blend together. I blotted excess liquid with a baby wipe. It took a good while for the mats to dry (I must have really saturated them. The next step was to stamp the mermaids and color them. I stamped them with FSJ Black Licorice ink onto FSJ Whip Cream cardstock. I colored them with my FSJ Color Splash watercolor pencils. The sentiment was stamped onto Whip Cream cardstock with the Black Licorice ink as well. I fussy cut the mermaids and the sentiment. Once the mats were dry, I contructed the card. The cut off the bottom of the first mat and with the extra piece I cut reversed scallops to create a wave. I adhered the base mat with FSJ White Liner Tape (this is the best adhesive for cardstock that has been wet and dried with the edges pulling up. I placed the liner tape on every edge so the panel would bend. The extra piece of cut cardstock was adhered next. The embossed mat was adhered with White Liner Tape around the edges. By only adhering to the outside edges I created a pocket for my diving mermaid. Before I adhered the sentiment and mermaids I used FSJ Sparkle Silk to sprinkle a little glitz and glamour to the card. The mermaids and the sentiment were popped out using FSJ medium Foam Squares. Before placing the sentiment onto the card, I looped some FSJ Twine onto the base mat where the sentiment would be placed.

I really love this card, and I hope you do to.

It has been a while since I have posted a card challenge. I have battled two colds since Christmas, and I am finally feeling better after two doctor visits, 2 rounds of antibiotics, and steriods. It is great to back to creating cards using my Fun Stampers Journey products.  Since it is Mondy, I decided to check out the  Freshly Made Sketches Challenge.  This week is a simple sketch that allows creative ideas to pop, pop, pop. Here is the sketch:

I decided to jump off in the deep end of the pool by cutting apart my words for the sentiment portion of this card. I just couldn’t resist. I chose FSJ Denim Days as my base cardstock and wave portion from FSJ Under The Sea Prints (PP-0041) 6 x 6 paper pack. I adhered the printed paper onto the Denim Days base. I used my Misti to stamp the sentiment. Since these stamps are deep etched red rubber, I had to work a bit to get a curve right amount of curve in each strip of words. I dusted the Denim Days with my embossing buddy to eliminate any static cling and I stamped the workd using Versamark ink. I sprinkled some FSJ white embossing powder onto the sentiment and heated with my FSJ heat tool. The sentiment reads In the waves of change we find our (front) direction (inside).

I looked up on YouTube how to tie a sailors knot and chose one I thought would look good on this card and place it at the top. This was a super quick and simple card; great to give someone who needs encouragement.

Here is the completed card:

Supplies: Please click here to order supplies to create this project.

Here I am with another weekend creation from our most recent stamp haul at the Heirloom’s Lawrenceville Rubber Stamp & Paper Arts Festival. This card was created with a Pink and Main stamp set called Need Coffee. Here is the package image containing all the stamps (you can click on Pink and Main or the image to check out their shop).


Isn’t this an adorable stamp set. This stamp set was from Cheyenne’s haul. She has been wanting this stamp set since October when she first saw it at Pink and Main’s booth during a different stamp show weekend. As I mentioned in the last post, I like to design a card around a card challenge and well, why not???

The challenge I chose for this card design is Fab Friday 105 card sketch challenge. Here is the card sketch:


There were four of use working on our own variation of this card. We chose our own color palette and embossing folder. I will post Cheyenne’s card at the end of the post. I don’t have pictures of the other cards.

We took our coffee girl and stamped her onto FSJ Whip Cream cardstock using Memento ink. In hindsight, we should have stamped the image using FSJ Black Licorice because the FSJ Fusion Blender we used to blend the colored pencil areas made some of the ink smear. We colored our images with the FSJ Color Burst Pencils. The FSJ Fusion Blender was used with the Blender stumps to smooth the colors together.

I used the FSJ pierced Circle die to create the circle mat out of FSJ Whip Cream cardstock and stamped the coffee cup in FSJ Oatmeal Cookie to add depth and bring interest. I added a touch of Spectrum Noir clear glitter pen to the bunny noses and ears, the steam from the coffee, and the pink sponge curlers. I applied Journey Glaze to the cofee to add a little shine. The sentiment is stamped with VersaMark ink and embossed with white embossing powder on FSJ Black Licorice cardstock.

Let me take a moment to comment on the mat and the red dot embellishment next to the sentiment. The quilted mat was created from FSJ Candy Apple cardstock using a We R Memory Keepers Next Leveling Embossing folder (this one is Cheyenne’s) purchased from Creek Bank Creations. Under the Candy Apple mat is a FSJ Cool Pool mat giving a hint of light blue. The red embellishment dot was created using Nuvo Red Berry Crystal Drops which was purchased from Sparkle and Sprinkle.

Here is the completed card:


Here is Cheyenne’s card (the base mat is FSJ Deep Lilac, the quilted mat is FSJ Cool Pool, the pierced rectangle mat is FSJ Lavender Fusion cardstocks):

Supplies:

You may purchase Fun Stamper Journey products through my FSJ website – click here.

To purchase the embossing folders or Nuvo Crystal Drops go to the vendor name and click on it.

All my close friends know I have transitioned over to Fun Stampers Journey (FSJ) this past September. One of the amazing benefits of purchasing through FSJ are their Bloom Benefits. For every $50 spent, you will receive a Bloom Benefit FREE! This includes ATS (Artist Trading Stamps) as well as dies and embellishments. I have attached a flyer showcasing some of the Bloom Benefits (there are Bloom Benefits in the main catalog as well as the mini-Trends catalogs):

thumbnail of bloom-benefitsv2

I have all the ATS Bloom Benefits from the 2016-2017 catalog. When I saw Paper Craft Crew Card Sketch #213, I knew the Flock Together ATS from the Bloom Benefits would make a perfect card for this sketch.

pcccs213

I used what I had from my FSJ starter Kit and my first order, which is very limited. For the base of my card and the mat I stamped on, I used FSJ – Oatmeal cardstock and matted the stamped portion onto FSJ – Dark Roast cardstock. I used the FSJ – Dark Roast cardstock for the banner and base of the embossed feathers. I stamped the feathers and sentiment in Versa-Mark and embossed with SU! copper embossing powder. I stamped the feathers in FSJ – Pumpkin Bread fusion ink onto the Oatmeal cardstock.  I fussy cut the embossed feathers. I adhered everything together using FSJ – white liner tape and a glue dot. I then added FSJ – twine and sprinkled the Bronze silk onto the card to give it that extra pop. The matted portion of the card is raised with SU! dimensional.

Flock Together

FSJ – Flock Together

Supplies:

Fun Stampers Journey – Oatmeal cardstock, Dark Roast cardstock, Twine, Pumpkin Bread Fusion Ink, Bronze Silk
Stampin’ Up! – Copper Embossing Powder, dimensionals

I haven’t posted anything since before Christmas. A lot has happened between then and now. My sister had a major stroke just before Christmas. She actually died, but thanks to the paramedics who resuscitated her she is doing well with some loss of use to her left arm. She stayed with me while she recuperated and she is now back at her home.

I did keep up with my make-n-take classes during January and the most recent class was a Valentine’s make-n-take class last week. The first class sample card I completed was inspired from Connie Collins’ Global Design card challenge entry (see here. . . .). I had the new SU! Love Blossoms paper pack but I had used a lot of it for a technique class (I’ll post that card next) and knew I didn’t have enough full sheets for a background left. This use of scraps from the Love Blossoms paper pack worked well. I took the coordinating Bloomin’ Hearts thinlit die and cut a lacey heart out of Rose Red card stock and placed a Very Vanilla cut out heart behind it to make the heart stand out from the rest of the busy background.  I used retired SU! Well Scripted set for the word phrase “Love You Much”, which was embossed using silver embossing powder. The flower blossoms were die cut out of the Love Blossoms paper and accented with clear rhinestones.


LoveYouMuch 2016


I made another card using some scraps from SU! Stacked With Love paper pack along with the Love Blossoms paper pack and I think it turned out well too.

Valentine 2016


The other card I’m featuring uses last year’s featured SU! stamp set Wood You Be Mine (it was inspired by Cindy Shuster’s card – see here. . . )? I LOVE the lumberjack from this stamp set. I used the Hardwood background stamp with Basic Gray on Real Red card stock. I then layered a Basic Black mat with the stamped image with a hint of Sahara Sand showing from behind accented with some linen thread. I wanted to make the card look like a balck and white photo with the red heart signifying “love.” I used Smoky Slate for the shirt and Smoky Slate and Basic Gray Stampin’ Write markers to accent the lumberjack. The Wood You Be Mine? tag was stamped on Sahara Sand using Basic Gray. And, some tiny Basic Black hearts were placed at the bottom to balance the card using the Confetti Hearts border punch. Love this Card!


Wood You Be Mine 2016


I made another card very similar to this one, but as a shaker card.

WoodYouBeMineShaker 2016

Supplies Used for Bloomin Hearts cards: retired SU! Well Scripted (not pictured)


Supply List

Built for Free Using:My Stampin Blog

Supplies for Wood You Be Mine Cards: basic gray stampin’ write marker, acetate and foam tape (not pictured)

Supply List

Built for Free Using: My Stampin Blog

This week’s Paper Craft Crew Card Challenge #165 is featuring the Hearth and Home Thinlit set. I mentioned in the previous post I love this set. It is so versatile and just makes the most darn cute cards you have ever seen that I’m entering another card for this challenge. The card sketch is below:

PCCCS-161-204-002

This card was one of September Make-n-Take cards. My stampers love this die set and several of them have purchased it already and others have it on their wish list.

This card, also, features the new SU! Brick Embossing folder. It is an outdoor scene using the Hearth & Home Thinlit set. It looks very much like a Spring card, but I couldn’t help myself; I just had to put flowers in the flower box die that comes with the set.

PCCCS 165 Card 2

I matted the entire card with a thin layer of Basic Black to make the Cherry Cobbler brick wall stand out. I gave it a worn look by adding Very Vanilla Craft Ink to the embossing folder and then running the mat through the Big Shot. The flowers and leaves were made using punches. The grass was cut out with a die (it might have come from My Favorite Things – I’m not sure since I purchased it from one of my stampers who was getting rid of their stash). The shade was punched with a retired ribbon type punch from Stampin’ Up!. I love this card and I hope you do too.

Supplies:


It seems like a long time since I have posted. I have been sick plus super busy. The last make-n-take we had at my house featured the card below.  It is using the new SU! Woodland Textured embossing folder. Here is the card:

SUO #130

This is a super simple card to make. I used a brayer to roll Crumb Cake onto the inside flaps of the Woodlands embossing folder. I then placed a piece of Very Vanilla card stock into the folder and ran it through my Big Shot. I cut a wreath out of SU! Color Me Autumn DSP. I cut out the leaves with a retired BigZ die (can’t remember the name) and ran them through various SU! embossing dies (it doesn’t matter which dies you use, just something to give the leaves texture). I printed out “hello” in a color close to Elegant Eggplant, which is the color of the card stock used to mat the embossed Very Vanilla.

Supplies: **Note: I added the current Leaflets Framelits and Acorn Builder below, which can be used to substitute for retired product I used on my card.

Price: $12.50

Price: $110.00

Supply List

Built for Free Using: My Stampin Blog

One of my friends asked me to make a birthday card for his wife. I asked him what she liked and he responded her favorite colors were white, navy, and gold and she liked geometrical shapes. I began to think how I could incorporate the geometric shapes into the card design. I remembered geometric shapes were a feature of her wedding decorations and they reminded me of diamond, like the jewel, shapes. I did not have a stamp set of geometric diamond shapes, but I knew where I could purchase one . . . at the Duluth Scrapbook Expo.

My friends Cheyenne, Kevin (she is a female with a guy’s name), Robbi, and her friend Cindy attended the expo somewhat together, meaning Cheyenne and I were together and briefly encountered Robbi and Cindy. Kevin attended the Thursday night Make-n-Take (well worth the $$ spent), and she took a scrapbook class with us on Friday.

Anyway, back to the stamp set. I found only TWO out of a center full of stamps, glitter, ribbon, embellishments, dies, etc., etc., etc. . . . . . I went with Pink and Mains geometric stamp set. Here’s a picture and link to Pink and Main website:

www.pinkandmain.com

www.pinkandmain.com

I got busy and made a blinged out card for his wife incorporating all of her favorite colors and shapes. I used Whisper White as a base, I used SU! Brushed Gold paper, along with Night of Navy, and glimmer paper while embossing the birthday stamped image and the geometric bling shapes with gold embossing powder. I accented the geometric shapes with diamond rhinestones. I posted two different photos but neither one captures the “bling” effect of the gold paper, gold embossing, and rhinestones. Personally, I was very excited to give the card to my friend. I really think this card turned out awesomely well.


Anisha Bday

Anisha Bday

Supplies: (not pictured – Pink and Main stamp set “Bling”

PAGE TOP
[dealsbar preview] Amazing Deals: !!toolbar-deal-title!! - !!toolbar-deal-merchant!!