Tag : whip cream

8 posts

Can you create a one layer card? For those who like clean and simple this might be an easy task, but for me, it is a challenge. I love to create a lot of depth and dimension on my papercrafting projects. This means layer upon layer of mats and the stamped images are often raised using FSJ foam squares, not to mention embellishments such as Rainbow Drops, ribbon, twine, clips, etc. . .

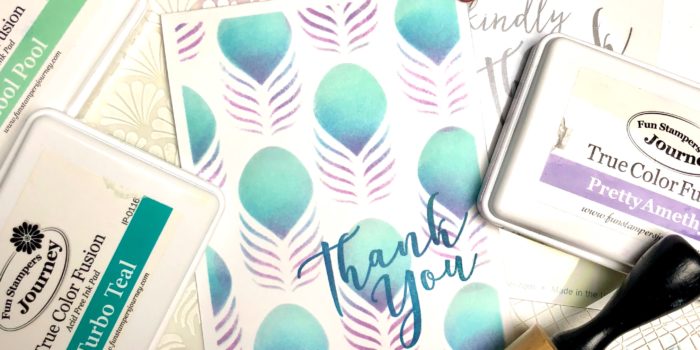
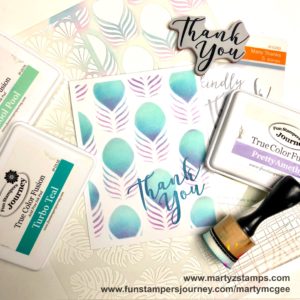
When Christine Pennington called her Bloomin’ Buddies to take part in a one layer card challenge, I jumped on board. I needed a quick and simple thank you card to place in the envelope with my Ebay sales of retired stamps and dies. I immediately knew our NEW Wallpaper stencil from our NEW Inspiration Book and Catalog would make a beautiful card (click here to order). To begin the project, I chose fusion inks which would blend together nicely. They are Cool Pool, Turbo Teal, and Pretty Amethyst (if you want a darker shade of purple, you can choose Lavender Fusion).

I began by cutting my Whip Cream cardstock into 5 1/2″ x 4 1/4″ rectangles.  I placed the stencil onto the cardstock and using my large dowels I began applying color.

TIP: To keep the cardstock and stencil from moving, place a rolled piece of washi tape on the backside of the cardstock and place onto your stamping surface, add washi tape onto the stencil to hold it in place.

TIP: Use the small dowels for better application management; otherwise, tilt the large dowel back towards you to apply a small amount of color at a time.

Apply the Pretty Amethyst with the sponge dowel starting from the bottom of the image and going up about a third of the way. Using a different sponge, apply the Turbo Teal from the top of the Pretty Amethyst and to a little above the mid-point of the image. Finish sponging the image with Cool Pool (use a different sponge). Go over the entire image with Cool Pool to help blend all colors seamlessly.

TIP: Since Turbo Teal is a deep, rich ink, dab off some of the ink before apply.

Once all the color has been applied, add a sentiment of your choice. That’s all there is to it. I was able to create approximately 20 cards in an hour. Here is the finished project.
 

Product List

For this week’s Freshly Made Sketches #278 challenge, I made a variation of this month’s Make It Class card to meet the sketch challenge (I will post this month’s Make It cards on another post). Here is the FMS #278 sketch:

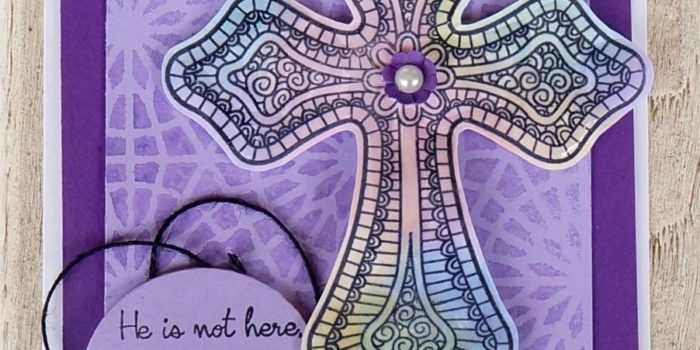
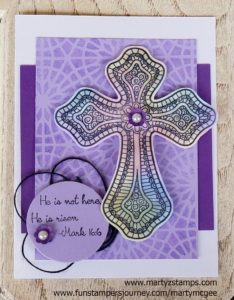
I had created a cross card from a video/demo Richard Garay had for FSJ coaches using a special technique to create a stained glass effect. I began by stamping the cross from FSJ Color Cross stamp set onto FSJ Whip Cream cardstock using Black Licorice ink. After I stamped the image, I took the solid flower stamp from FSJ Be Happy stamp set (note: any solid shape would work) and stamped it into various colors of ink (one at a time) then stamping onto the cross (you can go out of the lines because the cross will be cut out). I used the following Fun Stampers Journey inks to create this stained glass effect (Bubble Gum, Sweet Pear, Banana Cream, Pool Party, and Pretty Amethyst). Note: If you try this technique, make sure to clean your stamp off after each inking because the black ink sometimes comes off onto the stamp. This will help eliminate any frustration if colors bleed and become muddy/murky). Once I finished stamping, I cut the cross out and applied Journey Glaze to give it a little shine. Set the cross aside to dry.

I created the patterned mat by placing the FSJ Starburst stencil on top of the piece of FSJ Pretty Amethyst cardstock. In a FSJ Media Mister, I combined one squirt of FSJ Sweet Berry Splash and one squirt of FSJ Blue Lagoon Splash and filled with water to create the purple mist. I spritzed the paper with the purple mist and immediately applied a paper towel to the stencil to soak up any excess liquid. This created another stained glass effect for the card.
I used FSJ Deep Lilac for the back mat. I layered the patterned mat on top. I adhered the cross with FSJ Foam Squares (medium). I stamped the sentiment onto FSJ Pretty Amethyst cardstock and die cut a circle from the stamped cardstock. I placed a loose loop of black twine behind the circle sentiment and adhered the sentiment with FSJ Foam Squares (medium) as well. For the final touch, I punched two small flowers from the FSJ Summer Pretties punch. I curled the edges and applied a peal accent to the middle. They were adhered to the card project with FSJ liquid glue.

Here is the final project.

Supplies:

Fun Stampers Journey (click here to order)

Stamps: Color Cross Bundle, Be Happy
Cardstock: Whip Cream, Pretty Amethyst, Deep Lilac
Inks: Black Licorice, Bubble Gum, Pool Party, Pretty Amethyst, Banana Cream, Sweet Pear
Accessories: Black Twine, Journey Glaze, Pearl Accents, Circle Die, Starburst Stencil, Media Mister, Sweet Berry Splash, Blue Lagoon Splash

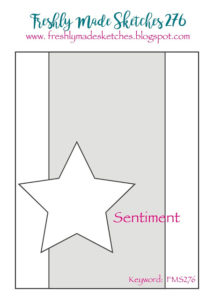
You know how you purchase a stamp set because it’s so cute; and, then it sits unopened, unused for several months? Well, if you don’t, I do. The stamp set I used today was purchased back in September 2016, and I just pulled it out and used it for the Freshly Made Sketch #276 card challenge. Here is this week’s sketch:

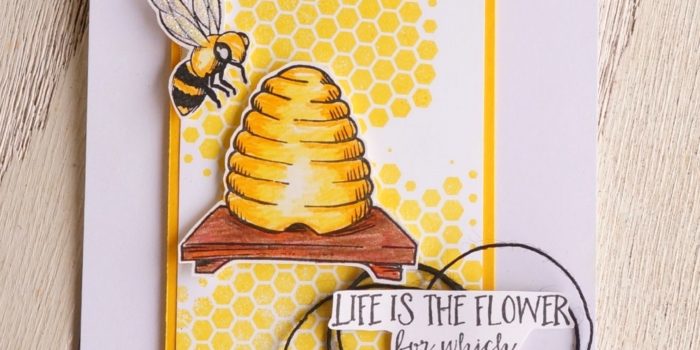
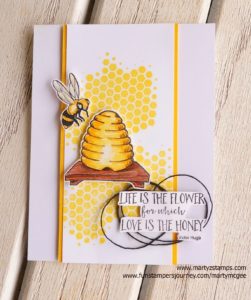
I chose Fun Stampers Journey Hey Honey stamp set to create this simple and quick adorable card. I stamped the images on FSJ Whip Cream cardstock using FSJ Black Licorice ink. I colored the beehive and the bee with FSJ Color Burst Pencils. I used for the hive – 015, 016, 017; hive base – 039 with 040 colored on top; bee – 015, 016, 017 and a touch of gray on the wings and eyes. I added a little glitz to the bee’s wings with FSJ Sparkle Dust. The honeycomb background is stamped using FSJ Lemon Drop ink with the FSJ ATS Honeycomb stamp. The center strip is accented on either side with FSJ Summer Days cardstock. All stamped images are popped up using FSJ Foam Squares (medium and small). The sentiment has a looping of FSJ Black Twine behind it. A great card to make for beginners as well as seasoned card makers.

This project was created using Fun Stampers Journey products. If you would like to purchase any of the supplies listed above click here.

The theme challenge for Paper Craft Crew #230 is “LOVE”.

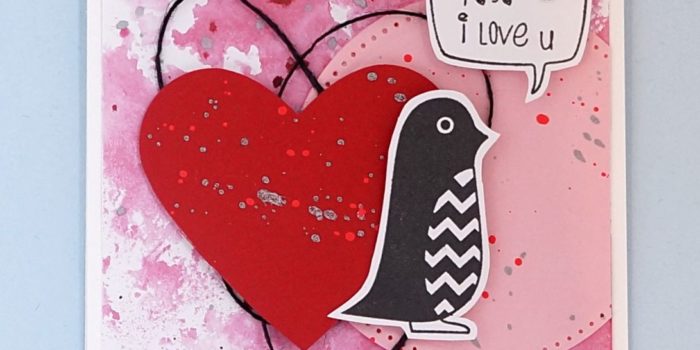
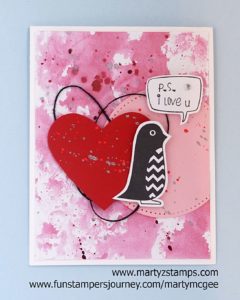
I have the perfect card for this theme. It is super cute and adorable. It features a cutie patootie peguin with the sentiment “P.S. i love u.”
This card was created for my Make-It Card Class, and it was a favorite design. The base of the card is FSJ Whip Cream. The background mat was created using FSJ Sweet Berry splash, Cranberry Bliss, Outrageous Pink, and Silver silks. To the background mat, I added a FSJ Bubble Gum pierced circle mat with a FSJ Cranberry Bliss die cut heart splattered with the same silks used on the background mat. The heart is accented with a looping of FSJ Black twine. The penguin is a FSJ P.S. ATS (Artist Trading Stamp). Both images were stamped using FSJ Black Licorice ink onto FSJ Whip Cream cardstock. They were both fussy cut leaving a 1/8″ border around the images. The heart, the penguin, and the sentiment are popped up with FSJ Medium Foam Squares.

This was a quick and simple Wow card creation.

Supplies:

Fun Stampers Journey products – To order click here.

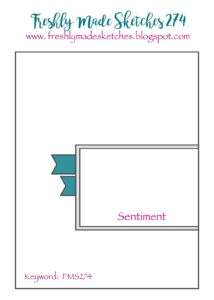
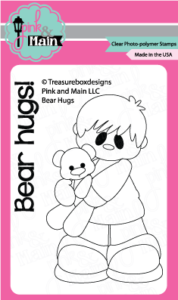
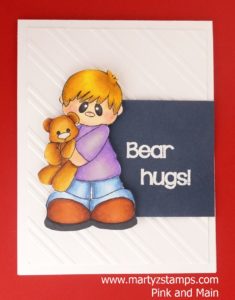
This week’s Freshly Made Sketches #274 card sketch is the perfect sketch to showcase Pink and Main’s Bear Hugs Stamp Set. Here is the sketch:

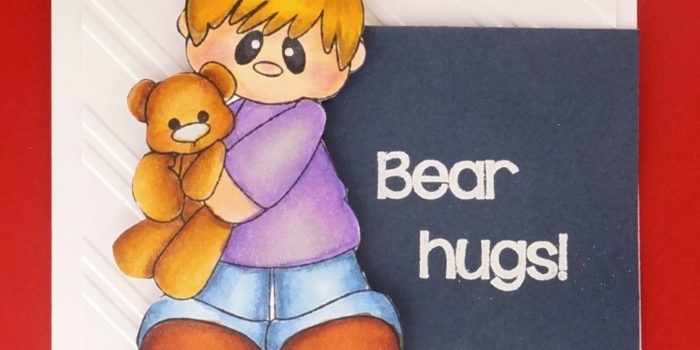
When I am creating a card for a challenge, I first look at the card sketch and then go through my stamps to determine which stamp would best fit the card sketch design. As I mentioned in the opening paragraph, I chose Pink and Main’s Bear Hug stamp set featuring an adorable boy with his teddy bear.

I stamped the images onto Spectrum Noir cardstock using Memento Tuxedo Black ink. I colored the boy and bear with my Spectrum Noir markers. Here are the color combinations: Hair – LV1, CT4, GB3, GB6, GB10; Skin – Fs2, FS3, FS6, TN2 and FS8 for cheek color; Shirt – LV1, CG1, HB3, HB2; Bear – TN2, TN3, GB6, GB10, TN6, TN9; Pants – TB2, TB3, TB8; Shoes – TN4, TN7, TN9. He turned out so cute.

I cut a FSJ Whip Cream mat to 5 1/8″ X 3 7/8″ and ran it through my Big Shot with a diagonal stripe embossing folder (SU!). I cut a small mat out of FSJ Denim Days and stamped the sentiment on it using VersaMark ink and embossed using white embossing powder. I popped the boy and bear image out using FSJ Medium Foam square. A simply adorable card.

Supplies:

Fun Stamper Journey – www.funstampersjourney.com/martymcgee
Pink and Main – www.pinkandmain.com
Spectrum Noir Markers – www.consumercrafts.com

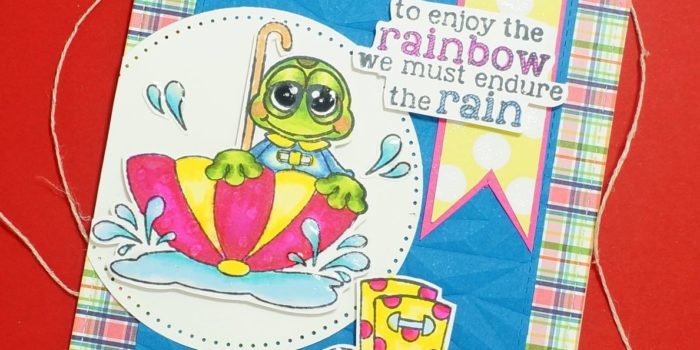
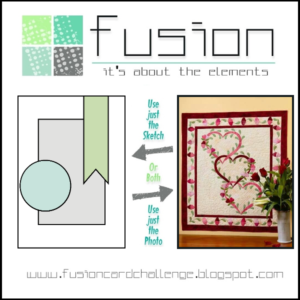
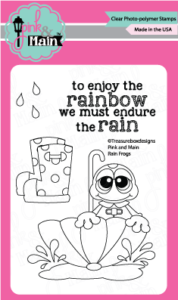
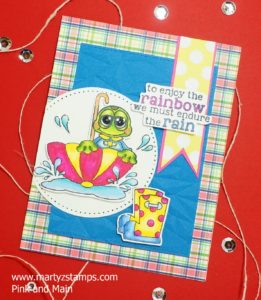
Here is the post featuring the last of the three cards we made this weekend. I used the card sketch from the Fusion Interlocking Hearts Card Challenge. This design features Pink and Main Rain Frogs stamp set. This set is just too cute. Here is the sketch and the image of the stamps in the Rain Frog set:


The frog and umbrella, rain boots, and sentiment were stamped on Spectrum Noir cardstock with Memento Tuxedo Black ink. The images were colored with Spectrum Noir markers. I will admit I didn’t write down the colors I used but I think I can give a good guess as to which ones I used.

The frog – DG1, DG2, DG3, DG4. The umbrella – TN2, TN3, CT1, CT4, DR1, BP5. The raincoat and raindrops – TB1, TB2, TB3, IB1, IB2. The rainboots – CT1, CT4, DR1, BP5, TB1, TB3, TB8. The words – BP5, TB2. The frog and rainboots were cut out using a Brother Scan n Cut 2. The sentiment was fussy cut. All images were popped up using FSJ Foam Squares. The base printed cardstock and the yellow with white polka dot banner were from a Pink and Main paper pack. Love the designs. The circle mat was cut using a FSJ pierced die from FSJ Whip Cream cardstock. The embossed mat was cut from FSJ Huckleberry Fusion cardstock and embossed with a We R Memory Next Leveling embossing folder. Both mats were die cut with stitched rectangle dies (one from Simon Says and the other from My Favorite Things). The banner was matted on a piece of FSJ Watermelon Fusion cardstock. Last but not least FSJ Journey Glaze was added to the raindrops and puddle as well as the toes of the rainboots.

So cute!

Supplies:

You may purchase Fun Stamper Journey products through my FSJ website – click here.

To purchase the embossing folder click here or Pink and Main click here.

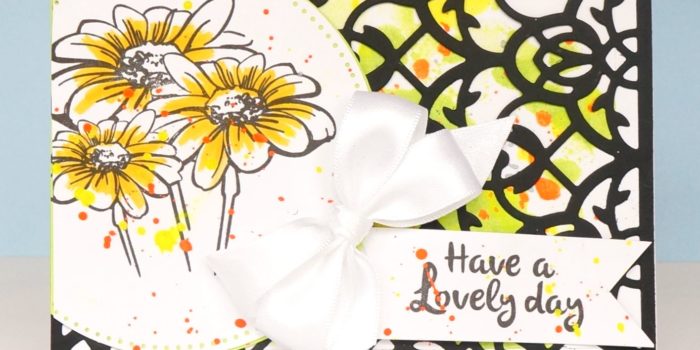
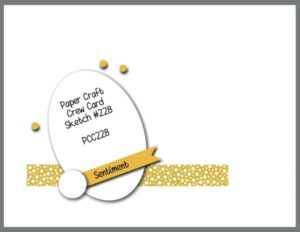
This week’s Paper Craft Crew Challenge #228 is such a great and unique card sketch. It really allows a papercraft artist to think beyond the box. I decided to enter two cards I recently designed for my January Make It based on is this week’s sketch:

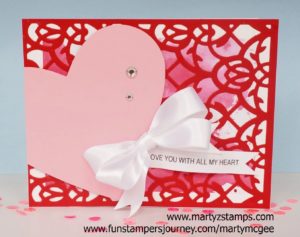
I had created a heart card for January’s Make It class, but one of my good friend’s, Julianne, really needed a card design for a friend on the mend. Her friend has been a garden club member for a long time, and we decided to take the heart card design, change the cardstock colors and change the stamped image.

Here is the Make It heart card:

The card base is Fun Stampers Journey Whip Cream, there is a 3 1/2″ x 4 3/4″ Whip Cream mat with a watered down application of FSJ Sweet Berry Splash. The red mat is cut from FSJ Cranberry Bliss cardstock using the FSJ Persian Garden die (note: it’s best to use a precision plate to have the die cut efficiently). The heart is die cut from FSJ Bubble GUM cardstock. The bow is SU! white silk ribbon tied into a double knot (yes, I love those double knots). The wording was printed onto Whip Cream cardstock from a Word documents and cut into a banner. The heart is accented with FSJ rhinestones.

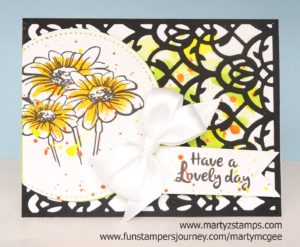
The Daisy card is below:

The base is FSJ Whip Cream with the same Whip Cream Mat mentioned in the heart description, but it was created using the FSJ Electric Lime Spash and then accenting with FSJ Sour Lemon and Orange Rave Silks. The cardstock used with the Persian die is Black Licorice. I stamped the Lovely Day Daisy in Black Licorice on Whip Cream cardstock and ran it throught the Platinum machine using the Pierced Circle dies. The double bow was created out of SU! white silk ribbon, and the sentiment was stamped onto Whip Cream and cut into a banner. The stamped images are accented with Orange Rave and Sour Lemon Silks. I LOVE those silks.

I know Julianne’s friend will love this card when she receives it.

If you would like to purchase any of these products, please click here.

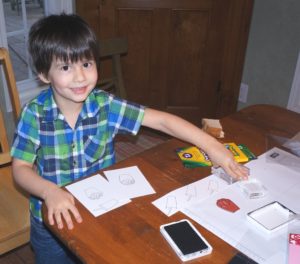
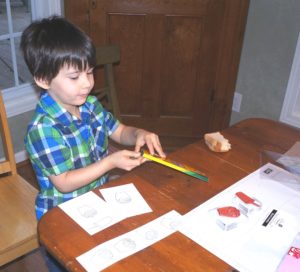
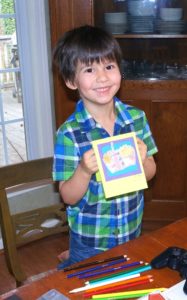
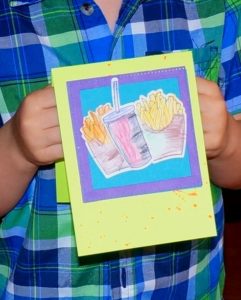
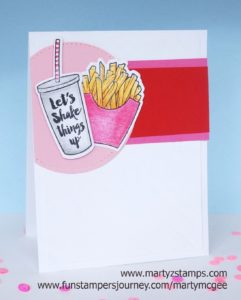
I have had this brand new bundle “Fry Friends” from Fun Stampers Journey sitting around for the last three weeks. Last night, my best bud spent the night, and when we got up this morning, I said, “Do you want to make a card?” Of course he said, “YES!” So, I pulled out Fry Friends and he chose the shake and fries along with the sentiment. He wanted to make his card for his friend, Gloria. Here he is working away.

Here is his finished card.

He is very excited to give her this handmade card.

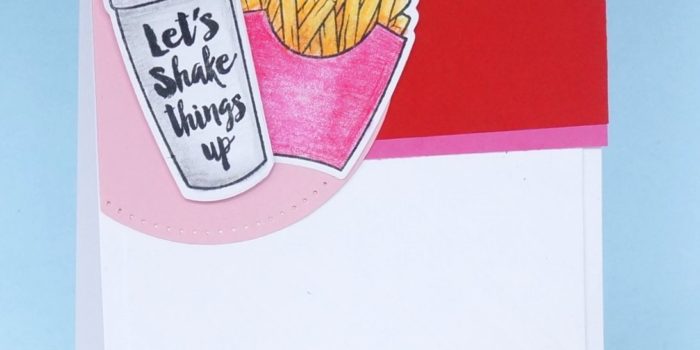
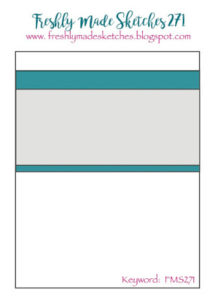
My card design was based on Freshly Made Sketches Card Challenge #271. Here is the card sketch:

I had some scraps let over from my recent Make It classes and pulled together a simple and cute card for someone special. The base of the card is FSJ Whip Cream as well as the 5 1/8″ x 3 7/8″ mat. The mat has been scored diagonally (my photography skills do not showcase the diagonally scored lines, but they are there). The strips of paper are cut from Watermelon Fusion and Cranberry Bliss FSJ cardstock. The pierced circle is cut from FSJ Bubble Gum cardstock with FSJ pierced circle dies. The fries and shake are colored with FSJ Color Burst Pencils. This is a super quick card to make on the go.

I think this would make a great Make It card for either a class or a party.

All supplies can be purchased from www.funstampersjourney.com/martymcgee

PAGE TOP
[dealsbar preview] Amazing Deals: !!toolbar-deal-title!! - !!toolbar-deal-merchant!!