Tag : cards

110 posts

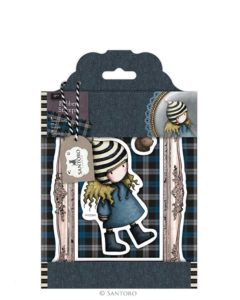
This past weekend I attended Heirloom’s Lawrenceville Rubber Stamp & Paper Arts Festival. Friday night I attended the Design & Treasure Make-n-Take with some friends. Saturday we went shopping! I was in search of some stamped images for my Spectrum Noir coloring class held at the end of this month which will feature coloring fabric/clothes. I came across the Santoro stamp sets at the Creek Bank Creations vendor booth. The stamps they featured were large with open areas to color and practice blending techniques. Here is the Santoro Tweed – The Friendly Hedgehog stamp set:
Four of us got together Sunday and made several creations using some of our recent stamp haul. While the other ladies finished their Pink and Main cards, I decided to work on my sample of this stamped image for the Spectrum Noir class at the end of the month. I also like to kill two birds with one stone, so I looked at the online card challenges available this week and decided to enter my card creation for CASology Week 234 – Youth challenge.

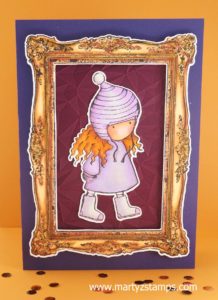
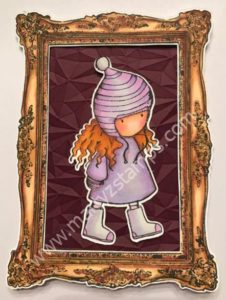
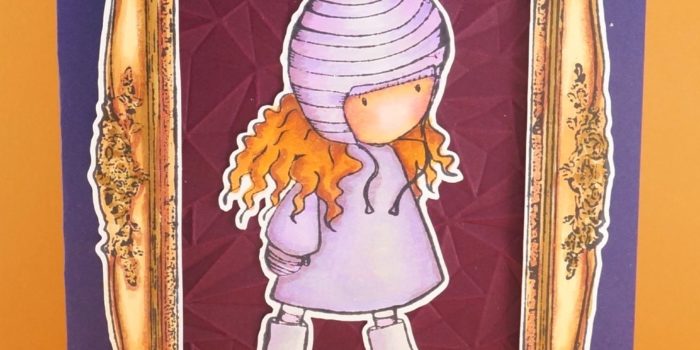
I had already stamped the images using my MISTI the night before. I chose Spectrum Noir cardstock and inked the images with Memento Tuxedo black ink. The ladies around the table wanted a sepia/lavender colored card; therefore, I chose the following colors. I began with the frame and used Spectrum Noir TN1, TN3, TN9, and GB10. Next, was the hat and clothing on the adorable girl. I used IG1, LV1, LV2, and HB1. As usual, I colored the hair a reddish/auburn color. I didn’t want to go too brunette because I felt the hair would blend in too much with the other colors. I wanted a little pop of color against the muted shades. I chose TN2, TN3, TN4, TN9, and OR1. Last but not least was her face. I used FS6, HB3, TN3, and FS8. The colored images are simply stunning.  Once everything was colored, I cut the images out using Cheyenne’s new Brother Scan and Cut 2. I did have to cut the inside of the frame by hand but I’m sure there’s a way to do this with the cutter.

The finished card ended up being a 5 x 7 card because the frame is almost that large. I took some SU! retired Grape cardstock for the base (I can’t remember the name other than Grape). The mat is SU! Rich Razzleberry which I embossed with one of my new We R Memory Keepers Next Leveling Embossing folder. I LOVE that folder design!!! Contact Creek Bank Creations to purchase one for yourself. The frame is popped up using two layers of foam tape and the girl is adhered using FSJ White Liner Tape.

Here is the finished card. It is just too cute.

Just for comparison, I’ve added Cheyenne’s photo taken with her iPhone before the card was assembled. It’s amazing how colored cardstock and lighting make a difference in the same completed image.
Thanks so much for dropping by!

 

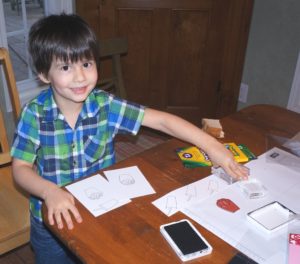
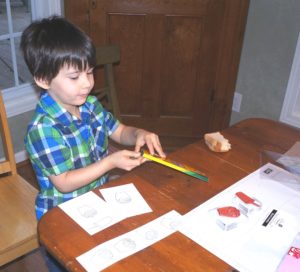
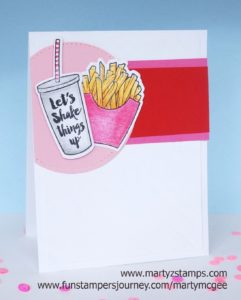
I have had this brand new bundle “Fry Friends” from Fun Stampers Journey sitting around for the last three weeks. Last night, my best bud spent the night, and when we got up this morning, I said, “Do you want to make a card?” Of course he said, “YES!” So, I pulled out Fry Friends and he chose the shake and fries along with the sentiment. He wanted to make his card for his friend, Gloria. Here he is working away.

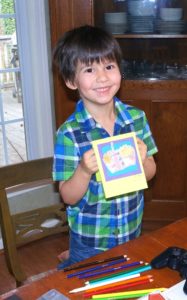
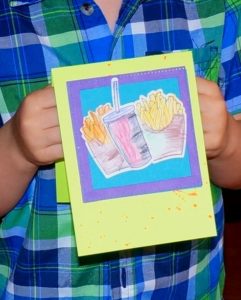
Here is his finished card.

He is very excited to give her this handmade card.

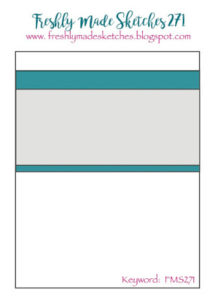
My card design was based on Freshly Made Sketches Card Challenge #271. Here is the card sketch:

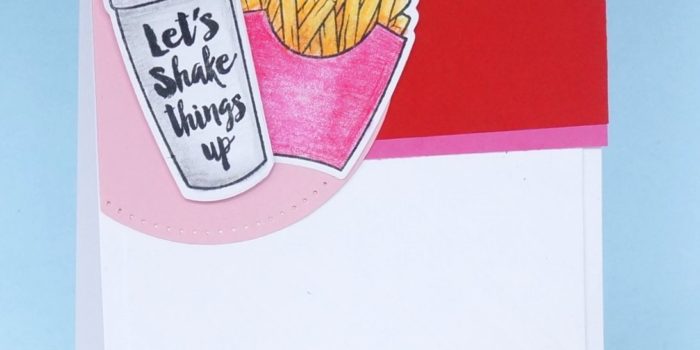
I had some scraps let over from my recent Make It classes and pulled together a simple and cute card for someone special. The base of the card is FSJ Whip Cream as well as the 5 1/8″ x 3 7/8″ mat. The mat has been scored diagonally (my photography skills do not showcase the diagonally scored lines, but they are there). The strips of paper are cut from Watermelon Fusion and Cranberry Bliss FSJ cardstock. The pierced circle is cut from FSJ Bubble Gum cardstock with FSJ pierced circle dies. The fries and shake are colored with FSJ Color Burst Pencils. This is a super quick card to make on the go.

I think this would make a great Make It card for either a class or a party.

All supplies can be purchased from www.funstampersjourney.com/martymcgee

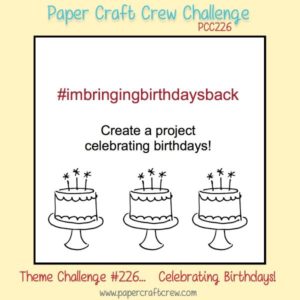
This week’s Paper Craft Crew Challenge #226 is a Birthday theme card. Here is their card sketch:

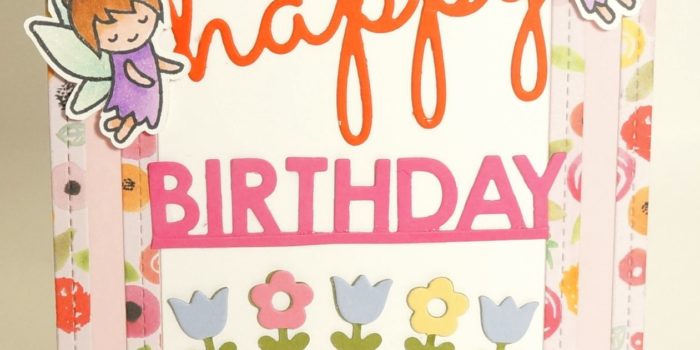
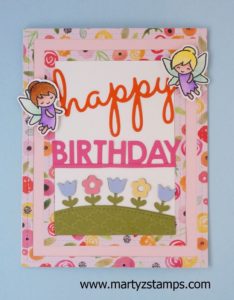
A week and a half ago, I went over to my friend’s house to help her set up her new Brother Scan-n-Cut. Once we had it working to scan and cut out stamped images, we made a card using the Lawn Fawn fairies we had just cut out. We colored the fairies using Spectrum Noir Alcohol Markers. The designer paper is from a paper stack (I think it is Penny Black – not sure). The “happy BIRTHDAY” is cut from a My Favorite Thing die set out of Fun Stampers Journey cardstock (this was cut out at a later date at my house). The grassy hill and flowers are cut from the Lawn Fawn coordinating dies that work with the Fairy set and the hill is embossed using a SU! embossing folder. The cardstock mat is SU! cardstock as well as the grassy hill and flowers.

As we were working on our cards, I became extremely nauseated and left to go home (not realizing I had left my unfinished card project). My friend, Cheyenne, brought it over and gave it to me to finish, but she didn’t realize I had not stamped the sentiment on my card; so, we had cut out the “happy BIRTHDAY” for a card Cheyenne was making for a friend and it just didn’t fit what she was creating and it was pushed aside. A few days later, I was going through my cards that needed to be completed or updated to sell on my Etsy shop and I thought this “happy BIRTHDAY” would work wonderfully on my card. Voila! It did and here it is:

What a cute, adorable card to give someone special on their special day!
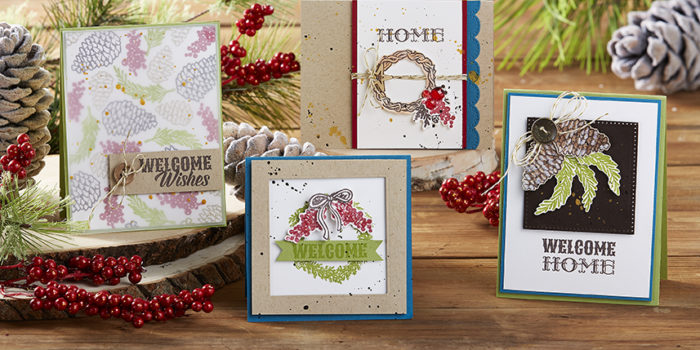
I can’t say this enough, but I really, really love Fun Stampers Journey Bloom Box monthly card kit. I have made a variety of beautiful cards with the December kit. Of course, my group of Bloom Box Girls take the step-by-step instructions and make our own version of the card designs provided in the kit. The official promotion picture of the assembled cards from the December kit is below:

Each kit provides a unique technique, which is a great way to expand your creativity and apply this knowledge to other amazing creations you make.

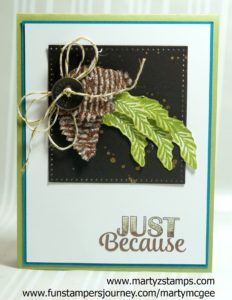
Here is our first card we made with our December kit:

We decided to add another two branches to the bough, and a small pinecone to the this card. We used the Just Because ATS to add a sentiment.

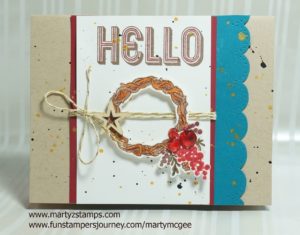
Card #2:

We used our FSJ Color Burst Pencils to color the stamped wreath image. The only change is the sentiment of “Hello” from the FSJ Be Amazing stamp set.

Card #3:

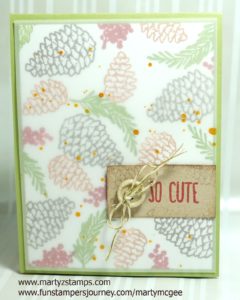
Using vellum over the stamped card images adds a touch of elegance to an already beautiful card. We changed the sentiment and used the “So Cute” from the ATS So Cute stamp.

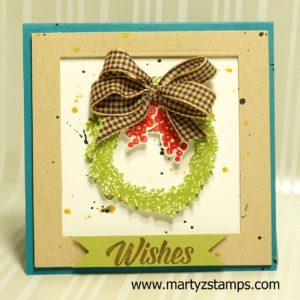
Card #4:

This is such a cute card. We stamped our wreath onto the base and stamped another image onto some FSJ Whip Cream cardstock. We fussy cut it out (the center and the outside), added some Journey Glaze to the berries and made a double bow. Oh yes, by the way, I love the wow factor a double bow gives a card creation.

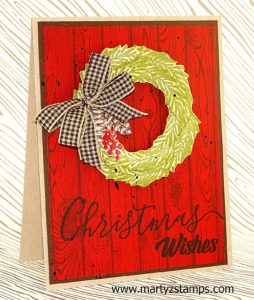
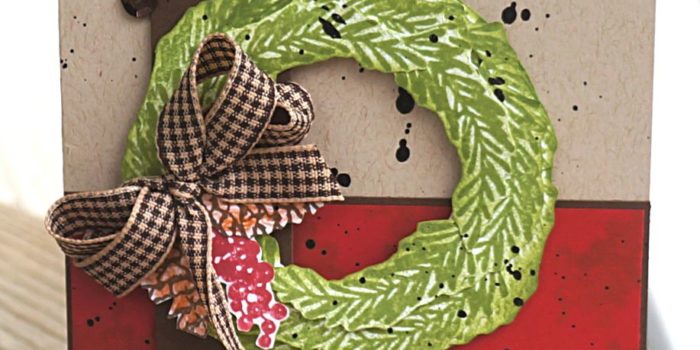
Here are two more cards I made using this set. The wreath on the Oatmeal Cookie and Cranberry Bliss background was a Top 3 pick at Paper Craft Crew website. The other card I made using a SU! woodgrain background stamp and the Christmas sentiment from the FSJ Holiday Script. I did have to use my MISTI to stamp the sentiment about 5 to 6 times to get a good enough impression on the busy background.
         

It is not too late to sign-up for the December Bloom Box and  5 more months of Bloom Box card making kits.  You can go to my website and order the kit here.

Whoo hoo, I made top three on Paper Craft Crew Challenge #222. I am super excited about this pick because I used my Fun Stampers Journey, December Bloom Box stamp set Welcome Wreaths to make this card. I absolutely love this stamp set and the kit as well. Here is the winning card.

I wanted to keep everything about this card FSJ, and I did except for the sequins. I just haven’t acquired enough FSJ bling, . . . . . yet.  If you click the picture, you will be redirected to the original post.

I love everything about Fun Stampers Journey and I can’t wait to make more amazing cards using their products.


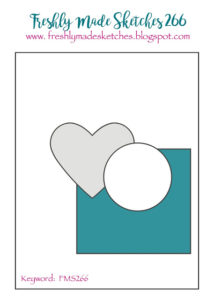
It is another week with a wonderful card sketch challenge from Freshly Made Sketches #266. Here is their challenge sketch:

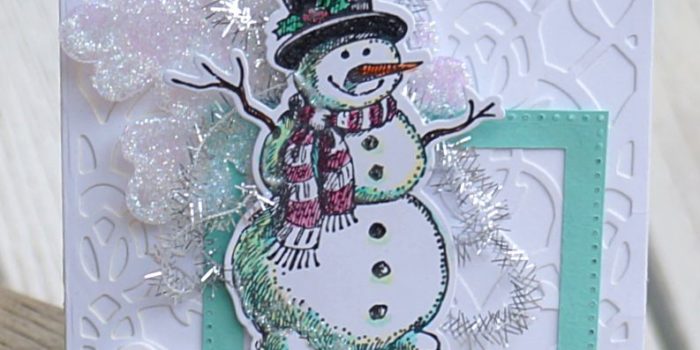
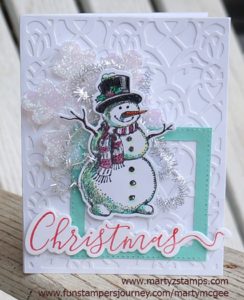
I wanted to take advantage of the Christmas season, yet again. I pulled out my Fun Stampers Journey (FSJ) Frosty Fun ATS and coordinating die to use on this challenge. As I was pulling this card together, I tried various colors of cardstock for the background, but every color I chose took away from the Frosty Snowman stamped image. I realized I had the perfect background die I received this past Friday from Fun Stampers Journey. It is the Persian Gardens die. I cut the base and the background die cut out of FSJ Whip Cream cardstock. I adhered the die cut onto the base using FSJ Craft glue which dries in a matte finish.

In place of the heart image, I took a large snowflake from the FSJ Snowflake Elements and applied Journey Glaze to the snowflake and then covered it with Sparkle Dust. I burnished the Sparkle Dust onto the snowflake with my finger. I cut the square piece out of FSJ Cool Pool cardstock with the FSJ Square pierced dies. I adhered both of these accents to the card with the FSJ craft glue. I stamped Frosty Fun onto FSJ Whip Cream with Black Licorice ink and colored him with FSJ Color Burst Pencils. For the circle element, I replaced it with some FSJ Tinsel Trim. I popped Frosty out with Journey Foam Squares (medium). I stamped the Christmas sentiment from FSJ Holiday Script with coordinating die in Cranberry Bliss ink and die cut it out. I adhered it with Journey Foam squares.

This is a cute card to give to a friend or family.


Supplies:

Fun Stampers Journey (all products used can be ordered through my FSJ website – click here).

Stamps: FSJ Frosty Fun (ATS – artist trading stamp) with coordinating die
Cardstock: FSJ Whip Cream, FSJ Coo Pool
Ink: FSJ Black Licorice, FSJ Cranberry Bliss
Dies: FSJ Square Pierced Dies, FSJ Persian Gard Die, FSJ Frosty Fun die
Coloring: FSJ Color Burst Pencils
Ribbon: FSJ Tinsel Trim
Miscellaneous: FSJ Foam Squares, FSJ Snowflake Elements, FSJ Craft Glue, FSJ Journey Glaze, FSJ Sparkle Dust

My little kiddos love to play any type of Super Hero. It can be Captain America, Wonder Woman, Super Girl, Superman, Batman, and it goes on and on. This was the reason I purchased Darcies Super Heroes rubber stamp set at the Stamp and Scrapbook Event back in September. I stamped the images when I got home and colored them with my brand new Fun Stampers Journey (FSJ) Color Burst Pencils, and then they have been moved between the kitchen and craft room many times until today.  I, finally, took the time to make a card with my buddy, Jacob, because he asked me to make a card with the super hero images he found laying around last week in my office. I suggested he make a card with his image, and I would make a card for my super hero girl, Sam.

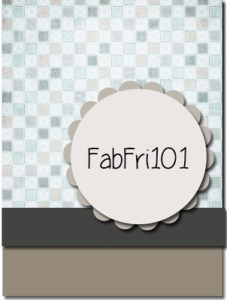
I chose my layout based on Fab Friday’s Sketch Card Challenge #101. Once I got started, the card fell right into place. Here is their sketch:

fabfri101

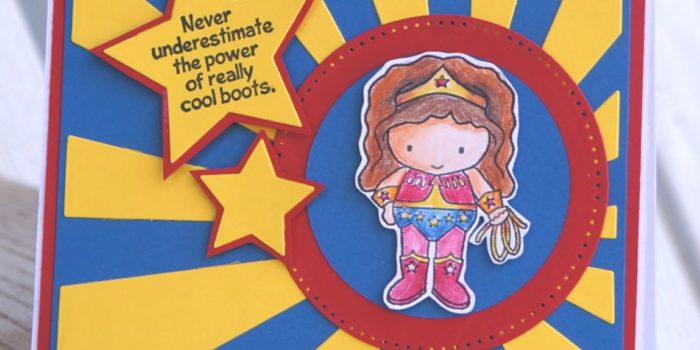
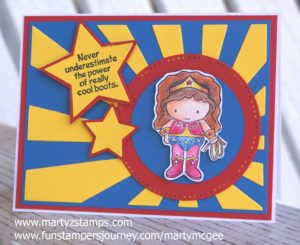
The base of the card is FSJ Whipped Cream with two mats on top of it FSJ Cranberry Bliss and FSJ Catalina Splash cardstocks.   I took some FSJ Lemon Drop cardstock and using the FSJ Sun Rays die I ran them through the FSJ Platinum Machine. I DID NOT punch out the negative of the cut image, instead I applied adhesive to the backside of the pieces still in the die and carefully tuned the die right side up (the cardstock is on the bottom side of the die) and centered it on the FSJ Catalina Splash mat. I pressed each piece down and then lifted the die creating a negative image sun ray onto the mat. Using FSJ Circle dies, I cut a large pierced circle out of FSJ Cranberry Bliss cardstock and a smaller circle out of FSJ Catalina Splash cardstock and layered them over the negative image of the die circle. The final step involved me stamping the sentiment onto FSJ Lemon Drop cardstock and die cutting them out with FSJ Star dies. Since they blended into the background, I matted them onto FSJ Cranberry Bliss cardstock. The Super Hero girl is raised using FSJ Foam Squares. I LOVE THIS CARD! Sam wanted to hold her card, and I said no – LOL. How ’bout we get a picture of you in a super hero costume, and we can make a scrapbook page to keep for a long time? That sounded good to her – wow, missed that bullet of the card, more than likely, getting torn up and/or mutilated.

Here is the card:


fabfri101_01


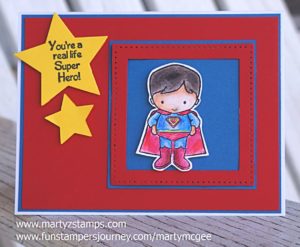
The next card is Jacob’s creation. I helped to adhere everything and the image was already stamped, colored, and cut out, but he directed where everything needed to be placed. He did place his stars into position.  I suggested a couple of thin Catalina Spash strips a little more than half way down and he nixed that idea. He’s just keeping it simple! He is my super hero.


fabfrixtra_01


Supplies: If you would like to order any of the Fun Stampers Journey products, please click here .
Stamp Set – Darcie’s JCS281
Coloring Tools: Fun Stampers Journey Color Burst Pencils with Fusion Blender and Blending Stubs
Cardstock: Fun Stampers Journey – Cranberry Bliss, Catalina Splash, Lemon Drop, Whipped Cream
Dies: FSJ Sun Ray Die, FSJ Circle Dies

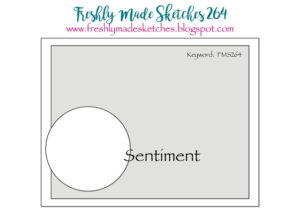
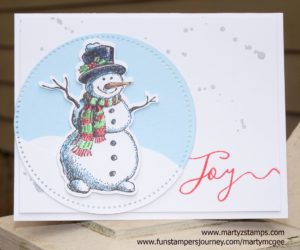
Thanksgiving is over, and I’m on track this week to posting some card challenges. The first one of the week is Freshly Made Sketches #264.

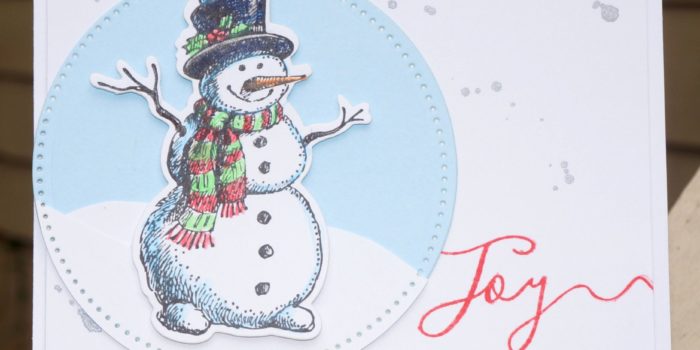
I have the perfect stamp to make a super cute and simple card. It is Fun Stampers Journey (FSJ) ATS (Artist Trading Stamp) Frosty Fun and its coordinating die.  I stamped Frosty in FSJ Black Licorice ink onto Whipped Cream cardstock. I colored him with FSJ Color Burst pencils. Once I finished coloring him, I cut him out with his coordinating die. The circle is cut out with the FSJ pierced Circle Dies using FSJ cardstocks Pool Play and Whipped Cream. Frosty is attached using FSJ Foam Squares (medium). I accented the background with FSJ Silver Splash and added a sentiment in FSJ Candy Apple ink using the word “Joy” from the Holiday Script stamp set. Here is the main attraction:


All supplies used are from Fun Stampers Journey. If you would like to create this card for yourself, please feel free to check-out my FSJ website to place an on-line order (click here).

Every year I host an opportunity for my stampers to make Christmas cards to give to friends and family. This year was no different. I chose three Fun Stampers Journey stamps to highlight for this Make-It opportunity. The first card was featured in a previous card challenge post. I chose the Frosty Fun ATS (Artist Trading Stamp) and coordinating die set for this card. I used a card layout I saw on YouTube by Christy Gets Crafty 2015 card tutorial. There is one difference between the previous post and this card. The blue mat to which Frosty is adhered. My FSJ Catalina Splash cardstock came in and I changed the blue mat to the Catalina Splash cardstock mat.


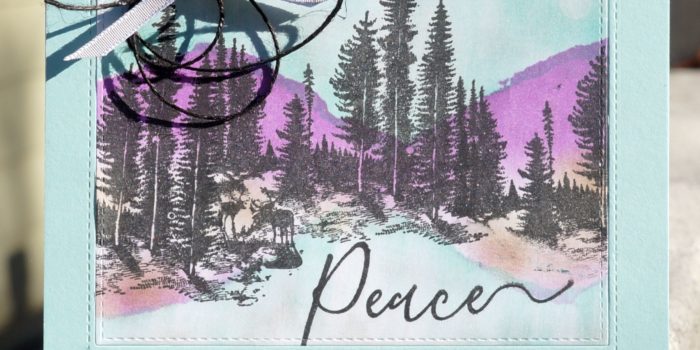
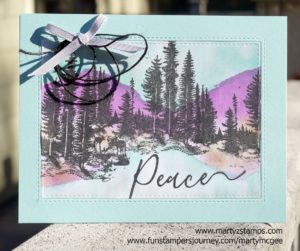
The second card features the Stay Wild ATS. The inspiration for this card came from another FSJ Coach, Sara Hoogendoorn. She took the Stay Wild ATS and stamped it multiple times across her neutral cardstock to create a stunning wooded landscape making sure the deer are not stamped with the second and third generation of the image. I used torn paper along with sponge daubers using FSJ inks – Cool Pool, Lavender Fusion, and Hazelnut Blend. The water and sky are lightly accented with the Silver Pan Pastel. Black Licorice twine and a silver bow are adhered in the top left corner of the card. The sentiment comes from the FSJ stamp set Holiday Script. Love This CARD!


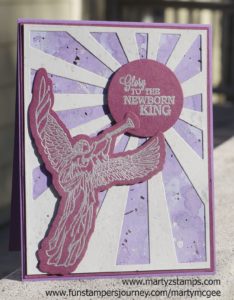
The last card was created using the FSJ Angel Herald stamp set with the Sun Rays Die. This card is a mixture of FSJ cardstock and other cardstock I had on hand. Yes, I’m working on filling my FSJ paper gaps. The angel and words are embossed using silver embossing powder. The mat behind the die cut cardstock was created by blending Blue Lagoon and Sweet Berry Splashes with water onto an acetate sheet; then, Silver and Dark Roast silks were added to accent the mat. Love this technique!


My stampers created 15 cards with these designs (5 cards of each design). These are quick, simple cards to create. It took them on average about 3 1/2 hours to complete these projects. I hope this inspires you to Create and Share your own cards.

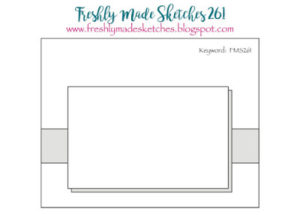
In about a week and a half, it will be my annual Christmas Stamp-a-Stack. I have two card designs ready to go, and I’m waiting on my Fun Stamper Journey order to make my third design, which will feature an angel heralding the birth of Christ. I really enjoy Freshly Made Sketches card challenges. Their sketch this week is #261:

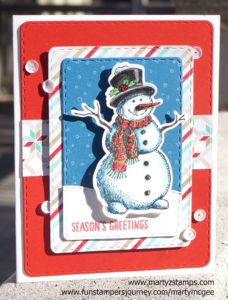
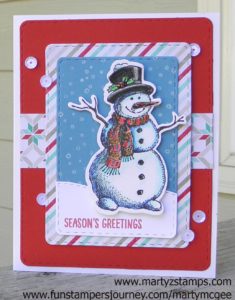
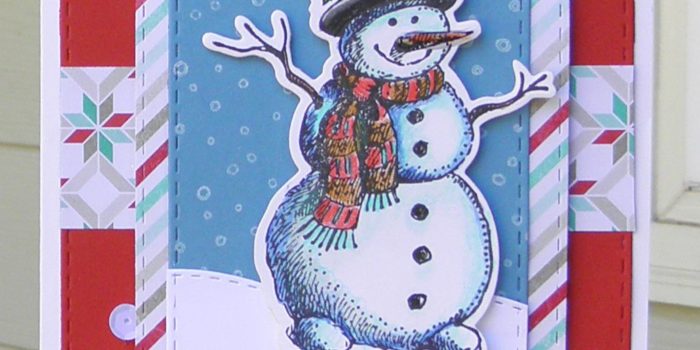
I am uploading my second design, which is a snowman card. Every year I have to have a snowman card featured in my stamp-a-stack event. This year I chose to use Fun Stampers Journey Frosty Fun and its coordinating die. I stamped Frosty Fun on FSJ Whipped Cream cardstock and colored him with FSJ Color Burst Pencils. I accented the berries and his nose with FSJ Glaze.  The snowman is adhered using FSJ foam squares to pop him up. I used Pink and Main rounded stitched rectangle dies for all the mats. The base mat is FSJ Candy Apple cardstock, the next mat (diagonal stripes) is SU! Fresh Prints DSP as well as the patterned paper belly band, and the snowman mat is SU! Marina Mist and FSJ Whipped Cream cardstocks. The top edge of the snow was cut using a die I got last year from Poppy Stamps (I can’t remember the name – sorry). I stamped the snowflakes from SU! Happy Scenes onto the Marina Mist with SU! Whisper White craft ink, and I stamped the sentiment from the same SU! stamp set in FSJ Candy Apple ink.

I try to make my stamp-a-stack cards fairly simple since my stampers will be making 15 cards at this event. I think this card is just adorable.

FMS261

PAGE TOP
[dealsbar preview] Amazing Deals: !!toolbar-deal-title!! - !!toolbar-deal-merchant!!