Tag : cards

110 posts

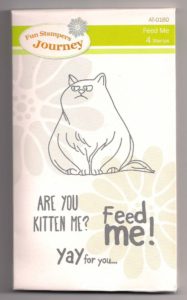
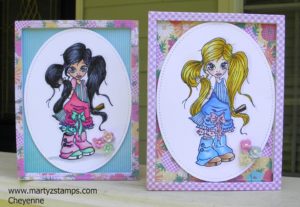
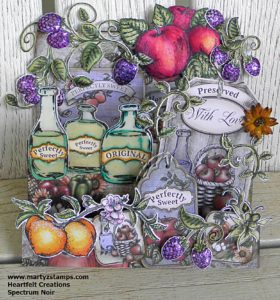
Next weekend, I along with three other friends will be at the Fun Stampers Journey – The Amazing Tour. We are super excited to go and experience all the “Amazing” energy and creativity. I have been to many papercrafting events throughout my 13 years of papercrafting, usually, involves taking cards I have made and trading them with other event participants. We call them swaps. The swaps should be exclusive to the company presenting the event. So, for this trip, my friend – Debbie Kissel – came over and we re-made some swaps we used for a Coach meeting.

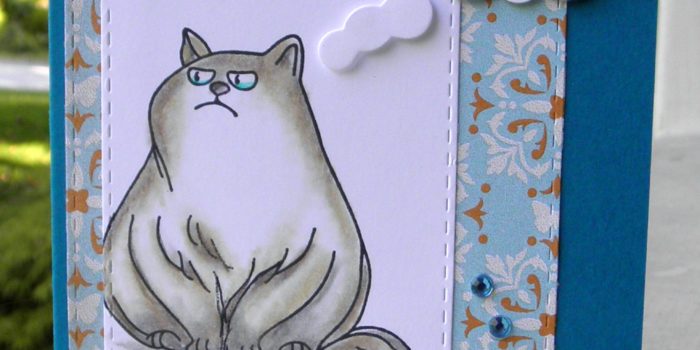
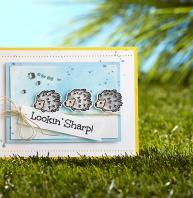
I wanted to feature an Artist Trading Stamp (ATS) keeping the price point low for papercrafting beginners and those on a limited budget.  Although the card featured in this post looks labor intensive, it is a super simple and quick card to make. This card definitely has a WOW factor. Hello – you can create awesome cards without breaking the bank. 

OLYMPUS DIGITAL CAMERA


Here is how I made these cards:

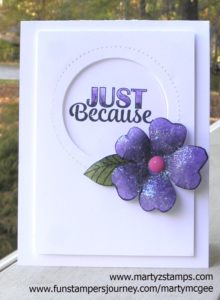
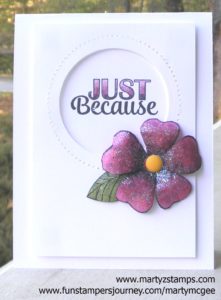
  1. I used Fun Stampers Journey (FSJ) Black Licorice ink to stamp the flower and leaf images. I stamped directly on Watermelon Fusion and Lavender Fusion cardstocks. I stamped the leaf on colored cardstock as well (Sweet Pear or Limeade Splash both would make a wonderful leaf).
  2. I used the Candy Apple ink pad for the Watermelon Fusion flower and the Lavender Fusion ink pad for the Lavender Fusion flower. Using sponge daubers (one for each color) and starting in the middle of the flower, I applied the ink in a circular motion and stopped about 1/4″ from the tip of the flower petals. Do this until you are satisfied with the shading.
  3. I fussy cut the flowers and the leaf (a die is available, but the flower and leaf need to be cut next to the stamped image for the best effect). 
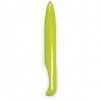
  4. I placed the flowers on a foam mat that is firm but not too firm (you want it to have a little give). I took the large stylus on the Journey Bloom Tool; starting in the center of each petal, I applied pressure and moved the stylus in a circular motion out to the edges of the petal and back toward the middle of the flower until the petal began to curl in on itself. I did this to each petal. Note: For this second round of flowers, Debbie was the stylus operator.
  5. I turned the flower over, cut the petals apart about 1/4″ from the center. I placed the flower on the mat; using the stylus, I pressed down hard and move in a circular motion in the center only. Note: The petals should pull in toward the middle. You can squeeze and shape the petals with your fingers. The leaves are done the same way but only working on the backside of them.
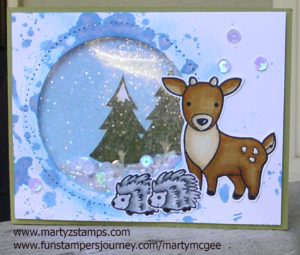
  6. I placed all the flowers that were created (10 in all) in a box and made a solution of 1/2 Journey glaze and 1/2 water (I saw Richard Garay do this on a video to make a sparkling background for a snowman card). This solution was created in a spray bottle I had in my craft room. I sprayed the flowers; then, sprinkled them with Journey Sparkle Dust (I used a small glitter shaker bottle). I should have sprayed the flowers again to set the glitter, but so far the glitter hasn’t come off.
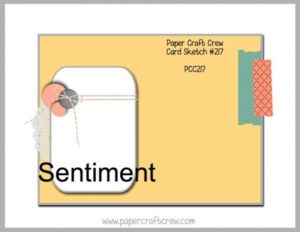
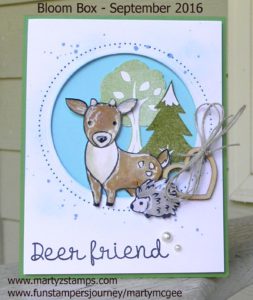
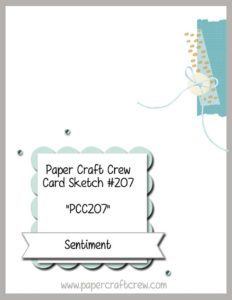
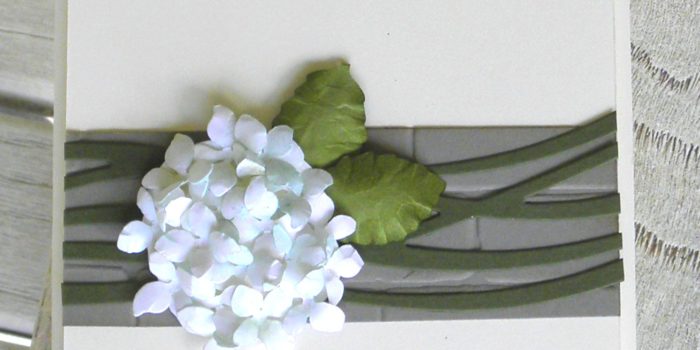
  7. I cut a circle in the top mat ( top mat measurement 5″ x 3 1/2″) using the pierced circle dies. I placed the pierced circle die on the outside of the circle I wanted to create, and nested the cutting circle die inside the pierced die. I saved the cut circle and set it to the side.
  8. I popped out the mat with the medium Journey Foam Squares and adhered it to the Whipped Cream cardstock base.
  9. I used the circle that was left over from cutting out the mat to stamp the sentiment. I colored the sentiment with the Color Burst pencils in a color that coordinated with the flowers. I placed liquid glue on the back of the circle and pressed it into the circle and directly onto the cardstock base.
  10. I adhered the flower and petal with liquid glue and placed a Spring Accent Dot in the middle of the flower.

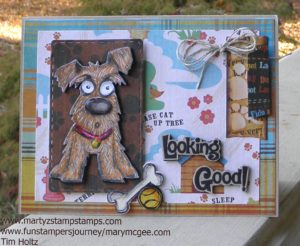
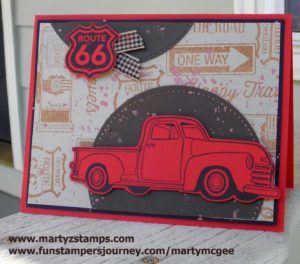
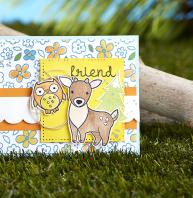
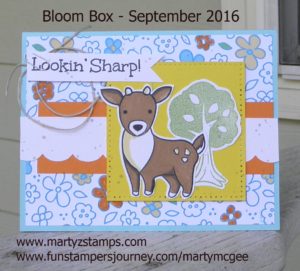
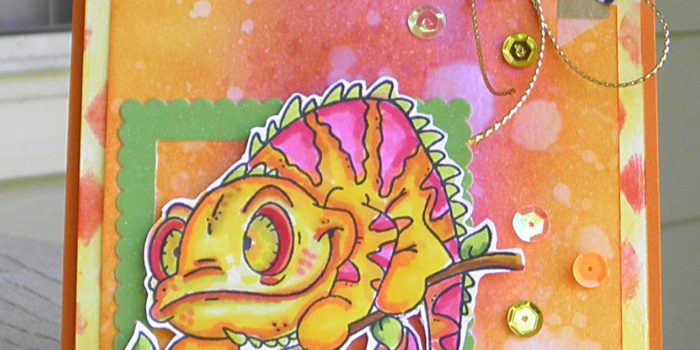
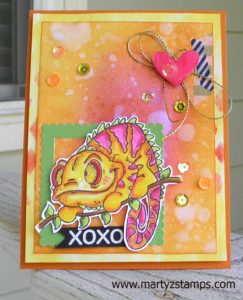
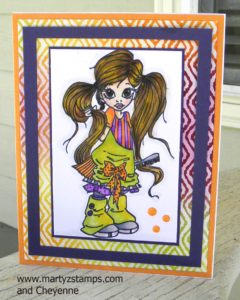
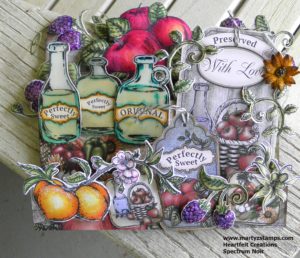
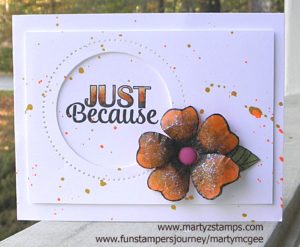
One of the mats had the circle cut off-center; so, instead of wasting the cardstock, I looked at it and thought . . . hmmmm. . . . I could make the same card in a horizontal position. I created an additional WOW factor using Orange Rave and Gold silk accents on this card. Note: I left the first two cards “clean”, because I didn’t have the silks I wanted to use with those flowers,. I think having two different ways to complete a card shows the versatility of our amazing products. Some of my stampers like “clean” and others do not – they want Wow, Wow, Wow.

Here is the mistake turned into a raving beauty:

Supplies:

All Fun Stampers Journey – all products can be purchased through my website.

Cardstock: Whipped Cream CS-0040, Lavender Fusion CS-0017, Watermelon Fusion CS-0039, Orange Creamsicle CS-0024
Ink: Black Licorice IP-0009, Lavender Fusion IP-0036, Candy Apple IP-0017, IP-0043
Die: Pierced Circle DI-0039    Use a Bloom Tool to separate the pierced die from the paper TO-0073
Adhesives: Journey Glaze AD-0003 or AD-0002, Journey Foam Squares AD-0085, Craft Glue AD-0111
Embellishments: Journey Sparkle Dust AC-0013, Spring Accent Dots AC-0179
Silks: Orange Rave IP-0118, Gold IP -0096
Suggested Silks for first two cards: Cosmic Grape IP-0117 and Outrageous Pink IP-0109

Well, Cheyenne and I got together on Wednesday and made the most adorable card EVER! She had purchased Tim Holtz’s Dog stamp set with coordinating dies. She came over to my house whipped those stamps and dies out of her little black bag, and we got off to a ruff start (ha, ha – do you like the pun). Anyway, she wanted to create a dog with textured hair. She had a picture to go by from a Pinterest pin, and I tried to pick out Spectrum Noir colors that were a close match. We got half of our dog’s faces done and she didn’t like them. They weren’t the correct color. So, upon her insistence, we started with a fresh dog stamped in SU! Smokey Slate. The first one was stamped with Memento Tuxedo Black, but we wanted the hair to over-balance the stamped image’s outline. That’s when I said, let’s make our card using the Paper Craft Crew Challenge #217 (why not kill two birds with one stone). So, she pulled the sketch up on her phone and we began again.


We took our stamped image and gave it a base color of Spectrum Noir EB1 and LV1. Then, we took my Fun Stamper Journey Color Burst pencils and began to create shading (darkest brown) along with several other colors to create lighter shading and depth to the dog. Once all of this was accomplished, we kept our pencils sharpened and began making flicks of color onto the dog image. This took a LONG time. It takes a very light touch, and when you flick the pencil lead, you need to lift at the same time so your hair image looks light and hairy. We used several different colors with the black pencil giving more depth and a white gel pen was used to add light effects on the hair. Cheyenne said my dog looked mad and her dog looked scared.

Once we were happy with our hair and color of our dog, we cut out a nose and popped it out and added Journey glaze to give it a nice shine. A bone and ball were added to my card. Cheyenne added a leash to her card, but I couldn’t add one to mine because my matted dog was in a different place on my card than her card. I took the Fun Stampers Journey ATS stamp and stamped the sentiment onto FSJ Oatmeal Cookie cardstock. I made faux washi tape out of cardstock and placed a Journey twine bow up at the top of the card (I did have my twine on the smaller mat as in the sketch, but it pulled your eye away from the focal point – the dog). Last but not least, the dog, the mat the dog is on, the bone, tennis ball, sentiment, and the smaller piece of washi tape are popped out. I used fun foam for everything but the washi tape. All of the printed paper is from The Pets Stack paper stack which was purchased from Hobby Lobby a long, long time ago. The base of the card is FSJ Oatmeal Cookie cardstock. The mat for the dog was cut out using a rounded corner stitched rectangle die from Pink and Main. Here he is. He thinks you are “Looking Good.”


Hope you enjoy!

When I saw Paper Craft Crew sketch challenge, I was super excited because I had the perfect card to enter. I have been so busy I would have missed the deadline but PCC extended their usual one week deadline to two weeks. Woo hoo! This is their card sketch:

13925327_10209951237435388_6685491755259514637_n

When you order a starter kit with Fun Stampers Journey, you choose three stamp sets and one ATS (Artist Trading Stamp). For one of my three regular stamps, I chose Hit The Road. My group of stampers are always in need of masculine cards, and this set fit the bill. I stamped the truck and road sign in Black Licorice ink onto Candy Apple card stock and fussy cut them out.  The road signs on the Oatmeal Cookie mat are stamped in Pumpkin Bread ink. The stitched partial circle was cut using the Journey Platinum Machine with the Journey Circle dies from Hazelnut card stock (I cut off part of the bottom circle once it was mounted to the Oatmeal Cookie mat and placed the leftover piece at the top of the mat). Before I added the truck, sign, and ribbon, I sprinkled some Bronze Silk onto my mat.  I popped the truck and sign up using small and medium Journey Foam Squares, and I added an accent of gingham cocoa ribbon to the sign with a glue dot.  I matted the Oatmeal Cookie mat onto a Black Licorice mat and then adhered these mats to the Candy Apple base. This card is perfect for a masculine birthday, thank you, get well, etc. I think the truck and sign really make the card pop.

PCC214

Supplies:

Fun Stampers Journey: (You can order any of the listed supplies to create your own Hit The Road card – click here)

Cardstock: CS-0007 Candy Apple, CS-0013 Hazelnut, CS-0023 Oatmeal Cookie, CS-0003 Black Licorice
Inks: IP0044 – Black Licorice, IP-0057 Pumpkin Bread, IP-0091 Bronze Silk
Dies: DI-0039 Journey Circles (these are a group of circles with stitched and plain circle)
Embellishments: AC-080 Gingham Cocoa Ribbon, AD-0084 Small Foam Squares, AD-00875 Medium Foam Squares

This past weekend my friends Cheyenne, Mary, Karen, and I attending the Stamp Scrap Art Tour Show’s Make-n-Take at the Gwinnett Infinite Energy Center. It’s like Scrapbook Expo, but different, and we had a great time. Every one of us won a door prize during the make-n-take. I can’t remember what Mary and Karen won, but Cheyenne won a stamp set from Darcie and I won something from the Fun Stampers Journey make-n-take table! I was thrilled. I chose a retired ATS (Artist Trading Stamp) called Feed Me. Here it is:

catalina

It reminded me of my friend, Kevin’s, cat named Catalina. Catalina can be quite the diva.

Saturday and Sunday were shopping days at the show. They had quite a few door prizes. Cheyenne was one of the first to win a door prize and she got $100.00 to spend in “show bucks.” Of course, her dear friend, that would be me, was right there with her helping to spend every last dollar of her prize. LOL  Here we are right after she got her show bucks:

show-bucks

I, also, helped her select various items from the Heartfelt Creations booth. I will be posting our creations we make sometime in the future from those purchases. The best part is she let me pick out a die that went with one of the free stamp sets I received this past July at the Scrapbook Expo. Yay, me! The Darcie booth had the most incredible stamps and shrinky dink supplies. That’s where the show bucks went. You will be seeing those creations soon.

Once we got home, I said let’s make something really quick and use my new Fun Stampers Journey Color Burst pencils. We decided on the cat, and we pulled together a card in about 40 minutes (that’s pretty quick for us). It turned out to be so cute! I can just see Catalina thinking/saying this to Kevin.

You do not need any gamsol or other medium to create a blended image with FSJ Color Burst Pencils. You only need blending stumps. I added a few rhinestones I purchased from Cre8tiveArtz at the Scrapbook Expo. I used a die we purchased from Pink and Main for the stamped image and the DSP mat.  Because we attended the make-n-take, we could purchase the die set (stitched rectangles with rounded corners) for $10; regular price during the show was $20. The die was a GREAT deal! Cheyenne purchased a scarecrow stamp set with coordinating die the next day. It is soooo cute. I will post our creation when we have time to make it.

Supplies:
Stamp – FSJ retired ATS Feed Me
Cardstock – FSJ base (I don’t know all the names yet), FSJ Whipped Cream, SU! DSP paper
Dies – Pink and Main rectangle stitched (rounded corners), SU! Word Play
Inks – FSJ Black Licorice
Color – FSJ Color Burst Pencils
Accessories – FSJ blending stumps, Journey Platinum Die Machine, rhinestones, FSJ white liner tape adhesive


At the end of last month, my cousin, Barbara Helms, celebrated her 40th birthday (her birthday is actually in September). I couldn’t make it to the celebration, but I sent her this card, which was a total CASE from K Werner Designs on YouTube. My friend and cohort, Cheyenne Luken, purchased Lawn Fawn’s So Smooth stamp set, and we went about making a shaker card. We both had to start over from scratch (note here: do not use alcohol markers to blacken the edge of cut cardstock – it bleeds).

Anyway, we completed the card and I thought it was the perfect card to send to my cousin. As many of you know, I don’t send cards, I hoard them. I am trying to get better about this. Here is the card we made and I sent to Barbara:

Supplies: Lawn Fawn So Smooth stamp set
Ink: Memento Ink
Markers: Spectrum Noir Alcohol Markers
Cardstock: SU! Whisper White, the mat is from a designer paper stack Cheyenne bought (don’t know the name), Acetate
Die: Lawn Fawn crosstitched rectangle die
Sequins: Pink sequins from Cre8tiveartz
Adhesive: Insulation Foam Tape

Fun Stampers Journey provides a monthly card kit called the Bloom Box. Since I am new to the Fun Stampers Journey (FSJ) products, I decided to sign up for their Bloom Box card kit. I knew it was a six-month commitment, but after looking at the past Bloom Boxes, I knew this would be a commitment I wouldn’t regret (click here to see past Bloom Boxes). I had one other friend sign-up for this kit. We received our Bloom Boxes on the same day, and we scheduled a day to get together to complete our cards. You might be asking what is the cost and what is included in the Bloom Box. It includes a full stamp set valued at $16-18, pre-cut cardstock and accessories to complete four cards. You use your own ink, scissors, and adhesives. If you live close to Buford, GA, my Bloom Box crafters get together to complete our kits and I provide the ink and other tools you might need. You bring scissors and adhesives.

If any of you know me well, I can’t just follow directions, I have to make my cards unique to my style. That being said. I will post the Bloom Box card example and I will post what we created beside it. I did not have all the FSJ inks, silks, or color splashes, but we were able to use what we had to make some amazingly cute cards. By the way, I will have some silks and splashes by the time we get together for the next Bloom Box.

Here is card number one:

FSJ Sept Bloom Box Card 1

FSJ Sept Bloom Box Card 1

On our card, we kept the sentiment on one line, and we added Journey Glaze to the deer and hedgehog/porcupine. We watercolored the deer and hedgehog using re-inkers.

Bloom Box Card 1 - Marty

Bloom Box Card 1 – Marty

Card Two:

FSJ Sept Bloom Box Card 2

FSJ Sept Bloom Box Card 2

We both wondered why the owl was just hanging in mid-air. It wasn’t like his wings were out indicating flight; so, we took away the owl, added the round-top tree, and changed the sentiment by wording and placing it on a banner tag and clipping to the top left hand corner to balance out the card. We colored the deer using SU! Stampin’ Write markers.

Bloom Box Sept - Marty

Bloom Box Sept – Marty

Card 3:

FSJ Sept Bloom Box Card 3

FSJ Sept Bloom Box Card 3

This card we only added two owls sitting together on more green branches. I guess I’m a little OCD about random things and I just kept wondering why the owls would be flipping through the air (o.k. I can be whimsical, but sometimes I just can’t). We colored these with SU! Stampin’ Write markers. Here is our version. My friend thought this would make a great anniversary card.

FSJ Sept Bloom Box - Marty

FSJ Sept Bloom Box – Marty

Card 4:

FSJ Sept Bloom Box

FSJ Sept Bloom Box

This one we didn’t change anything because I had an appointment to be somewhere; therefore, no extra time to change-up the card.

FSJ Sept Bloom Box - Marty

FSJ Sept Bloom Box – Marty

Extra Card: Before I received my Bloom Box, I came up with this design, and we made this card first when we got together. We used our Spectrum Noir markers to color the animals. It turned out great. I will be ordering a word stamp with coordinating die to make this a Christmas card. I will post an updated picture when this comes in and I have added it to the card.

FSJ Bloom Box Additional Card

FSJ Bloom Box Additional Card

We both LOVE the Bloom Box, and we can’t wait for our October Bloom Box to get to us. If anyone is interested in the Bloom Box, please click here to go to my website and sign up to receive a Bloom Box kit for the next six months. If you are local, we will get together to make the cards. For an additional $3, I will provide two additional designs with prepared cardstock for you to create two more amazing cards. If you are out-of-town, you will love putting this kit together. The kit includes step-by-step instructions with colored pictures. I can mail you the additional pre-cut cards and email you pictures and directions to put it together for $6.00 this includes additional instructions and postage.

If you have been reading my blog posts recently, it is very apparent I’m hooked on the Spectrum Noir alcohol markers. I just LOVE them and the awesome results I get from using them on my card projects. This week’s Paper Craft Crew Card Sketch #207 inspired me to make a card out of C.C. Designs – Chameleon (You Color My World!) rubber stamp. I purchased this stamp through Impressive Ideas stamp store in Norcross, GA. Here is this week’s sketch:

He is trying to camouflage himself amongst the bright yellow, orange, pink background of the card mat. He’s just too darn cute. The base of the card is SU! Tangelo Twist card stock. The bottom mat was created from a piece of SU! Whisper White cardstock using SU! Daffodil Delight and SU! Tangelo Twist a sponge dauber and SU! Happy Patterns Decorative Masks. The top mat was created using SU! Whisper White cardstock and distressing the cardstock with Tim Holtz Picked Raspberry and Spiced Marmalade inks. I squirted the paper with some water and blotted it dry and then allowed the mat to sit and dry completely before adhering all the elements. The square scalloped frame in the left hand, bottom corner is from SU! Layering Squares Framelits using Glitter Cardstock Matstack purchased from Hobby Lobby. I gave the card a little sparkle and glitz by gluing some Craft Medley sequins to the card. The gold twine, wooden heart, and washi tape are all from Stampin’ Up!. Note: The wooden heart was colored using the Spectrum Noir marker BP4 and then covered with Crystal Effects.

The chameleon was stamped with Memento Tuxedo Ink and colored using Spectrum Noir Markers. Here is the list of markers I used: LV1, CT4, OR1, OR3, CR10, CG3, GB7, TN7, CR6, CR7, CR11. I added SU! dimensionals under him to add depth and dimension to the card. I just love him. He’s sending everyone hugs and kisses!

PCCCS207

I hope you enjoy this chameleon as much as I do.

Yes, I’m on a Spectrum Noir coloring jag! And, my cohort in this coloring jag is Cheyenne Luken. We work very well together when creating papercrafting projects. We disagree with placement, with color choices, with everything, but in the end we love the other ones creation sometimes a little more than our own. In other words, we have a lot of fun! On these cards, we were making use of Cheyenne’s limited supply of Spectrum Noir alcohol markers. We did use some Copics for the skin tones and the faint shadow around the images, and Cheyenne used more Copic markers on her card. I tried to stick solely to the Spectrum Noir’s, and we lamented the whole time we wished our orders were already here! We will receive our orders this week (Tuesday and Wednesday)!!!! AND, I was looking at Consumer Crafts this morning and the two 24 sets (the Darks and the Pastels) which were out-of-stock for many weeks are now in stock. We really need (o.k. want) the Pastels because most of the skin tones needed for lighter shading are in that set. I’m still on the fence about the Darks. I think I can hold off on ordering them until they have another huge sale. . . . . or, maybe not!

Anyway, Saturday Cheyenne gave me a call and asked if she could come over and make some more cards. She asked me, do you want to work on your make-n-take cards, do another Heartfelt Creation card, make a “shakey butt” card from Art Impressions, or go to the Stamp Store (Impressive Ideas) in Norcross? I immediately said, I want to go to the stamp store in Norcross. Who wouldn’t want to say that???? Really, like I needed to spend anymore money, but I have been wanting a die to use to make a stitching affect around the exact size of an A2 sized card (5 1/2 x 4 1/4). So, off we went . . . . . to the store that is – not crazy. I had forgotten Sandy Allnock was going to be in-house teaching classes but, I remembered Impressives Ideas’ newsletter with the dates for these classes once we walked through the store’s doors due to several tables set up with papercrafters creating some amazing projects. We were not hampered in the least by these tables as we made our way through the store. In fact we navigated around them like the shopping professionals we are. As we wandered around ooooooing and aaaahhhing at all the gorgeous card samples, Jenny Gropp, one of the owners, helped us find everything we needed to purchase (yes, I did find the die I wanted) and some more items to add to our ever-growing wish list.

One of Cheyenne’s purchases was Piper from Saturated Canary by Krista Smith (her stamps can be purchased from Impressive Ideas’ store in Norcross). When we got back to my house after being at the store for 2 hours, we didn’t have time to make a card. I had to serve in our church’s cafe and I didn’t have any time to spare. So, she came back over on Sunday afternoon. And, we got started.

We stamped the images with Memento black ink on SU! Whisper White cardstock. Once we were finished coloring our stamped images, we cut them out using a Simon Says stitched oval die. The paper frame and mats came from Penny Black’s Painted Blooms paper stack. The frame was cut using a Simon Says stitched frame die. I do not have a name for the flower bunches we used as embellishments on the cards, but we bought them at Impressive Ideas (I threw away the packaging).

Once the image was stamped, we were ready to color them. I wanted to have black hair on my Piper because black hair is a challenge to color and I always like a challenge. Cheyenne chose blond hair because her children are blond-headed. This time I did remembered to write down the colors I used for the black-haired girl.

On my Piper, I used Copic markers for the skin E00, YR00, RV11, RV14 and N0 to outline the stamped image. For her hair I used Spectrum Noir BGR1, BGR3, and True Black; her shirt, apron, and leggings are Spectrum Noir PP3, PP5, and BP6; her jumper, petticoat, leggings, and shoes are Spectrum Noir PP3, PP5, BP6, BT2, BT4, BT5, BGR3 and oops, I didn’t write down the brush color. There is definitely room for improvement on her hair highlight positions, but for a first go at black hair coloring, I’m happy. Here is my Piper:

Marty's Piper

Cheyenne did use some Spectrum Noir markers on her Piper’s hair. They were CT2, CT4, and one of SU! Blendabilities yellow markers (the medium tone out of the 3 pack). I’m pretty sure she used Copic markers for her girl’s outfit. Here is Cheyenne’s Piper:

Cheyenne's Piper

Cheyenne’s Piper

Here they are together, they make such good friends:


Marty's Piper (left) Cheyenne's Piper (right) Saturated Canary stamps

Marty’s Piper (left) Cheyenne’s Piper (right)
Saturated Canary stamps


And, . . . . . we collaborated on this next Piper. She was abandoned at first because her hair was looking too muddy and muddled. Cheyenne took another look at her when we finished the first two and noticed her hair looked pretty good once the markers had time to saturate the paper and dry out. So, Cheyenne takes credit for the hair color. She handed her off to me for coloring the clothes. Once the clothes were colored, Cheyenne dug through my stash of paper and found the Glitter Cardstock Matstack I purchased from Hobby Lobby many years ago and had never used along with the Recollections Resist Paper Pad I purchased from Michael’s on a 70% off clearance rack. I used Tim Holtz distressed inks Spiced Marmalade and Mustard Seed along with SU! Lucky Limeade and SU! Rich Razzleberry to ink the resist paper mat. For the orange glitter mat and the SU! Elegant Eggplant frame we used Simon Says stitched frames. I accented the bottom right of the card with SU! Halloween Nights Enamel Dots.  Here is our Piper:

Marty and Cheyenne Piper

Don’t forget local ladies, I will be having Spectrum Noir technique classes to learn the basics and more complicated techniques. You will have to bring your own markers. The best price for them is through Consumer Crafts.

This post is showcasing a card my friend, Cheyenne, and I completed this past Tuesday. We case’d the card from Designs by Marisa with a few additions to our cards. The card is made with stamp sets and 12 x 12 paper stack from the Farmer’s Market Collection sold by Heartfelt Creations. The coloring of the stamped images was completed using Spectrum Noir alcohol markers.  I had been researching alcohol markers and trying to decide which ones I wanted to purchase. The Copic Ciao and Sketch markers seemed to be the best investment because you can refill them; and, they would have been an investment. They are definitely not inexpensive. I had also considered Prismacolor alcohol markers, but they are not refillable and they are not much less in cost than the Copic markers. My friends, Debbie and Cheyenne, had purchased Spectrum Noir alcohol markers but neither of them had really used them for any card making sessions. By the way, Spectrum Noir markers are refillable and are sold at a great price point. So, Cheyenne suggested we use her Spectrum Noir alcohol markers to color the stamped images on this card.  Prior to Cheyenne’s arrival, I watched a lot of YouTube tutorials on how to use the Spectrum Noir markers and felt confident I would do well using them.

Once she arrived at my house, I stamped a fairy image onto some SU! Whisper White card stock and gave the markers a go for the first time. I think my coloring turned out well. I noticed when I cropped the photo, the mushroom doesn’t look well blended, but in “real life” it looks well blended and great. Here is my first attempt with the Spectrum Noir markers.

spectrum noir

Now, to the show piece. This card took us all afternoon to create. The base of the card is a stair step fold using SU! Elegant Eggplant cardstock. We started with the peaches first and colored them using the Spectrum Noir markers (no, I did not write down the numbers we used – too excited to color and couldn’t be bothered to slow down and take notes – lol). The rest of the peach stamped image was colored using the Spectrum Noir markers as well as the blackberries, apples, vines, olives, and bottles. The glass part of the three bottles and the bottle on the tag, along with the blackberries were accented with SU! Crystal Effects. The peaches and blackberries were dusted with fine glitter. I found one of Cheyenne’s sunflowers from our last card session and claimed it for my card.

We should video our creative sessions because they are quite humorous. We compete against each other to see who has the better card. And, many times we pull our own card apart to do what the other one is doing. At the end of our sessions, we text a picture of both our creations to friends and family and have them vote on the one they like best (we don’t tell them who made which one). It’s usually 50-50 and we both agree the other ones card is better. Although, this go round, I think my bottles turned out better than Cheyenne’s (yes, Cheyenne, they are better than yours – ha), but her apple looks better than mine. My apple looks really good, but i had to cover my yellow highlight area because I put too much dark red near it and it had to be blended out.

All in all, I am sold on the Spectrum Noir markers. In fact, I ordered as many of them as I could from Consumer Crafts (www.consumercrafts.com). They are having a sale today, August 11, 2016, until 9:00 p.m. You will receive $10 off of every $40 spent. That is a great deal. For all of you local ladies, I will be having technique classes using these markers. You will need markers to take the class. You don’t have to buy all of them. You could start out with the following 6 packs: yellow, red, green, essentials, and a blender pen.

Here are several pictures showing the card we created (I used Spectrum Noir packs – yellow, purple, red, green, blue, essentials, and pink):

Hearfelt Farmers Market


Heartfelt Farmers Market


Heartfelt Farmers Market

The Pals Paper Arts Challenge 312 sketch was a great sketch to showcase the Elizabeth Craft Design Hydrangea Die I purchased at our recent Scrapbook Expo held in Duluth, GA.

ppa312

To keep the main focus on the hydrangea, I kept the background and the cardstock band neutral. The Elizabeth Craft Design die comes with an irregular shaped circle, a die for the petals and several different sized leaves.  I cut three of the circles and cut the second and third down to create a stairstep affect on the bottom circle. I adhered each of the circles onto the larger circle using SU! dimensionals. This adds greater dimension to the hydrangea.  I sponged a little SU! Pool Party on to some Whisper White card stock and then cut out the petals. I shaped the petals using the Elizabeth Craft Design tool kit for flower shaping; then, I cut the leaves out of SU! Old Olive and sponged the edges with SU! Old Olive ink andshaped the leaves. I  adhered the flowers on the cardstock circles and I took a dry watercolor brush (a stiff one) and took up a little Pool Party ink from the ink pad lid and brushed the color lightly across the petals.

The band is cut from SU! Crumb Cake cardstock and embossed with the SU! brick wall embossing folder. I cut the strips on top of the Crumb Cake from Old Olive using the SU! Swirly Scribbles Thinlits. The sentiment is stamped in Old Olive and is a Bo Bunny – Amen stamp set which I purchased on sale from Hobby Lobby. The mat and base are SU! Very Vanilla cardstock.

If you have been keeping up with my posts, you know I have really fallen in love with 3D flowers. I think this card is clean and simple and would be a great card to give someone as a sympathy or get well card.

PPA312

Enjoy!

PAGE TOP
[dealsbar preview] Amazing Deals: !!toolbar-deal-title!! - !!toolbar-deal-merchant!!