Tag : Christmas

15 posts

Welcome, to the November Creative Team Blog Hop.

Once you finish my blog click on the names below to hop along:

Kazan Clark

Lezlye Lauterbach

Carrie Rhoades

Christine Chan

Jill Hilliard

Marty McGee (you are here)

The blog hop theme for November is Christmas and I wanted to bring to life a 3D project featuring the Gingerbread Boy Tag Set.

Click on the banner below to order your Gingerbread Boy Tag Die Set:

This little guy evolved from a Pumpkin Bread Gingerbread Boy to a Santa Gingerbread Man. In fact, there are two Santas bringing you a special treat for Christmas.

To begin, cut one each of the gingerbread boy die in the following cardstock colors: Peaches and Cream, Candy Apple, Whip Cream and Black Licorice.

To create a Santa, take your die-cuts and proceed as follows. On the Black Licorice die-cut, cut off the arms and legs for Santa’s gloves and boots. On the Whip Cream die-cut, cut rectangular shaped pieces off each arm (near the shoulder),  off each leg (near body), at neck into the body portion and the middle part of the face. For Santa’s suit cut off the arms, feet and head from the Candy Apple die-cut. You will need to cut off the top portion of the Candy Apple head for the hat and save back one of the hands for the tip of the cap (the top portion for the cap is not pictured).

Glue the arms and legs onto the Peaches and Cream gingerbread Santa. Add the facial features onto Santa’s face. These pieces are cut from Black Licorice, Watermelon Fusion and Whip Cream.

Adhere the red suit and cap to Santa’s body.

To finish off Santa’s outfit, die-cut a curvy Whip Cream strip, three large Black Licorice circles and one large Whip Cream circle. Apply the curvy strip down the front of Santa’s suit, add buttons and puff to end of Santa’s cap. Go ahead and add the cuffs, rim of cap and neck trim to body.

Set aside the two Santas. Cut two strips of Candy Apple cardstock one at 5 3/8″ x 1 1/2″ and the other 5″ x 2 1/2″. Score both pieces at 1 3/4″ measure in from each end. On the 5″ x 2 1/2″ strip, score down each long side at 1/4″, cut out the scored tabs on the middle portion (between the two 1 3/4″ score lines).   Place the 5 3/8″ x  1 1/2″ strip crosswise onto the 5″ x 2 1/2″ strip.  Adhere the tabbed edges to the inside of the crosswise strip.


Adhere a Santa to each narrow end of the box, where the middle of the Santa hides the box.

The last step is to Place candy or small cookies into a cello bag and tie off with a ribbon. Place treat into holder.

How cute is this for a Christmas treat.


Supplies:

Gingerbread Boy Tag Die Set
Cardstock – Peaches and Cream, Candy Apple, Whip Cream, Black Licorice, Watermelon Fusion
Trimmer
Cello Bag
Twine
Journey Glue
White Liner Tape
Precision Shears


The FSJ + Spellbinders partnership launch is today! To celebrate this day, I created a Christmas card using the Zenspired Holidays, Holly Bells stamp and die set by Joanne Fink.

I began with a FSJ Butter Cream base and added a 5 1/4″ x 4″ FSJ Kiwi Slice mat to the base.

The gold embossed holly leaves mat took several steps. First, I cut a 5 1/2″ x 4 1/4″ watercolor paper mat and set it aside. Next, I placed my Gel Press onto my desk and applied FSJ Fresh Forest and Limeade Splash Liquid Colors to it. Tip: Apply more Limeade Splash for a more Christmas green color. Note: The pictured Gel Press with liquid color was created by cutting a full 8 1/2″ x 11″ Gel Press into fourths.

After spritzing the Gel Press and the watercolor mat generously with water from my media mister, I pressed the watercolor paper mat onto the Gel Press, lifting and reapplying until the entire mat was covered with color.

Before embossing with gold embossing powder, I made sure the colored mat was completely dry. To make sure the powder only stayed on the inked image, I applied anti-static powder over the entire mat and then stamped the holly leaves using FSJ Clear Pigment ink. Once I finished stamping, I applied the gold embossing powder and using my heat tool melted the powder creating shiny, gold holly leaves. The last step for this portion of the project was to cut the mat down to 5″ x 3 3/4″ using FSJ Trimmer.

For the sentiment, I gold embossed “Peace on Earth” stamped image from the Holiday Joy stamp set and die cut it with the coordinating Special Day Tags Die Set.

Tip: I used my MISTI to stamp the image four or five times to get a good inked impression.

This card definitely needed some ribbon. A 5 1/2″ length of Special Day White Organza Ribbon was placed across the mat and adhered to the back. The die cut sentiment was centered and adhered on top of the ribbon with medium foam squares. A double bow created from the ribbon is attached with a piece of gold thread and the finishing touch are the Sea Stones embellishments. And, of course, they sparkle just a little bit.

Here is the finished project. I hope this inspires you to create your own holly themed Christmas card.

Supplies Used For This Project (click on the banner above to order):


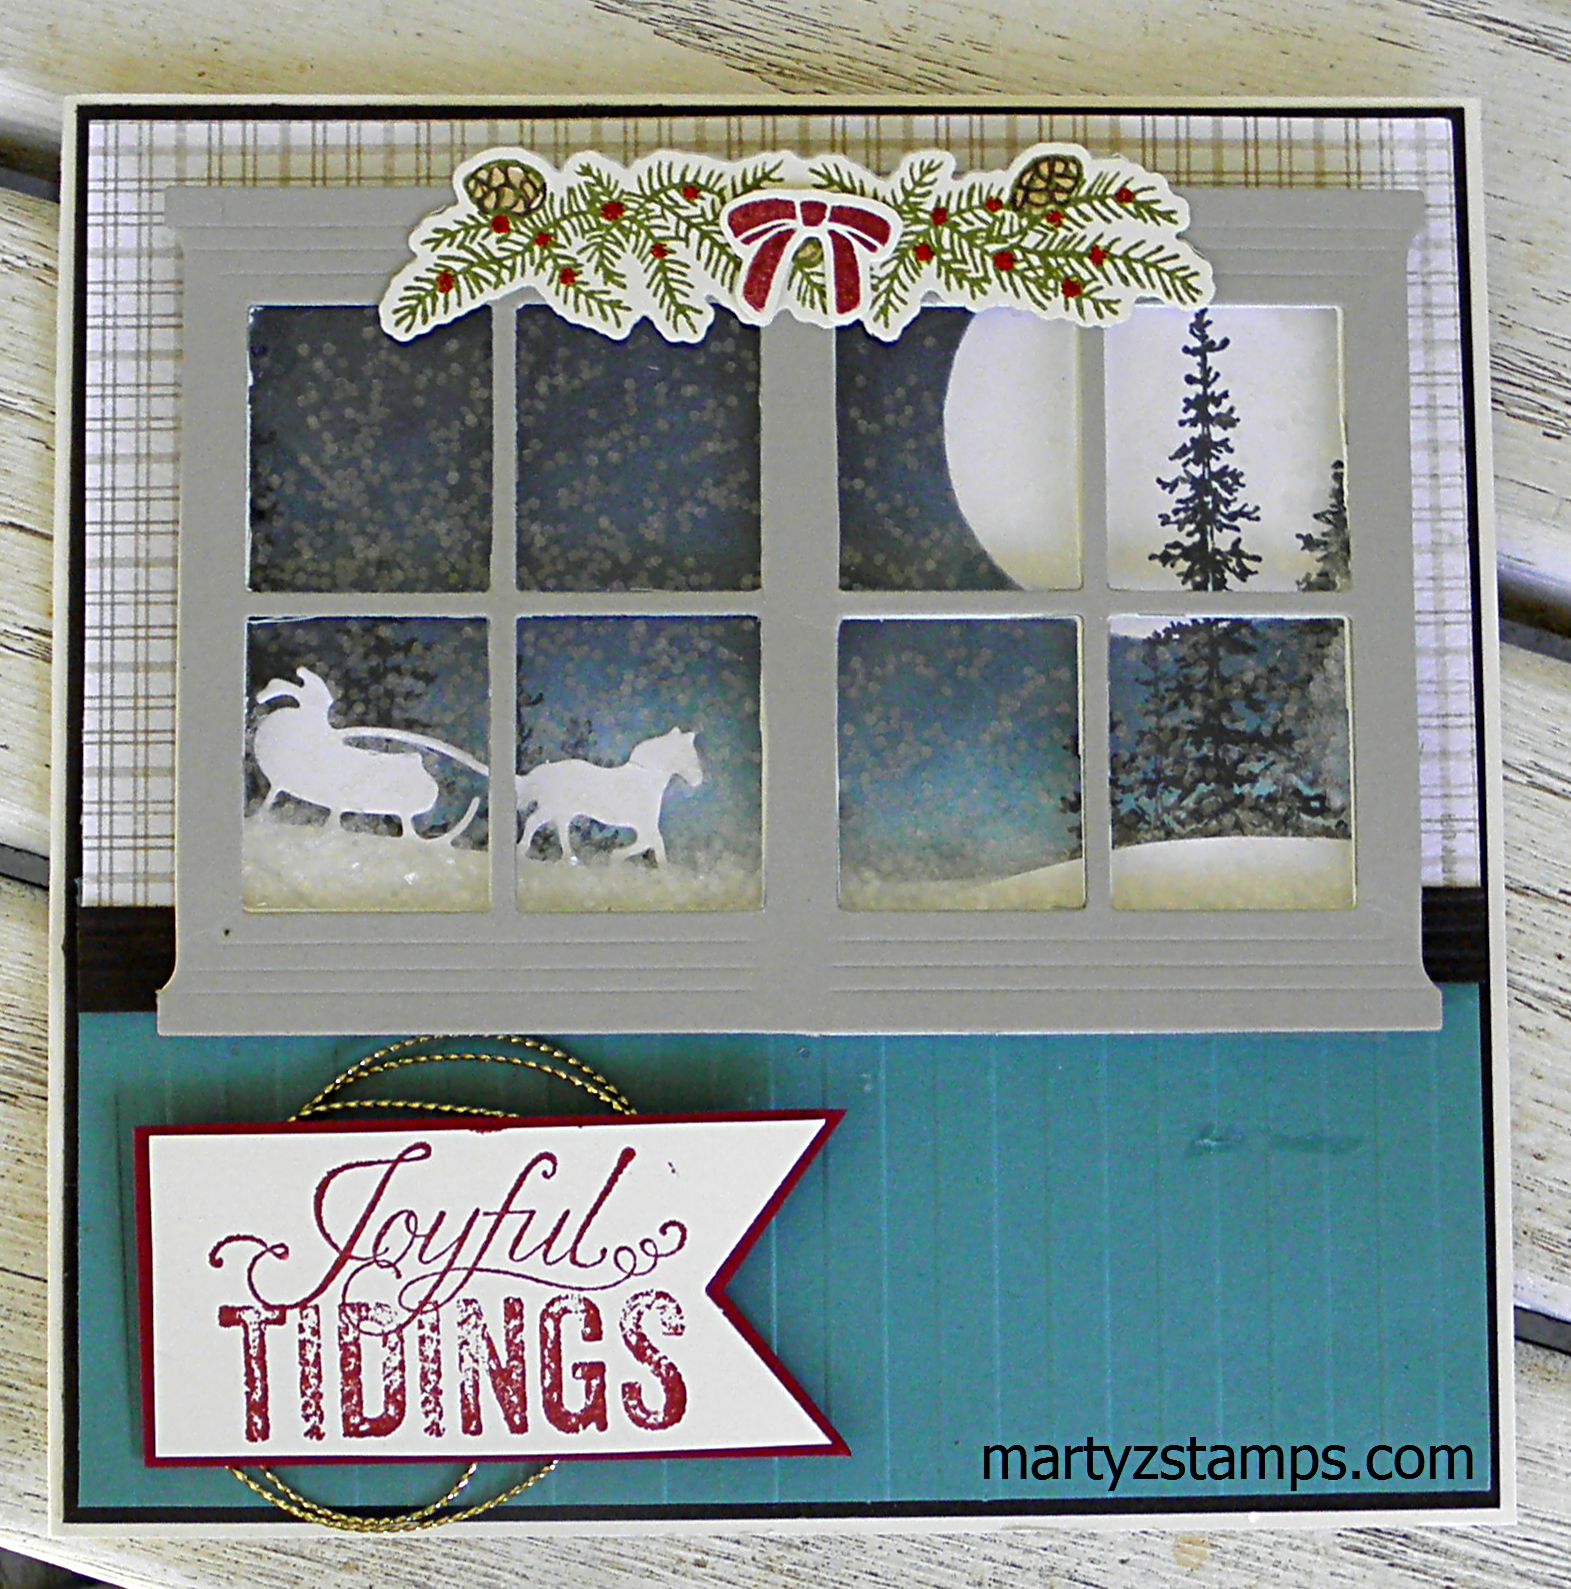
I know I can’t say enough about how much I love being a coach with Fun Stampers Journey. I particularly love their catalogs which feature amazing card and project ideas. This year for Christmas inspiration, I went straight to the catalogs for some card ideas. I re-imagined or Case’d card ideas straight from our catalogs and some from our group of wonderful coaches.

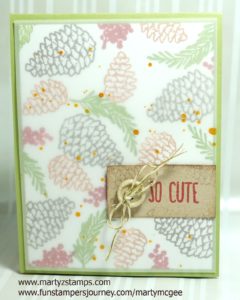
The first card featured is the Fresh Forest stamp set (SS-0487 or the bundle BD-0271) and Holiday Wishes (SS-0469). I gained inspiration from the card featured on page 56 of our main Inspiration Catalog. Since my group of stampers would be creating a lot of cards in one class, I wanted to make sure most of the cards were easy to recreate. I created a remixed version below.

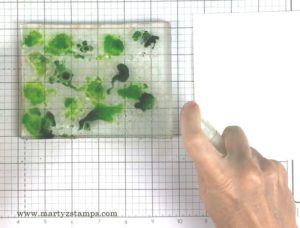
I used FSJ Whip Cream (CS-0040) as a base and the main piece of cardstock used for stamping. I stamped the Merry Christmas and two of the smaller trees with FSJ Beach Breeze fusion ink (IP-0044). The rest of the trees I used FSJ Lemon Grass fusion ink IP-0022). The shadowed affect behind the trees is created using one of the smaller trees stamped using FSJ Sweet Pear fusion ink (IP-0054). To create the snowy hills, I masked the lower portion of the card with a curvy piece of cardstock. This kept the bottom of the trees from making an ink impression and created the illusion of snow banks and smaller trees stamped with the same stamp. The flecks of blue on the card was created using FSJ Beach Ball acrylic paint (JM-0102) thinned down with water and flicked onto the card with a paint brush. The stamped piece of cardstock was adhered to a mat from FSJ Beach Breeze cardstock (CS-0088). The card was accented with Special Day Organza Ribbon (AC-0316) and Silver Tinsel (AC-0341). Last but not least is a strip of Silver Sparkle Tape (AC-0259). Super Cute, Super Easy, Wow!

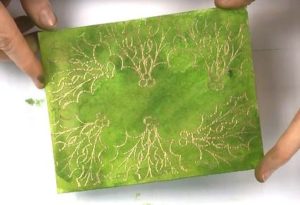
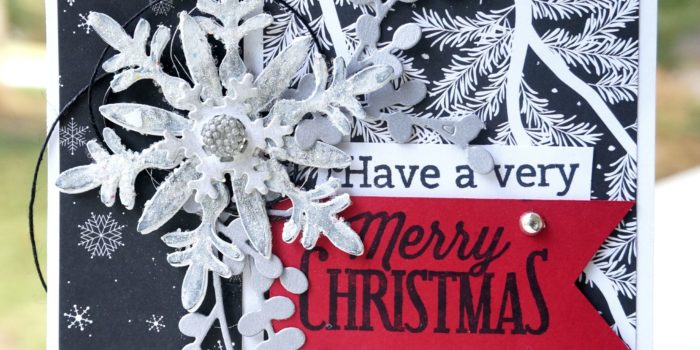
I feel in love with this next card, and I Case’d straight out of the catalog. I mentioned to Rose Curtis on FSJ Coach Connection Facebook Page; if I create a card way in advance of a class, I should make another sample of the card the night before the class so I can remember how I made it. I really had those ladies at this class working really hard to complete the textured snowflake. I helped one of the attendees with her stenciled image, and I thought, “I don’t remember this card being this hard to make.” Well, when I got home, I happened to look at the directions in the catalog and yes, I wanted to beat my head against the wall. I can really make something very simple, very complicated. LOL

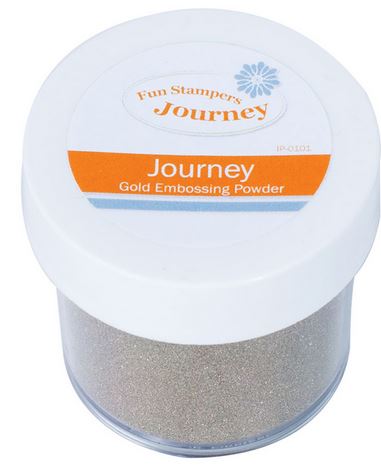
You can get the directions for this card by viewing the Journey Holiday catalog on-line (click here). Note: The sentiment was stamped from the Hostess Exclusive Night Star stamp set (SS-0518) – I cut off the Joyful portion because it was too long. I used the following cardstock: Cranberry Bliss (CS-0090), Black Licorice (CS-0003), Whip Cream (CS-0040), and the Christmas Cheer Prints (PP-0049). The snowflake mask was created using the Snow Blooms die set (DI-0253). Other supplies needed were Journey Gesso (JM-0072) – Note: the catalog references Journey Modeling Paste (JM-0073), but I didn’t have any and the Gesso worked just fine, a Spatula (TO-0089), Special Day Organza Ribbon (AC-0316) and Silver Tinsel (AC-0341).

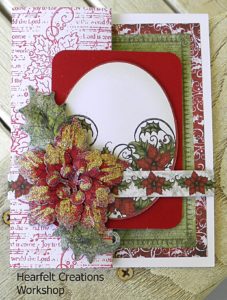
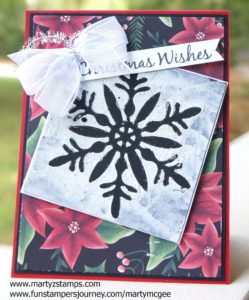
I had the Black Licorice snowflake mask left over from creating the previous card (the catalog suggest using chip board, but I didn’t have any; therefore, the Black Licorice snowflake). I was thinking how could I use this instead of throwing it away and I saw the card idea featured on page 40 of the Journey Holidays catalog and decided to re-imagine this card idea. Here is my version below:

The base of this card is FSJ Whip Cream cardstock (CS-0040). I cut two mats from the Christmas Cheer Prints 12×12 paper (PP-0049). I must mention the Christmas Cheer Prints (PP-0049) contains 24 12×12 sheets, 4 each of 6 two-sided designs! What a deal. I cut two more large snowflakes from the Snow Blooms (DI-0253) out of Whip Cream cardstock (CS-0040). I glued the white together and the black one on top of the two white snowflakes. I added sparkle to the snowflake with FSJ Sparkle Dust (AC-0151). I die-cut the smallest snowflake out of Whip Cream cardstock, applied Silver Pan Pastel to it and adhered it to the other larger snowflakes. I accented the snowflake with a large Sparkle Drop (AC-0022). The sentiment was stamped using Black Licorice fusion ink (IP-0041) onto Whip Cream cardstock and Candy Apple cardstock (CS-0007). I added some interest and dimension to the card by die-cutting the Bloom Cluster (DI-0163) from Journey Brush Silver (CS-0135). The final accent is a Fashion Silver (AC-0293) drop of goodness. This is my favorite card!

If you are looking to create a super simple, super quick, quick, quick card for a mass mailing of Christmas Cheer, this is your card.

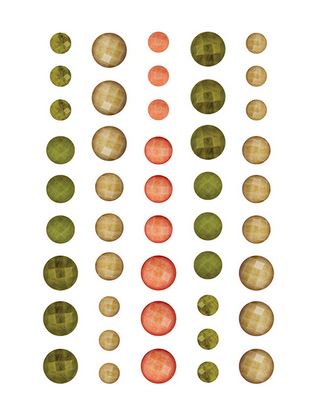
I was inspired by the card featured on page 41 of the Journey Holidays catalog. I took the word stamps from the Holiday Wishes stamp set (SS-0469) and placed them on one clear block. This made stamping the sentiment in Black Licorice fusion ink (IP-0041) onto the Whip Cream cardstock (CS-0040) really easy. The green bows were stamped using FSJ Lemongrass Fusion ink (IP0022). The bows and curly swirls were stamped using Candy Apple fusion ink (IP-0017). I used Fashion Silver (AC-0293) accents on the bows. The red dots are not FSJ because I did not have my most wonder Rainbow Drops (AC-0178), yet (they will arrive today) and I had to make due. The mats included the following cardstocks – Candy Apple cardstock (CS-0007), Limeade Splash cardstock (CS-0020), and the Christmas Cheer prints (PP-0049). There is a splash of Sparkle Silk (IP-0126) to finish it off.

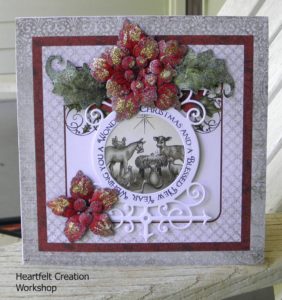
The next beautiful card was Case’d straight from another coach Marcie Besecker. I tweaked it a little bit for my Christmas Buffet Make-It class. Here is my version below:

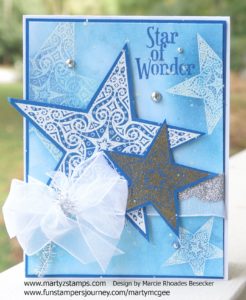
The tweaks were: Star of Wonder sentiment is stamped onto the embossed mat with Huckleberry Fusion ink (IP-0035), Silver Tinsel (AC-0341) instead of the Gold Tinsel (AC-0340), triple bow instead of a double bow from the Special Day Organza Ribbon (AC-0316), a large star with a medium star instead of two medium stars, and a Huckleberry Fusion cardstock base mat (CS-0015). The stamp set for this card is the Night Start (SS-0518) from the Journey Holidays catalog.

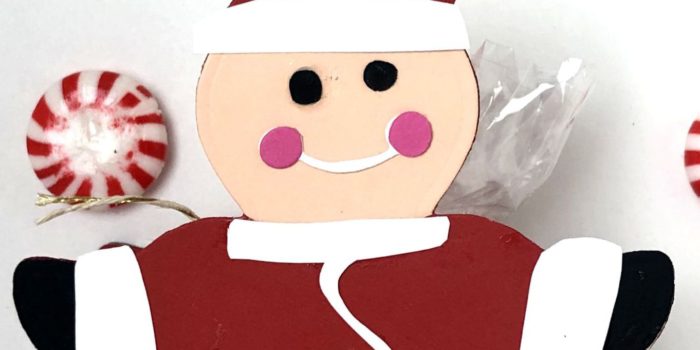
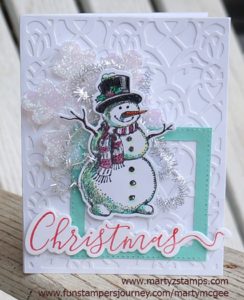
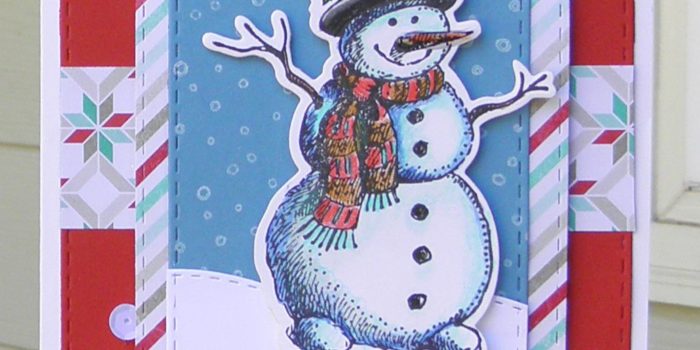
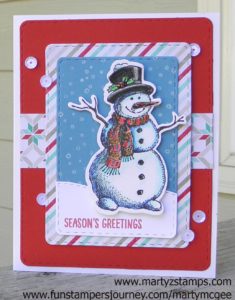
The next card I cannot find my inspiration for this layout, but I know I looked at something to create this because of the tree. This is what I get for not making notes as I create (like that will ever happen – once I get going, I’m off and running, no time to slow down and write down any notes). Anywhoo, I love this stamp set Snowmen Days (SS-0519) from the Journey Holidays catalog. I must have a snowman card every year for my Christmas card classes and this set was too cute to pass up.

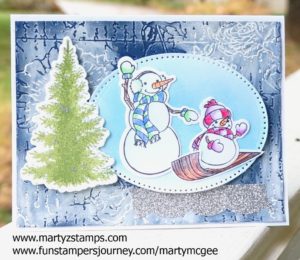
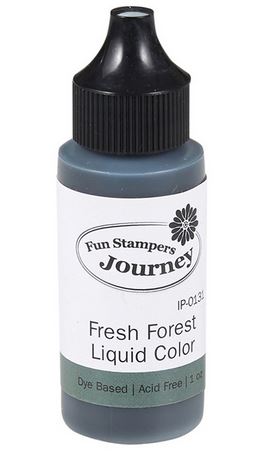
The base and all cardstock used for stamping is FSJ Whip Cream cardstock (CS-0040). The snowmen were stamped using Black Licorice Fusion Ink (IP-0041), the tree was stamped using Lemongrass fusion ink (IP-0022) with some Fresh Forest fusion ink (IP-0013) barely stamped onto the stamp down the middle. The tree was die-cut with a die from the Fresh Forest Bundle (BD-0271 found on page 86 of the Inspiration catalog. The oval mat was pierced and die-cut using the Journey Ovals (DI-0042). The background is sponged onto the oval using Pool Play and Beach Breeze fusion inks (IP-0051 and IP-0044). The base mat is cut from Denim Days cardstock (CS-0113) and embossed with the $100 level Bloom Benefit Love Letter Embossing Folder (EF-0025) NOTE: It’s free with a $100 purchase!! I turned the embossed piece of cardstock upside down (the de-bossed side) and using a little water to make the Journey Gesso (JM-0072) move easier, I smeared and rubbed the Gesso over the entire mat leaving a few places untouched. The snowmen were colored using the Journey Color Burst Pencils (JM-0077). The final touch was a piece of Silver Sparkle Tape (AC-0259). Love it!

These are all the cards I came up with using inspiration from other sources. I hope this gets your creative juices flowing. Fun Stampers Journey provides amazing card, scrapbook, and project ideas throughout both their catalogs. As a Journey Coach, I have access to a private Facebook page for Coaches only where we all share our ideas and encourage each other in our journey.

I can’t say this enough, but I really, really love Fun Stampers Journey Bloom Box monthly card kit. I have made a variety of beautiful cards with the December kit. Of course, my group of Bloom Box Girls take the step-by-step instructions and make our own version of the card designs provided in the kit. The official promotion picture of the assembled cards from the December kit is below:

Each kit provides a unique technique, which is a great way to expand your creativity and apply this knowledge to other amazing creations you make.

Here is our first card we made with our December kit:

We decided to add another two branches to the bough, and a small pinecone to the this card. We used the Just Because ATS to add a sentiment.

Card #2:

We used our FSJ Color Burst Pencils to color the stamped wreath image. The only change is the sentiment of “Hello” from the FSJ Be Amazing stamp set.

Card #3:

Using vellum over the stamped card images adds a touch of elegance to an already beautiful card. We changed the sentiment and used the “So Cute” from the ATS So Cute stamp.

Card #4:

This is such a cute card. We stamped our wreath onto the base and stamped another image onto some FSJ Whip Cream cardstock. We fussy cut it out (the center and the outside), added some Journey Glaze to the berries and made a double bow. Oh yes, by the way, I love the wow factor a double bow gives a card creation.

Here are two more cards I made using this set. The wreath on the Oatmeal Cookie and Cranberry Bliss background was a Top 3 pick at Paper Craft Crew website. The other card I made using a SU! woodgrain background stamp and the Christmas sentiment from the FSJ Holiday Script. I did have to use my MISTI to stamp the sentiment about 5 to 6 times to get a good enough impression on the busy background.


It is not too late to sign-up for the December Bloom Box and  5 more months of Bloom Box card making kits.  You can go to my website and order the kit here.

Whoo hoo, I made top three on Paper Craft Crew Challenge #222. I am super excited about this pick because I used my Fun Stampers Journey, December Bloom Box stamp set Welcome Wreaths to make this card. I absolutely love this stamp set and the kit as well. Here is the winning card.

I wanted to keep everything about this card FSJ, and I did except for the sequins. I just haven’t acquired enough FSJ bling, . . . . . yet.  If you click the picture, you will be redirected to the original post.

I love everything about Fun Stampers Journey and I can’t wait to make more amazing cards using their products.


It is another week with a wonderful card sketch challenge from Freshly Made Sketches #266. Here is their challenge sketch:

I wanted to take advantage of the Christmas season, yet again. I pulled out my Fun Stampers Journey (FSJ) Frosty Fun ATS and coordinating die to use on this challenge. As I was pulling this card together, I tried various colors of cardstock for the background, but every color I chose took away from the Frosty Snowman stamped image. I realized I had the perfect background die I received this past Friday from Fun Stampers Journey. It is the Persian Gardens die. I cut the base and the background die cut out of FSJ Whip Cream cardstock. I adhered the die cut onto the base using FSJ Craft glue which dries in a matte finish.

In place of the heart image, I took a large snowflake from the FSJ Snowflake Elements and applied Journey Glaze to the snowflake and then covered it with Sparkle Dust. I burnished the Sparkle Dust onto the snowflake with my finger. I cut the square piece out of FSJ Cool Pool cardstock with the FSJ Square pierced dies. I adhered both of these accents to the card with the FSJ craft glue. I stamped Frosty Fun onto FSJ Whip Cream with Black Licorice ink and colored him with FSJ Color Burst Pencils. For the circle element, I replaced it with some FSJ Tinsel Trim. I popped Frosty out with Journey Foam Squares (medium). I stamped the Christmas sentiment from FSJ Holiday Script with coordinating die in Cranberry Bliss ink and die cut it out. I adhered it with Journey Foam squares.

This is a cute card to give to a friend or family.


Supplies:

Fun Stampers Journey (all products used can be ordered through my FSJ website – click here).

Stamps: FSJ Frosty Fun (ATS – artist trading stamp) with coordinating die
Cardstock: FSJ Whip Cream, FSJ Coo Pool
Ink: FSJ Black Licorice, FSJ Cranberry Bliss
Dies: FSJ Square Pierced Dies, FSJ Persian Gard Die, FSJ Frosty Fun die
Coloring: FSJ Color Burst Pencils
Ribbon: FSJ Tinsel Trim
Miscellaneous: FSJ Foam Squares, FSJ Snowflake Elements, FSJ Craft Glue, FSJ Journey Glaze, FSJ Sparkle Dust

Every year I host an opportunity for my stampers to make Christmas cards to give to friends and family. This year was no different. I chose three Fun Stampers Journey stamps to highlight for this Make-It opportunity. The first card was featured in a previous card challenge post. I chose the Frosty Fun ATS (Artist Trading Stamp) and coordinating die set for this card. I used a card layout I saw on YouTube by Christy Gets Crafty 2015 card tutorial. There is one difference between the previous post and this card. The blue mat to which Frosty is adhered. My FSJ Catalina Splash cardstock came in and I changed the blue mat to the Catalina Splash cardstock mat.


The second card features the Stay Wild ATS. The inspiration for this card came from another FSJ Coach, Sara Hoogendoorn. She took the Stay Wild ATS and stamped it multiple times across her neutral cardstock to create a stunning wooded landscape making sure the deer are not stamped with the second and third generation of the image. I used torn paper along with sponge daubers using FSJ inks – Cool Pool, Lavender Fusion, and Hazelnut Blend. The water and sky are lightly accented with the Silver Pan Pastel. Black Licorice twine and a silver bow are adhered in the top left corner of the card. The sentiment comes from the FSJ stamp set Holiday Script. Love This CARD!


The last card was created using the FSJ Angel Herald stamp set with the Sun Rays Die. This card is a mixture of FSJ cardstock and other cardstock I had on hand. Yes, I’m working on filling my FSJ paper gaps. The angel and words are embossed using silver embossing powder. The mat behind the die cut cardstock was created by blending Blue Lagoon and Sweet Berry Splashes with water onto an acetate sheet; then, Silver and Dark Roast silks were added to accent the mat. Love this technique!


My stampers created 15 cards with these designs (5 cards of each design). These are quick, simple cards to create. It took them on average about 3 1/2 hours to complete these projects. I hope this inspires you to Create and Share your own cards.

In about a week and a half, it will be my annual Christmas Stamp-a-Stack. I have two card designs ready to go, and I’m waiting on my Fun Stamper Journey order to make my third design, which will feature an angel heralding the birth of Christ. I really enjoy Freshly Made Sketches card challenges. Their sketch this week is #261:

I am uploading my second design, which is a snowman card. Every year I have to have a snowman card featured in my stamp-a-stack event. This year I chose to use Fun Stampers Journey Frosty Fun and its coordinating die. I stamped Frosty Fun on FSJ Whipped Cream cardstock and colored him with FSJ Color Burst Pencils. I accented the berries and his nose with FSJ Glaze.  The snowman is adhered using FSJ foam squares to pop him up. I used Pink and Main rounded stitched rectangle dies for all the mats. The base mat is FSJ Candy Apple cardstock, the next mat (diagonal stripes) is SU! Fresh Prints DSP as well as the patterned paper belly band, and the snowman mat is SU! Marina Mist and FSJ Whipped Cream cardstocks. The top edge of the snow was cut using a die I got last year from Poppy Stamps (I can’t remember the name – sorry). I stamped the snowflakes from SU! Happy Scenes onto the Marina Mist with SU! Whisper White craft ink, and I stamped the sentiment from the same SU! stamp set in FSJ Candy Apple ink.

I try to make my stamp-a-stack cards fairly simple since my stampers will be making 15 cards at this event. I think this card is just adorable.

FMS261

Friday, at Scrapbook Expo 2016, Cheyenne and I had a class with Heartfelt Creations. It was Flower Shaping 101. Cheyenne and I have wanted to learn how to make 3D flowers since visiting Heartfelt Creations booth last year. This class was awesome. We made four flowers.


Heartfelt Creations Flower Shaping Class

Heartfelt Creations Flower Shaping Class

I think my flowers came out really well.

Our second and final class was Hearfelt Creations Sparkling Poinsettia Class. We made three gorgeous cards. This class was definitely fast paced and we barely finished in time.

Here are the cards we made in class:

Heartfelt Creations Workshop Card

Heartfelt Creations Workshop Card


Heartfelt Creations Workshop Card

Heartfelt Creations Workshop Card


Heartfelt Creations Workshop Card

Heartfelt Creations Workshop Card

I plan on saving money each month to take more workshops; especially the Heartfelt Creation workshops. In addition to making wonderful samples and cards, we could pick out for each workshop a FREE stamp set up to a $19.99 value. Here are the stamps I chose. I would have the 12X12 paper stack I purchased (Berry Cafe), but I think I put it in Cheyenne’s bag of Heartfelt Creation haul after we made our Bee Hive Card.

Heartfelt Creation Free Stamps

Heartfelt Creation
Free Stamps

I will be posting either today or tomorrow the cards Cheyenne and I made with her haul of Heartfelt Creation products.


This is the third and final card I entered on the SUO Challenge #136. See previous posts for Card 1 and Card 2.


This is one of three cards my stamping group will be making at the next make-n-take. It is based on an October challenge card (see below). The card I created in October was going to be one of the make-n-take cards, but I felt it was just too big and used up too much paper (a little worried I wouldn’t have enough similar paper for everyone). I decided; if I could make a double window, I, certainly, could make a six-paned window using the Hearth and Home thinlit, and I was successful. Just make sure you hold the plates as they come out the other side of the Big Shot, because they are quite the projectile. I could see someone busting a window to bits or knocking somone in the head. I wanted to keep the sleigh ride scene from the original card; so, I carefully pulled apart the original card, cut down the window scene, made a new window, adhered the dimensionals, added the glitter, and then . . . . What a nightmare! I made the shaker card based off of a shaker card tutorial on YouTube. Note to self: DO NOT place the window on the table, put the glitter on the window sheet and then place the card upside-down onto the window. Ha! It wasn’t exactly where I wanted it, and well, you know, when you try to reposition something with dimensionals you are asking for a mess; especially, if glitter is involved. Needless to say, the glitter got on the adhesive part of the dimensionals and made it not adhere well; therefore, when the card was shaken, glitter filtered out the sides of the window. We certianly, DON’T want glitter snow in our house. So, if you make this card, be advised, put the card on the table, put the glitter on the card, and then place the window where it needs to be and DON’T put too much glitter either. I’m sure you can’t see the miniscule amount of glitter in this card, but there is still some left. And, no, I didn’t want to remake the card. No, no, no! I was so frustrated by the time I got it right, I wanted to pull my hair out. My friend, Cheyenne was over here making her card with me, and she had a good laugh at my expense. (Note: make sure to rub the embossing buddy on the side of the window sheet that will make contact with the glitter to get rid of the static electricity.)

Anywhoo, we felt the card needed a little bling. We took the wreath framelit from the Festive Fireplace set and cut out wreaths in silver glimmer paper; then, cut them in half to make boughs. We added EVEN MORE bling by making lights for me and berries for Cheyenne on the boughs with Cherry Cobbler Dazzling Details. Real Red bows accent each bough. The bottom of the card looked so stark when we finished, I added joy in Cherry Cobbler cardstock from a retired SU! die (it’s really old).

And least I forget, the scene was made on Whisper White paper. I cut a circle out of copy paper and placed it on the background piece of cardstock. I sponged Coastal Cabana and Midnight Muse to create the night sky. The trees are from the SU! Wonderland set stamped in Midnight Muse. The sleigh thinlit was used for the sleigh rider and horse, cut in Whisper White cardstock. The background mats are Night of Navy and Whisper White, with the Whisper White embossed with the Stripes folder.


PCCCS165October Card

I think the revised version of the first card is much more to my liking. Either way, I really love this card.

Supplies: SU! retired Joy die. Note – it looks like Midnight Muse ink is not available, you can substitute Night of Navy (I listed it in the supplies).


Price: $110.00

Supply List

Built for Free Using: My Stampin Blog

PAGE TOP
[dealsbar preview] Amazing Deals: !!toolbar-deal-title!! - !!toolbar-deal-merchant!!