Tag : grays

2 posts

This past weekend I attended Heirloom’s Lawrenceville Rubber Stamp & Paper Arts Festival. Friday night I attended the Design & Treasure Make-n-Take with some friends. Saturday we went shopping! I was in search of some stamped images for my Spectrum Noir coloring class held at the end of this month which will feature coloring fabric/clothes. I came across the Santoro stamp sets at the Creek Bank Creations vendor booth. The stamps they featured were large with open areas to color and practice blending techniques. Here is the Santoro Tweed – The Friendly Hedgehog stamp set:

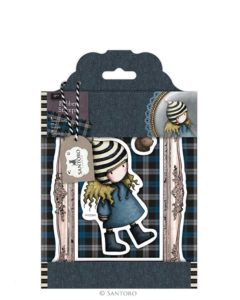
Four of us got together Sunday and made several creations using some of our recent stamp haul. While the other ladies finished their Pink and Main cards, I decided to work on my sample of this stamped image for the Spectrum Noir class at the end of the month. I also like to kill two birds with one stone, so I looked at the online card challenges available this week and decided to enter my card creation for CASology Week 234 – Youth challenge.

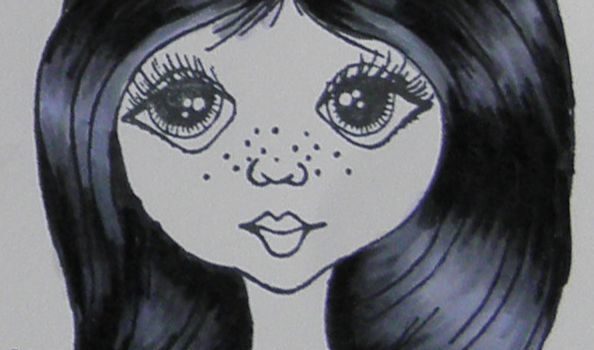
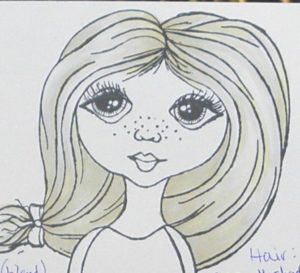
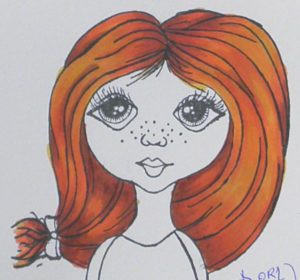
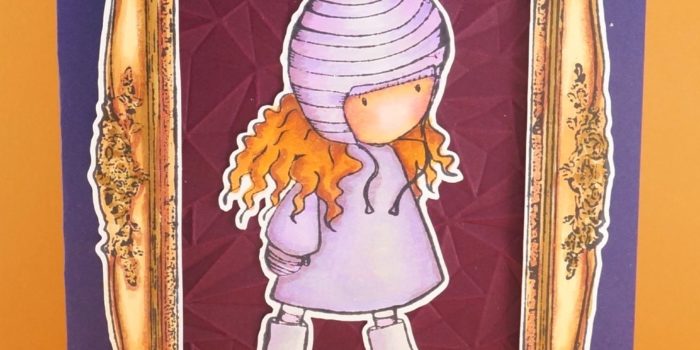
I had already stamped the images using my MISTI the night before. I chose Spectrum Noir cardstock and inked the images with Memento Tuxedo black ink. The ladies around the table wanted a sepia/lavender colored card; therefore, I chose the following colors. I began with the frame and used Spectrum Noir TN1, TN3, TN9, and GB10. Next, was the hat and clothing on the adorable girl. I used IG1, LV1, LV2, and HB1. As usual, I colored the hair a reddish/auburn color. I didn’t want to go too brunette because I felt the hair would blend in too much with the other colors. I wanted a little pop of color against the muted shades. I chose TN2, TN3, TN4, TN9, and OR1. Last but not least was her face. I used FS6, HB3, TN3, and FS8. The colored images are simply stunning.  Once everything was colored, I cut the images out using Cheyenne’s new Brother Scan and Cut 2. I did have to cut the inside of the frame by hand but I’m sure there’s a way to do this with the cutter.

The finished card ended up being a 5 x 7 card because the frame is almost that large. I took some SU! retired Grape cardstock for the base (I can’t remember the name other than Grape). The mat is SU! Rich Razzleberry which I embossed with one of my new We R Memory Keepers Next Leveling Embossing folder. I LOVE that folder design!!! Contact Creek Bank Creations to purchase one for yourself. The frame is popped up using two layers of foam tape and the girl is adhered using FSJ White Liner Tape.

Here is the finished card. It is just too cute.

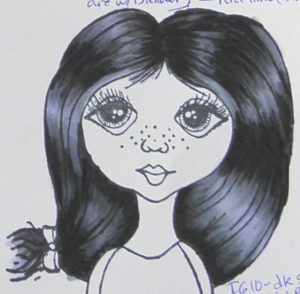
Just for comparison, I’ve added Cheyenne’s photo taken with her iPhone before the card was assembled. It’s amazing how colored cardstock and lighting make a difference in the same completed image.

Thanks so much for dropping by!


If you have been keeping up with my posts, you will know I have been offering classes on how to color with alcohol markers; specifically, Spectrum Noir alcohol markers. We have learned the basics, moved on to skin coloring, and most recently, worked with hair coloring. This, so far, would be the most challenging technique to learn. After coloring about ten samples, I finally came up with a way that creates some gorgeous highlight effects on hair. If you go back and look at the Spectrum Noir – Skin Coloring post and look at the completed skin coloring class sample showing the range of skin tones we learned, you will see each girl’s hair is colored. The images looked so stark when we finished, I hurriedly added some color to their hair to even out the stamped images without taking the time to account for in-depth lighting and shading. Now, take the time to compare these previous images to the actual class images and you will see a huge difference in technique. The Spectrum Noir – Hair Coloring technique took two to three times the amount of time to create stunning highlight effects versus slapping on some color.

Before I show you the first sample, I want to detail the technique I used on all the stamped images. First, I consulted my Spectrum Noir hex chart and determined which colors I wanted to use for each sample used in the hair coloring class (light blonde, platinum, golden blonde, brunette, bright red, and black). Next, I lay out my color choices with the darkest color first, the lightest color next, the second lightest color beside the lightest color; then, a medium color (note: some choices only included three colors and sometimes certain hair tones might require more, but I think you get the jist). Contrary to how we started coloring in the basic and skin tone class, I start with the darkest shade first, adding the lightest highlight areas next making sure to leave white space (do not color all white space); then, moving from color choice to color choice as mentioned previously in how I set up the order of my markers. This order also helps to keep me from grabbing the wrong color and messing up my whole project by accident. I am working on making video tutorials for hair coloring.

Note: For both the skin and hair coloring classes, the student’s purchased Fun Stampers Journey – Media Artist stamp set. This is a larger stamp and great for learning how to manipulate the Spectrum Noir alcohol markers using shading and highlighting effects.

Sample #1:

Light Blonde –  Blonde hair is the easiest hair coloring effect. This is due to the makers having a high content of blending solution in them. The effects are more subtle and not so easy to create a hot mess):

Light Blond Hair


Sample #2:

Platinum Blonde – One of my friend’s has platinum blonde hair. This is a very hard color to recreate, because the shading can be minimal; but yet, you need shading to create depth and interest to your image. This hair color will be a project in the works requiring more experimentation until I get the color combination down to my liking.


Sample #3:

Golden Blonde – A very easy color combination with easy blending. But, yes there is a “but”, beginning with this darker shade and with all the darker shades, you do not want to pull or blend the darkest color(s) using your lightest color(s). You will want to make sure to blend out the darker colors with your medium tones into the lighter areas; then, use your lightest color(s). If you don’t, the high amount of blending solution in your light colors will act like a blender pen and pull color out of your dark shades. This will make your shading look mottled and blotched (not good).


Sample #4:

Brunette – Another easy hair color to create.


Bright Red – Yes, this is a very bright color, but I LOVE it (hmmm, I wonder why).


Sample #6:

Black Hair – By far the hardest hair color to create. It is important to create appropriate highlights when coloring black hair. This sample image has a lot of light hitting her hair. You will still need appropriate highlights even with minimal light; otherwise, the hair will look like a huge ink blob of black with no definition. Yuk! Several colors can be chosen for black highlights, grays, purples, and blue hues. If you will start to notice highlights on black hair in the real world, there are varying shades of light colors creating these highlight effects. Also, begin to notice where the light falls on on the hair with different hair styles. It took me three tries to come up with a black hair color, I liked. I did like the one before this one, but it had a lot of medium-light purple shading, which made her a great looking goth girl; but, for the class, I wanted to go lighter with the higlights. Also, this hair color takes three to four times as long to create. You HAVE to take your time, begin in small flicking strokes, blending and highlighting, moving on little by little to cover the entire hair area. If you go too fast, your darker areas will begin to look like black blotches. A special note here: I used the True Black almost at the very end of coloring the image. It is too easy to put too much black down and create a mess. It is used sparingly.


I will add more hair colors at a later time along with my coloring bloopers, and I will add some skin tones to my girls as well.

Supplies:

Fun Stampers Journey – Media Girl Stamp Set
Ink: Memento Tuxedo Black
Color: Spectrum Noir Alcohol Markers


PAGE TOP
[dealsbar preview] Amazing Deals: !!toolbar-deal-title!! - !!toolbar-deal-merchant!!