Tag : girl

4 posts

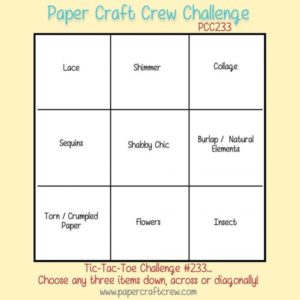
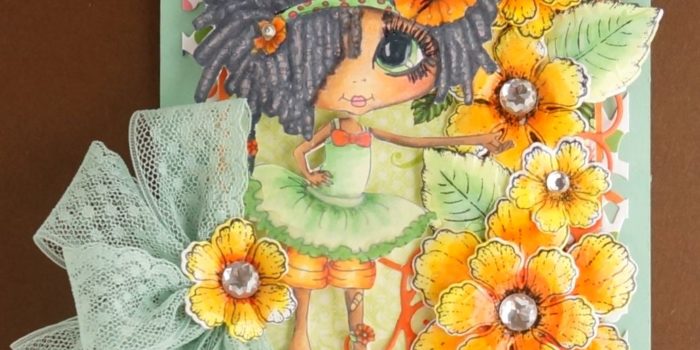
I am making it under the wire, yet again, for a Paper Craft Crew (#233) challenge. This week’s challenge is a Tic-Tac-Toe Challenge. I chose the middle, vertical column (shimmer, Shabby Chic, flowers) for my card. Here is the sketch:

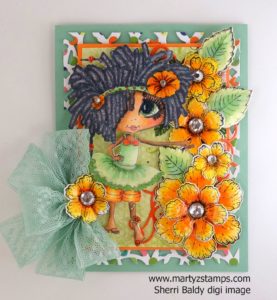
This image is a digi stamp I purchased from Sherri Baldy’s Etsy shop. The purchase gave me two digi stamps of the cutest girl. I have a blog post featuring the other image here.

I had decided to try and make dread locks/ringlets on my girl after watching a YouTube tutorial on coloring with alcohol markers (sorry, I didn’t make a note of the video). I will do my best to note the markers I used, but this was one of those creative moments where I was creating and not paying attention to the details of what I used. Anyway, I’ll pull out my Spectrum Noir Hex chart and do the best I can (it will be pretty close).

Spectrum Noir alcohol markers were used on the girl and the flowers. The hair – IG10, IG2, BG6, BG3; skin – HB2, FS2, FS7, BG4, TN3, TN5; lips and cheeks – FS8; dress/headband/pants – LG2, LG3, LG5, LY`, OR1, OR2; eye – LG2, LG5; flowers – CT2, OR2, OR3; leaves – LG2, LG3, LG5; and, the blender pen was used throughout.

The base cardstock is SU! Pistachio. The images were stamped on Spectrum Noir cardstock using Memento Tuxedo Black ink. The base mat is Pink and Main designer paper die cut with Fun Stamper Journey Persian Garden die, The orange mat is FSJ Creamsicle cardstock with a light green mat of designer paper from Heartfelt Creations Sweet Berry 12×12 paper pack (this explains all the flowers – I had to cover up all the strawberries on the mat – LOL), a Spellbinders die was used to create some FSJ Creamsicle swirls. Spectrum Noir clear glitter pen was applied to the hair and skirt to add the SHIMMER. FSJ Journey Glaze was applied to the flowers, skirt waist, skirt trim, and eye. Diamond rhinestones were added to the flower centers, and a triple bow from SU! lace Pistachio ribbon accented the card. Last but not least, everything is popped, popped, popped up. A lot of dimension is going on here.

It is a very busy card, but I like busy and it really yells Shabby Chic.

I really love the way this card turned out. It is one of my favorites.

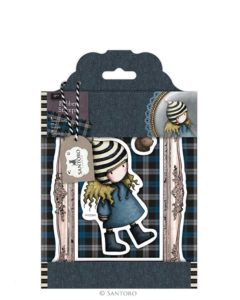
This past weekend I attended Heirloom’s Lawrenceville Rubber Stamp & Paper Arts Festival. Friday night I attended the Design & Treasure Make-n-Take with some friends. Saturday we went shopping! I was in search of some stamped images for my Spectrum Noir coloring class held at the end of this month which will feature coloring fabric/clothes. I came across the Santoro stamp sets at the Creek Bank Creations vendor booth. The stamps they featured were large with open areas to color and practice blending techniques. Here is the Santoro Tweed – The Friendly Hedgehog stamp set:

Four of us got together Sunday and made several creations using some of our recent stamp haul. While the other ladies finished their Pink and Main cards, I decided to work on my sample of this stamped image for the Spectrum Noir class at the end of the month. I also like to kill two birds with one stone, so I looked at the online card challenges available this week and decided to enter my card creation for CASology Week 234 – Youth challenge.

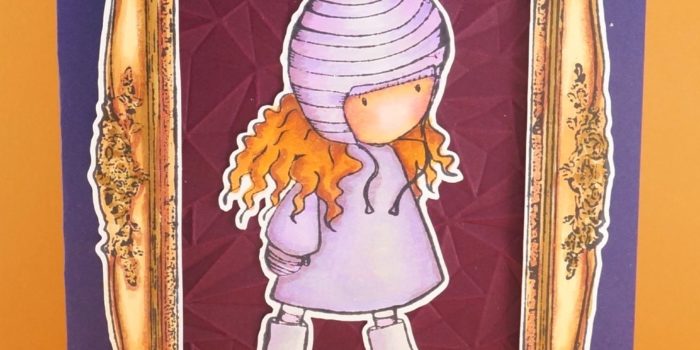
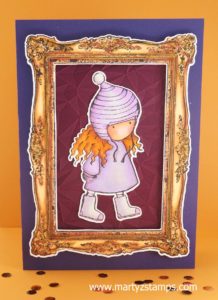
I had already stamped the images using my MISTI the night before. I chose Spectrum Noir cardstock and inked the images with Memento Tuxedo black ink. The ladies around the table wanted a sepia/lavender colored card; therefore, I chose the following colors. I began with the frame and used Spectrum Noir TN1, TN3, TN9, and GB10. Next, was the hat and clothing on the adorable girl. I used IG1, LV1, LV2, and HB1. As usual, I colored the hair a reddish/auburn color. I didn’t want to go too brunette because I felt the hair would blend in too much with the other colors. I wanted a little pop of color against the muted shades. I chose TN2, TN3, TN4, TN9, and OR1. Last but not least was her face. I used FS6, HB3, TN3, and FS8. The colored images are simply stunning.  Once everything was colored, I cut the images out using Cheyenne’s new Brother Scan and Cut 2. I did have to cut the inside of the frame by hand but I’m sure there’s a way to do this with the cutter.

The finished card ended up being a 5 x 7 card because the frame is almost that large. I took some SU! retired Grape cardstock for the base (I can’t remember the name other than Grape). The mat is SU! Rich Razzleberry which I embossed with one of my new We R Memory Keepers Next Leveling Embossing folder. I LOVE that folder design!!! Contact Creek Bank Creations to purchase one for yourself. The frame is popped up using two layers of foam tape and the girl is adhered using FSJ White Liner Tape.

Here is the finished card. It is just too cute.

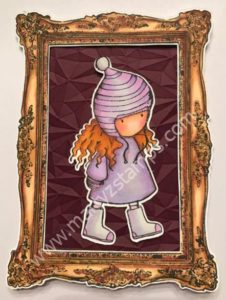
Just for comparison, I’ve added Cheyenne’s photo taken with her iPhone before the card was assembled. It’s amazing how colored cardstock and lighting make a difference in the same completed image.

Thanks so much for dropping by!


When I purchased my Spectrum Noir alcohol markers, I sent out an email letting my group of stampers know I would be providing classes on how to use these wonderful markers. The only requirement was they needed to purchase their own markers to use in class. I had four ladies sign up, and they went ahead and purchased all 168 markers through Consumer Crafts (they have the BEST price on these markers AND they offer 25% site wide regularly – just saying). We have had two classes so far, and I wanted to give a quick update about the progress of our Spectrum Noir alcohol marker colorist group has made as of this past week.

Note: These are NOT Copic markers and quite frankly, some of the YouTube reviews and compairsons do not do the Spectrum Noir Alcohol Markers justice. These markers fit into their own category; they are versatile; produce a great colored image; they are VERY affordable; and if you will watch the Spectrum Noir – Crafter’s Companion tutorials, you will have great success and produce outstanding papercraft projects. That being said, you can find Accreditation Coloring Download at www.spectrumnoir.com .  You can print this off on an inkjet printer and follow along with their YouTube tutorials to learn, to practice, and to turn in to them to receive accreditation as a colorist.

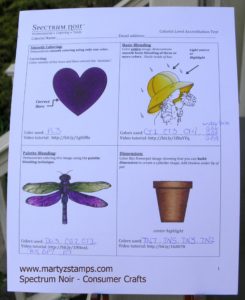
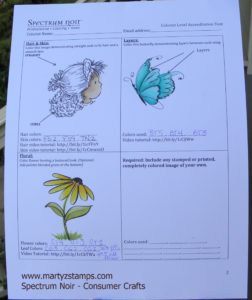
My first class was learning some of the basics. We covered Smooth Coloring, Basic Blending, Palette Blending, Dimension, Layers, and Florals. The class had a GREAT time and came away with a lot of hands-on practice (we colored two images).  Here are the two sheets we have completed so far (note: the second class was skin coloring; therefore, the skin on the girl is colored in on the second sheet):

I found it very hard to get a good picture. The heart on the first sheet is a deep purple color and in “real” life, you can see this clearly.


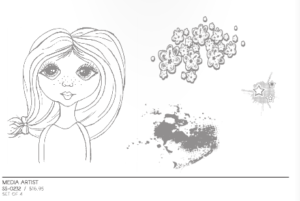
The second class focused on skin tones. I researched Spectrum Noir recipes for skin color on Pinterest and I took those color combinations and either used them, tweaked them, or came up with my own. The cost for classes two and three (skin and hair coloring) included a Fun Stampers Journey stamp called Media Artist (see below).

This image of the girl is a fantastic stamp to practice color combinations for skin and hair. I stamped six images of the girl onto Fun Stamper Journey Whipped Cream cardstock. Note: The quality of paper is important when using any alcohol markers. A lower quality product will increase bleeding of your ink color into areas you don’t want to be colored. Stampin’ Up! Whisper White is a great cardstock to use as well. You can also purchase specialty paper through Consumer Crafts for alcohol marker coloring.

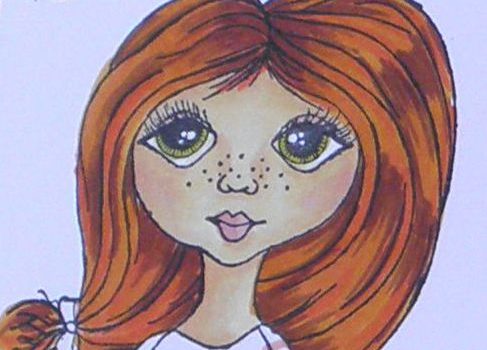
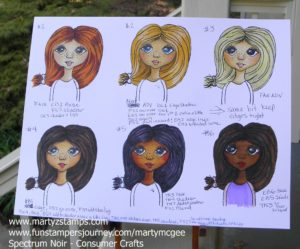
We completed our skin tones, and we all made a few mistakes (that includes me). On my #6 girl, I used the wrong base color (I switched my colors) and she was so dark that her nose couldn’t be seen. I was able to correct this with the blender pen chisel tip and going over and over the image until I pushed some color through the cardstock to lighten up the image. You can tell because the coloring is a little mottled. I found that some of the lighter colors in the combo I chose could pull color out (acting like the blender) instead of creating a smooth blend. You will be able to see this in the next picture. But, that’s o.k. because we are all new to this type of coloring and there is always a learning curve when you learn something new.  I will be gong back and stamping more images and honing my skin coloring techniques to share with my group of colorists. Our next class will feature hair coloring. The image below has the hair colored because I decided to play around after class to see what I could come up with. These are not perfect hair colors, but I just felt the girl’s looked a little naked without hair color. Here is the sheet from class:

Once these classes are finished, our group should be able to scan and upload our accreditation pages to Spectrum Noir and receive their stamp of approval. I will, then, develop YouTube tutorials on how to color with the Spectrum Noir alcohol markers. I hope you decide to look into Spectrum Noir alcohol markers and begin to create outstanding colored papercraft projects.

Yes, I’m on a Spectrum Noir coloring jag! And, my cohort in this coloring jag is Cheyenne Luken. We work very well together when creating papercrafting projects. We disagree with placement, with color choices, with everything, but in the end we love the other ones creation sometimes a little more than our own. In other words, we have a lot of fun! On these cards, we were making use of Cheyenne’s limited supply of Spectrum Noir alcohol markers. We did use some Copics for the skin tones and the faint shadow around the images, and Cheyenne used more Copic markers on her card. I tried to stick solely to the Spectrum Noir’s, and we lamented the whole time we wished our orders were already here! We will receive our orders this week (Tuesday and Wednesday)!!!! AND, I was looking at Consumer Crafts this morning and the two 24 sets (the Darks and the Pastels) which were out-of-stock for many weeks are now in stock. We really need (o.k. want) the Pastels because most of the skin tones needed for lighter shading are in that set. I’m still on the fence about the Darks. I think I can hold off on ordering them until they have another huge sale. . . . . or, maybe not!

Anyway, Saturday Cheyenne gave me a call and asked if she could come over and make some more cards. She asked me, do you want to work on your make-n-take cards, do another Heartfelt Creation card, make a “shakey butt” card from Art Impressions, or go to the Stamp Store (Impressive Ideas) in Norcross? I immediately said, I want to go to the stamp store in Norcross. Who wouldn’t want to say that???? Really, like I needed to spend anymore money, but I have been wanting a die to use to make a stitching affect around the exact size of an A2 sized card (5 1/2 x 4 1/4). So, off we went . . . . . to the store that is – not crazy. I had forgotten Sandy Allnock was going to be in-house teaching classes but, I remembered Impressives Ideas’ newsletter with the dates for these classes once we walked through the store’s doors due to several tables set up with papercrafters creating some amazing projects. We were not hampered in the least by these tables as we made our way through the store. In fact we navigated around them like the shopping professionals we are. As we wandered around ooooooing and aaaahhhing at all the gorgeous card samples, Jenny Gropp, one of the owners, helped us find everything we needed to purchase (yes, I did find the die I wanted) and some more items to add to our ever-growing wish list.

One of Cheyenne’s purchases was Piper from Saturated Canary by Krista Smith (her stamps can be purchased from Impressive Ideas’ store in Norcross). When we got back to my house after being at the store for 2 hours, we didn’t have time to make a card. I had to serve in our church’s cafe and I didn’t have any time to spare. So, she came back over on Sunday afternoon. And, we got started.

We stamped the images with Memento black ink on SU! Whisper White cardstock. Once we were finished coloring our stamped images, we cut them out using a Simon Says stitched oval die. The paper frame and mats came from Penny Black’s Painted Blooms paper stack. The frame was cut using a Simon Says stitched frame die. I do not have a name for the flower bunches we used as embellishments on the cards, but we bought them at Impressive Ideas (I threw away the packaging).

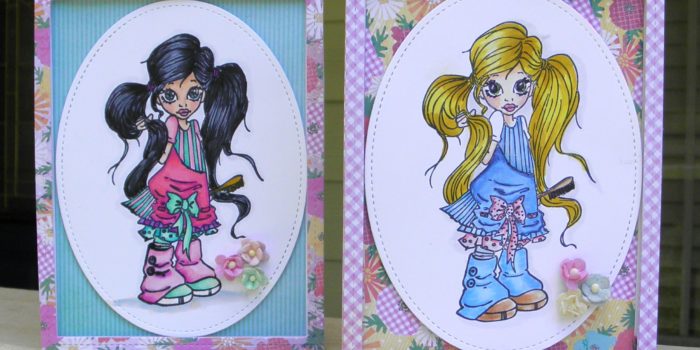
Once the image was stamped, we were ready to color them. I wanted to have black hair on my Piper because black hair is a challenge to color and I always like a challenge. Cheyenne chose blond hair because her children are blond-headed. This time I did remembered to write down the colors I used for the black-haired girl.

On my Piper, I used Copic markers for the skin E00, YR00, RV11, RV14 and N0 to outline the stamped image. For her hair I used Spectrum Noir BGR1, BGR3, and True Black; her shirt, apron, and leggings are Spectrum Noir PP3, PP5, and BP6; her jumper, petticoat, leggings, and shoes are Spectrum Noir PP3, PP5, BP6, BT2, BT4, BT5, BGR3 and oops, I didn’t write down the brush color. There is definitely room for improvement on her hair highlight positions, but for a first go at black hair coloring, I’m happy. Here is my Piper:
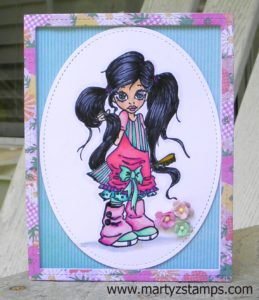
Marty's Piper

Cheyenne did use some Spectrum Noir markers on her Piper’s hair. They were CT2, CT4, and one of SU! Blendabilities yellow markers (the medium tone out of the 3 pack). I’m pretty sure she used Copic markers for her girl’s outfit. Here is Cheyenne’s Piper:
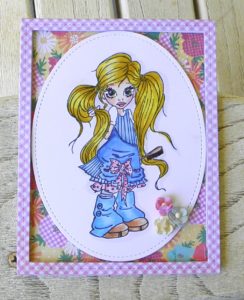
Cheyenne's Piper

Cheyenne’s Piper

Here they are together, they make such good friends:
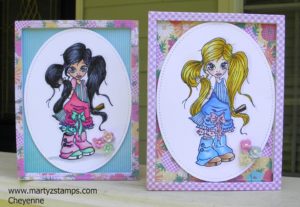
 

Marty's Piper (left) Cheyenne's Piper (right) Saturated Canary stamps

Marty’s Piper (left) Cheyenne’s Piper (right)
Saturated Canary stamps


And, . . . . . we collaborated on this next Piper. She was abandoned at first because her hair was looking too muddy and muddled. Cheyenne took another look at her when we finished the first two and noticed her hair looked pretty good once the markers had time to saturate the paper and dry out. So, Cheyenne takes credit for the hair color. She handed her off to me for coloring the clothes. Once the clothes were colored, Cheyenne dug through my stash of paper and found the Glitter Cardstock Matstack I purchased from Hobby Lobby many years ago and had never used along with the Recollections Resist Paper Pad I purchased from Michael’s on a 70% off clearance rack. I used Tim Holtz distressed inks Spiced Marmalade and Mustard Seed along with SU! Lucky Limeade and SU! Rich Razzleberry to ink the resist paper mat. For the orange glitter mat and the SU! Elegant Eggplant frame we used Simon Says stitched frames. I accented the bottom right of the card with SU! Halloween Nights Enamel Dots.  Here is our Piper:
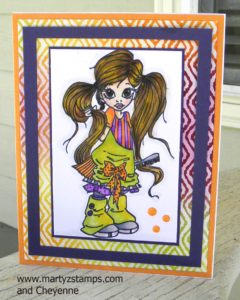
Marty and Cheyenne Piper

Don’t forget local ladies, I will be having Spectrum Noir technique classes to learn the basics and more complicated techniques. You will have to bring your own markers. The best price for them is through Consumer Crafts.

PAGE TOP
[dealsbar preview] Amazing Deals: !!toolbar-deal-title!! - !!toolbar-deal-merchant!!