I know I can’t say enough about how much I love being a coach with Fun Stampers Journey. I particularly love their catalogs which feature amazing card and project ideas. This year for Christmas inspiration, I went straight to the catalogs for some card ideas. I re-imagined or Case’d card ideas straight from our catalogs and some from our group of wonderful coaches.
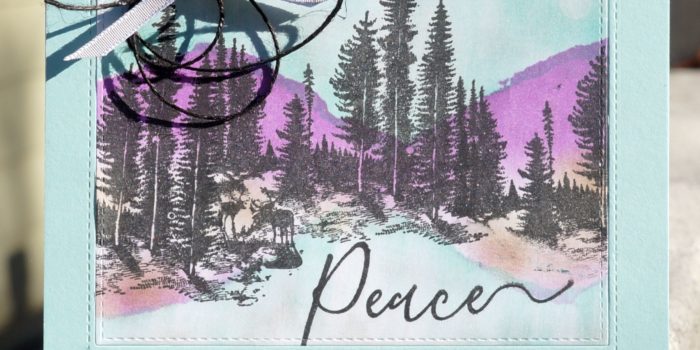
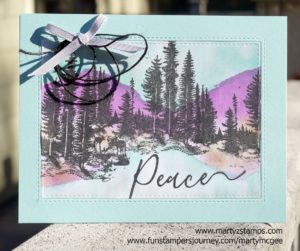
The first card featured is the Fresh Forest stamp set (SS-0487 or the bundle BD-0271) and Holiday Wishes (SS-0469). I gained inspiration from the card featured on page 56 of our main Inspiration Catalog. Since my group of stampers would be creating a lot of cards in one class, I wanted to make sure most of the cards were easy to recreate. I created a remixed version below.
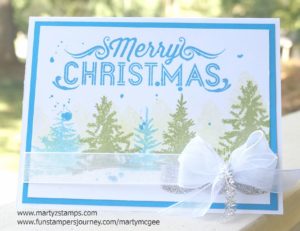
I used FSJ Whip Cream (CS-0040) as a base and the main piece of cardstock used for stamping. I stamped the Merry Christmas and two of the smaller trees with FSJ Beach Breeze fusion ink (IP-0044). The rest of the trees I used FSJ Lemon Grass fusion ink IP-0022). The shadowed affect behind the trees is created using one of the smaller trees stamped using FSJ Sweet Pear fusion ink (IP-0054). To create the snowy hills, I masked the lower portion of the card with a curvy piece of cardstock. This kept the bottom of the trees from making an ink impression and created the illusion of snow banks and smaller trees stamped with the same stamp. The flecks of blue on the card was created using FSJ Beach Ball acrylic paint (JM-0102) thinned down with water and flicked onto the card with a paint brush. The stamped piece of cardstock was adhered to a mat from FSJ Beach Breeze cardstock (CS-0088). The card was accented with Special Day Organza Ribbon (AC-0316) and Silver Tinsel (AC-0341). Last but not least is a strip of Silver Sparkle Tape (AC-0259). Super Cute, Super Easy, Wow!
I feel in love with this next card, and I Case’d straight out of the catalog. I mentioned to Rose Curtis on FSJ Coach Connection Facebook Page; if I create a card way in advance of a class, I should make another sample of the card the night before the class so I can remember how I made it. I really had those ladies at this class working really hard to complete the textured snowflake. I helped one of the attendees with her stenciled image, and I thought, “I don’t remember this card being this hard to make.” Well, when I got home, I happened to look at the directions in the catalog and yes, I wanted to beat my head against the wall. I can really make something very simple, very complicated. LOL
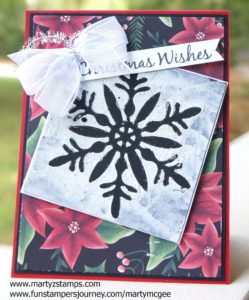
You can get the directions for this card by viewing the Journey Holiday catalog on-line (click here). Note: The sentiment was stamped from the Hostess Exclusive Night Star stamp set (SS-0518) – I cut off the Joyful portion because it was too long. I used the following cardstock: Cranberry Bliss (CS-0090), Black Licorice (CS-0003), Whip Cream (CS-0040), and the Christmas Cheer Prints (PP-0049). The snowflake mask was created using the Snow Blooms die set (DI-0253). Other supplies needed were Journey Gesso (JM-0072) – Note: the catalog references Journey Modeling Paste (JM-0073), but I didn’t have any and the Gesso worked just fine, a Spatula (TO-0089), Special Day Organza Ribbon (AC-0316) and Silver Tinsel (AC-0341).
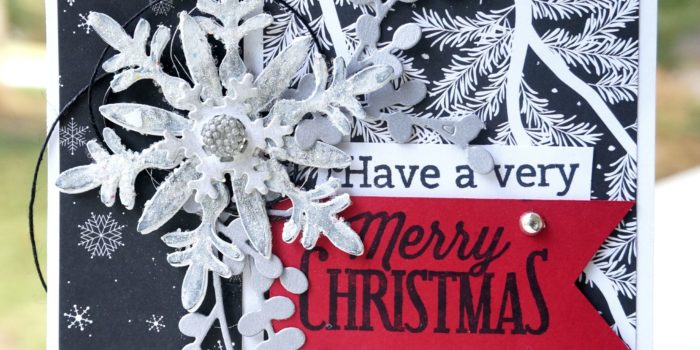
I had the Black Licorice snowflake mask left over from creating the previous card (the catalog suggest using chip board, but I didn’t have any; therefore, the Black Licorice snowflake). I was thinking how could I use this instead of throwing it away and I saw the card idea featured on page 40 of the Journey Holidays catalog and decided to re-imagine this card idea. Here is my version below:
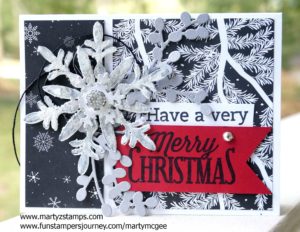
The base of this card is FSJ Whip Cream cardstock (CS-0040). I cut two mats from the Christmas Cheer Prints 12×12 paper (PP-0049). I must mention the Christmas Cheer Prints (PP-0049) contains 24 12×12 sheets, 4 each of 6 two-sided designs! What a deal. I cut two more large snowflakes from the Snow Blooms (DI-0253) out of Whip Cream cardstock (CS-0040). I glued the white together and the black one on top of the two white snowflakes. I added sparkle to the snowflake with FSJ Sparkle Dust (AC-0151). I die-cut the smallest snowflake out of Whip Cream cardstock, applied Silver Pan Pastel to it and adhered it to the other larger snowflakes. I accented the snowflake with a large Sparkle Drop (AC-0022). The sentiment was stamped using Black Licorice fusion ink (IP-0041) onto Whip Cream cardstock and Candy Apple cardstock (CS-0007). I added some interest and dimension to the card by die-cutting the Bloom Cluster (DI-0163) from Journey Brush Silver (CS-0135). The final accent is a Fashion Silver (AC-0293) drop of goodness. This is my favorite card!
If you are looking to create a super simple, super quick, quick, quick card for a mass mailing of Christmas Cheer, this is your card.

I was inspired by the card featured on page 41 of the Journey Holidays catalog. I took the word stamps from the Holiday Wishes stamp set (SS-0469) and placed them on one clear block. This made stamping the sentiment in Black Licorice fusion ink (IP-0041) onto the Whip Cream cardstock (CS-0040) really easy. The green bows were stamped using FSJ Lemongrass Fusion ink (IP0022). The bows and curly swirls were stamped using Candy Apple fusion ink (IP-0017). I used Fashion Silver (AC-0293) accents on the bows. The red dots are not FSJ because I did not have my most wonder Rainbow Drops (AC-0178), yet (they will arrive today) and I had to make due. The mats included the following cardstocks – Candy Apple cardstock (CS-0007), Limeade Splash cardstock (CS-0020), and the Christmas Cheer prints (PP-0049). There is a splash of Sparkle Silk (IP-0126) to finish it off.
The next beautiful card was Case’d straight from another coach Marcie Besecker. I tweaked it a little bit for my Christmas Buffet Make-It class. Here is my version below:
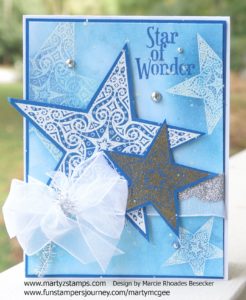
The tweaks were: Star of Wonder sentiment is stamped onto the embossed mat with Huckleberry Fusion ink (IP-0035), Silver Tinsel (AC-0341) instead of the Gold Tinsel (AC-0340), triple bow instead of a double bow from the Special Day Organza Ribbon (AC-0316), a large star with a medium star instead of two medium stars, and a Huckleberry Fusion cardstock base mat (CS-0015). The stamp set for this card is the Night Start (SS-0518) from the Journey Holidays catalog.
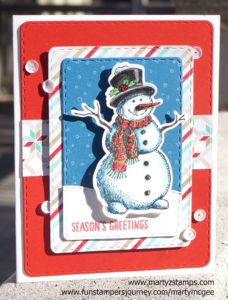
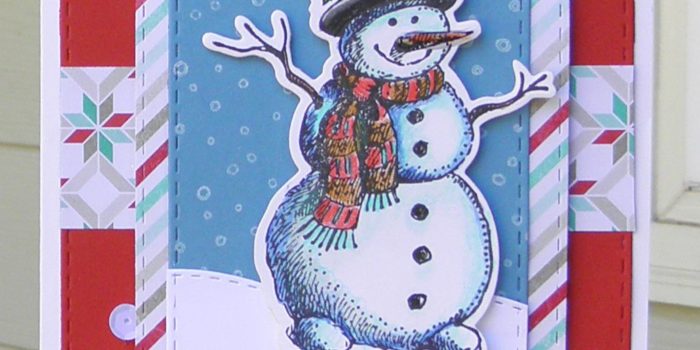
The next card I cannot find my inspiration for this layout, but I know I looked at something to create this because of the tree. This is what I get for not making notes as I create (like that will ever happen – once I get going, I’m off and running, no time to slow down and write down any notes). Anywhoo, I love this stamp set Snowmen Days (SS-0519) from the Journey Holidays catalog. I must have a snowman card every year for my Christmas card classes and this set was too cute to pass up.
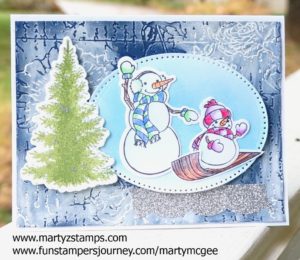
The base and all cardstock used for stamping is FSJ Whip Cream cardstock (CS-0040). The snowmen were stamped using Black Licorice Fusion Ink (IP-0041), the tree was stamped using Lemongrass fusion ink (IP-0022) with some Fresh Forest fusion ink (IP-0013) barely stamped onto the stamp down the middle. The tree was die-cut with a die from the Fresh Forest Bundle (BD-0271 found on page 86 of the Inspiration catalog. The oval mat was pierced and die-cut using the Journey Ovals (DI-0042). The background is sponged onto the oval using Pool Play and Beach Breeze fusion inks (IP-0051 and IP-0044). The base mat is cut from Denim Days cardstock (CS-0113) and embossed with the $100 level Bloom Benefit Love Letter Embossing Folder (EF-0025) NOTE: It’s free with a $100 purchase!! I turned the embossed piece of cardstock upside down (the de-bossed side) and using a little water to make the Journey Gesso (JM-0072) move easier, I smeared and rubbed the Gesso over the entire mat leaving a few places untouched. The snowmen were colored using the Journey Color Burst Pencils (JM-0077). The final touch was a piece of Silver Sparkle Tape (AC-0259). Love it!
These are all the cards I came up with using inspiration from other sources. I hope this gets your creative juices flowing. Fun Stampers Journey provides amazing card, scrapbook, and project ideas throughout both their catalogs. As a Journey Coach, I have access to a private Facebook page for Coaches only where we all share our ideas and encourage each other in our journey.
