Category : Card Challenge

121 posts

In one of my Spectrum Noir classes I taught to my colorists, we used our Spectrum Noir alcohol markers to color a stamped image from C. C. Designs Rubber Stamps & Dies called Scaredy Cat (DA1006). I just love the expression on this cat’s face with the sentiment, “Need a HUG?!” I can’t decide if the cat is super excited, totally scared of something and needs a hug, or what my face looks like when someone is coming in for a hug. LOL What do you think?

I know I think this made a great card to submit at Freshly Made Sketches card challenge #259 this week. The sketch is super simple but some really WOW cards can be made from this sketch. Here is the sketch:

My card featured “Scaredy Cat” colored with Spectrum Noir markers and popped up on a circle with two banners peeking out from below. For added interest I die cut a stitched rectangle and matted it on FSJ Deep Lilac cardstock. The cat was stamped using Memento Tuxedo Black Ink and the sentiment was stamped with FSJ Black Licorice. Love it!

Enjoy!

Supplies:

Fun Stampers Journey:
Cardstock – Whipped Cream, Deep Lilac, and Lavendar Fusion
Inks – Memento Tuxedo Black, and Black Licorice
Dies – Stitched Rectangles

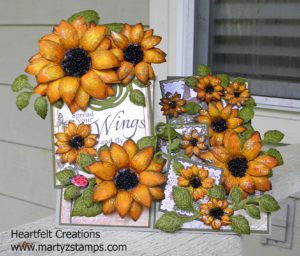
This past September three friends and I went to the Stamp Scrap Art Tour held in Duluth, GA. Pink and Main was one of the vendors at this show. The owner and illustrator for Pink and Main, Michelle Currie, was at the Friday night make-n-take, and we were able to complete an awesome card, purchase a discounted die set (only available during the make-n-take), and have a great time enjoying her company. We also had the opportunity to see her the next day while shopping for all sorts of goodies. My friend and co-crafter, Cheyenne, purchased their scarecrow stamp set and coordinating dies.

We spent a whole afternoon stamping the scarecrows and coloring them with our Spectrum Noir alcohol markers. We had a great time. Cheyenne ended up putting her card together that evening, but when I am tired I know better than to try to pull together something important. It usually spells disaster. I finally put mine together this weekend. AND, it is gorgeous.

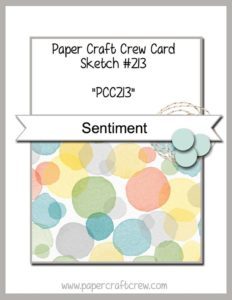
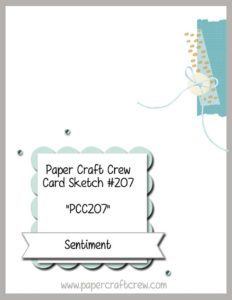
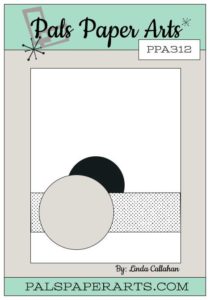
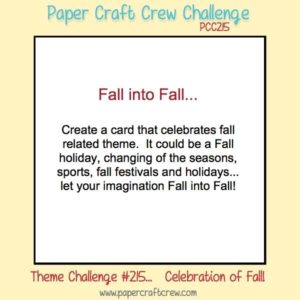
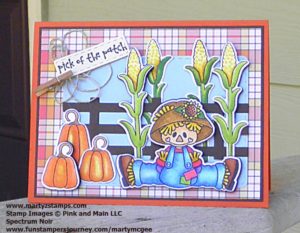
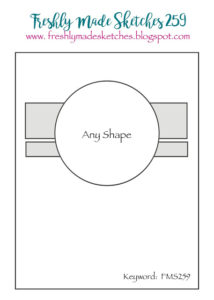
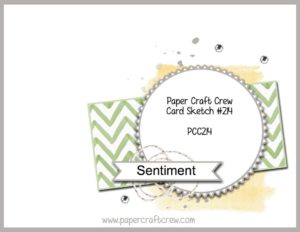
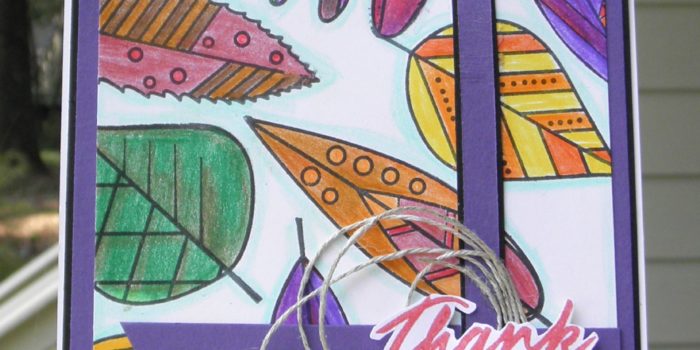
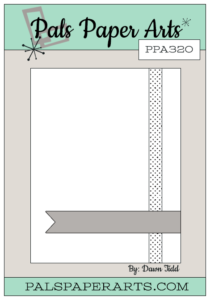
When I saw the Paper Craft Crew #215 challenge today, I knew my Pink and Main Scarecrow card was the perfect match for this challenge. Here is the card challenge:

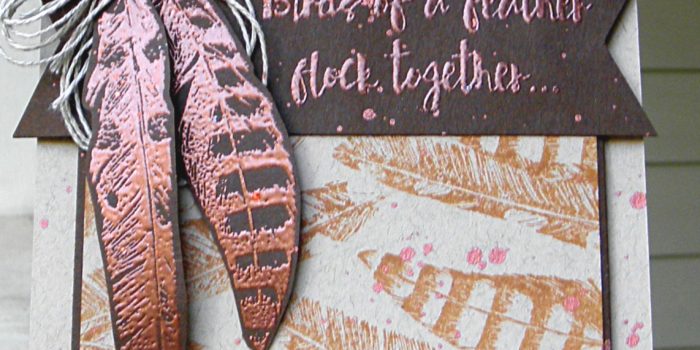
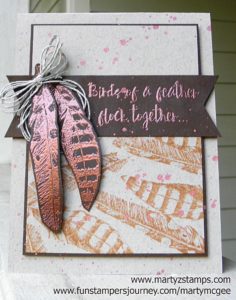
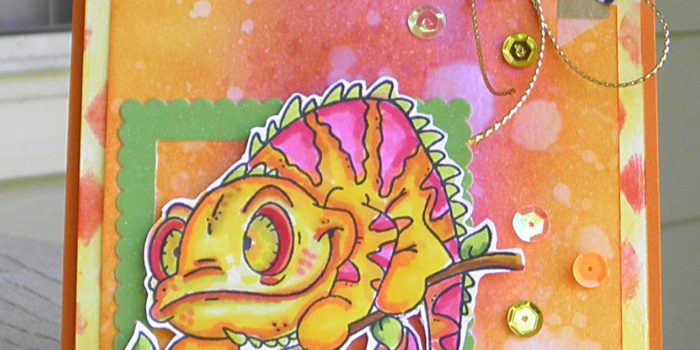
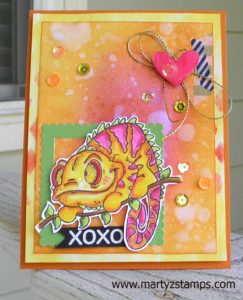
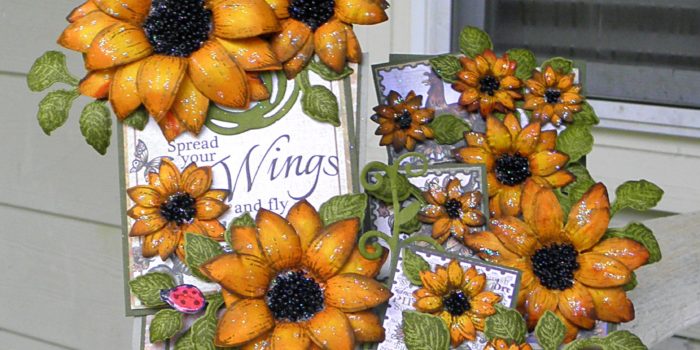
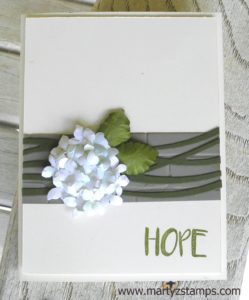
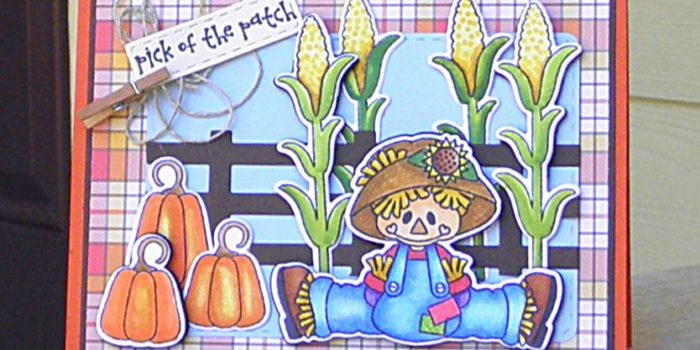
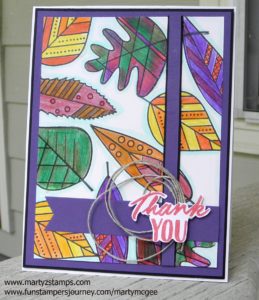
For our scarecrow card, we stamped the images on Spectrum Noir paper with Tuxedo Black Memento Ink. The images were colored with our Spectrum Noir alcohol markers. See the end of this post for the color combos. Several of the images are raised using black foam. I believe we used Lawn Fawn’s 6×6 plaid paper pack for the printed mat. The blue mat is SU! Bashful Blue (a very retired cardstock), the plaid mat is on FSJ Hazelnut cardstock and the base is a SU! paper (Cheyenne’s paper wasn’t listed but I think FSJ Orange Rave or Tangerine Fusion would work really well). The mini-clothes pin and twine are from Fun Stampers Journey (FSJ). Here is the card:

Spectrum Noir Color Combos (the ones I wrote down):

Jeans – TB5, TB2, TB4, GG1
Corn – CT1, GB9, GB6
Straw – CT4, GB6
Hat – Fl Yellow, TN3, FS1 and Color Burst pencils for crosshatch texture
Pumpkins – CT1, OR2, OR3
Corn stalks – can’t remember the lighter green but I did palette blending with the lighter one and DG3

Supplies:

Pink and Main – Scarecrows and dies, stitched rectangular (rounded corner) dies
Lawn Fawn – plaid paper stack
FSJ – Tangerine Fusion, Hazelnut cardstocks, Color Burst Pencils, twine, clothes pin
Inks and Markers – Memento Black, Spectrum Noir alcohol markers
Misc – Black Fun Foam sheets, fence die (bought a long time ago from My Favorite Things)

When I saw Paper Craft Crew sketch challenge, I was super excited because I had the perfect card to enter. I have been so busy I would have missed the deadline but PCC extended their usual one week deadline to two weeks. Woo hoo! This is their card sketch:

13925327_10209951237435388_6685491755259514637_n

When you order a starter kit with Fun Stampers Journey, you choose three stamp sets and one ATS (Artist Trading Stamp). For one of my three regular stamps, I chose Hit The Road. My group of stampers are always in need of masculine cards, and this set fit the bill. I stamped the truck and road sign in Black Licorice ink onto Candy Apple card stock and fussy cut them out.  The road signs on the Oatmeal Cookie mat are stamped in Pumpkin Bread ink. The stitched partial circle was cut using the Journey Platinum Machine with the Journey Circle dies from Hazelnut card stock (I cut off part of the bottom circle once it was mounted to the Oatmeal Cookie mat and placed the leftover piece at the top of the mat). Before I added the truck, sign, and ribbon, I sprinkled some Bronze Silk onto my mat.  I popped the truck and sign up using small and medium Journey Foam Squares, and I added an accent of gingham cocoa ribbon to the sign with a glue dot.  I matted the Oatmeal Cookie mat onto a Black Licorice mat and then adhered these mats to the Candy Apple base. This card is perfect for a masculine birthday, thank you, get well, etc. I think the truck and sign really make the card pop.

PCC214

Supplies:

Fun Stampers Journey: (You can order any of the listed supplies to create your own Hit The Road card – click here)

Cardstock: CS-0007 Candy Apple, CS-0013 Hazelnut, CS-0023 Oatmeal Cookie, CS-0003 Black Licorice
Inks: IP0044 – Black Licorice, IP-0057 Pumpkin Bread, IP-0091 Bronze Silk
Dies: DI-0039 Journey Circles (these are a group of circles with stitched and plain circle)
Embellishments: AC-080 Gingham Cocoa Ribbon, AD-0084 Small Foam Squares, AD-00875 Medium Foam Squares

I recently purchased the Fun Stampers Journey (FSJ) Artsy Leaves out of their mini-Trend Catalog (it has since retired as of September 30th). Even though I knew it would not be a stamp set I could demo at parties, I still wanted it. I LOVE the whole collection and it came with a die set that I purchased as well. When I saw the Pals Paper Arts Card Sketch Challenge #320, I thought this set would make a perfect background stamped card with a Thank You sentiment.

ppa-320-sep29I stamped the leaves using FSJ Black Licorice ink. This ink is very versatile. It is a “true” black ink, it doesn’t smear (it’s dry in about 30 seconds), you can use watercolor mediums with it, and it can be used on plastic, glass, etc (some surfaces require the ink to be set with a heat using a heat gun.
I colored the leaves using FSJ Color Burst Pencils. These pencils do not require Gamsol to blend them together; they are infused with oil to make blending without a liquid medium easy. You can purchase blending stubs from FSJ and dry blend them, but I didn’t use the stubs on this project. I outlined each leave with a light blue pencil to make them pop. I used FSJ – Whipped Cream as the base and matted the leaves on FSJ – Black Licorice and FSJ – Deep Lilace cardstocks. The stips of paper accents are in FSJ – Deep Lilac and FSJ – Black Licorice as well. I highlighted the sentiment with FSJ – Twine and stamped the sentiment from one of the Bloom Benefit ATS – Thanks Much. I stamped the “Thank You” in FSJ – Candy Apple Fusion Ink and fussy cut only the “Thank You” out of the full image. The “Thank You” is popped up on dimensionals.

PPA320Supplies:
FSJ – Whipped Cream, Black Licorice, and Deep Lilace cardstocks, Black Licorice and Candy Apple Fusion Inks, Color Burst pencils, twine, dimensionals, liquid glue, white liner tape, and glue dots.

All my close friends know I have transitioned over to Fun Stampers Journey (FSJ) this past September. One of the amazing benefits of purchasing through FSJ are their Bloom Benefits. For every $50 spent, you will receive a Bloom Benefit FREE! This includes ATS (Artist Trading Stamps) as well as dies and embellishments. I have attached a flyer showcasing some of the Bloom Benefits (there are Bloom Benefits in the main catalog as well as the mini-Trends catalogs):

thumbnail of bloom-benefitsv2

I have all the ATS Bloom Benefits from the 2016-2017 catalog. When I saw Paper Craft Crew Card Sketch #213, I knew the Flock Together ATS from the Bloom Benefits would make a perfect card for this sketch.

pcccs213

I used what I had from my FSJ starter Kit and my first order, which is very limited. For the base of my card and the mat I stamped on, I used FSJ – Oatmeal cardstock and matted the stamped portion onto FSJ – Dark Roast cardstock. I used the FSJ – Dark Roast cardstock for the banner and base of the embossed feathers. I stamped the feathers and sentiment in Versa-Mark and embossed with SU! copper embossing powder. I stamped the feathers in FSJ – Pumpkin Bread fusion ink onto the Oatmeal cardstock.  I fussy cut the embossed feathers. I adhered everything together using FSJ – white liner tape and a glue dot. I then added FSJ – twine and sprinkled the Bronze silk onto the card to give it that extra pop. The matted portion of the card is raised with SU! dimensional.

Flock Together

FSJ – Flock Together

Supplies:

Fun Stampers Journey – Oatmeal cardstock, Dark Roast cardstock, Twine, Pumpkin Bread Fusion Ink, Bronze Silk
Stampin’ Up! – Copper Embossing Powder, dimensionals

If you have been reading my blog posts recently, it is very apparent I’m hooked on the Spectrum Noir alcohol markers. I just LOVE them and the awesome results I get from using them on my card projects. This week’s Paper Craft Crew Card Sketch #207 inspired me to make a card out of C.C. Designs – Chameleon (You Color My World!) rubber stamp. I purchased this stamp through Impressive Ideas stamp store in Norcross, GA. Here is this week’s sketch:

He is trying to camouflage himself amongst the bright yellow, orange, pink background of the card mat. He’s just too darn cute. The base of the card is SU! Tangelo Twist card stock. The bottom mat was created from a piece of SU! Whisper White cardstock using SU! Daffodil Delight and SU! Tangelo Twist a sponge dauber and SU! Happy Patterns Decorative Masks. The top mat was created using SU! Whisper White cardstock and distressing the cardstock with Tim Holtz Picked Raspberry and Spiced Marmalade inks. I squirted the paper with some water and blotted it dry and then allowed the mat to sit and dry completely before adhering all the elements. The square scalloped frame in the left hand, bottom corner is from SU! Layering Squares Framelits using Glitter Cardstock Matstack purchased from Hobby Lobby. I gave the card a little sparkle and glitz by gluing some Craft Medley sequins to the card. The gold twine, wooden heart, and washi tape are all from Stampin’ Up!. Note: The wooden heart was colored using the Spectrum Noir marker BP4 and then covered with Crystal Effects.

The chameleon was stamped with Memento Tuxedo Ink and colored using Spectrum Noir Markers. Here is the list of markers I used: LV1, CT4, OR1, OR3, CR10, CG3, GB7, TN7, CR6, CR7, CR11. I added SU! dimensionals under him to add depth and dimension to the card. I just love him. He’s sending everyone hugs and kisses!

PCCCS207

I hope you enjoy this chameleon as much as I do.

Just found out I was the winner of the TGIF#66 Card Challenge! Here is a picture of my card that won the challenge along with the link here for the original blog post (this post includes links for Heartfelt Creations and Marisa Jobs blog). Love, Love, Love the Heartfelt Creation product line. They are awesome. Thank you to Marisa Jobs for her design I modified to create a winning card. Also, thanks to Cheyenne Luken for being my stamping cohort.

Heartfelt Creations inspiration from Marisa Jobs

Heartfelt Creations
inspiration from Marisa Jobs

The Pals Paper Arts Challenge 312 sketch was a great sketch to showcase the Elizabeth Craft Design Hydrangea Die I purchased at our recent Scrapbook Expo held in Duluth, GA.

ppa312

To keep the main focus on the hydrangea, I kept the background and the cardstock band neutral. The Elizabeth Craft Design die comes with an irregular shaped circle, a die for the petals and several different sized leaves.  I cut three of the circles and cut the second and third down to create a stairstep affect on the bottom circle. I adhered each of the circles onto the larger circle using SU! dimensionals. This adds greater dimension to the hydrangea.  I sponged a little SU! Pool Party on to some Whisper White card stock and then cut out the petals. I shaped the petals using the Elizabeth Craft Design tool kit for flower shaping; then, I cut the leaves out of SU! Old Olive and sponged the edges with SU! Old Olive ink andshaped the leaves. I  adhered the flowers on the cardstock circles and I took a dry watercolor brush (a stiff one) and took up a little Pool Party ink from the ink pad lid and brushed the color lightly across the petals.

The band is cut from SU! Crumb Cake cardstock and embossed with the SU! brick wall embossing folder. I cut the strips on top of the Crumb Cake from Old Olive using the SU! Swirly Scribbles Thinlits. The sentiment is stamped in Old Olive and is a Bo Bunny – Amen stamp set which I purchased on sale from Hobby Lobby. The mat and base are SU! Very Vanilla cardstock.

If you have been keeping up with my posts, you know I have really fallen in love with 3D flowers. I think this card is clean and simple and would be a great card to give someone as a sympathy or get well card.

PPA312

Enjoy!

After seeing this past TGIF challenge winner, Bronwyn Eastley’s fancy fold card, I decided to CASE her card and create my own fancy fold card for TGIF #66 Case Your Fave challenge. If you have been keeping up with my previous posts, I attended Scrapbook Expo 2016 held in Duluth, GA. I fell in love with the Heartfelt Creation flowers, dies, and paper stacks. My fiend Cheyenne and I created a side-step card initially featured in Heartfelt Creations gallery but with a few changes (here’s the artist’s post here). We love Marisa Job’s designs! This side-step card creates a unique blend of 3D flowers in a 3D card. I LOVE this card!

Before I post the picture, I should say this was an all day project. Cheyenne had just purchased the stamps, dies, and paper to create sunflower cards and since we do not have a lot of practice flower shaping, it was a long arduous task but very satisfying. We first stamped our flowers on SU! So Saffron cardstock in SU! Soft Suede ink. I sponge daubed my flowers with SU! Hello Honey in the center of each petal and in the center of the flower. I then sponge daubed the edges and the outer portion of the flower center with Tim Holtz Spiced Marmalade distress ink. The leaves were stamped with SU! Old Olive ink onto SU! Old Olive cardstock. We shaped the flowers and leaves and set them aside to create the card base. We used SU! Crumb Cake cardstock with Heartfelt Creations Sunflower paper matted on SU! Mossy Meadow cardstock. We cut out some Old Olive from the SU! Swirly Bird dies and a Sizzix die Cheyenne picked up from Hobby Lobby. This was one of the design changes due to neither of us having the corresponding die to match their gallery pic. Once the base was created, I added black beads from Hobby Lobby in the center of my flowers and glitter to my flowers. Note: Add glitter first to your flowers, because the beads held the excess glitter and I had to add extra beads to cover the shine. I placed my flowers on my card and adhered everything together. Now, this sounds very straight forward, but . . . . . Cheyenne and I both are perfectionists to a certain degree, and we just weren’t satisfied with the balance of flowers on our cards. We pulled flowers off and re-adhered them many times until we were satisfied. This was not an easy thing to do because Heartfelt Creations glue is a very strong adhesive. I, also, had to pull the large bottom flower off and move it down so the sentiment was not covered up. Here’s another tip: If you decided to watch a YouTube video to created a specialized fold card, make sure to watch it all the way through. We were following along with the video, when the woman creating the tutorial said she messed up. What!!!!???? She didn’t edit that part out or add text prior to the goof? We had to cut more paper and start over. Sweet Shananigans!

#tgifc66

I can’t wait to create more 3D projects using flower shaping!

It has been a while since I last posted a card challenge, but that will be changing soon.
I have several cards to enter into challenges and my 2016 Scrapbook Expo make-n-take
projects, workshop projects, and small but satisfying haul to post as well.

This cute little chick card began as a make-n-take card for one of my classes. I had, originally, used the new SU! square dies and placed it on a piece of Very Vanilla cardstock cut with the hexagon die. It just didn’t pop and I really didn’t like the card. So, when I saw the Freshly Made Sketches challenge #247,the light bulb came on, and I sat down and created this cute card in a matter of minutes.

FMS #247

I pulled the bird off of the original card (holding my breath the whole time – you know what I mean. . . . when you don’t want something to be stuck really well to your card, it is, and this was!!!) Whew, I got it off with no damage. I cut it with SU! circle dies and matted it on Cherry Cobbler cut with SU! zig-zag circle dies. I took some retired SU! designer series paper featuring a woodgrain (reminded me of a barn) and matted it on Early Espresso SU! cardstock. I placed a strip of Early Espresso down onto the woodgrain paper and placed the hello die cut on top of it. The white showing beneath is intentional. I wanted a slight shadow behind the Hello Honey paper to make it stand out from the Early Espresson. The last item I wanted to mention was a left over sunflower from a side-step sunflower card a friend and I made (I’ll be posting it soon). It is highlighted with a little dazzling diamonds and prills for the center of the flower.

I almost forgot to mention how I created the chick. It came from the SU! stamp set Honeycomb Happiness. I stamped the chick in Staz-on Jet Black onto 140 lb watercolor paper. I watercolored the chick using re-inkers and my aqua-painter. The colors SU! re-inker colors I used were, Pool Party, Hello Honey, Cherry Cobbler, Mossy Meadow, and Soft Suede. Then I went back with a Chocolate Chip Stampin’ Write Marker and added some dimension to the bird by accenting its check with marks to create a feathery look.

This card went from blah to adorable. I hope you enjoy it!

PAGE TOP
[dealsbar preview] Amazing Deals: !!toolbar-deal-title!! - !!toolbar-deal-merchant!!