Tag : sunflower

3 posts

What do I like the best about the Freshly Made Sketches card challenges? I must preface this with the majority of my cards are not clean and simple. I just can’t help adding and adding and adding; well, I guess you can see where this is going. And, this is why I really enjoy the FMS card challenges. I am challenged to create a simple and clean card. This week’s challenge is Jen Mitchell’s “All About the Angles”.

A digitized sunflower is featured on my challenge card. I first saw this sunflower in a collection of sunflowers featured on Instagram by Junior Aguilar a very accomplished artist as well as a tattoo artist in the Atlanta, GA area (Instagram @jr_aguila_mk_v). I immediately thought these would look beautiful colored and placed on a card. He was gracious enough to print them off for me along with some gorgeous roses.

This week’s FMS #327 sketch is below:


This was a super simple card to create. It began with the digitized sunflower which I colored with Fun Stampers Journey Color Burst Pencils. I added some texture in the center of the flower with a fine tip Sharpie pen. To give it a little shine, I added FSJ Journey Glaze to the center.

The base is FSJ Whip Cream cardstock with a mat created from FSJ Summer Sun cardstock cut at an angle. I stamped the sentiment from last month’s Bloom Box at the top of the card with FSJ Black Licorice ink. It was just that quick and simple.

Please click here to purchase any Fun Stampers Journey products to create your awesome papercrafting creations.


This post is showcasing a card my friend, Cheyenne, and I completed this past Tuesday. We case’d the card from Designs by Marisa with a few additions to our cards. The card is made with stamp sets and 12 x 12 paper stack from the Farmer’s Market Collection sold by Heartfelt Creations. The coloring of the stamped images was completed using Spectrum Noir alcohol markers.  I had been researching alcohol markers and trying to decide which ones I wanted to purchase. The Copic Ciao and Sketch markers seemed to be the best investment because you can refill them; and, they would have been an investment. They are definitely not inexpensive. I had also considered Prismacolor alcohol markers, but they are not refillable and they are not much less in cost than the Copic markers. My friends, Debbie and Cheyenne, had purchased Spectrum Noir alcohol markers but neither of them had really used them for any card making sessions. By the way, Spectrum Noir markers are refillable and are sold at a great price point. So, Cheyenne suggested we use her Spectrum Noir alcohol markers to color the stamped images on this card.  Prior to Cheyenne’s arrival, I watched a lot of YouTube tutorials on how to use the Spectrum Noir markers and felt confident I would do well using them.

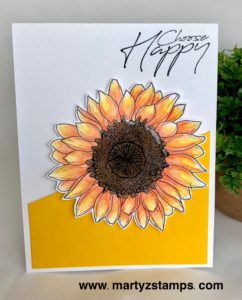
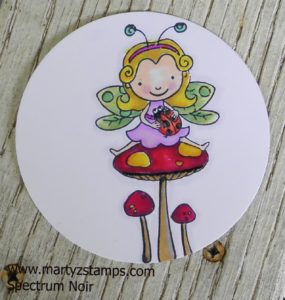
Once she arrived at my house, I stamped a fairy image onto some SU! Whisper White card stock and gave the markers a go for the first time. I think my coloring turned out well. I noticed when I cropped the photo, the mushroom doesn’t look well blended, but in “real life” it looks well blended and great. Here is my first attempt with the Spectrum Noir markers.

spectrum noir

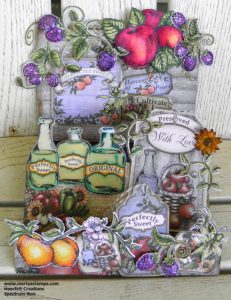
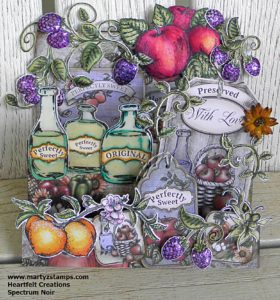
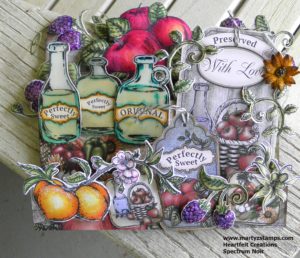
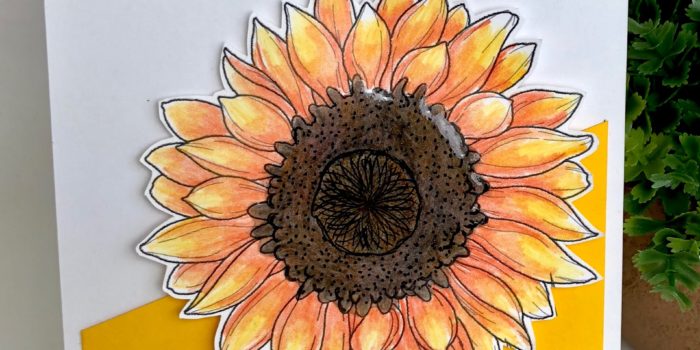
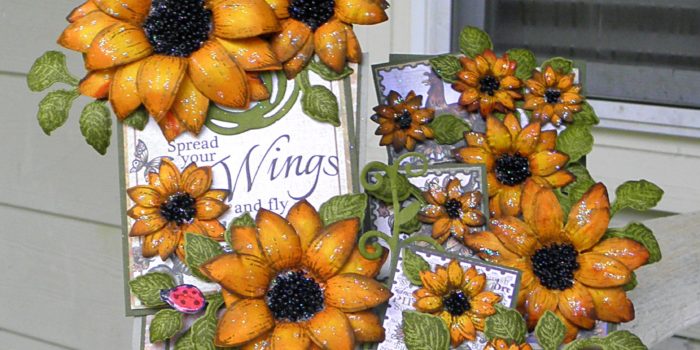
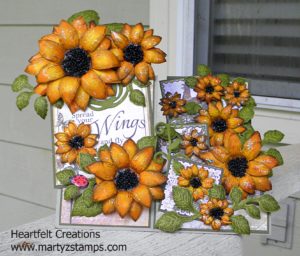
Now, to the show piece. This card took us all afternoon to create. The base of the card is a stair step fold using SU! Elegant Eggplant cardstock. We started with the peaches first and colored them using the Spectrum Noir markers (no, I did not write down the numbers we used – too excited to color and couldn’t be bothered to slow down and take notes – lol). The rest of the peach stamped image was colored using the Spectrum Noir markers as well as the blackberries, apples, vines, olives, and bottles. The glass part of the three bottles and the bottle on the tag, along with the blackberries were accented with SU! Crystal Effects. The peaches and blackberries were dusted with fine glitter. I found one of Cheyenne’s sunflowers from our last card session and claimed it for my card.

We should video our creative sessions because they are quite humorous. We compete against each other to see who has the better card. And, many times we pull our own card apart to do what the other one is doing. At the end of our sessions, we text a picture of both our creations to friends and family and have them vote on the one they like best (we don’t tell them who made which one). It’s usually 50-50 and we both agree the other ones card is better. Although, this go round, I think my bottles turned out better than Cheyenne’s (yes, Cheyenne, they are better than yours – ha), but her apple looks better than mine. My apple looks really good, but i had to cover my yellow highlight area because I put too much dark red near it and it had to be blended out.

All in all, I am sold on the Spectrum Noir markers. In fact, I ordered as many of them as I could from Consumer Crafts (www.consumercrafts.com). They are having a sale today, August 11, 2016, until 9:00 p.m. You will receive $10 off of every $40 spent. That is a great deal. For all of you local ladies, I will be having technique classes using these markers. You will need markers to take the class. You don’t have to buy all of them. You could start out with the following 6 packs: yellow, red, green, essentials, and a blender pen.

Here are several pictures showing the card we created (I used Spectrum Noir packs – yellow, purple, red, green, blue, essentials, and pink):

Hearfelt Farmers Market


Heartfelt Farmers Market


Heartfelt Farmers Market

After seeing this past TGIF challenge winner, Bronwyn Eastley’s fancy fold card, I decided to CASE her card and create my own fancy fold card for TGIF #66 Case Your Fave challenge. If you have been keeping up with my previous posts, I attended Scrapbook Expo 2016 held in Duluth, GA. I fell in love with the Heartfelt Creation flowers, dies, and paper stacks. My fiend Cheyenne and I created a side-step card initially featured in Heartfelt Creations gallery but with a few changes (here’s the artist’s post here). We love Marisa Job’s designs! This side-step card creates a unique blend of 3D flowers in a 3D card. I LOVE this card!

Before I post the picture, I should say this was an all day project. Cheyenne had just purchased the stamps, dies, and paper to create sunflower cards and since we do not have a lot of practice flower shaping, it was a long arduous task but very satisfying. We first stamped our flowers on SU! So Saffron cardstock in SU! Soft Suede ink. I sponge daubed my flowers with SU! Hello Honey in the center of each petal and in the center of the flower. I then sponge daubed the edges and the outer portion of the flower center with Tim Holtz Spiced Marmalade distress ink. The leaves were stamped with SU! Old Olive ink onto SU! Old Olive cardstock. We shaped the flowers and leaves and set them aside to create the card base. We used SU! Crumb Cake cardstock with Heartfelt Creations Sunflower paper matted on SU! Mossy Meadow cardstock. We cut out some Old Olive from the SU! Swirly Bird dies and a Sizzix die Cheyenne picked up from Hobby Lobby. This was one of the design changes due to neither of us having the corresponding die to match their gallery pic. Once the base was created, I added black beads from Hobby Lobby in the center of my flowers and glitter to my flowers. Note: Add glitter first to your flowers, because the beads held the excess glitter and I had to add extra beads to cover the shine. I placed my flowers on my card and adhered everything together. Now, this sounds very straight forward, but . . . . . Cheyenne and I both are perfectionists to a certain degree, and we just weren’t satisfied with the balance of flowers on our cards. We pulled flowers off and re-adhered them many times until we were satisfied. This was not an easy thing to do because Heartfelt Creations glue is a very strong adhesive. I, also, had to pull the large bottom flower off and move it down so the sentiment was not covered up. Here’s another tip: If you decided to watch a YouTube video to created a specialized fold card, make sure to watch it all the way through. We were following along with the video, when the woman creating the tutorial said she messed up. What!!!!???? She didn’t edit that part out or add text prior to the goof? We had to cut more paper and start over. Sweet Shananigans!

#tgifc66

I can’t wait to create more 3D projects using flower shaping!

PAGE TOP
[dealsbar preview] Amazing Deals: !!toolbar-deal-title!! - !!toolbar-deal-merchant!!