Tag : tim holtz

3 posts

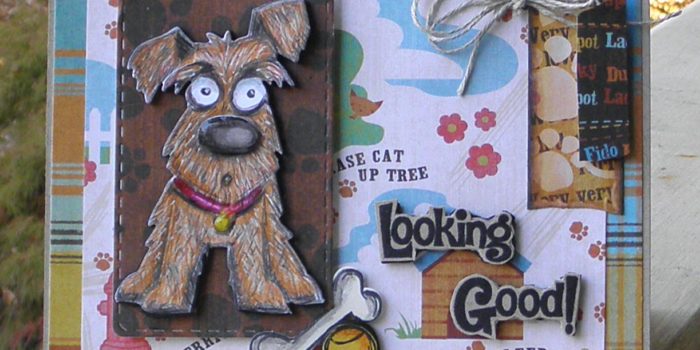
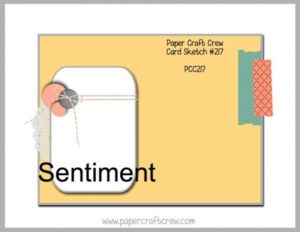
Well, Cheyenne and I got together on Wednesday and made the most adorable card EVER! She had purchased Tim Holtz’s Dog stamp set with coordinating dies. She came over to my house whipped those stamps and dies out of her little black bag, and we got off to a ruff start (ha, ha – do you like the pun). Anyway, she wanted to create a dog with textured hair. She had a picture to go by from a Pinterest pin, and I tried to pick out Spectrum Noir colors that were a close match. We got half of our dog’s faces done and she didn’t like them. They weren’t the correct color. So, upon her insistence, we started with a fresh dog stamped in SU! Smokey Slate. The first one was stamped with Memento Tuxedo Black, but we wanted the hair to over-balance the stamped image’s outline. That’s when I said, let’s make our card using the Paper Craft Crew Challenge #217 (why not kill two birds with one stone). So, she pulled the sketch up on her phone and we began again.


We took our stamped image and gave it a base color of Spectrum Noir EB1 and LV1. Then, we took my Fun Stamper Journey Color Burst pencils and began to create shading (darkest brown) along with several other colors to create lighter shading and depth to the dog. Once all of this was accomplished, we kept our pencils sharpened and began making flicks of color onto the dog image. This took a LONG time. It takes a very light touch, and when you flick the pencil lead, you need to lift at the same time so your hair image looks light and hairy. We used several different colors with the black pencil giving more depth and a white gel pen was used to add light effects on the hair. Cheyenne said my dog looked mad and her dog looked scared.

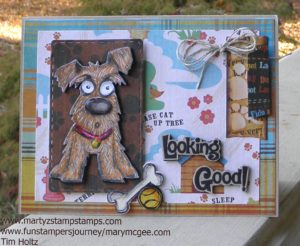
Once we were happy with our hair and color of our dog, we cut out a nose and popped it out and added Journey glaze to give it a nice shine. A bone and ball were added to my card. Cheyenne added a leash to her card, but I couldn’t add one to mine because my matted dog was in a different place on my card than her card. I took the Fun Stampers Journey ATS stamp and stamped the sentiment onto FSJ Oatmeal Cookie cardstock. I made faux washi tape out of cardstock and placed a Journey twine bow up at the top of the card (I did have my twine on the smaller mat as in the sketch, but it pulled your eye away from the focal point – the dog). Last but not least, the dog, the mat the dog is on, the bone, tennis ball, sentiment, and the smaller piece of washi tape are popped out. I used fun foam for everything but the washi tape. All of the printed paper is from The Pets Stack paper stack which was purchased from Hobby Lobby a long, long time ago. The base of the card is FSJ Oatmeal Cookie cardstock. The mat for the dog was cut out using a rounded corner stitched rectangle die from Pink and Main. Here he is. He thinks you are “Looking Good.”


Hope you enjoy!

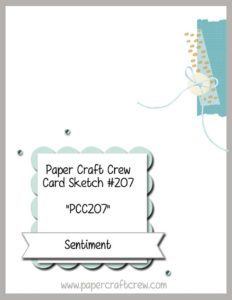
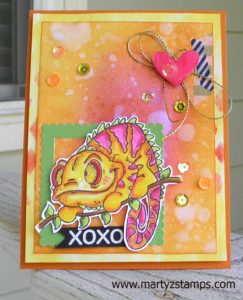
If you have been reading my blog posts recently, it is very apparent I’m hooked on the Spectrum Noir alcohol markers. I just LOVE them and the awesome results I get from using them on my card projects. This week’s Paper Craft Crew Card Sketch #207 inspired me to make a card out of C.C. Designs – Chameleon (You Color My World!) rubber stamp. I purchased this stamp through Impressive Ideas stamp store in Norcross, GA. Here is this week’s sketch:

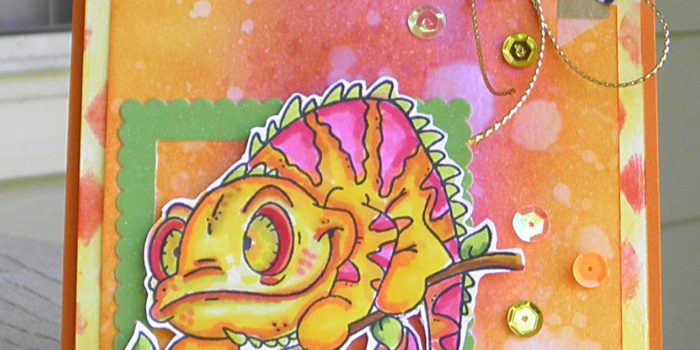
He is trying to camouflage himself amongst the bright yellow, orange, pink background of the card mat. He’s just too darn cute. The base of the card is SU! Tangelo Twist card stock. The bottom mat was created from a piece of SU! Whisper White cardstock using SU! Daffodil Delight and SU! Tangelo Twist a sponge dauber and SU! Happy Patterns Decorative Masks. The top mat was created using SU! Whisper White cardstock and distressing the cardstock with Tim Holtz Picked Raspberry and Spiced Marmalade inks. I squirted the paper with some water and blotted it dry and then allowed the mat to sit and dry completely before adhering all the elements. The square scalloped frame in the left hand, bottom corner is from SU! Layering Squares Framelits using Glitter Cardstock Matstack purchased from Hobby Lobby. I gave the card a little sparkle and glitz by gluing some Craft Medley sequins to the card. The gold twine, wooden heart, and washi tape are all from Stampin’ Up!. Note: The wooden heart was colored using the Spectrum Noir marker BP4 and then covered with Crystal Effects.

The chameleon was stamped with Memento Tuxedo Ink and colored using Spectrum Noir Markers. Here is the list of markers I used: LV1, CT4, OR1, OR3, CR10, CG3, GB7, TN7, CR6, CR7, CR11. I added SU! dimensionals under him to add depth and dimension to the card. I just love him. He’s sending everyone hugs and kisses!

PCCCS207

I hope you enjoy this chameleon as much as I do.

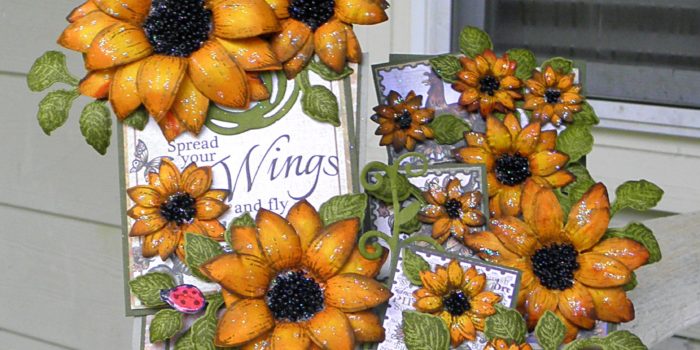
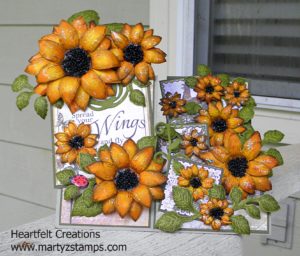
After seeing this past TGIF challenge winner, Bronwyn Eastley’s fancy fold card, I decided to CASE her card and create my own fancy fold card for TGIF #66 Case Your Fave challenge. If you have been keeping up with my previous posts, I attended Scrapbook Expo 2016 held in Duluth, GA. I fell in love with the Heartfelt Creation flowers, dies, and paper stacks. My fiend Cheyenne and I created a side-step card initially featured in Heartfelt Creations gallery but with a few changes (here’s the artist’s post here). We love Marisa Job’s designs! This side-step card creates a unique blend of 3D flowers in a 3D card. I LOVE this card!

Before I post the picture, I should say this was an all day project. Cheyenne had just purchased the stamps, dies, and paper to create sunflower cards and since we do not have a lot of practice flower shaping, it was a long arduous task but very satisfying. We first stamped our flowers on SU! So Saffron cardstock in SU! Soft Suede ink. I sponge daubed my flowers with SU! Hello Honey in the center of each petal and in the center of the flower. I then sponge daubed the edges and the outer portion of the flower center with Tim Holtz Spiced Marmalade distress ink. The leaves were stamped with SU! Old Olive ink onto SU! Old Olive cardstock. We shaped the flowers and leaves and set them aside to create the card base. We used SU! Crumb Cake cardstock with Heartfelt Creations Sunflower paper matted on SU! Mossy Meadow cardstock. We cut out some Old Olive from the SU! Swirly Bird dies and a Sizzix die Cheyenne picked up from Hobby Lobby. This was one of the design changes due to neither of us having the corresponding die to match their gallery pic. Once the base was created, I added black beads from Hobby Lobby in the center of my flowers and glitter to my flowers. Note: Add glitter first to your flowers, because the beads held the excess glitter and I had to add extra beads to cover the shine. I placed my flowers on my card and adhered everything together. Now, this sounds very straight forward, but . . . . . Cheyenne and I both are perfectionists to a certain degree, and we just weren’t satisfied with the balance of flowers on our cards. We pulled flowers off and re-adhered them many times until we were satisfied. This was not an easy thing to do because Heartfelt Creations glue is a very strong adhesive. I, also, had to pull the large bottom flower off and move it down so the sentiment was not covered up. Here’s another tip: If you decided to watch a YouTube video to created a specialized fold card, make sure to watch it all the way through. We were following along with the video, when the woman creating the tutorial said she messed up. What!!!!???? She didn’t edit that part out or add text prior to the goof? We had to cut more paper and start over. Sweet Shananigans!

#tgifc66

I can’t wait to create more 3D projects using flower shaping!

PAGE TOP
[dealsbar preview] Amazing Deals: !!toolbar-deal-title!! - !!toolbar-deal-merchant!!