Tag : old olive

2 posts

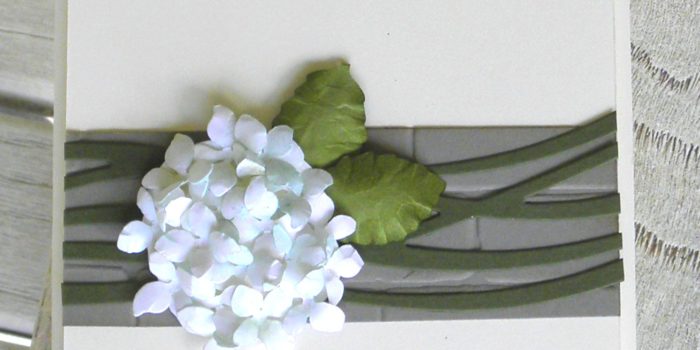
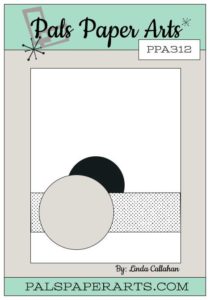
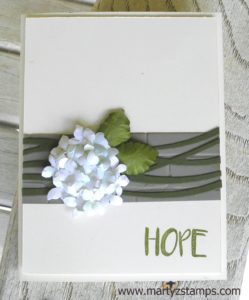
The Pals Paper Arts Challenge 312 sketch was a great sketch to showcase the Elizabeth Craft Design Hydrangea Die I purchased at our recent Scrapbook Expo held in Duluth, GA.

ppa312

To keep the main focus on the hydrangea, I kept the background and the cardstock band neutral. The Elizabeth Craft Design die comes with an irregular shaped circle, a die for the petals and several different sized leaves.  I cut three of the circles and cut the second and third down to create a stairstep affect on the bottom circle. I adhered each of the circles onto the larger circle using SU! dimensionals. This adds greater dimension to the hydrangea.  I sponged a little SU! Pool Party on to some Whisper White card stock and then cut out the petals. I shaped the petals using the Elizabeth Craft Design tool kit for flower shaping; then, I cut the leaves out of SU! Old Olive and sponged the edges with SU! Old Olive ink andshaped the leaves. I  adhered the flowers on the cardstock circles and I took a dry watercolor brush (a stiff one) and took up a little Pool Party ink from the ink pad lid and brushed the color lightly across the petals.

The band is cut from SU! Crumb Cake cardstock and embossed with the SU! brick wall embossing folder. I cut the strips on top of the Crumb Cake from Old Olive using the SU! Swirly Scribbles Thinlits. The sentiment is stamped in Old Olive and is a Bo Bunny – Amen stamp set which I purchased on sale from Hobby Lobby. The mat and base are SU! Very Vanilla cardstock.

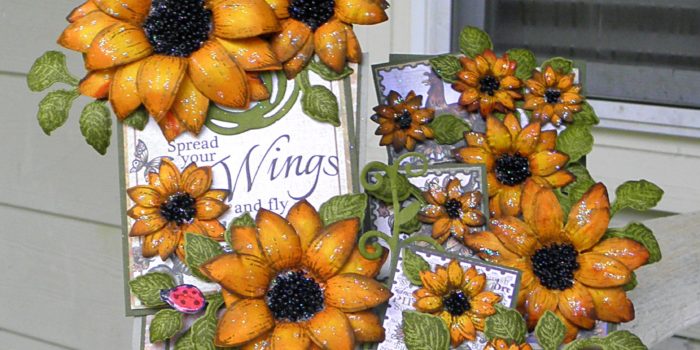
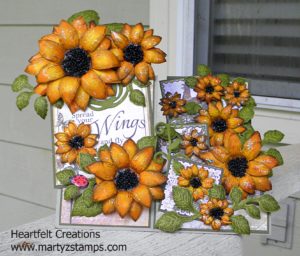
If you have been keeping up with my posts, you know I have really fallen in love with 3D flowers. I think this card is clean and simple and would be a great card to give someone as a sympathy or get well card.

PPA312

Enjoy!

After seeing this past TGIF challenge winner, Bronwyn Eastley’s fancy fold card, I decided to CASE her card and create my own fancy fold card for TGIF #66 Case Your Fave challenge. If you have been keeping up with my previous posts, I attended Scrapbook Expo 2016 held in Duluth, GA. I fell in love with the Heartfelt Creation flowers, dies, and paper stacks. My fiend Cheyenne and I created a side-step card initially featured in Heartfelt Creations gallery but with a few changes (here’s the artist’s post here). We love Marisa Job’s designs! This side-step card creates a unique blend of 3D flowers in a 3D card. I LOVE this card!

Before I post the picture, I should say this was an all day project. Cheyenne had just purchased the stamps, dies, and paper to create sunflower cards and since we do not have a lot of practice flower shaping, it was a long arduous task but very satisfying. We first stamped our flowers on SU! So Saffron cardstock in SU! Soft Suede ink. I sponge daubed my flowers with SU! Hello Honey in the center of each petal and in the center of the flower. I then sponge daubed the edges and the outer portion of the flower center with Tim Holtz Spiced Marmalade distress ink. The leaves were stamped with SU! Old Olive ink onto SU! Old Olive cardstock. We shaped the flowers and leaves and set them aside to create the card base. We used SU! Crumb Cake cardstock with Heartfelt Creations Sunflower paper matted on SU! Mossy Meadow cardstock. We cut out some Old Olive from the SU! Swirly Bird dies and a Sizzix die Cheyenne picked up from Hobby Lobby. This was one of the design changes due to neither of us having the corresponding die to match their gallery pic. Once the base was created, I added black beads from Hobby Lobby in the center of my flowers and glitter to my flowers. Note: Add glitter first to your flowers, because the beads held the excess glitter and I had to add extra beads to cover the shine. I placed my flowers on my card and adhered everything together. Now, this sounds very straight forward, but . . . . . Cheyenne and I both are perfectionists to a certain degree, and we just weren’t satisfied with the balance of flowers on our cards. We pulled flowers off and re-adhered them many times until we were satisfied. This was not an easy thing to do because Heartfelt Creations glue is a very strong adhesive. I, also, had to pull the large bottom flower off and move it down so the sentiment was not covered up. Here’s another tip: If you decided to watch a YouTube video to created a specialized fold card, make sure to watch it all the way through. We were following along with the video, when the woman creating the tutorial said she messed up. What!!!!???? She didn’t edit that part out or add text prior to the goof? We had to cut more paper and start over. Sweet Shananigans!

#tgifc66

I can’t wait to create more 3D projects using flower shaping!

PAGE TOP
[dealsbar preview] Amazing Deals: !!toolbar-deal-title!! - !!toolbar-deal-merchant!!