Tag : acrylic paint

2 posts

Here is Round Two of the Gel Press Throwdown between Carrie Rhoades and myself. Just a brief review, we sent each other what we considered “ugly” Gel Press pulls and our challenge was to make something beautiful out of the “ugly ducklings”. So, make sure to check out her blog carriestamps.com to see the creations she has made from my “ugly” Gel Press pulls. Here is the link for Round one on my blog http://martyzstamps.com/2018/08/27/gel-press-challenge-round-one-fms351-sketch-challenge/.

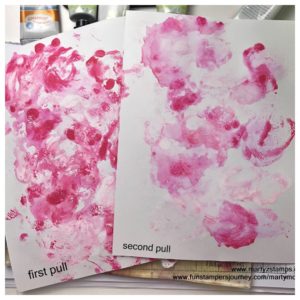
I forgot to take a picture of the pull before I started adding to it. Carrie was gracious enough to send me a photo of a piece of the original pull. It is not the actual piece but it will give you and idea of what I started with. Here it is.

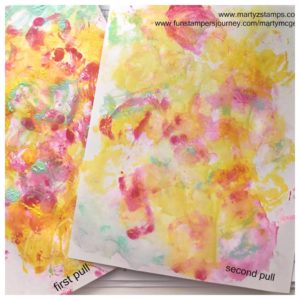
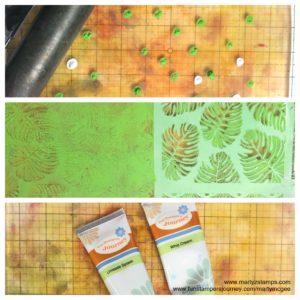
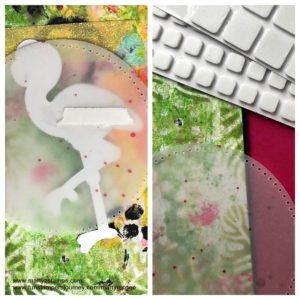
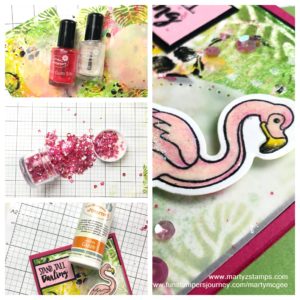
I took the original pull and placed it in my spraying box (a box to use silks, splashes and splattering to contain any over mist). I placed our Vintage Screen on top of the pull. I then spritz it with our Shimmer Silver Splash. You can see the design on the bottom photo.  


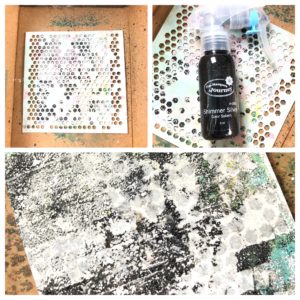
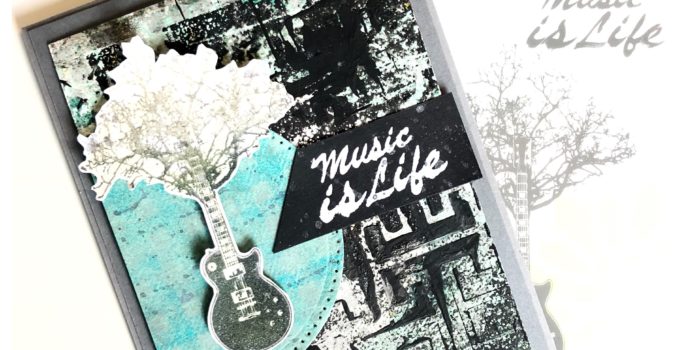
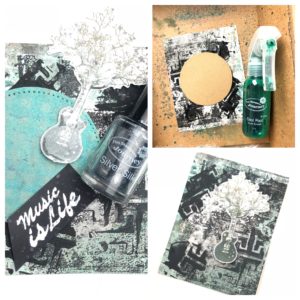
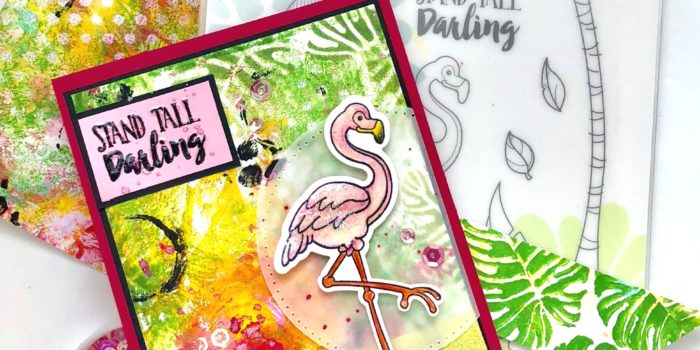
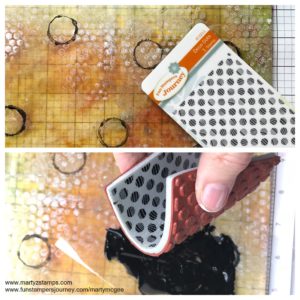
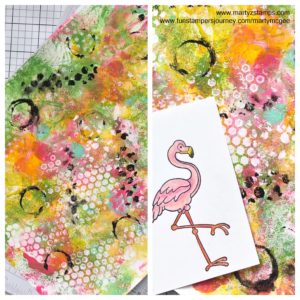
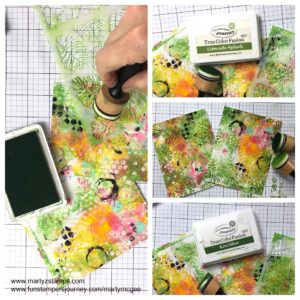
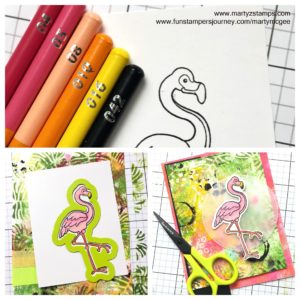
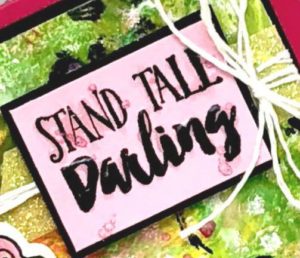
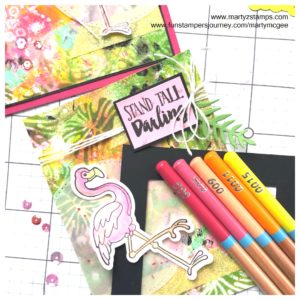
I stamped the guitar/tree with River Stone at the top and Rock Candy at the bottom using my Misti to get the right amount of ink onto the paper. I used Journey Glaze to create a sheen on the guitar and once the glaze was dry, I painted some Sparkle Silk onto the guitar and tree branches for a hint of glitz. I placed the guitar on the Gel Press background to decide what I wanted to do next. Since there was already a hint of Cool Pool acrylic paint on the pull, I decided to spritz the card with the Cool Pool Splash. At first I wanted to keep a circular space in the middle free of Cool Pool color; so I placed a piece of scrap paper on the background and spritzed the paper. Once this was dry, I happened to spy some Cool Pool cardstock and thought that would make an awesome mat. I grabbed it and put some Blue Lagoon ink on the Flannel Life background stamp and stamped the image on the circle which I ran through the die machine with the piercing die to give it some interest. I took the circle and spritzed it with the Shimmer Silver Splash. While all of this was drying, I stamped the sentiment in Whip Cream onto Black Licorice cardstock and embossed with White Embossing Powder. Then, a little splatter of Silver Silk.

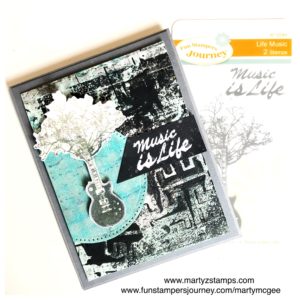
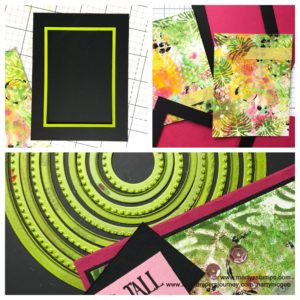
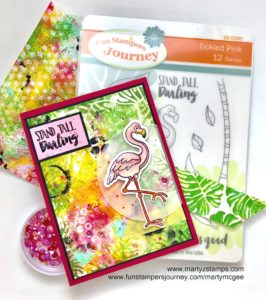
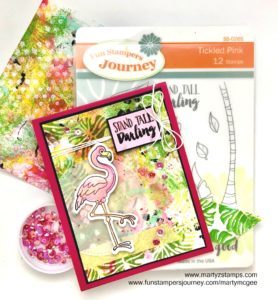
After everything was dry, I began assembling the card. I chose River Stone as the base with a Rock Candy mat. I cut down the Gel Press background, added the circle and sentiment with the guitar popped up using foam squares. This was adhered to the base with foam squares. I think this turned into an amazing card. Remember, there are no “ugly” pulls!!!!

What do you think of this card?

Product List

I love incorporating FSJ mixed media products to create one-of-a-kind designs. The flamingo cards are a submission requirement to becoming part of the FSJ Creative Team. I hope you are inspired to create and bring paper to life!

Important read all instructions. Gather supplies (products at end of blog).

TIP: Clean Gel Press with damp towel before changing to new color/color combo.

Pull – each time cardstock is applied to Gel Press, smoothed out and pulled up.

TIP: All pulls are made on two pieces of Whip Cream 8 ½ x 11 cardstock. The first pull is the initial application of paint; second pull is created from leftover paint from first pull (may need to lightly mist Gel Press with water).

Place Gel Press on table.
Apply Sweet Berry and Whip Cream paint, mist with water (picture 1).
Mix with fingers as shown (picture 2).
Initial pull with first sheet and another pull with second sheet.

Repeat with Cool Pool, Pineapple Smoothie and Lemon Drop paints. Don’t incorporate Cool Pool with the yellow paints (picture 3).
Repeat pull instructions.

Place Vintage Screen stencil on Gel Press, add Whip Cream paint onto top of stencil. Brayer paint over entire stencil. Repeat covering Gel Press (picture 4).
Repeat pull.

Dilute Black Licorice paint with water. Take a small bottle, press into paint and transfer image onto the Gel Press (picture 5).
Repeat pull.


Apply Limeade Splash and Whip Cream. Brayer covering press. Apply Wallpaper stencil (leaves portion) to press – VERY IMPORTANT TO READ – Use SECOND pull cardstock on top of the stencil, rub transferring image onto cardstock. Repeat over entire Gel Press.

Mist the press with water. Use FIRST pull cardstock, make a pull of the entire press. *Aim for hints of green on cardstock.

Bend Deco Dots ATS slightly dip Black Licorice paint.
Stamp randomly onto both cardstocks.

Cut dry cardstock into fourths (4 – 5 ½ x 4 ¼ pieces).

Sponge Limeade Splash and Kiwi Slice using Wallpaper Stencil adding hints of green leaves around edge of mat.

Stamp flamingo image; color with Color Burst Pencils. Die cut.

Card base – Sweet Berry cardstock.
Black mat – 5 ¼  x 4.
Mixed media mat – 5 1/8 x 3 7/8.
Circle dies – Pierce vellum and cut circle.

Position flamingo on vellum circle (do not adhere).
Turn circle over, place adhesive where it won’t show once card is finished. Place foam squares onto flamingo, set aside.

Adhere mats and vellum circle to card base.

REMIX CARD, wrap white thread onto mixed media base before adhering to Black Licorice mat.

Stamp sentiment onto Bubble Gum cardstock with Black Licorice ink.
Mat onto Black Licorice cardstock.
Add Lemon Sparkle tape and adhere sentiment.

Sprinkle with Bubble Gum and Sparkle Silk.
Adhere flamingo.
Add sequins and Journey Glaze to sentiment and flamingo (dust flamingo with Sparkle Dust).  Allow to dry.


Original:


The REMIX CARD uses Color Splash Pencils.

REMIX CARD – make a double bow from White Thread and adhere using glue dot.

Remix:

Product List

Spatula

$3.95

Brayer

$7.96
PAGE TOP
[dealsbar preview] Amazing Deals: !!toolbar-deal-title!! - !!toolbar-deal-merchant!!