Category : Fun Stampers Journey

111 posts

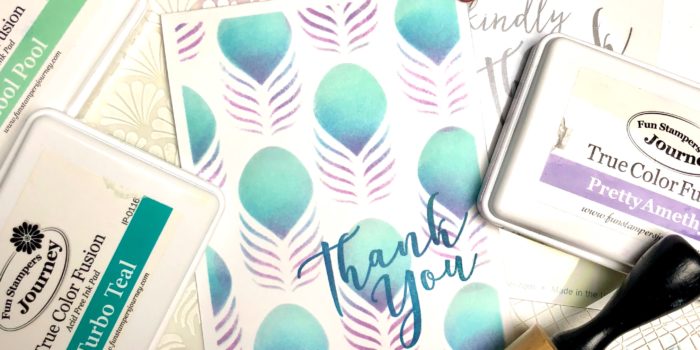
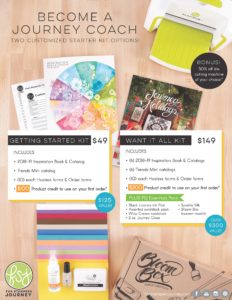
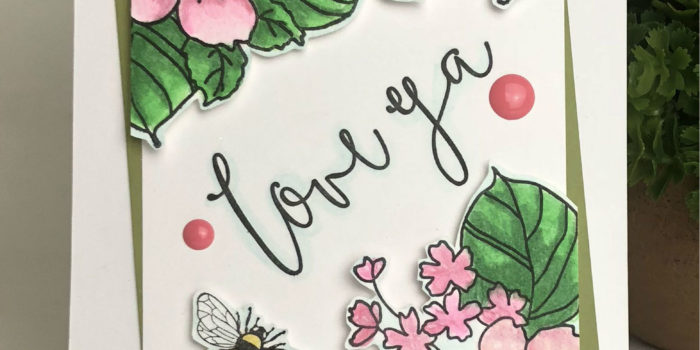
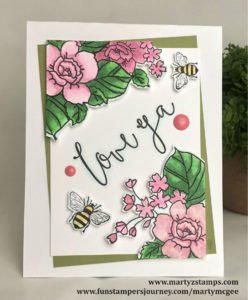
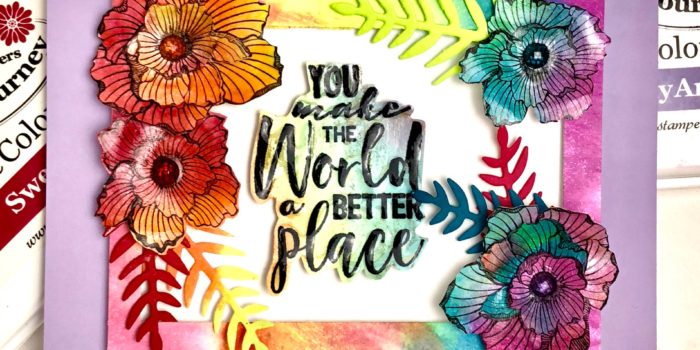
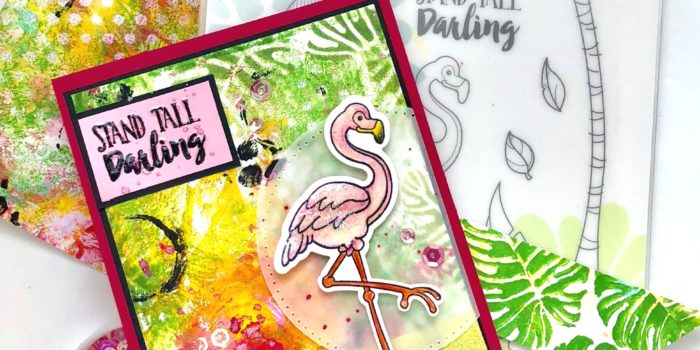
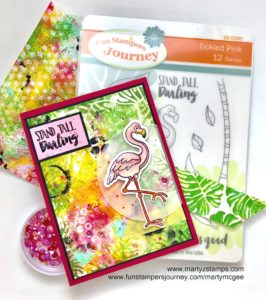
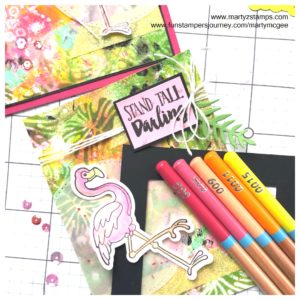
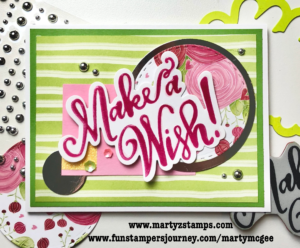
I love incorporating FSJ mixed media products to create one-of-a-kind designs. The flamingo cards are a submission requirement to becoming part of the FSJ Creative Team. I hope you are inspired to create and bring paper to life!

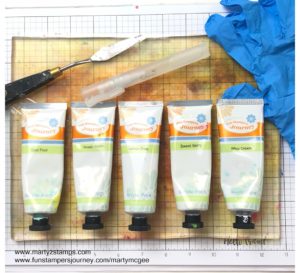
Important read all instructions. Gather supplies (products at end of blog).

TIP: Clean Gel Press with damp towel before changing to new color/color combo.

Pull – each time cardstock is applied to Gel Press, smoothed out and pulled up.

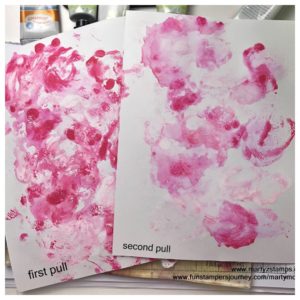
TIP: All pulls are made on two pieces of Whip Cream 8 ½ x 11 cardstock. The first pull is the initial application of paint; second pull is created from leftover paint from first pull (may need to lightly mist Gel Press with water).

Place Gel Press on table.
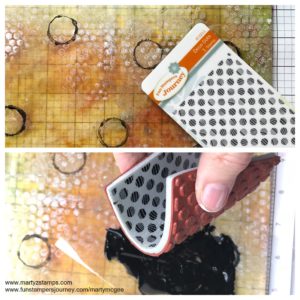
Apply Sweet Berry and Whip Cream paint, mist with water (picture 1).
Mix with fingers as shown (picture 2).
Initial pull with first sheet and another pull with second sheet.

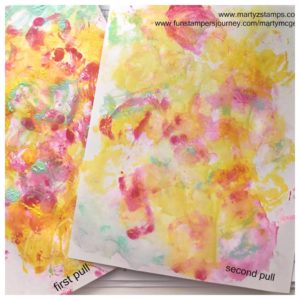
Repeat with Cool Pool, Pineapple Smoothie and Lemon Drop paints. Don’t incorporate Cool Pool with the yellow paints (picture 3).
Repeat pull instructions.

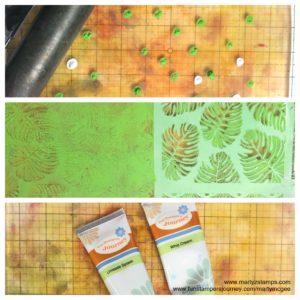
Place Vintage Screen stencil on Gel Press, add Whip Cream paint onto top of stencil. Brayer paint over entire stencil. Repeat covering Gel Press (picture 4).
Repeat pull.

Dilute Black Licorice paint with water. Take a small bottle, press into paint and transfer image onto the Gel Press (picture 5).
Repeat pull.


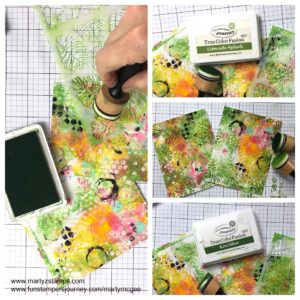
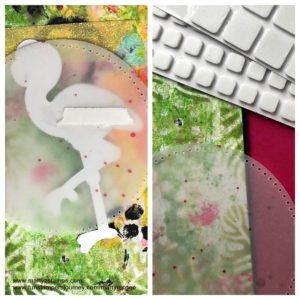
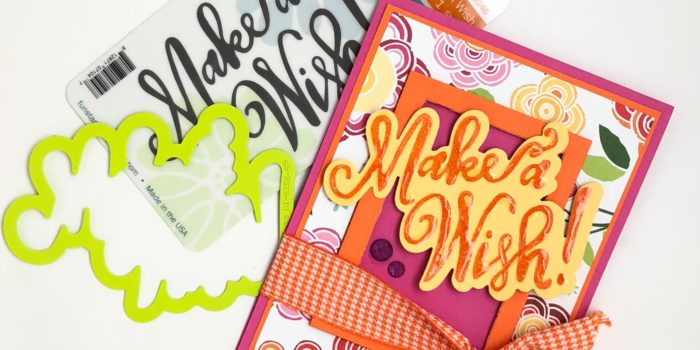
Apply Limeade Splash and Whip Cream. Brayer covering press. Apply Wallpaper stencil (leaves portion) to press – VERY IMPORTANT TO READ – Use SECOND pull cardstock on top of the stencil, rub transferring image onto cardstock. Repeat over entire Gel Press.

Mist the press with water. Use FIRST pull cardstock, make a pull of the entire press. *Aim for hints of green on cardstock.

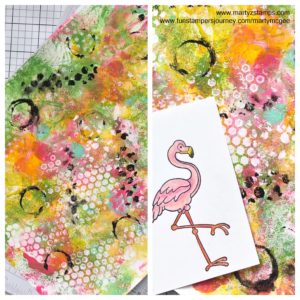
Bend Deco Dots ATS slightly dip Black Licorice paint.
Stamp randomly onto both cardstocks.

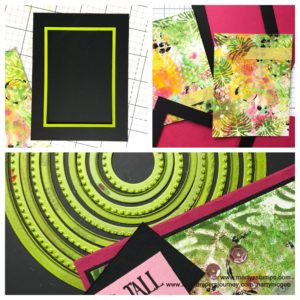
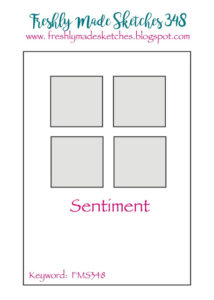
Cut dry cardstock into fourths (4 – 5 ½ x 4 ¼ pieces).

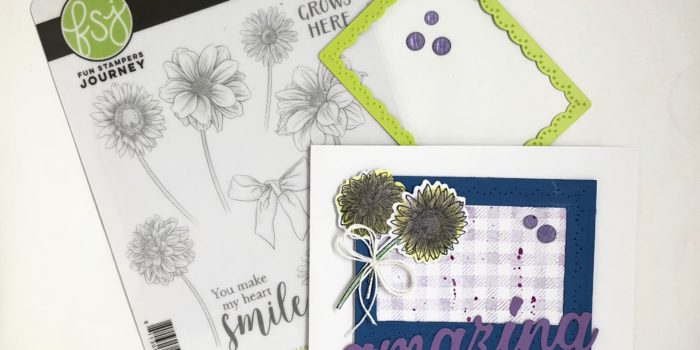
Sponge Limeade Splash and Kiwi Slice using Wallpaper Stencil adding hints of green leaves around edge of mat.

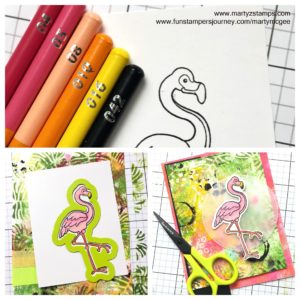
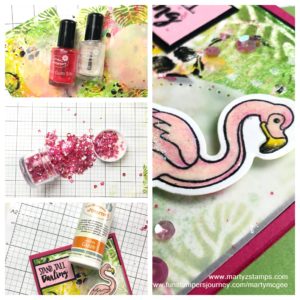
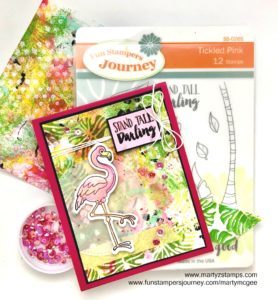
Stamp flamingo image; color with Color Burst Pencils. Die cut.

Card base – Sweet Berry cardstock.
Black mat – 5 ¼  x 4.
Mixed media mat – 5 1/8 x 3 7/8.
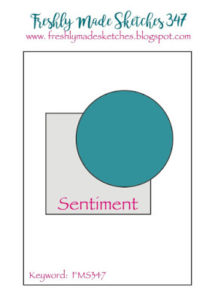
Circle dies – Pierce vellum and cut circle.

Position flamingo on vellum circle (do not adhere).
Turn circle over, place adhesive where it won’t show once card is finished. Place foam squares onto flamingo, set aside.

Adhere mats and vellum circle to card base.

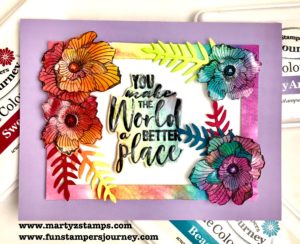
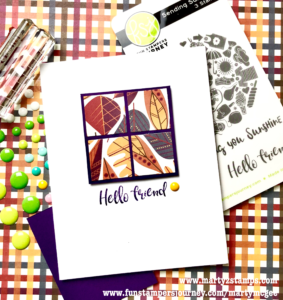
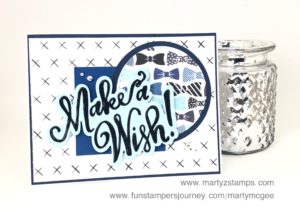
REMIX CARD, wrap white thread onto mixed media base before adhering to Black Licorice mat.

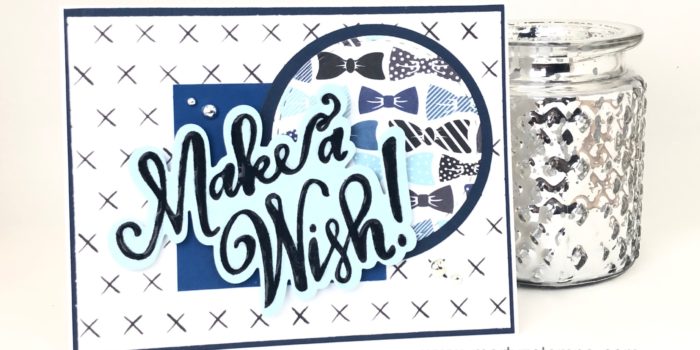
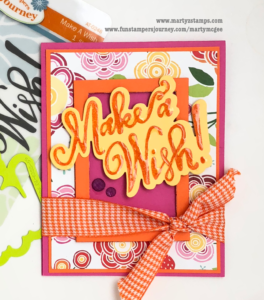
Stamp sentiment onto Bubble Gum cardstock with Black Licorice ink.
Mat onto Black Licorice cardstock.
Add Lemon Sparkle tape and adhere sentiment.

Sprinkle with Bubble Gum and Sparkle Silk.
Adhere flamingo.
Add sequins and Journey Glaze to sentiment and flamingo (dust flamingo with Sparkle Dust).  Allow to dry.


Original:


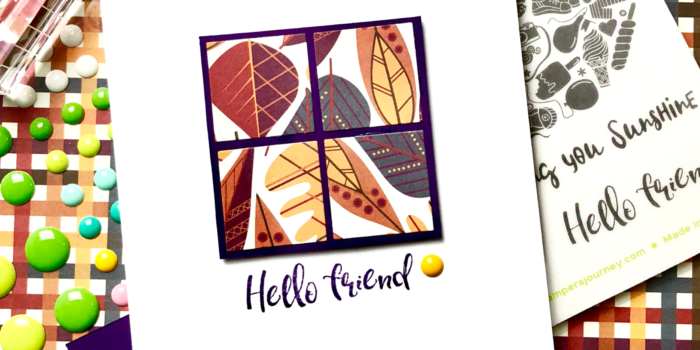
The REMIX CARD uses Color Splash Pencils.

REMIX CARD – make a double bow from White Thread and adhere using glue dot.

Remix:

Product List

Spatula

$3.95

Brayer

$7.96

Have you ever heard of a Tic Tac Toe Challenge? If you haven’t, it is a design challenge where the designer chooses three design elements in a row, just like tic-tac-toe. The designer can go vertical, horizontal or diagonal. Once the choice is made, the design work begins. Here is Paper Craft Crew #301 design challenge for this week:

I chose the first vertical row, which included bundled products, metallic and favorite color. If you have been keeping up with my blog, Facebook and Instagram posts, you will know I’m all about the FSJ Make A Wish stamp and die bundle. So many great projects can be created from this one stamp and die. For the metallic design element, I had some Mirror Silver card stock and I grabbed some Watermelon Fusion card stock for my favorite color. Who can’t resist hot pink? I can’t.

The base is Whip Cream with a Limeade Splash base mat and a Through the Year Prints mat adhered on top. I die cut circles from the mirror silver (they look black due to lighting but they do shine in “real” life) and Through the Year Prints card stock along with a small rectangle of Bubble Gum card stock. The sentiment is popped up to create dimension as well as the addition of Fashion Silver embellishments with a couple of Bloom Time sequins. Let’s not forget the lemon sparkle tape and the Journey Glaze on top of the Make A Wish.

All supplies Fun Stampers Journey. If you would like to order supplies used in this project, please click an image below:

Product List

A simple and cute sketch this week from Freshly Made Sketches #348. It’s four squares and a sentiment. Really, that’s it in a nutshell.

I love it when a project just happens. Base of Whip Cream card stock, small Deep Lilac mat with Through the Year Prints die cut into four square and adhered to the mat. Sentiment stamped in Pretty Pansy Fusion ink. And, there ya go.

All materials used are Fun Stampers Journey. If you would like to order any of the supplies from this project, click on the image(s) below:

Product List

If there is one stamp set and die that I truly love, it is the Make A Wish stamp and die bundle! In fact, I love it so much it is my August Featured “A” Team Bundle. To bring in this featured stamp set, I wanted to showcase it as a blue and bow tie birthday card on Freshly Made Sketches #347 card challenge.

I turned the design to landscape position and went to work. If you are a paper crafter that likes quick, simple and clean creations, this card is for you! I began with a base of FSJ Whip Cream card stock with two base mats of Denim Days (5 3/8″ x 4 1/8″) and Through the Year Prints 12 x 12 paper (5 1/4″ x 4″). Using the same Denim Days card stock I cut a mat out of our circle dies and a circle out of Through the Years Prints. The square accent is cut from Huckleberry Fusion (2 1/2″ x 2 1/2″). The Make A Wish sentiment is stamped with Black Licorice onto Pool Play card stock using my MISTI to create a fully stamped image and then die cut with the coordinating die using our Amaze die cutting machine. Make A Wish is popped up with Medium Foam squares and Journey Glaze makes the words pop off the card stock. The final accent are the Fashion Silver accents.

So quick, so easy, so cute!

If you would like to order this bundle and any of the supplies used to create it, please click here or on any of the supplies below!

Product List

Have you every wanted a simple, versatile stamp and die set that can become whatever you want it to be? Well, let me introduce the Make A Wish ATC stamp set with coordinating die. What a great way to bring in the New Year, a special person’s Birthday, a great gift tag on a PRESENT, a CAKE TOPPER, . . .  I can go on and on!!!

This post will feature a bright and cheery birthday card as one of the card challenge entries on Paper Craft Crew Sketch Challenge #298. Here is the featured sketch challenge:

This card was so quick and simple to make. I started out with a Watermelon Fusion card base; then, placed a Tangerine Fusion mat on top. The designer paper (I hate to admit is retired – but, Colorful Journey or Playful Prints  will work – see supplies) has a rectangle shape cut from the middle using one of the Journey Rectangle dies. The Tangerine Fusion frame is next and it is popped up using Small Foam Squares.

TIP: Use the same rectangle die to cut out the middle portion of the designer paper as well as the center portion of the Tangerine Fusion cardstock to create the frame. This will allow your layers to line up easily.

The Make A Wish sentiment is stamped onto Pineapple Smoothie cardstock with Tangerine Fusion ink. The sentiment was die cut with the coordinating die and Journey Glaze was added to create a focal point. It is popped up with the Medium Foam Squares to add greater dimension to the card.

TIP: Use a positioning tool like the MISTI to stamp the image multiple times creating a deep, rich, vibrantly colored  sentiment.

The final touches are the Rainbow Drops just below the sentiment and the Tangerine Fusion Gingham ribbon.

Let me know what you think about this card in the comments:

To order, click here or click on any of the supplies listed below:

Product List

One of the FREE gifts from Fun Stampers Journey to each coach in June at convention was the Cottage Bouquet stamp set. I am in love with this set. There are so many beautiful papercrafting project possibilities using this dynamic set of florals not to mention the cute bow and sentiments – did I mention we received the coordinating dies FREE too!

When I saw the Freshly Made Sketch #345, I knew this set would make the perfect card.

Freshly Made Sketches are clean and simple cards. Making sure I kept to this design style, I chose FSJ Whip Cream cardstock for the base. I pulled out one of the stitched designed frames from the Pocket Cuts Die set and cut the initial rectangle. To create a frame, I cut the center of the rectangle out with one of the Journey Rectangles dies using Huckleberry Fusion cardstock. The frame mat is stamped in Pretty Amethyst with the Flannel Life stamp background stamp. I wanted the “amazing” sentiment to create a pop of color and Lavender Fusion cardstock was just the right touch of color to create this affect. The “amazing” die came with a set of dies included when I ordered my Amaze machine. The flowers are stamped on Whip Cream with Black Fusion ink and colored with Pretty Amethyst and Electric Lime ink by dabbing color onto the petals with the small dowel sponge set. The stems are colored with a Color Burst Pencil. I accented the card with Cosmic Grape silk, Rainbow Drops and a triple bow created from our Whip Cream twine.

A simple but amazing floral card:

To order click here or click on one of the featured products for this project below:

Product List

Can you create a one layer card? For those who like clean and simple this might be an easy task, but for me, it is a challenge. I love to create a lot of depth and dimension on my papercrafting projects. This means layer upon layer of mats and the stamped images are often raised using FSJ foam squares, not to mention embellishments such as Rainbow Drops, ribbon, twine, clips, etc. . .

When Christine Pennington called her Bloomin’ Buddies to take part in a one layer card challenge, I jumped on board. I needed a quick and simple thank you card to place in the envelope with my Ebay sales of retired stamps and dies. I immediately knew our NEW Wallpaper stencil from our NEW Inspiration Book and Catalog would make a beautiful card (click here to order). To begin the project, I chose fusion inks which would blend together nicely. They are Cool Pool, Turbo Teal, and Pretty Amethyst (if you want a darker shade of purple, you can choose Lavender Fusion).

I began by cutting my Whip Cream cardstock into 5 1/2″ x 4 1/4″ rectangles.  I placed the stencil onto the cardstock and using my large dowels I began applying color.

TIP: To keep the cardstock and stencil from moving, place a rolled piece of washi tape on the backside of the cardstock and place onto your stamping surface, add washi tape onto the stencil to hold it in place.

TIP: Use the small dowels for better application management; otherwise, tilt the large dowel back towards you to apply a small amount of color at a time.

Apply the Pretty Amethyst with the sponge dowel starting from the bottom of the image and going up about a third of the way. Using a different sponge, apply the Turbo Teal from the top of the Pretty Amethyst and to a little above the mid-point of the image. Finish sponging the image with Cool Pool (use a different sponge). Go over the entire image with Cool Pool to help blend all colors seamlessly.

TIP: Since Turbo Teal is a deep, rich ink, dab off some of the ink before apply.

Once all the color has been applied, add a sentiment of your choice. That’s all there is to it. I was able to create approximately 20 cards in an hour. Here is the finished project.


Product List

July is Fun Stampers Journey’s New Year and bringing in our new year, means a new Inspiration Book and Catalog (all 331 pages and over 500 ideas and photos) along with some sweet surprises.

FSJ Flip Catalog is here. Check it out! Or, click here to order one.

With the new catalog, comes all new Bloom Benefits. Yes, for every $75.00, you receive a FREE gift from Fun Stampers Journey. You can choose from stamps, dies, embellishments and embossing folders. Check them out:

NEW COLORS! Rustic Rose, Peaches and Cream, Tin, Chambray Shirt, Haystack and Fresh Sage.

AMAZE MACHINE – new and improved debuting in August. It will fold up for more compact storage like our Platinum die cutting machine.

JOIN MY TEAM with one of two new Starter Kits. They have been updated and provide each new coach the ability to choose the products they want in their kit!!!!! That means no more limited, pre-selected products. You can choose between the $49 kit which includes $100 of product on top of the kit itself or choose the I WANT IT ALL KIT for $149 with $200 of product. You have the opportunity to purchase one of our amazing die cutting machines for 50% off. If you are interested in joining the journey, contact me at martyzstamps@gmail.com or click on the picture below.

NEW LOGO to start off the New Year! It’s clean and simple and I love it! What do you think???

Last but not least, are all the new stamp sets, dies, pan pastels, liquid colors, embellishments etc.,  . . . . I know you will love them.

Please subscribe to receive post notifications.

If you would like to place an order, click here.


Who doesn’t love a big party? It’s Fun Stampers Journey’s Retirement Party, up to 50% off over 500 items, including our Journey Girl tote, Amaze machine, jewelry, accessories, stamps and dies! This party lasts until June 30, 2018!
To celebrate this party, I am featuring the Summer Garden stamp set (SS-0078) in Freshly Made Sketches #336 card challenge. The FMS336 sketch is below:
The card base is FSJ Whip Cream Card stock with a base mat from FSJ Lemongrass card stock. The stamped portion of the card is Whip Cream with images stamped using Black Licorice Fusion ink. I used FSJ Color Burst Pencils to color the stamped images in shades of pink, green, yellow, and highlighting around the images with light blue.
The sentiment is stamped on the Whip Cream mat using Black Licorice Fusion ink. All the other stamped images are popped out with foam squares. The card is accented with Sweet Candy Drops and there’s a little sparkle dust on the bee’s wings.
Summer Garden is the perfect stamp set for any occasion. If you would like to purchase this stamp set or other products, please click here.

I am so excited to let my readers know, I am the Guest Designer on The Paper Girls Challenge Blog featuring a Rainbow Theme designed card. The challenge begins the week of April 15th.

Before I created the card I submitted as a guest designer, I had fun creating a rainbow cake happy birthday card, which is featured below:

I really love this card, but I wasn’t satisfied with the results. So, I moved on to another idea. I went to my collection of stamps and chose the “A Better Place” stamp set (this was featured in a previous post, Black and White – A Better Place). It is our new host exclusive stamp set for parties that reach $600 or more dollars in orders. I sat and looked at all the stamps in this two set collection, I browsed many card collections on Pinterest and finally decided to create a floral card awash with the colors of the rainbow.

As many of you know, this month’s product promotion feature our silks and splashes. Since they are 20% off, I wanted to showcase what could be down with them. I went with the splashes since I had all the colors to create a rainbow on hand. I began with a large, clear block (think background sized) and drizzled a good amount of water from my media blender brush onto the block prior to adding the splash colors. Normally, you spritzed color with the splashes, but I unscrewed the cap and using the pipe that pulls the color through to the nozzle, placed each color in a vertical row making sure to keep each color separate from the next. I, also, screwed the cap back onto each bottle as I used it (trust me, you want to do this or you could have a “real” mess on your hands). After all the colors were on the block, I gently pulled the colors into the one beside it, keeping white space to a minimum. Next, I placed a piece of 5 1/4″ x 4″ Whip Cream card stock onto the rainbow of colors. I pulled the paper off and repeated the entire process with a second sheet. I let my paper air dry, or a heat tool can speed up the process.  I took two of the floral stamps from the set and stamped them several times onto one of the colored pieces of paper. I used  the Journey Rectangles Die and cut a frame and stamped the sentiment on the leftover piece. I used the Mystic Fern die to cut leaves out of several pieces of card stock. To create a more dimensional look, I fussy cut inner petal pieces and manipulated all the petals with an embossing tool (thing Heartfelt Creation flowers). I added foam squares to everything, popping them up off the card to create dimension. The color filled mat was adhered to a base of Pretty Amethyst card stock. The final touches included Rainbow Drops to the center of the flowers and Journey Glaze.

Thank you Paper Girls Challenge Blog for asking me to be your guest designer.

If you would like to order any of the supplies to create this card, please click here, or contact me through my Fun Stampers Journey website to host a party (www.funstampersjourney.com/martymcgee).


PAGE TOP
[dealsbar preview] Amazing Deals: !!toolbar-deal-title!! - !!toolbar-deal-merchant!!