Tag : sequins

11 posts

If you checked out my previous post, you know a doughnut will make a kitty happy, but did you know a cup of cocoa will make a penguin happy? Oh, I forgot, only if it has marshmallows on top.

I created a no mat card for this happy penguin to meet Paper Craft Crew Card Challenge 328. See the challenge below:

This penguin and hot cocoa image is from one of my past Scrapping for Less kits, Stamping Bella’s Penguin with a Mug.

I colored the stamped image with Spectrum Noir alcohol markers and fussy cut the penguin and mug leaving a small white boarder. I folded a piece of Whip Cream cardstock in half, layered on two strips of Fun Stampers Journey’s Deco Layer Strips (black). The penguin and mug are popped up and the finishing touches are the Journey Sequins pink for a touch of bling.

Supplies: Click on the banners below to shop.

Spectrum Noir Alcohol Markers

Spellbinders + FSJ

Here in Georgia, the weather is fine, the trees are blooming, the birds are building their nests, and wouldn’t you know the most adorable bunnies showed up in my craft room wanting to make a grand entrance as well. They hopped right over and posed for a Pretty in Pink Bunny Delight portrait.

This was perfect timing for the Fusion Card Challenge – Pretty in Pink. Fusion Card Challenges allow three variations to a crafter’s designs. First choice, you can choose just the template layout; second choice, you can choose the color theme; or, you can combine both into one design. I decided to stick with the color theme of PINK.

Once the bunnies were settled down and ready for me to create, I stamped their images onto Spectrum Noir cardstock using Fun Stampers Journey Spring Fling stamp set. I then colored them with the following Sprectrum Noir Alcohol Markers: The bunnies heads and bodies IG1 and IG2; their ears, feet, bellies, cheeks, and noses PP1. This was a very simple and easy coloring project. Great for beginners. They are just too cute.

The base of the card is Fun Stampers Journey Whip Cream cardstock, and the mat with a large oval cut out of it is FSJ Watermelon Fusion cardstock.  I stamped circles with FSJ Watermelon Fusion ink from the FSJ Planner Sketch stamp set. An acetate sheet was placed behind the Watermelon Fusion mat. The zig-zag accent mat is from Pink and Main Spring Fling 6×6 paper stack. The Watermelon Fusion mat is raised using a double layer of foam tape. The bunnies are popped-out using FSJ Foam Squares Medium. The sequins in the oval are assorted sequins from my stash (Note: a horizontal strip foam tape about a 1/2″ up from the bottom of the oval to keep the sequins from “disappearing” when the card is upright). The final touch is a double bow created from SU! pink ribbon.

Such a cute card.

Supplies:
Fun Stampers Journey supplies can be ordered through me – click here

This week’s Paper Craft Crew Card Sketch #222 challenge inspired me to use Fun Stampers Journey December Bloom Box stamp set Welcome Wreaths. Here is their card sketch:


I think wreaths are a great way to welcome in the holidays and the FSJ December Bloom Box Welcome Wreaths stamp set is the perfect set to create a welcoming card featuring a wreath. I began this card with an base using FSJ Oatmeal cardstock. The bottom portion of the card has a FSJ Hazelnut Blend mat with a FSJ Cranberry Bliss mat. The Cranberry Bliss mat is stamped with the berry cluster from the stamp set in FSJ Cranberry Bliss ink. I cut a banner out of FSJ Hazelnut Blend cardstcok and cut out a “v” shape in both ends. The entire card was sprinkled with FSJ Dark Roast silk.

The wreath was a “work in progress while creating”. LOL You know what I mean. You start off with one idea of how to make something unique; and, well, . . it kinda doesn’t turn out like you expected . . . .so, you begin experimenting with different ways to create something beautiful out of a …. pig’s ear …. lol.  I started off with the branch stamp and using FSJ Lemon Grass ink went about stamping the curved branch into a wreath shape (o.k. a circle). This took multiple turns around the circle because I wanted a full and bushy wreath. When I was finished stamping, I thought the wreath look flat and dull. Hmmm,….. what can I do to make it “pop”. I thought, why not fussy cut lots of branches and layer them onto the flat, dull base. Oh, yes I did! And, I think it created the look I was trying to get from the beginning. I must say, it really didn’t take that long to fussy cut the branches (it really didn’t and it was so worth it). I stamped the small pine cones in FSJ Hazelnut Blend and colored them with my FSJ Color Burst Pencils and fussy cut them out. I stamped the berry cluster with FSJ Cranberry Bliss (all of this was stamped onto FSJ Whip Cream cardstock). I fussy cut the berries out as well. No, booing and hissing from the peanut gallery – it’s those little extra steps that make a super cute card. I took some FSJ Cocoa Gingham Ribbon and made a double bow and adhered everything onto the wreath with glue dots. I then put the card together using craft glue and I popped out the wreath and banner using Journey Foam Squares (medium). For a little extra touch, I flicked Dark Roast silk onto the wreath. Last but not least, I added a little bling by placing some dark chocolate sequins onto the card.

Here is the finished card:


Supplies: All product used can be ordered from my FSJ website. Click here. Note: Everything is Fun Stampers Journey except as noted.

December Bloom Box – Welcome Wreaths
Cardstock: Cranberry Bliss, Whip Cream, Oatmeal Cookie, Hazelnut Blend
Ink: Hazelnut Blend, Cranberry Bliss, Lemon Grass
Coloring: Color Burst Pencils
Silk: Dark Roast
Ribbon: Cocoa Gingham Ribbon
Miscellaneous: Sequins (not FSJ)

This past weekend a very dear friend’s daughter, Paulina, celebrated her Quinceanera. I wanted to make her a very special card for her birthday using Spectrum Noir alcohol markers, because I, my daughter and son, and my friend, Cheyenne, bought her 84 Spectrum Noir markers. Woo Hoo! I know she will make some incredible art projects using her markers.

I thought the Fun Stampers Journey Media Artist girl was the perfect stamp to create a card for Paulina. I stamped the image on SU! Whisper White cardstock using Memento Tuxedo Black ink. This is the best cardstock I’ve found for coloring with alcohol markers. It took me about two hours to complete the coloring. To get a smooth finish, you have to take your time and work coloring small areas at a time. I tried to video tape the process, but the battery gave out before I was finished.

Lest any of you think I just throw together cards with no mess ups or problems. I had to pull this card apart about five times before I was satisfied with how the card looked. I decided about the fourth go round to make a shaker card, and I think this was a great choice. Here is the first picture before I stamped the flowers onto the card.


After I took this picture, I decided to stamp the flowers that is part of the FSJ Media Artist girl stamp set onto the card using SU! Midnight Muse. Here is the final card.

I absolutely love this card and I hope you do too!

Supplies:

Fun Stampers Journey:
Stamp Set: FSJ Media Artist girl

Stampin’ Up!:
Cardstock: Whisper White, Bashful Blue, Night of Navy
Ink: Midnight Muse

Spectrum Noir Alcohol Markers, Spectrum Noir Clear Glitter Pen

Miscellaneous:
Sequins, Acetate, Stitched Oval Dies from Lawn Fawn

At the end of last month, my cousin, Barbara Helms, celebrated her 40th birthday (her birthday is actually in September). I couldn’t make it to the celebration, but I sent her this card, which was a total CASE from K Werner Designs on YouTube. My friend and cohort, Cheyenne Luken, purchased Lawn Fawn’s So Smooth stamp set, and we went about making a shaker card. We both had to start over from scratch (note here: do not use alcohol markers to blacken the edge of cut cardstock – it bleeds).

Anyway, we completed the card and I thought it was the perfect card to send to my cousin. As many of you know, I don’t send cards, I hoard them. I am trying to get better about this. Here is the card we made and I sent to Barbara:

Supplies: Lawn Fawn So Smooth stamp set
Ink: Memento Ink
Markers: Spectrum Noir Alcohol Markers
Cardstock: SU! Whisper White, the mat is from a designer paper stack Cheyenne bought (don’t know the name), Acetate
Die: Lawn Fawn crosstitched rectangle die
Sequins: Pink sequins from Cre8tiveartz
Adhesive: Insulation Foam Tape

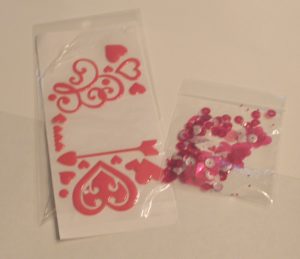
In a previous post I had mentioned posting about my experience at the Scrapbook Expo 2016 in Duluth, GA. It was an awesome time of fun and shopping with some close friends. It all began Thursday afternoon at 3:00 p.m. The doors opened for the Mega Make-n-Take. We were there waiting in line to get in and save some tables for our group. The actual make-n-take didn’t start until 5:00 p.m. The cost was $45.00 and it was well worth the cost. Each attendee chose a free gift just for attending the make-n-take. I chose the glitter.

Mega Make-n_take glitter

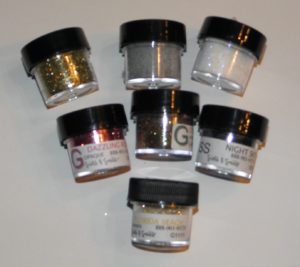
My friend, Cheyenne, chose the glitter as well, but she received bold and bright colored glitter.

The friends at my table, Cheyenne Luken, Debbie Kissel, and Kevin Kesler got settled in to begin the make-n-take. The following pictures and descriptions are not in order of when they were made.

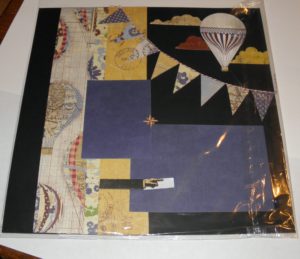
JustRite Stamps started off the night with a scrapbook page. I thought it turned out well even though these are not my favorite colors.

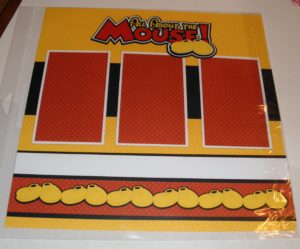
We made a laser cut All About the Mouse by Paper Wizard, Inc. It is adorable.

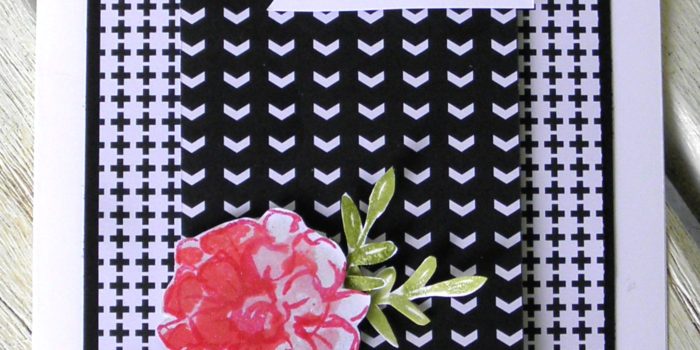
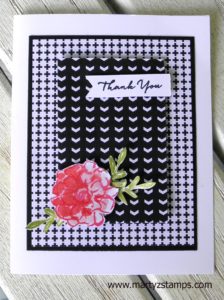
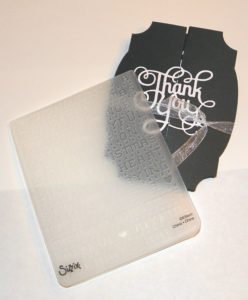
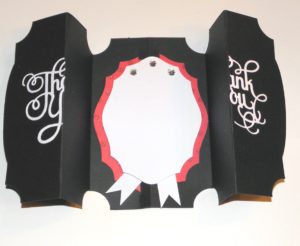
The next item is a fancy Fold-A-Long Thank you card by It’s Cheaper Than Therapy. This company sells Sizzix dies, machines, and anything Sizzix. I put my Thank You in the wrong place and when it opens up, it looks a little odd. We, also, received an embossing folder. My folder was Christmas themed.

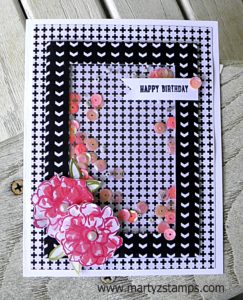
We made another card from Scrap That! It came with a free chalk marker and a selection of sequins.

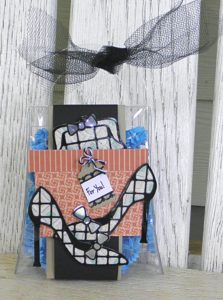
Krazy Kreations had a really cute gift purse with shoes accenting the front. Love it!

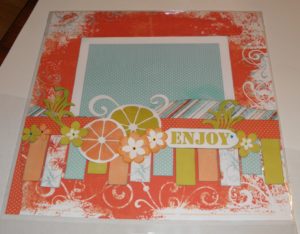
Last year Cheyenne, Kevin, and I attended the A to Z Scrapbook workshop and really loved their products. They were at the make-n-take and we created a scrapbook page entitled Enjoy. I ended up giving this page to a friend for her birthday along with one of the pages I made last year since the pages were from the same kit.

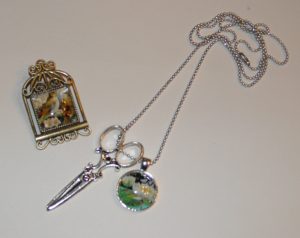
Craft Fantastic was here again this year. We made a pendant and a necklace. These are so easy to make and look so elegant.

I can’t show the Doo Dilly Design scrapbook page embellishment, because I messed mine up and then threw it away. Boo Hoo! It was really cute!

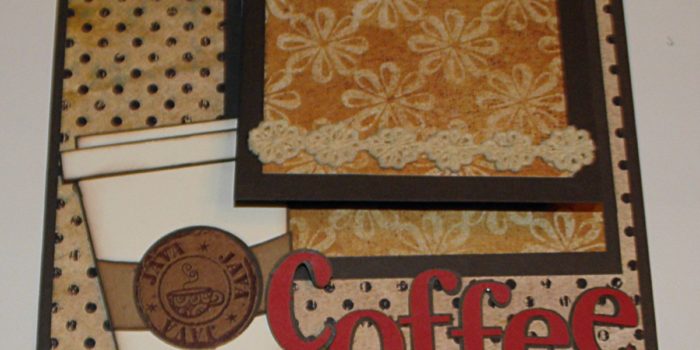
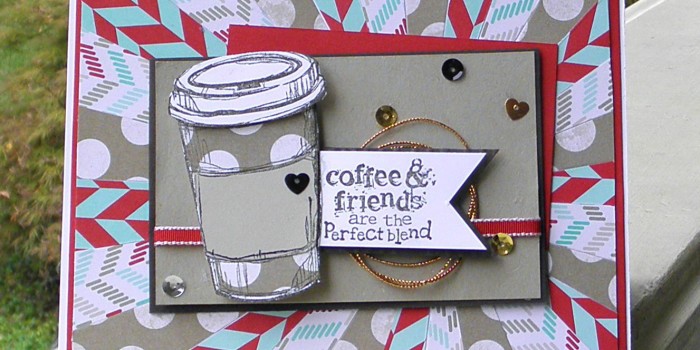
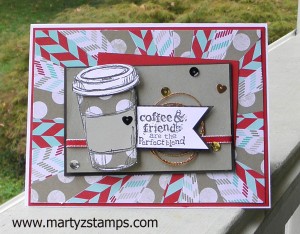
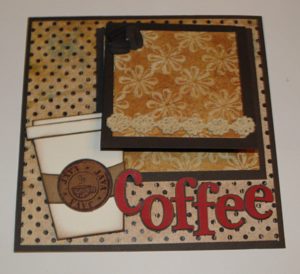
Shoestring Productions had a 6×6 coffee layout. This company has incredible laser cut page kits at a reasonable price.

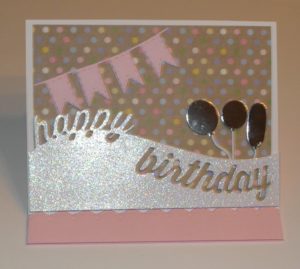
Loved, Loved, Loved this Happy Birthday Easel Card by Craft Fancy.

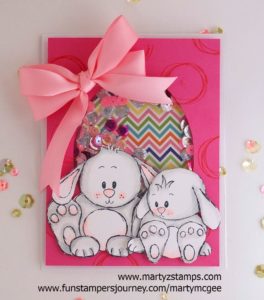
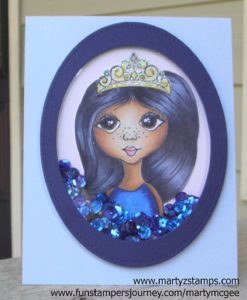
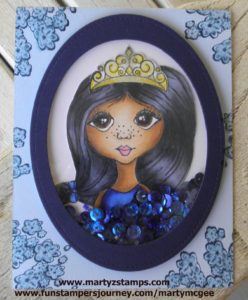
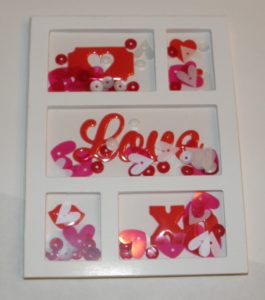
Queen and Co. had a fantastic shaker card to make and we walked away with extra sequins and epoxy embellishments.

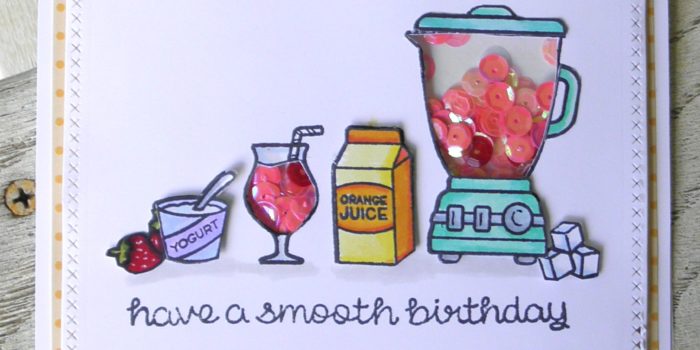
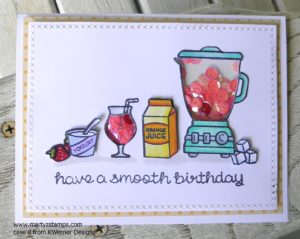
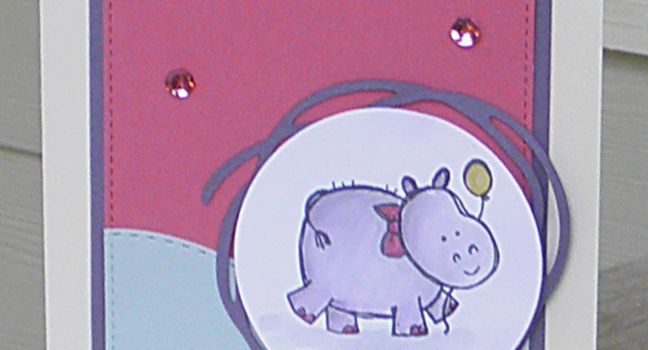
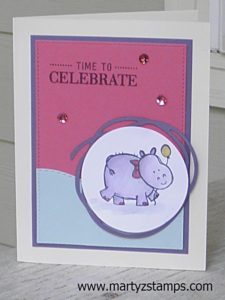
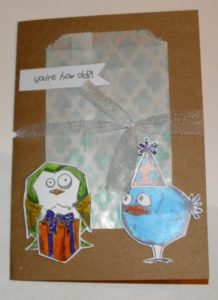
We did a Crazy Bird Birthday Card by Bee Creative. Everyone received a Spectrum Noir glitter/sparkle pen. My pen was purple!

All of this fun ended at 11:30 p.m. I didn’t get home until 12:00 midnight!

As I was browsing through the card challenge websites, I was inspired to create a black and white card with a pop of color from SUO Challenges website. Since I have a TON of SU! Stacked with Love paper, and most of the paper is black and white, I thought what a great way to use up some designer series paper and make a really cute card in the process.

The card started out to be a regular two mat card with a couple of flowers (the pop) accenting the lower left corner. I had yet to use the Sale-a-bration set “What I Love” from Stampin’ Up! and I thought this flower would work really well for this design. I stamped and cut out the flowers along with some petals and began to place them on the mats (nothing was adhered) trying to find the perfect spot for them to “pop”. Then, it occured to me I could make a shaker card. I made a really, really cute shaker card. I used some sequins from my Scrapbook Expo haul this past July. The picture does not do them justice.


Sentiment and pearls

Sentiment and pearls


I had an extra flower and leaves along with the center portion of paper from the shaker card. So, I pulled out some more of the cross hatched paper for the first mat, placed the center of the cut out paper from the shaker card onto it using dimensionals. Then matted the first mat in black to make it stand out from the white cardstock. I added a sentiment banner to the top of the center mat and the extra flower to the bottom left corner (both are raised using dimensionals). I finished the card by brushing some clear Wink of Stella onto the flower and leaves.

Here is card number two:

SUO Challenge #153

Enjoy!!!

I made this card for a business associate who gave birth prematurely. Her daughter is doing fine but will be in NCIU a few more weeks. Even though Amelia came early, I know Ashley and her family are celebrating her birth and each milestone she accomoplishes as she gets closer to being able to go home.

Freshly Made Sketches #241 card sketch was a perfect sketch to stir my imagination. The hippo from SU! Fun Pun stamp set made an absolutely adorable card for such a sweet girl.

FMS Final 241-001

I started out with SU! Whisper White as the base of the card, but it seemed a little harsh; therefore, I switched the base to SU! Very Vanilla.
I matted the card with SU! card stock Perfect Plum, Strawberry Slush, and Pool Party. I accented the mats with the stitched rectangle dies from Dienamics (love that set of dies). and the Pool Party mat’s top edge was cut using Poppy Stamp die stitched landscapes. I cut a swirly circle out of Perfect Plum card stock from SU! Swirly Scribbles dies as a mat for the cute watercolored hippo. While these are not traditional baby colors, they are muted with just enough punch to make the happy hippo shine.

For the happy hippo, I stamped it with Memento Tuxedo Ink on SU! Whisper White card stock and cut it out with a SU! circle die. I wanted to use alcohol markers but when I tried a few out they were not subtle enough (I don’t have very many to choose from). So, I went with watercoloring.
As a base for the hippo, I put a wash of color from SU! Stampin Write Markers (Smokey Slate, Basic Gray). Then, I added SU! Wisteria Wonder and a very diluted touch of Elegant Eggplant for shadowing. Tip: I scribbled a little of each marker on a plastic surface and picked up the color with an Aqua Painter. You could also use re-inkers if you don’t have any markers. I added a girlie touch of Melon Mambo straight from the marker to the toe nails and bow and colored the balloon with Daffodil Delight. I added some Wink of Stella for a little glitter effect. I stamped the sentiment from a stamp set included in the SU! Watercolor Wishes card kit and accented with some SU! sequins. Voila!

As you enjoy this card, please say a prayer for Amelia to get stronger each and every day and to give her family strength as they walk through this time of healing.

FMS#241 Amelia

Have a Great Day!

Fab Friday’s current challenge is a Color Challenge. Here are the colors:

Fab Friday 96 Color Challenge

Since Mother’s Day is just around the corner, I decided to create a Mother’s Day card using Fab Friday’s color challenge.
I chose SU! Painted Petals and SU! Perpetual Birthday Calendar to create this card. I think this unique color combination turned out well. This will definitely be a wonderful card to receive on that special day! I tried to get the best picture I could, but it does not do the card justice. I had used the hexagon metal die as a mask to add a little Hello Honey to the background and in person, it looks good. But, in the picture it looks like a dirt smudge. I added some bling

Fab Friday Color Challenge 86

Enjoy!

I must say having a make-n-take right around the corner helps me to overcome a creativity block. I’m so glad Paper Craft Crew Card Sketch #162 gave me the perfect inspiration for one of my September Make-n-Take designs:

PCCCS-162-205-001-300x232

I had wanted to use up some of the DSP paper in my paper stacks, and this card fit the bill. I took DSP from SU! Fresh Prints paper stack, cut it into 1 1/2″ strips and then cut the strips diagonally from corner to corner. I then spiraled them around a small circle in middle of the card (I did have to overlap the last two or three very slightly to make the card look good). I then took SU! Perfect Blend and made a cup with a sentiment banner. The card is accented with copper twine and sequins I just bought last week on Stampin’ Up! Weekly Deals.

PCCCS162

Supplies:

PAGE TOP
[dealsbar preview] Amazing Deals: !!toolbar-deal-title!! - !!toolbar-deal-merchant!!