Tag : flowers

16 posts

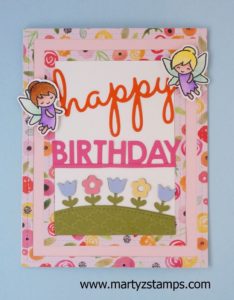
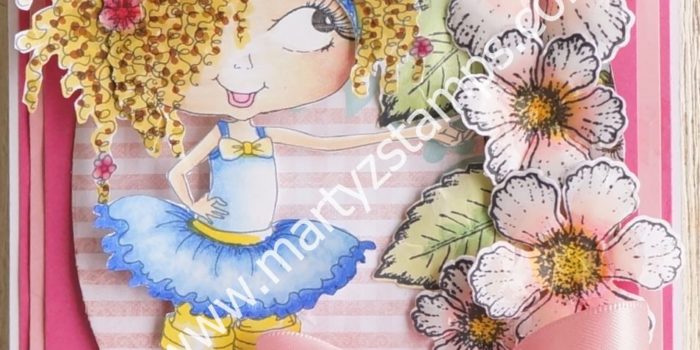
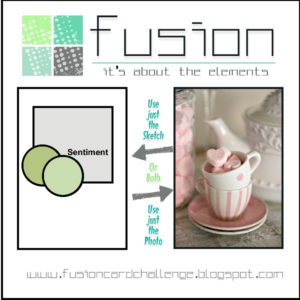
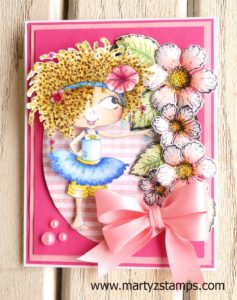
Yesterday I had a Spectrum Noir Alcohol Marker coloring class, which focused on shading clothing. I had recently ordered from Etsy a Sherri Baldy digi stamp (there were two images to my surprise and delight). I thought this would be a great image to practice clothing coloring. A color palette of blues and pinks was chosen. When she was finished, I knew I had to submit another card to the Fusion Card Challenge – Pretty in Pink Card Challenge.

She was so much fun to color. Here are the markers we used: Hair – base from roots to midway of hair GB11 then GB4 to the ends. TN3, GB 10, TN5, EB4, EB5 (dots throughout hair); skin – EB1, FS7, FS9 and FS8 for cheeks and lips; dress and headband- TB1, TB4, TB5; Pants – LY1, CT4; Flowers PP1 and PP3 and Blender throughout project.

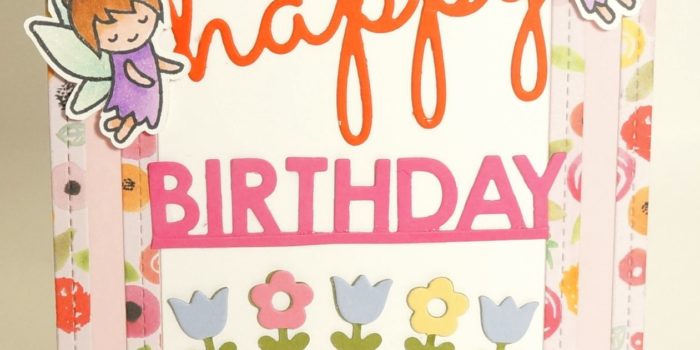
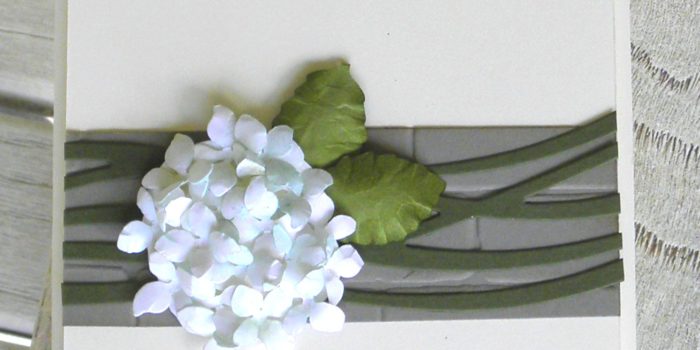
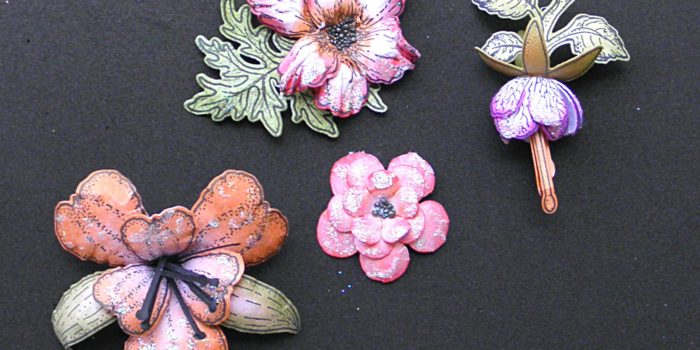
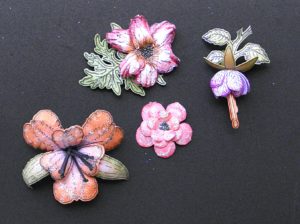
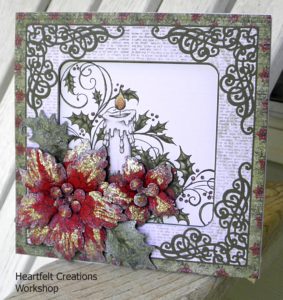
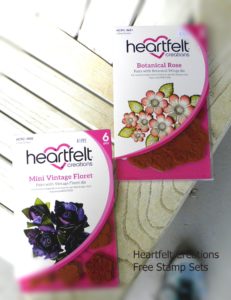
The flowers are from the Heartfelt Creations – Botanical Rose. The base of the card is FSJ Whip Cream with FSJ Watermelon Fusion and FSJ Bubble Gum cardstocks as mats. The oval was cut from Heartfelt Creations Strawberry Fields 12 x 12 paper pack. The pearl accents are FSJ pearls and they were colored with Spectrum Noir PP2 marker to make them pink. A layer of Journey Glaze was added to all the flowers to make them shine and pop. And, finally the bow is SU! silk ribbon made into a double bow.

If you would like to order any products from Fun Stampers Journey, click here.

This week’s Paper Craft Crew Challenge #226 is a Birthday theme card. Here is their card sketch:

A week and a half ago, I went over to my friend’s house to help her set up her new Brother Scan-n-Cut. Once we had it working to scan and cut out stamped images, we made a card using the Lawn Fawn fairies we had just cut out. We colored the fairies using Spectrum Noir Alcohol Markers. The designer paper is from a paper stack (I think it is Penny Black – not sure). The “happy BIRTHDAY” is cut from a My Favorite Thing die set out of Fun Stampers Journey cardstock (this was cut out at a later date at my house). The grassy hill and flowers are cut from the Lawn Fawn coordinating dies that work with the Fairy set and the hill is embossed using a SU! embossing folder. The cardstock mat is SU! cardstock as well as the grassy hill and flowers.

As we were working on our cards, I became extremely nauseated and left to go home (not realizing I had left my unfinished card project). My friend, Cheyenne, brought it over and gave it to me to finish, but she didn’t realize I had not stamped the sentiment on my card; so, we had cut out the “happy BIRTHDAY” for a card Cheyenne was making for a friend and it just didn’t fit what she was creating and it was pushed aside. A few days later, I was going through my cards that needed to be completed or updated to sell on my Etsy shop and I thought this “happy BIRTHDAY” would work wonderfully on my card. Voila! It did and here it is:

What a cute, adorable card to give someone special on their special day!

The Pals Paper Arts Challenge 312 sketch was a great sketch to showcase the Elizabeth Craft Design Hydrangea Die I purchased at our recent Scrapbook Expo held in Duluth, GA.

ppa312

To keep the main focus on the hydrangea, I kept the background and the cardstock band neutral. The Elizabeth Craft Design die comes with an irregular shaped circle, a die for the petals and several different sized leaves.  I cut three of the circles and cut the second and third down to create a stairstep affect on the bottom circle. I adhered each of the circles onto the larger circle using SU! dimensionals. This adds greater dimension to the hydrangea.  I sponged a little SU! Pool Party on to some Whisper White card stock and then cut out the petals. I shaped the petals using the Elizabeth Craft Design tool kit for flower shaping; then, I cut the leaves out of SU! Old Olive and sponged the edges with SU! Old Olive ink andshaped the leaves. I  adhered the flowers on the cardstock circles and I took a dry watercolor brush (a stiff one) and took up a little Pool Party ink from the ink pad lid and brushed the color lightly across the petals.

The band is cut from SU! Crumb Cake cardstock and embossed with the SU! brick wall embossing folder. I cut the strips on top of the Crumb Cake from Old Olive using the SU! Swirly Scribbles Thinlits. The sentiment is stamped in Old Olive and is a Bo Bunny – Amen stamp set which I purchased on sale from Hobby Lobby. The mat and base are SU! Very Vanilla cardstock.

If you have been keeping up with my posts, you know I have really fallen in love with 3D flowers. I think this card is clean and simple and would be a great card to give someone as a sympathy or get well card.

PPA312

Enjoy!

After seeing this past TGIF challenge winner, Bronwyn Eastley’s fancy fold card, I decided to CASE her card and create my own fancy fold card for TGIF #66 Case Your Fave challenge. If you have been keeping up with my previous posts, I attended Scrapbook Expo 2016 held in Duluth, GA. I fell in love with the Heartfelt Creation flowers, dies, and paper stacks. My fiend Cheyenne and I created a side-step card initially featured in Heartfelt Creations gallery but with a few changes (here’s the artist’s post here). We love Marisa Job’s designs! This side-step card creates a unique blend of 3D flowers in a 3D card. I LOVE this card!

Before I post the picture, I should say this was an all day project. Cheyenne had just purchased the stamps, dies, and paper to create sunflower cards and since we do not have a lot of practice flower shaping, it was a long arduous task but very satisfying. We first stamped our flowers on SU! So Saffron cardstock in SU! Soft Suede ink. I sponge daubed my flowers with SU! Hello Honey in the center of each petal and in the center of the flower. I then sponge daubed the edges and the outer portion of the flower center with Tim Holtz Spiced Marmalade distress ink. The leaves were stamped with SU! Old Olive ink onto SU! Old Olive cardstock. We shaped the flowers and leaves and set them aside to create the card base. We used SU! Crumb Cake cardstock with Heartfelt Creations Sunflower paper matted on SU! Mossy Meadow cardstock. We cut out some Old Olive from the SU! Swirly Bird dies and a Sizzix die Cheyenne picked up from Hobby Lobby. This was one of the design changes due to neither of us having the corresponding die to match their gallery pic. Once the base was created, I added black beads from Hobby Lobby in the center of my flowers and glitter to my flowers. Note: Add glitter first to your flowers, because the beads held the excess glitter and I had to add extra beads to cover the shine. I placed my flowers on my card and adhered everything together. Now, this sounds very straight forward, but . . . . . Cheyenne and I both are perfectionists to a certain degree, and we just weren’t satisfied with the balance of flowers on our cards. We pulled flowers off and re-adhered them many times until we were satisfied. This was not an easy thing to do because Heartfelt Creations glue is a very strong adhesive. I, also, had to pull the large bottom flower off and move it down so the sentiment was not covered up. Here’s another tip: If you decided to watch a YouTube video to created a specialized fold card, make sure to watch it all the way through. We were following along with the video, when the woman creating the tutorial said she messed up. What!!!!???? She didn’t edit that part out or add text prior to the goof? We had to cut more paper and start over. Sweet Shananigans!

#tgifc66

I can’t wait to create more 3D projects using flower shaping!

Friday, at Scrapbook Expo 2016, Cheyenne and I had a class with Heartfelt Creations. It was Flower Shaping 101. Cheyenne and I have wanted to learn how to make 3D flowers since visiting Heartfelt Creations booth last year. This class was awesome. We made four flowers.


Heartfelt Creations Flower Shaping Class

Heartfelt Creations Flower Shaping Class

I think my flowers came out really well.

Our second and final class was Hearfelt Creations Sparkling Poinsettia Class. We made three gorgeous cards. This class was definitely fast paced and we barely finished in time.

Here are the cards we made in class:

Heartfelt Creations Workshop Card

Heartfelt Creations Workshop Card


Heartfelt Creations Workshop Card

Heartfelt Creations Workshop Card


Heartfelt Creations Workshop Card

Heartfelt Creations Workshop Card

I plan on saving money each month to take more workshops; especially the Heartfelt Creation workshops. In addition to making wonderful samples and cards, we could pick out for each workshop a FREE stamp set up to a $19.99 value. Here are the stamps I chose. I would have the 12X12 paper stack I purchased (Berry Cafe), but I think I put it in Cheyenne’s bag of Heartfelt Creation haul after we made our Bee Hive Card.

Heartfelt Creation Free Stamps

Heartfelt Creation
Free Stamps

I will be posting either today or tomorrow the cards Cheyenne and I made with her haul of Heartfelt Creation products.


September’s Technique Class is August’s Technique Class rescheduled due to me having a nasty cold last month. This technique is all about making a negative image stencil using a hot glue gun. This is an awesome technique and I know everyone that tries this won’t be able to stop making hot glue gun stencils (see the YouTube video).

I had to go and purchase more glue sticks and decided to try the All Temperature sticks. I think they are easier to manipulate into the shape(s) you desire. I had previously posted a tree card using this technique, but I needed two more samples for my class this week,and I decided to make some hearts and flowers.

The heart/friend card turned out really well after I decided the spritzed color wasn’t brilliant enough and I went back and sponge daubed color onto the watercolor paper straight from the ink pads, The spritzed color did give it a nice light background as a base. I think I need to go back and start over with my color mix by putting more ink and less water and alcohol. Anyway, the heart/friend card is below my picture of card in progress showing the heart stencil.

PPA267


The next card featured is the flower card. When I first made the stencil, some of the flower lines were very thin. It was easy to go back and add more hot glue to make the lines thicker. Also, on the area where the flowers meet, there was a very large blank space; so, I took my rubber cutting scissors and cut some of the hot glue away so the ink could get to the paper. I used a sponge to apply the color straight from the ink pads. The stencil and card pictures are below.

The last card is the tree card, which I had completed last month. You can go back to its original post to get the supply list and details on making this card.

Hot Glue CardSupplies:

(not pictured) hot glue gun, retired label thinlits, watercolor garden SU! retired stamp set, stamp-a-ma-jig

Price: $110.00

Supply List

Built for Free Using: My Stampin Blog

PAGE TOP
[dealsbar preview] Amazing Deals: !!toolbar-deal-title!! - !!toolbar-deal-merchant!!