Category : Cards

186 posts

This week’s Paper Craft Crew Card Challenge #165 is featuring the Hearth and Home Thinlit set. I mentioned in the previous post I love this set. It is so versatile and just makes the most darn cute cards you have ever seen that I’m entering another card for this challenge. The card sketch is below:

PCCCS-161-204-002

This card was one of September Make-n-Take cards. My stampers love this die set and several of them have purchased it already and others have it on their wish list.

This card, also, features the new SU! Brick Embossing folder. It is an outdoor scene using the Hearth & Home Thinlit set. It looks very much like a Spring card, but I couldn’t help myself; I just had to put flowers in the flower box die that comes with the set.

PCCCS 165 Card 2

I matted the entire card with a thin layer of Basic Black to make the Cherry Cobbler brick wall stand out. I gave it a worn look by adding Very Vanilla Craft Ink to the embossing folder and then running the mat through the Big Shot. The flowers and leaves were made using punches. The grass was cut out with a die (it might have come from My Favorite Things – I’m not sure since I purchased it from one of my stampers who was getting rid of their stash). The shade was punched with a retired ribbon type punch from Stampin’ Up!. I love this card and I hope you do too.

Supplies:


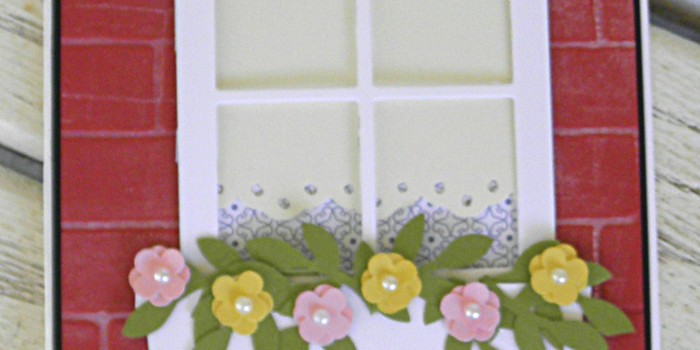
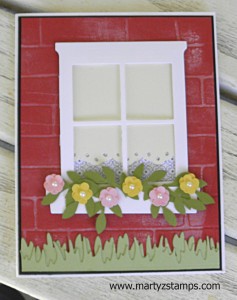
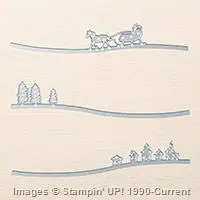
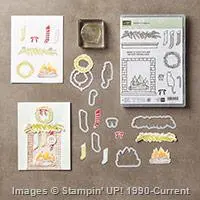
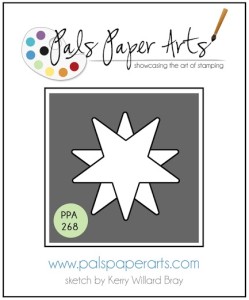
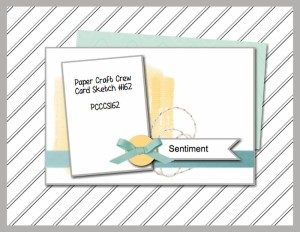
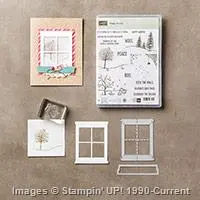
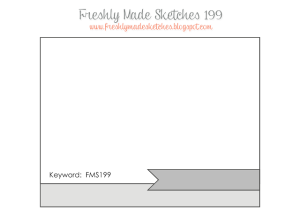
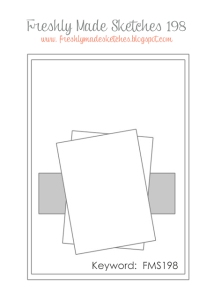
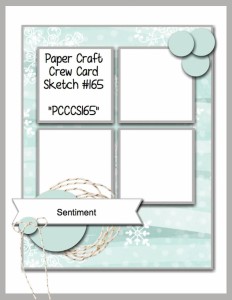
This week’s Paper Craft Crew Card Challenge #165 is featuring the Hearth and Home Thinlit set. I love this set. It is so versatile and just makes the most darn cute cards you have ever seen. The card sketch is below:

PCCCS-161-204-002

I am having a December Christmas Card make-n-take. Each stamper will be making two each of three designs which are detailed and require extra time to complete. I had completed, I thought, one of the cards for this make-n-take, but once I saw this week’s card sketch, I changed a few things.

OLYMPUS DIGITAL CAMERA

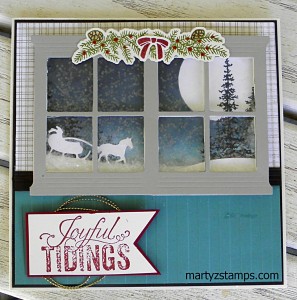
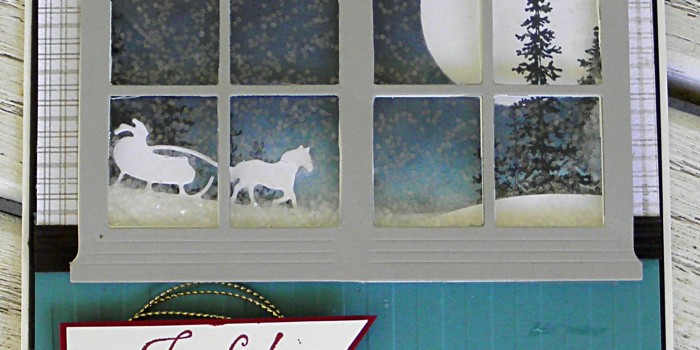
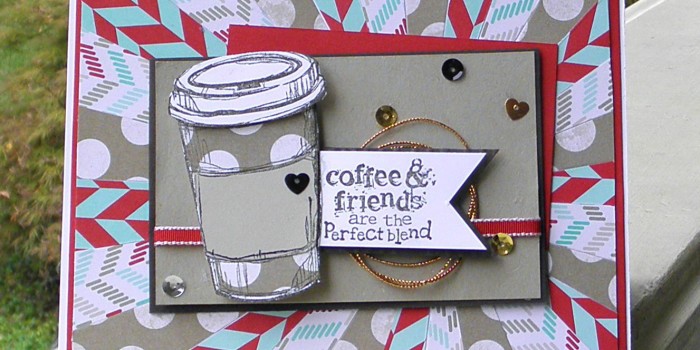
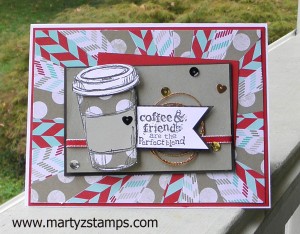
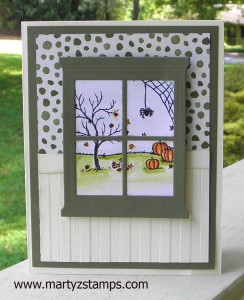
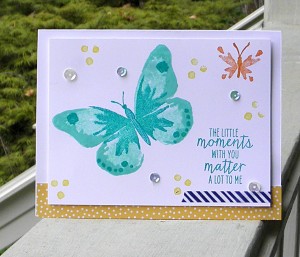
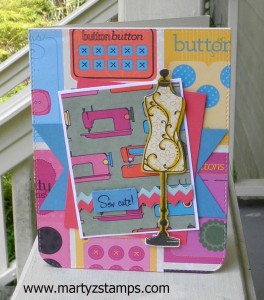
This is a 6″ x 6″ shaker card. Yes, it will snow on the sleigh rider if you shake the card up and down. If you shake it sideways you have created a blizzard for the poor horse and rider to endure. This card had initially started off as a regular 5 1/2″ x 4 1/4″ card, but the double window took up the entire card and it just didn’t look “right.” I decided to make it a 6″ x 6″, which allows for a sentiment (card change from sketch).

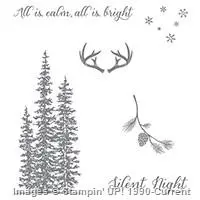
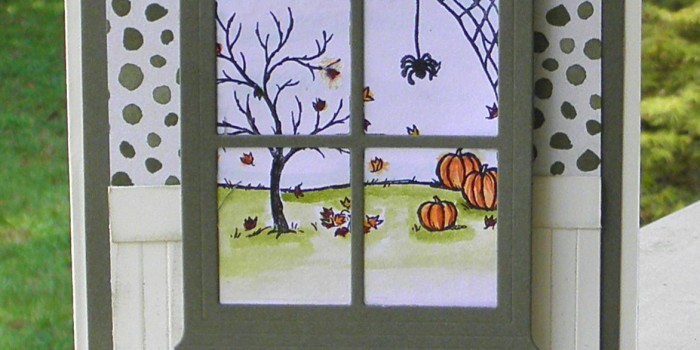
I cut the sleigh rider out of SU! Whisper White and set it aside to create the evening background. I used a piece of Whisper White card stock for the background. I punched a circle to mask where the moon would be and then, I sponged on retired SU! Midnight Muse (Night of Navy would work) on the outer edges and Coastal Cabana in the center to add some light. I stamped the top portion of the trees from the new Wonderland stamp set in Midnight Muse (there are trees on both sides – the left side is obscured by glitter sticking to the acetate sheet I used for the window panes. I cut a double window out of Sahara Sand (first go-around was Very Vanilla, it really left the card looking washed out). I added a little glitter to the background piece after placing the sled and other hill onto it. Now, here is where things got a little dicey. I tried using the circle dimensionals.  Well, that tended to be a problem, because the dimensionals naturally curved, they are very thin, and don’t close the gaps between them very well. Needless to say, I had “glitter leak”. What a pain!!!! I tried squirting the new clear fine tip glue in the gaps, but I can say that did not work. I, eventually, went to Lowe’s and bout mounting tape, which I will cut in half and double. Oh, the joys of cardmaking snags.

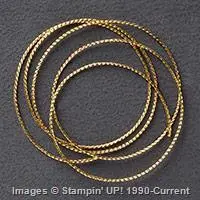
Anywhoo, The top portion of the interior wall is SU! DSP from WAY BACK WHEN I can’t remember. It just look appropriate. Lost Lagoon is the bottom portion and it was embossed with SU! retired stripes embossing folder. I stamped the sentiment in Cherry Cobbler on Very Vanilla and ran it through the Big Shot with a banner die (oops! didn’t put that on the purchase list) and matted it with Cherry Cobbler card stock. I accented the sentiment with Gold Cording Trim. All of this is matted on Early Espresso.

Hope you enjoy!

Price: $110.00

Supply List

Built for Free Using: My Stampin Blog

 For some reason, I have missed the last two Pals Paper Arts card challenges by a few hours. But, I’m super excited to submit a card to PPA #268 Card Challenge today.

PPA268

This card is a quick and simple Christmas card using SU! Festive Flurry stamp set. I stamped the large snowflake in Pacific Point, the medium sized snowflake in Bermuday Bay, and the small snowflake in Coastal Cabana. I added stampin’ dimensionals and rhinestones to give the stamped image depth and eye-candy. The sentiment is stamped in Pacific Point using SU! Greetings of the Season stamp set.

PPA268

Supplies: retired SU! Greetings of the Season (not pictured)

I must say having a make-n-take right around the corner helps me to overcome a creativity block. I’m so glad Paper Craft Crew Card Sketch #162 gave me the perfect inspiration for one of my September Make-n-Take designs:

PCCCS-162-205-001-300x232

I had wanted to use up some of the DSP paper in my paper stacks, and this card fit the bill. I took DSP from SU! Fresh Prints paper stack, cut it into 1 1/2″ strips and then cut the strips diagonally from corner to corner. I then spiraled them around a small circle in middle of the card (I did have to overlap the last two or three very slightly to make the card look good). I then took SU! Perfect Blend and made a cup with a sentiment banner. The card is accented with copper twine and sequins I just bought last week on Stampin’ Up! Weekly Deals.

PCCCS162

Supplies:

September’s Technique Class is August’s Technique Class rescheduled due to me having a nasty cold last month. This technique is all about making a negative image stencil using a hot glue gun. This is an awesome technique and I know everyone that tries this won’t be able to stop making hot glue gun stencils (see the YouTube video).

I had to go and purchase more glue sticks and decided to try the All Temperature sticks. I think they are easier to manipulate into the shape(s) you desire. I had previously posted a tree card using this technique, but I needed two more samples for my class this week,and I decided to make some hearts and flowers.

The heart/friend card turned out really well after I decided the spritzed color wasn’t brilliant enough and I went back and sponge daubed color onto the watercolor paper straight from the ink pads, The spritzed color did give it a nice light background as a base. I think I need to go back and start over with my color mix by putting more ink and less water and alcohol. Anyway, the heart/friend card is below my picture of card in progress showing the heart stencil.

PPA267


The next card featured is the flower card. When I first made the stencil, some of the flower lines were very thin. It was easy to go back and add more hot glue to make the lines thicker. Also, on the area where the flowers meet, there was a very large blank space; so, I took my rubber cutting scissors and cut some of the hot glue away so the ink could get to the paper. I used a sponge to apply the color straight from the ink pads. The stencil and card pictures are below.

The last card is the tree card, which I had completed last month. You can go back to its original post to get the supply list and details on making this card.

Hot Glue CardSupplies:

(not pictured) hot glue gun, retired label thinlits, watercolor garden SU! retired stamp set, stamp-a-ma-jig

Price: $110.00

Supply List

Built for Free Using: My Stampin Blog

It seems like a long time since I have posted. I have been sick plus super busy. The last make-n-take we had at my house featured the card below.  It is using the new SU! Woodland Textured embossing folder. Here is the card:

SUO #130

This is a super simple card to make. I used a brayer to roll Crumb Cake onto the inside flaps of the Woodlands embossing folder. I then placed a piece of Very Vanilla card stock into the folder and ran it through my Big Shot. I cut a wreath out of SU! Color Me Autumn DSP. I cut out the leaves with a retired BigZ die (can’t remember the name) and ran them through various SU! embossing dies (it doesn’t matter which dies you use, just something to give the leaves texture). I printed out “hello” in a color close to Elegant Eggplant, which is the color of the card stock used to mat the embossed Very Vanilla.

Supplies: **Note: I added the current Leaflets Framelits and Acorn Builder below, which can be used to substitute for retired product I used on my card.

Price: $12.50

Price: $110.00

Supply List

Built for Free Using: My Stampin Blog

I am very excited to enter a card in the SUO Challenge #129: Cards Without Words card challenge.
For those stampers who send out cards, it is nice to have cards with no sentiment on them to have
on hand for any occasion. The inside of the card is great for writing a meaningful note with a
sentiment appropriate for the occasion.

I am also super excited to use the new SU! Happy Scenes stamp set along with the SU! Hearth & Home
Thinlits Dies. They are super awesome! I created a card looking out onto a Fall landscape. I think you will
really love this card as well.

SUO #129

Supplies: not pictured SU! stripe embossing folder, chocolate chip stampin’ write marker, SU! 2014-2015 Fall DSP

Price: $12.50

Supply List

Built for Free Using: My Stampin Blog

This week’s Freshly Made Sketches #199 challenge is:

FMS Final 199-001

I decided to use SU! Watercolor Wings stamp set for this challenge. I stamped the larger butterfly in Pool Party, Coastal Cabana, and Bermuda Bay inks and the smaller butterfly in Tangerine Tango and Tangelo Twist with Daffodil Delight accents and sequins from the Watercolor Wonder Kit (love that kit). The bottom of the card is accented with a strip of Cherry on Top DSP and washi tape from the Watercolor Wonder Kit (did I already mention, I LOVE THAT KIT).

FMS199

Supplies:


Supply List

Built for Free Using: My Stampin Blog

This week’s Freshly Made Sketch is:

FMS+Final+198-001I was inspired by Rita Wright’s card sample to pull out a MFT stamp set called Sew Nifty I bought a LONG time ago and never used. I used a blueprint die to make the base out of SU! DSP, I used the coordinating die to cut out the dress form and then I stamped the image on the pre-cut shape, I used a retired BigzXL die to cut some ric-rac, and I placed the sentiment on top of the ric-rac. Hopefully, you can see the Marina Mist rectangular panel which I made into a banner, and the Watermelon Wonder mat behind the mat of sewing machines. I love this card because it reminds me of my mother who could make anything with her sewing machine.

FMS 198

Supplies: not pictured (MFT stamp set Sew Nifty with matching dies, MFT blueprint die, BigzXL border die, SU! DSP sewing paper – don’t know the name of the paper).

In August, I am offering a Technique class featuring a hot glue mask/stencil. I found this technique on a YouTube channel with the Frugal Crafter and it looked like such a fun technique, I knew my stampers would love to learn how to do this in a class. Check out the YouTube website.

I found a small silicon mat I had purchased from Stampin’ Up! and forgot all about it until I cleaned out my tool bag. Lo and behold that was one less supply I needed to buy for the class. LOL  I hate to admit but this happens quite often to me; you know, you buy something just because, never use it, and one day you just happen upon it and become quite happy to have found it just in time for a project. Anyway, I broke out the glue gun with one glue stick left and heated it up. I really wanted to make a lot of hearts joined together (see the tutorial) but my glue gun didn’t want to cooperate. It wanted me to make something that would look good with globs of glue. How about a tree??? That worked well. So a tree making I did go.

Once I made my tree and let it cool for a few minutes. I made up the ink mist. I had two spritzer bottles and put 1/3 alcohol, 3 – 4 drops of ink, and filled with water (for lighter inks, you might want to put 5-6 drops of ink). I laid the hot glue tree on some watercolor paper and spritzed the yellow at the top and the orange half way down to the bottom of the card. On my next card, I will take something heavy and put on top of the paper so it doesn’t warp (I still can get the edges to lay flat on the mat).  Once the spritzed ink was dry, I sponged some Wild Wasabi on the branches and down at the bottom of the card for grass. I went back with a really, really old SU! stamp set Watercolor Minis and stamped leaves and grass with some flowers. Since the card had a modern/abstract feel to it, I stamped “You are a fabulous work of art” as the sentiment. Here is the card!

Hot Glue Card

Supplies: not pictured (hot glue gun with glue sticks, SU! Watercolor Minis)


PAGE TOP
[dealsbar preview] Amazing Deals: !!toolbar-deal-title!! - !!toolbar-deal-merchant!!