Tag : color burst pencils

15 posts

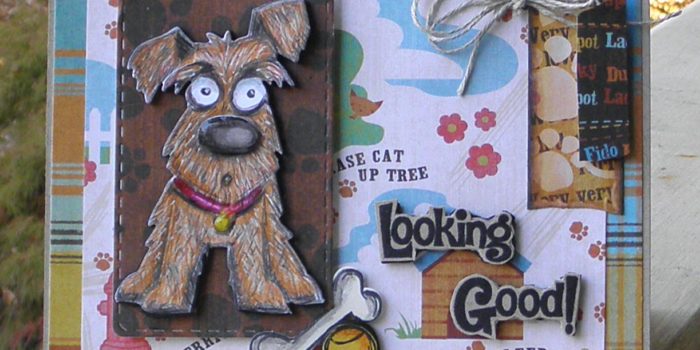
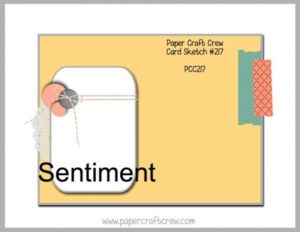
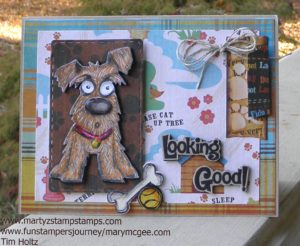
Well, Cheyenne and I got together on Wednesday and made the most adorable card EVER! She had purchased Tim Holtz’s Dog stamp set with coordinating dies. She came over to my house whipped those stamps and dies out of her little black bag, and we got off to a ruff start (ha, ha – do you like the pun). Anyway, she wanted to create a dog with textured hair. She had a picture to go by from a Pinterest pin, and I tried to pick out Spectrum Noir colors that were a close match. We got half of our dog’s faces done and she didn’t like them. They weren’t the correct color. So, upon her insistence, we started with a fresh dog stamped in SU! Smokey Slate. The first one was stamped with Memento Tuxedo Black, but we wanted the hair to over-balance the stamped image’s outline. That’s when I said, let’s make our card using the Paper Craft Crew Challenge #217 (why not kill two birds with one stone). So, she pulled the sketch up on her phone and we began again.


We took our stamped image and gave it a base color of Spectrum Noir EB1 and LV1. Then, we took my Fun Stamper Journey Color Burst pencils and began to create shading (darkest brown) along with several other colors to create lighter shading and depth to the dog. Once all of this was accomplished, we kept our pencils sharpened and began making flicks of color onto the dog image. This took a LONG time. It takes a very light touch, and when you flick the pencil lead, you need to lift at the same time so your hair image looks light and hairy. We used several different colors with the black pencil giving more depth and a white gel pen was used to add light effects on the hair. Cheyenne said my dog looked mad and her dog looked scared.

Once we were happy with our hair and color of our dog, we cut out a nose and popped it out and added Journey glaze to give it a nice shine. A bone and ball were added to my card. Cheyenne added a leash to her card, but I couldn’t add one to mine because my matted dog was in a different place on my card than her card. I took the Fun Stampers Journey ATS stamp and stamped the sentiment onto FSJ Oatmeal Cookie cardstock. I made faux washi tape out of cardstock and placed a Journey twine bow up at the top of the card (I did have my twine on the smaller mat as in the sketch, but it pulled your eye away from the focal point – the dog). Last but not least, the dog, the mat the dog is on, the bone, tennis ball, sentiment, and the smaller piece of washi tape are popped out. I used fun foam for everything but the washi tape. All of the printed paper is from The Pets Stack paper stack which was purchased from Hobby Lobby a long, long time ago. The base of the card is FSJ Oatmeal Cookie cardstock. The mat for the dog was cut out using a rounded corner stitched rectangle die from Pink and Main. Here he is. He thinks you are “Looking Good.”


Hope you enjoy!

This past September three friends and I went to the Stamp Scrap Art Tour held in Duluth, GA. Pink and Main was one of the vendors at this show. The owner and illustrator for Pink and Main, Michelle Currie, was at the Friday night make-n-take, and we were able to complete an awesome card, purchase a discounted die set (only available during the make-n-take), and have a great time enjoying her company. We also had the opportunity to see her the next day while shopping for all sorts of goodies. My friend and co-crafter, Cheyenne, purchased their scarecrow stamp set and coordinating dies.

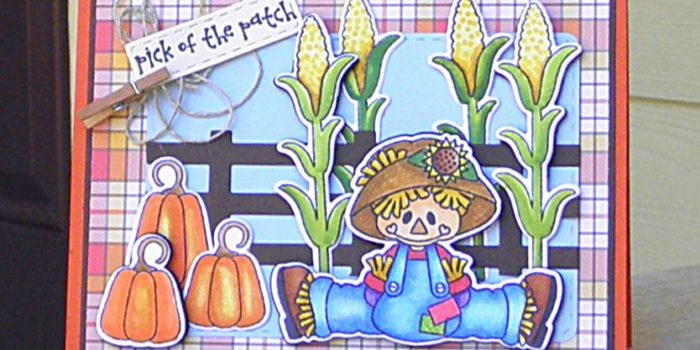
We spent a whole afternoon stamping the scarecrows and coloring them with our Spectrum Noir alcohol markers. We had a great time. Cheyenne ended up putting her card together that evening, but when I am tired I know better than to try to pull together something important. It usually spells disaster. I finally put mine together this weekend. AND, it is gorgeous.

When I saw the Paper Craft Crew #215 challenge today, I knew my Pink and Main Scarecrow card was the perfect match for this challenge. Here is the card challenge:

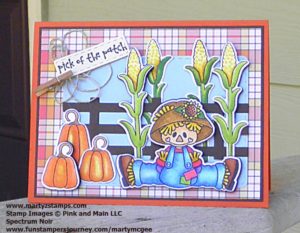
For our scarecrow card, we stamped the images on Spectrum Noir paper with Tuxedo Black Memento Ink. The images were colored with our Spectrum Noir alcohol markers. See the end of this post for the color combos. Several of the images are raised using black foam. I believe we used Lawn Fawn’s 6×6 plaid paper pack for the printed mat. The blue mat is SU! Bashful Blue (a very retired cardstock), the plaid mat is on FSJ Hazelnut cardstock and the base is a SU! paper (Cheyenne’s paper wasn’t listed but I think FSJ Orange Rave or Tangerine Fusion would work really well). The mini-clothes pin and twine are from Fun Stampers Journey (FSJ). Here is the card:

Spectrum Noir Color Combos (the ones I wrote down):

Jeans – TB5, TB2, TB4, GG1
Corn – CT1, GB9, GB6
Straw – CT4, GB6
Hat – Fl Yellow, TN3, FS1 and Color Burst pencils for crosshatch texture
Pumpkins – CT1, OR2, OR3
Corn stalks – can’t remember the lighter green but I did palette blending with the lighter one and DG3

Supplies:

Pink and Main – Scarecrows and dies, stitched rectangular (rounded corner) dies
Lawn Fawn – plaid paper stack
FSJ – Tangerine Fusion, Hazelnut cardstocks, Color Burst Pencils, twine, clothes pin
Inks and Markers – Memento Black, Spectrum Noir alcohol markers
Misc – Black Fun Foam sheets, fence die (bought a long time ago from My Favorite Things)

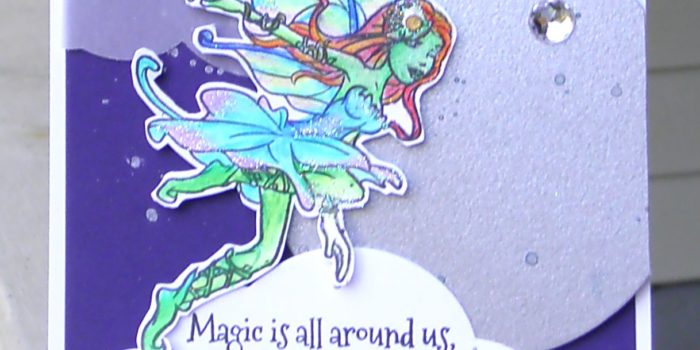
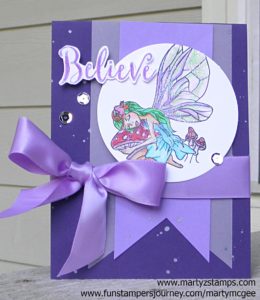
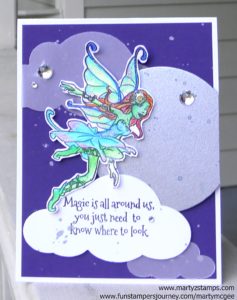
I received my Bloom Box last week and my Bloom Box group met Sunday afternoon to complete the kit. We had a great time creating some amazing cards. I love the stamp set and the color palette from this month’s Bloom Box. We used my NEW Color Burst Pencils with a little bit of Fusion Blender solution to make our images dazzle and pop! I am an avid RPG gamer, and know that many times elves and fairies are created in different skin tones. So, I colored my fairies with varying skin tones. Here is my first fairy:

Lila, the house fairy. House fairies have skin tones similar to humans ranging from light to dark skin tones. Their hair is usually a brilliant hue, which is often seen out of the corner of ones’ eye. But, before a closer inspection can be made, they have flitted off to a secret place where no one can find them. They are responsible for moving reading glasses, pens, pencils, keys, important documents causing the home’s occupants to feel they are becoming quite senile.

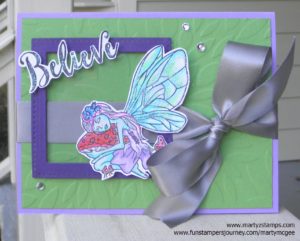
Our next fairy is a Woodland Fairy:

Heather Moss lives among the deepest parts of the forest. She is friends with all of the forest’s wildlife and many times helps them escape the traps and snares of hunters and poachers. It is extremely rare to see a Forest Fairy because they blend so well with their surroundings. All Forest Fairies can change their skin color to match the seasons. Heather Moss is shown during the summer season, but when fall arrives, she will change from green to an amber orange, and then she will become a light to dark brown during the winter so she can blend in with the tree trunks and branches strown through the forest. When spring arrives she will become a light green and transition into a dark green again for summer. This is one fairy you do not want to cross. They can have a very mean temperament and do not like humans in general.

The next fairy is a Water Fairy:

Water fairies like Crystal, love to race each other while riding the backs of frogs. The winner receives a laurel of water lilies held together by tangled vines. They love to tease fish by luring insects close to the water’s surface, making the fish think an easy meal is to be had; then, they chase the insect away right before the fish jumps from the water trying to enjoy a meal in one easy gulp. These fairies range in various shades of blue, and their skin shimmers like the scales on a fish. They are beautiful to behold, but rarely ever seen. These fairies are indifferent to humans, but like all fairies remain unseen by choice.

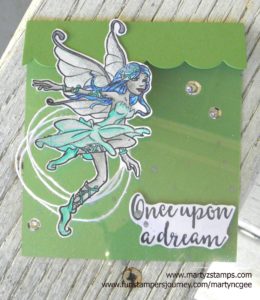
The last card is a Mountain Fairy:

Shard like all Mountain Fairies are found at the highest of altitudes. They prefer the starkness of these environs to warmer climates. They are gray which allows them to blend in with snow and rocky mountains. These fairies are the hardiest of all the fairies and are called upon as warriors when any fairy kingdom is threatened. These fairies are the easiest to glimpse, because where they live very few humans dare to tread. Sometimes they hover in plan view in astonishment as to why humans would want to venture into the bleakest and dangerous of environments. They are only vicious when trying to be entrapped and can inflict great physical damage to an unsuspecting human.

It is not too late to order October’s Bloom Box. They are available until the end of the month. Click here to order yours! The Bloom Box card kits require a six month commitment, but I can say, I have not been disappointed and my Bloom Box crafters look forward to each box arriving in the mail! I will be making some of my own layouts soon!

Supplies: Fun Stampers Journey October Bloom Box

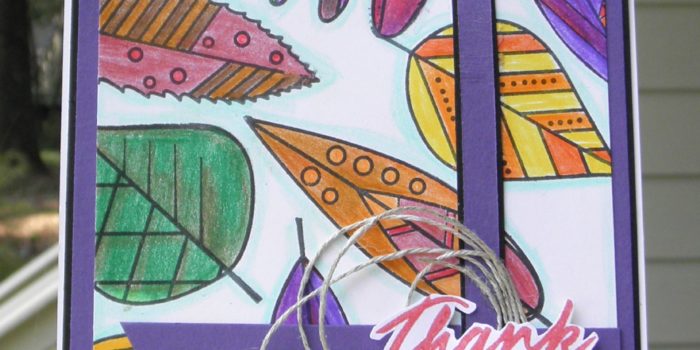
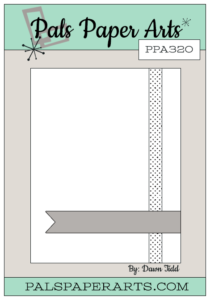
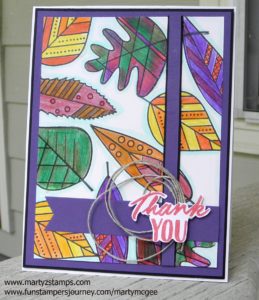
I recently purchased the Fun Stampers Journey (FSJ) Artsy Leaves out of their mini-Trend Catalog (it has since retired as of September 30th). Even though I knew it would not be a stamp set I could demo at parties, I still wanted it. I LOVE the whole collection and it came with a die set that I purchased as well. When I saw the Pals Paper Arts Card Sketch Challenge #320, I thought this set would make a perfect background stamped card with a Thank You sentiment.

ppa-320-sep29I stamped the leaves using FSJ Black Licorice ink. This ink is very versatile. It is a “true” black ink, it doesn’t smear (it’s dry in about 30 seconds), you can use watercolor mediums with it, and it can be used on plastic, glass, etc (some surfaces require the ink to be set with a heat using a heat gun.
I colored the leaves using FSJ Color Burst Pencils. These pencils do not require Gamsol to blend them together; they are infused with oil to make blending without a liquid medium easy. You can purchase blending stubs from FSJ and dry blend them, but I didn’t use the stubs on this project. I outlined each leave with a light blue pencil to make them pop. I used FSJ – Whipped Cream as the base and matted the leaves on FSJ – Black Licorice and FSJ – Deep Lilace cardstocks. The stips of paper accents are in FSJ – Deep Lilac and FSJ – Black Licorice as well. I highlighted the sentiment with FSJ – Twine and stamped the sentiment from one of the Bloom Benefit ATS – Thanks Much. I stamped the “Thank You” in FSJ – Candy Apple Fusion Ink and fussy cut only the “Thank You” out of the full image. The “Thank You” is popped up on dimensionals.

PPA320Supplies:
FSJ – Whipped Cream, Black Licorice, and Deep Lilace cardstocks, Black Licorice and Candy Apple Fusion Inks, Color Burst pencils, twine, dimensionals, liquid glue, white liner tape, and glue dots.

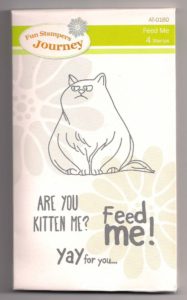
This past weekend my friends Cheyenne, Mary, Karen, and I attending the Stamp Scrap Art Tour Show’s Make-n-Take at the Gwinnett Infinite Energy Center. It’s like Scrapbook Expo, but different, and we had a great time. Every one of us won a door prize during the make-n-take. I can’t remember what Mary and Karen won, but Cheyenne won a stamp set from Darcie and I won something from the Fun Stampers Journey make-n-take table! I was thrilled. I chose a retired ATS (Artist Trading Stamp) called Feed Me. Here it is:

catalina

It reminded me of my friend, Kevin’s, cat named Catalina. Catalina can be quite the diva.

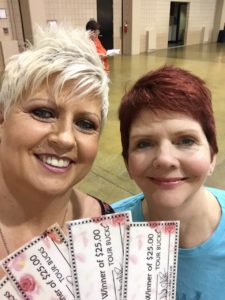
Saturday and Sunday were shopping days at the show. They had quite a few door prizes. Cheyenne was one of the first to win a door prize and she got $100.00 to spend in “show bucks.” Of course, her dear friend, that would be me, was right there with her helping to spend every last dollar of her prize. LOL  Here we are right after she got her show bucks:

show-bucks

I, also, helped her select various items from the Heartfelt Creations booth. I will be posting our creations we make sometime in the future from those purchases. The best part is she let me pick out a die that went with one of the free stamp sets I received this past July at the Scrapbook Expo. Yay, me! The Darcie booth had the most incredible stamps and shrinky dink supplies. That’s where the show bucks went. You will be seeing those creations soon.

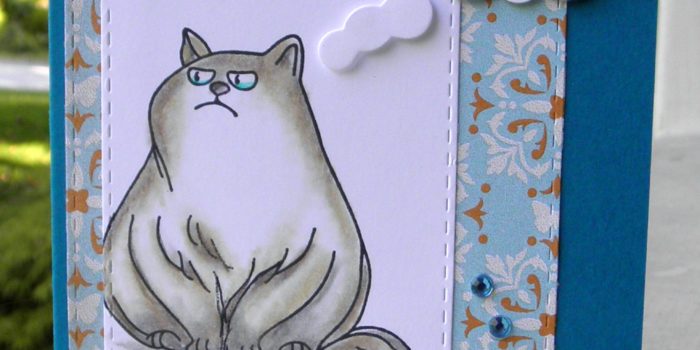
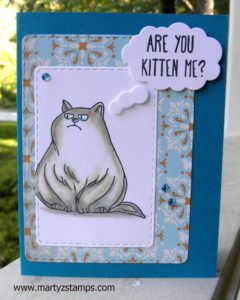
Once we got home, I said let’s make something really quick and use my new Fun Stampers Journey Color Burst pencils. We decided on the cat, and we pulled together a card in about 40 minutes (that’s pretty quick for us). It turned out to be so cute! I can just see Catalina thinking/saying this to Kevin.

You do not need any gamsol or other medium to create a blended image with FSJ Color Burst Pencils. You only need blending stumps. I added a few rhinestones I purchased from Cre8tiveArtz at the Scrapbook Expo. I used a die we purchased from Pink and Main for the stamped image and the DSP mat.  Because we attended the make-n-take, we could purchase the die set (stitched rectangles with rounded corners) for $10; regular price during the show was $20. The die was a GREAT deal! Cheyenne purchased a scarecrow stamp set with coordinating die the next day. It is soooo cute. I will post our creation when we have time to make it.

Supplies:
Stamp – FSJ retired ATS Feed Me
Cardstock – FSJ base (I don’t know all the names yet), FSJ Whipped Cream, SU! DSP paper
Dies – Pink and Main rectangle stitched (rounded corners), SU! Word Play
Inks – FSJ Black Licorice
Color – FSJ Color Burst Pencils
Accessories – FSJ blending stumps, Journey Platinum Die Machine, rhinestones, FSJ white liner tape adhesive


PAGE TOP
[dealsbar preview] Amazing Deals: !!toolbar-deal-title!! - !!toolbar-deal-merchant!!