Tag : card

119 posts

Here is Round Two of the Gel Press Throwdown between Carrie Rhoades and myself. Just a brief review, we sent each other what we considered “ugly” Gel Press pulls and our challenge was to make something beautiful out of the “ugly ducklings”. So, make sure to check out her blog carriestamps.com to see the creations she has made from my “ugly” Gel Press pulls. Here is the link for Round one on my blog http://martyzstamps.com/2018/08/27/gel-press-challenge-round-one-fms351-sketch-challenge/.

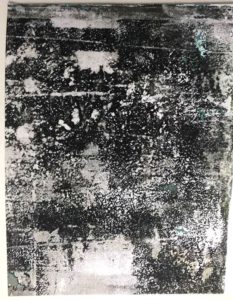
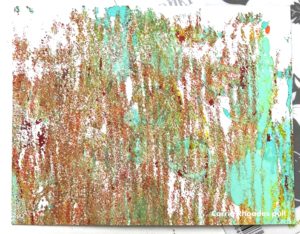
I forgot to take a picture of the pull before I started adding to it. Carrie was gracious enough to send me a photo of a piece of the original pull. It is not the actual piece but it will give you and idea of what I started with. Here it is.
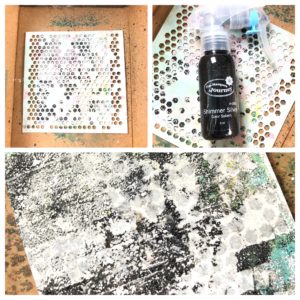
I took the original pull and placed it in my spraying box (a box to use silks, splashes and splattering to contain any over mist). I placed our Vintage Screen on top of the pull. I then spritz it with our Shimmer Silver Splash. You can see the design on the bottom photo.  


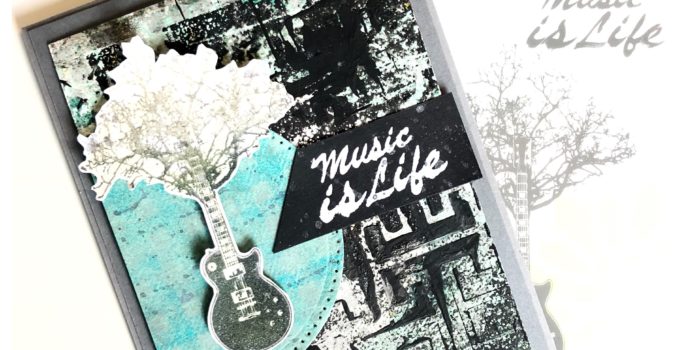
I stamped the guitar/tree with River Stone at the top and Rock Candy at the bottom using my Misti to get the right amount of ink onto the paper. I used Journey Glaze to create a sheen on the guitar and once the glaze was dry, I painted some Sparkle Silk onto the guitar and tree branches for a hint of glitz. I placed the guitar on the Gel Press background to decide what I wanted to do next. Since there was already a hint of Cool Pool acrylic paint on the pull, I decided to spritz the card with the Cool Pool Splash. At first I wanted to keep a circular space in the middle free of Cool Pool color; so I placed a piece of scrap paper on the background and spritzed the paper. Once this was dry, I happened to spy some Cool Pool cardstock and thought that would make an awesome mat. I grabbed it and put some Blue Lagoon ink on the Flannel Life background stamp and stamped the image on the circle which I ran through the die machine with the piercing die to give it some interest. I took the circle and spritzed it with the Shimmer Silver Splash. While all of this was drying, I stamped the sentiment in Whip Cream onto Black Licorice cardstock and embossed with White Embossing Powder. Then, a little splatter of Silver Silk.
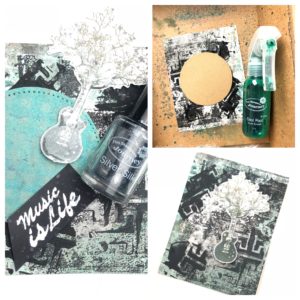
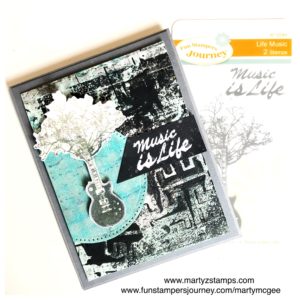
After everything was dry, I began assembling the card. I chose River Stone as the base with a Rock Candy mat. I cut down the Gel Press background, added the circle and sentiment with the guitar popped up using foam squares. This was adhered to the base with foam squares. I think this turned into an amazing card. Remember, there are no “ugly” pulls!!!!

What do you think of this card?
Product List

I know all my followers are aware of how much I love my Gel Press. That being said another member of the FSJ Creative Team, Carrie Rhoades, loves the Gel Press as well. We decided to have a challenge throwdown to create cards from each other’s pulls and one of the throwdown stipulations was to include some not so pretty pulls; because, as I tell my crafters, “There are no ugly pulls!”

I received Carrie’s package of pulls this past Thursday; and, quite frankly, I didn’t see any ugly pulls but maybe I have conditioned my mind to see past the obvious and to envision the beautiful. Here is the one I chose to use for the Freshly Made Sketches Challenge 351. I think it is a gorgeous Gel Press pull. *** Carrie used yarn wrapped around her brayer and acrylic pain to create this Gel Press pull (see below). Here is Carrie’s link to the “ugly” pull I sent her and she used for Round 1’s throwdown Carrie Stamps, No Such Thing as a Bad Print blog post (click here).

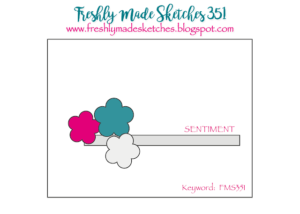
This set the stage for the FMS 351 sketch.

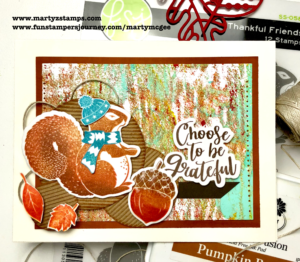
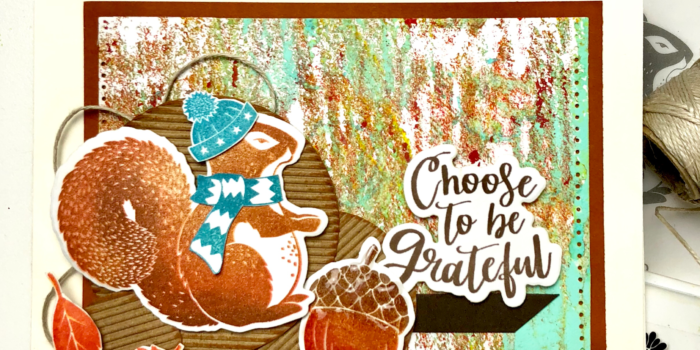
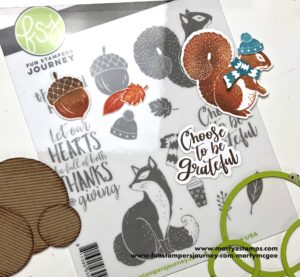
The minute I began working on putting a card together for this sketch, I knew this pull was a winner! I began with the Thankful Friends stamp set and incorporated some fall colors (Pumpkin Bread, Tangerine Fusion, Rich Coral, Hazelnut Blend and Turbo Teal):

The corrugated paper adds texture and dimension to the circle mats. To create a little depth to the circle mats, Pumpkin Bread ink was applied directly from the pad to the edges of the circles. A hint of twine peeking out from behind the mats adds a little fun to the card. I think the squirrel is just too adorable and makes a great focal point for this card. The sentiment says it all, “Choose to be Grateful.” Do you choose to be grateful? I do.

Product List

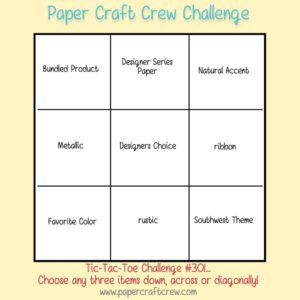
Have you ever heard of a Tic Tac Toe Challenge? If you haven’t, it is a design challenge where the designer chooses three design elements in a row, just like tic-tac-toe. The designer can go vertical, horizontal or diagonal. Once the choice is made, the design work begins. Here is Paper Craft Crew #301 design challenge for this week:

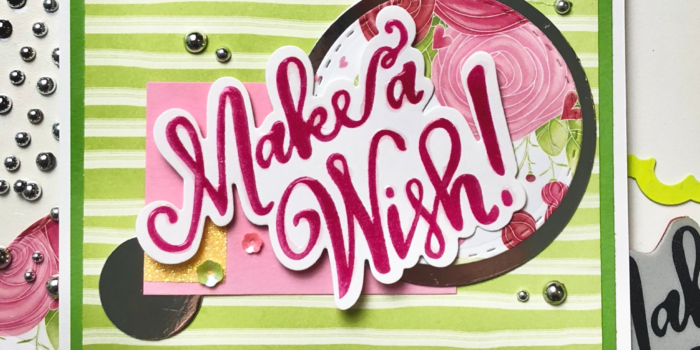
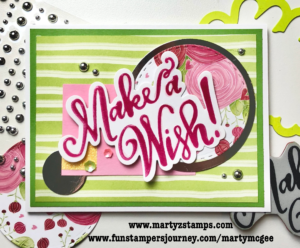
I chose the first vertical row, which included bundled products, metallic and favorite color. If you have been keeping up with my blog, Facebook and Instagram posts, you will know I’m all about the FSJ Make A Wish stamp and die bundle. So many great projects can be created from this one stamp and die. For the metallic design element, I had some Mirror Silver card stock and I grabbed some Watermelon Fusion card stock for my favorite color. Who can’t resist hot pink? I can’t.

The base is Whip Cream with a Limeade Splash base mat and a Through the Year Prints mat adhered on top. I die cut circles from the mirror silver (they look black due to lighting but they do shine in “real” life) and Through the Year Prints card stock along with a small rectangle of Bubble Gum card stock. The sentiment is popped up to create dimension as well as the addition of Fashion Silver embellishments with a couple of Bloom Time sequins. Let’s not forget the lemon sparkle tape and the Journey Glaze on top of the Make A Wish.

All supplies Fun Stampers Journey. If you would like to order supplies used in this project, please click an image below:

Product List

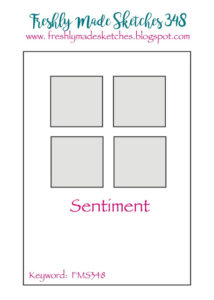
A simple and cute sketch this week from Freshly Made Sketches #348. It’s four squares and a sentiment. Really, that’s it in a nutshell.

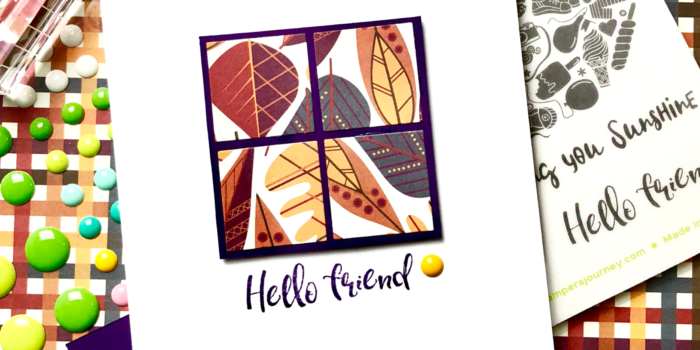
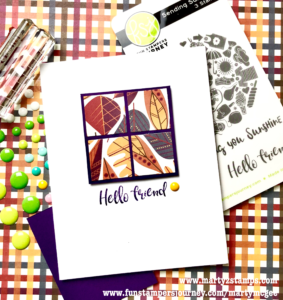
I love it when a project just happens. Base of Whip Cream card stock, small Deep Lilac mat with Through the Year Prints die cut into four square and adhered to the mat. Sentiment stamped in Pretty Pansy Fusion ink. And, there ya go.

All materials used are Fun Stampers Journey. If you would like to order any of the supplies from this project, click on the image(s) below:

Product List

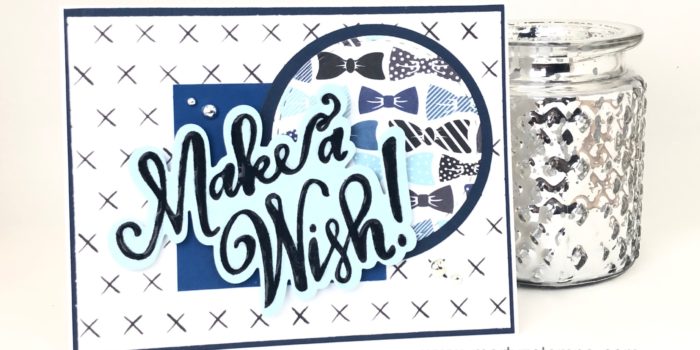
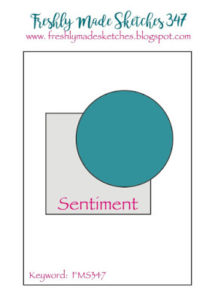
If there is one stamp set and die that I truly love, it is the Make A Wish stamp and die bundle! In fact, I love it so much it is my August Featured “A” Team Bundle. To bring in this featured stamp set, I wanted to showcase it as a blue and bow tie birthday card on Freshly Made Sketches #347 card challenge.

I turned the design to landscape position and went to work. If you are a paper crafter that likes quick, simple and clean creations, this card is for you! I began with a base of FSJ Whip Cream card stock with two base mats of Denim Days (5 3/8″ x 4 1/8″) and Through the Year Prints 12 x 12 paper (5 1/4″ x 4″). Using the same Denim Days card stock I cut a mat out of our circle dies and a circle out of Through the Years Prints. The square accent is cut from Huckleberry Fusion (2 1/2″ x 2 1/2″). The Make A Wish sentiment is stamped with Black Licorice onto Pool Play card stock using my MISTI to create a fully stamped image and then die cut with the coordinating die using our Amaze die cutting machine. Make A Wish is popped up with Medium Foam squares and Journey Glaze makes the words pop off the card stock. The final accent are the Fashion Silver accents.

So quick, so easy, so cute!

If you would like to order this bundle and any of the supplies used to create it, please click here or on any of the supplies below!

Product List
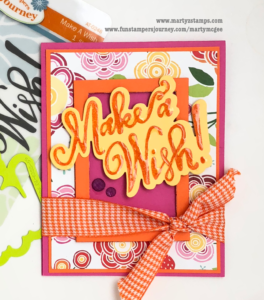
Have you every wanted a simple, versatile stamp and die set that can become whatever you want it to be? Well, let me introduce the Make A Wish ATC stamp set with coordinating die. What a great way to bring in the New Year, a special person’s Birthday, a great gift tag on a PRESENT, a CAKE TOPPER, . . .  I can go on and on!!!

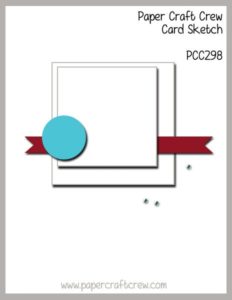
This post will feature a bright and cheery birthday card as one of the card challenge entries on Paper Craft Crew Sketch Challenge #298. Here is the featured sketch challenge:

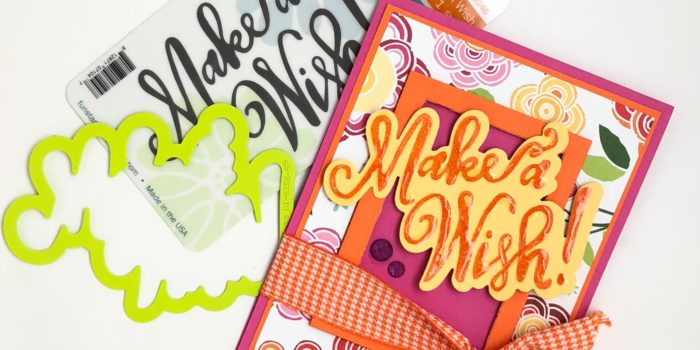
This card was so quick and simple to make. I started out with a Watermelon Fusion card base; then, placed a Tangerine Fusion mat on top. The designer paper (I hate to admit is retired – but, Colorful Journey or Playful Prints  will work – see supplies) has a rectangle shape cut from the middle using one of the Journey Rectangle dies. The Tangerine Fusion frame is next and it is popped up using Small Foam Squares.

TIP: Use the same rectangle die to cut out the middle portion of the designer paper as well as the center portion of the Tangerine Fusion cardstock to create the frame. This will allow your layers to line up easily.

The Make A Wish sentiment is stamped onto Pineapple Smoothie cardstock with Tangerine Fusion ink. The sentiment was die cut with the coordinating die and Journey Glaze was added to create a focal point. It is popped up with the Medium Foam Squares to add greater dimension to the card.

TIP: Use a positioning tool like the MISTI to stamp the image multiple times creating a deep, rich, vibrantly colored  sentiment.

The final touches are the Rainbow Drops just below the sentiment and the Tangerine Fusion Gingham ribbon.

Let me know what you think about this card in the comments:

To order, click here or click on any of the supplies listed below:

Product List
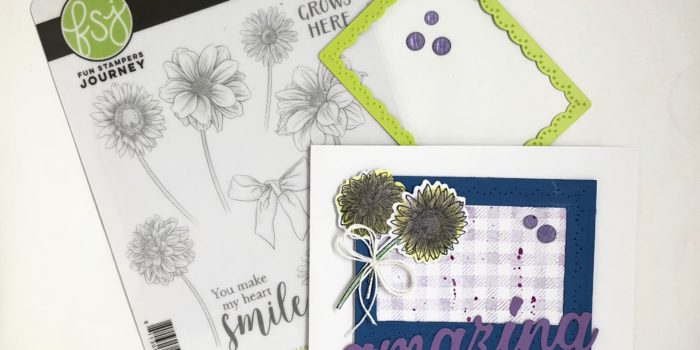
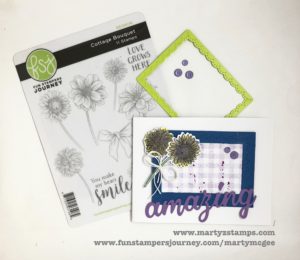
One of the FREE gifts from Fun Stampers Journey to each coach in June at convention was the Cottage Bouquet stamp set. I am in love with this set. There are so many beautiful papercrafting project possibilities using this dynamic set of florals not to mention the cute bow and sentiments – did I mention we received the coordinating dies FREE too!

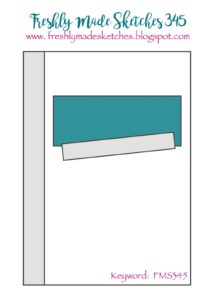
When I saw the Freshly Made Sketch #345, I knew this set would make the perfect card.

Freshly Made Sketches are clean and simple cards. Making sure I kept to this design style, I chose FSJ Whip Cream cardstock for the base. I pulled out one of the stitched designed frames from the Pocket Cuts Die set and cut the initial rectangle. To create a frame, I cut the center of the rectangle out with one of the Journey Rectangles dies using Huckleberry Fusion cardstock. The frame mat is stamped in Pretty Amethyst with the Flannel Life stamp background stamp. I wanted the “amazing” sentiment to create a pop of color and Lavender Fusion cardstock was just the right touch of color to create this affect. The “amazing” die came with a set of dies included when I ordered my Amaze machine. The flowers are stamped on Whip Cream with Black Fusion ink and colored with Pretty Amethyst and Electric Lime ink by dabbing color onto the petals with the small dowel sponge set. The stems are colored with a Color Burst Pencil. I accented the card with Cosmic Grape silk, Rainbow Drops and a triple bow created from our Whip Cream twine.

A simple but amazing floral card:

To order click here or click on one of the featured products for this project below:

Product List
Can you create a one layer card? For those who like clean and simple this might be an easy task, but for me, it is a challenge. I love to create a lot of depth and dimension on my papercrafting projects. This means layer upon layer of mats and the stamped images are often raised using FSJ foam squares, not to mention embellishments such as Rainbow Drops, ribbon, twine, clips, etc. . .

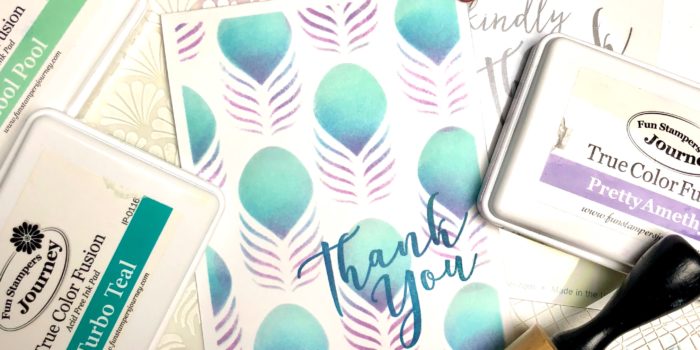
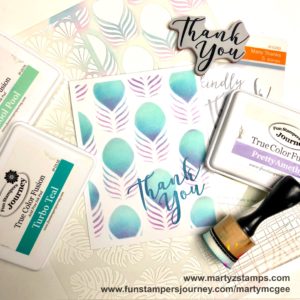
When Christine Pennington called her Bloomin’ Buddies to take part in a one layer card challenge, I jumped on board. I needed a quick and simple thank you card to place in the envelope with my Ebay sales of retired stamps and dies. I immediately knew our NEW Wallpaper stencil from our NEW Inspiration Book and Catalog would make a beautiful card (click here to order). To begin the project, I chose fusion inks which would blend together nicely. They are Cool Pool, Turbo Teal, and Pretty Amethyst (if you want a darker shade of purple, you can choose Lavender Fusion).

I began by cutting my Whip Cream cardstock into 5 1/2″ x 4 1/4″ rectangles.  I placed the stencil onto the cardstock and using my large dowels I began applying color.

TIP: To keep the cardstock and stencil from moving, place a rolled piece of washi tape on the backside of the cardstock and place onto your stamping surface, add washi tape onto the stencil to hold it in place.

TIP: Use the small dowels for better application management; otherwise, tilt the large dowel back towards you to apply a small amount of color at a time.

Apply the Pretty Amethyst with the sponge dowel starting from the bottom of the image and going up about a third of the way. Using a different sponge, apply the Turbo Teal from the top of the Pretty Amethyst and to a little above the mid-point of the image. Finish sponging the image with Cool Pool (use a different sponge). Go over the entire image with Cool Pool to help blend all colors seamlessly.

TIP: Since Turbo Teal is a deep, rich ink, dab off some of the ink before apply.

Once all the color has been applied, add a sentiment of your choice. That’s all there is to it. I was able to create approximately 20 cards in an hour. Here is the finished project.


Product List
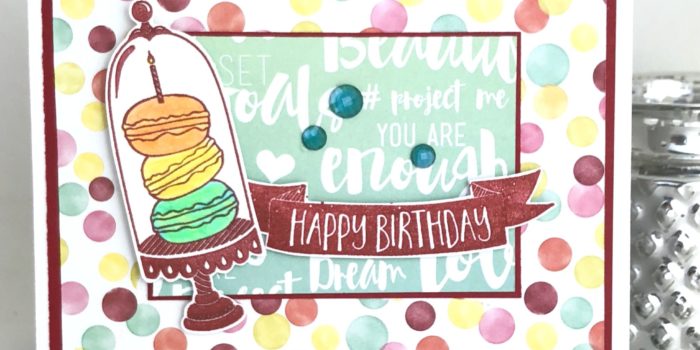
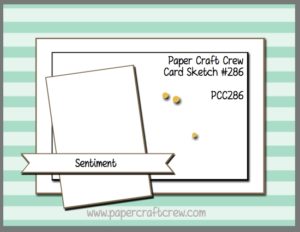
Celebrate your birthday with some delicious macarons. This week’s Paper Craft Crew Challenge sketch was a definite challenge for me. Do you have those times where nothing seems to work and/or pull together? Well, this was one of those times. Let me show you the sketch:

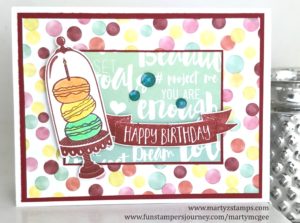
I used Whip Cream card stock as a base for my card. The solid mats were cut from Cranberry Bliss. I took out some designer paper and created some fun mats from them. The plate of macarons and the sentiment are from Fun Stamper Journey Let’s Eat Cake stamp set, and they were stamped onto Whip Cream card stock with Cranberry Bliss Fusion ink. The macarons were colored with the Color Burst pencils.

Let me know in the comments whether you like macarons and what color/flavor is your favorite.

All supplies are from Fun Stampers Journey. If you would like to order any of the supplies featured in this blog, please click here.


Having trouble creating a Masculine Birthday card? Well, I have a great card for just such an occasion. The Paper Girls Challenge #149 helped to spur my creativity with their fun card challenge; especially, when using the Fun Stampers Journey stamp set, “Thanks Dad”. I really love this set. It is so trendy and a great set for guys of any age.

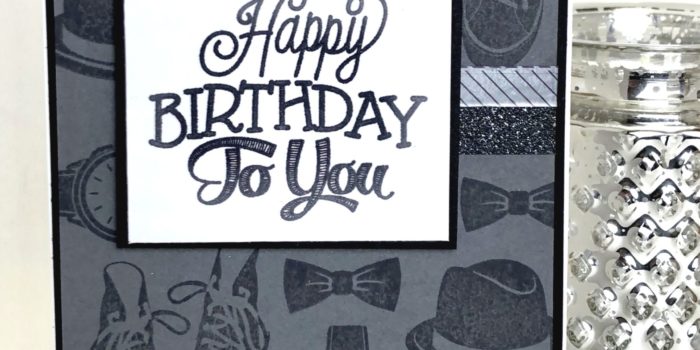
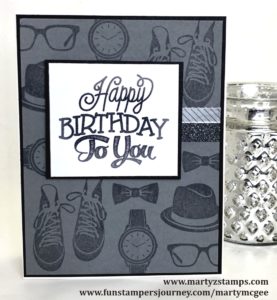
Since most guys are not about the bells and whistles of an elaborate handmade card, I wanted to keep this card design simple and clean. I began with a base of Whip Cream card stock; to the base, I added a Black Licorice mat. Once this part of the card was completed, the real fun began. I used Rock Candy fusion ink to stamp the images from the Thanks Dad set stamped onto a River Stone card mat. To add a little interest, I added a couple of accent strips that blend nicely into the card (the clear strip with black diagonal stripes is the Deco Strips-Black and the gray glitzy strip is from the Classic Elegance Journey washi Tape collection). Easy peasy.

Now, I needed a sentiment to wish that special guy, Happy Birthday. I chose a sentiment from the Celebration Script stamp set and stamped it onto Whip Cream card stock using Rock Candy fusion ink.  The final touch was a Black Licorice mat. And, that’s all she wrote. So quick, so simple, so cute, and so masculine. Love it!

All supplies used are Fun Stampers Journey products. If you would like to order supplies to create this card, please click here.


PAGE TOP
[dealsbar preview] Amazing Deals: !!toolbar-deal-title!! - !!toolbar-deal-merchant!!