Hi there! So glad you are hopping along with the FSJ Creative Team on a wonderful journey of amazing projects. Make sure to subscribe to our blogs. This way you will be notified each month not only with our regular posts but with a colorful line up of uniquely Fun Stampers Journey projects brought to life by the FSJ Creative Team. I hope you enjoy the fancy fold cards I created for this hop. Let the team know what inspires you to craft by posting comments.
I know you will be amazed and inspired by the talent of these creative paper crafters. Our team’s blog post links are below. If for some reason you hop off the trail, go to Fun Stampers Journey Blog and pick up where you left off.
Marty McGee (you are here!)
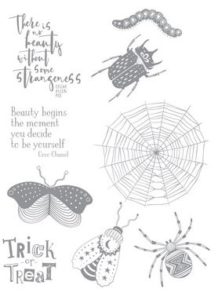
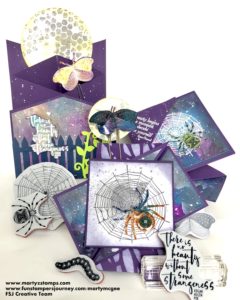
For this hop Strange Beauty is the featured stamp set, because I love insects. Yes, even spiders; although, I had to work on that one. I ordered this set a while ago and it sat unused and collecting dust because other sets kept calling my name, ya know what I mean. So, when the Creative Team was tasked to come up with some unique projects featuring each team member’s creative style, I immediately thought of this stamp set. I think all the “bugs” are just too cute.
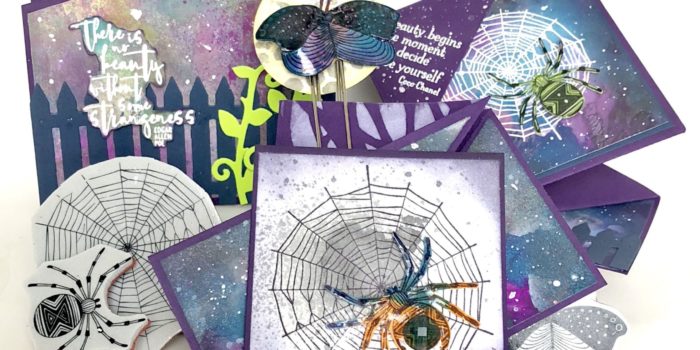
The decision to create three projects featuring fancy fold cards was made from a poll I created giving FSJ coaches three choices as to what they would like to see. Fancy Fold cards won! And, here they are:
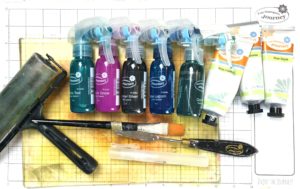
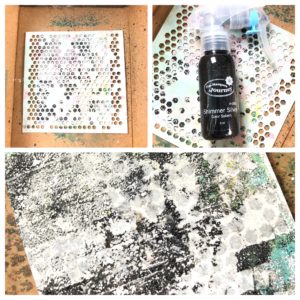
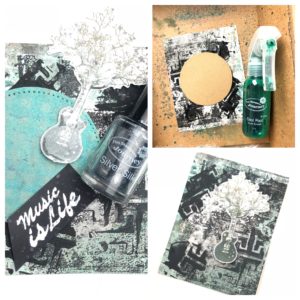
My vision was to create a night sky; so I pulled out one of my most favorite products, our Gel Press. I created two background pulls (note: I did not use the brayer as shown in the picture below). Check out the pictures for the steps:
 First pull:
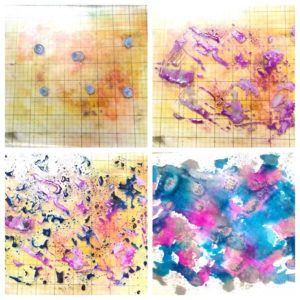 Second pull:
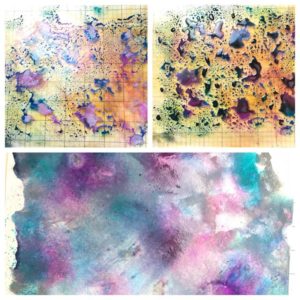
The first fold card is called a. . . .
Spring Card
5 1/4″ x 10 1/2″ piece of cardstock or printed paper
Scoring Tool (I used our trimmer)
Bone Folder
Pencil
Ruler
Scissors
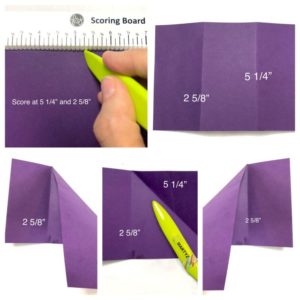
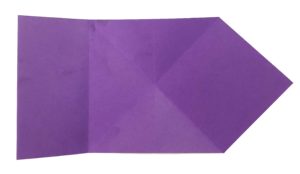
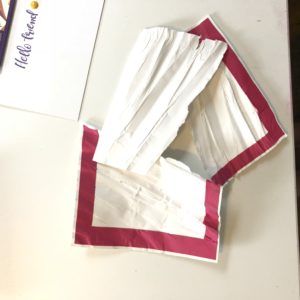
Step 1: Fold paper in half to create a
5 1/4″ square.
Step 2: Open the paper and fold the left side edge to the center.
Step 3: Grab the upper right hand corner, pull it down and over until the edge of the paper is aligned with the fold made in step 2. Open the paper and repeat with the lower right hand corner (you may need to turn the paper around as a preference).
Step 4: Open the paper. Mark the center on the right hand edge. You can use a ruler and mark at 2 5/8″.
Step 5: From the center point to the scored edge cut a diagonal line on both sides. You will have a diamond shape.
Here are a few pictures for reference.
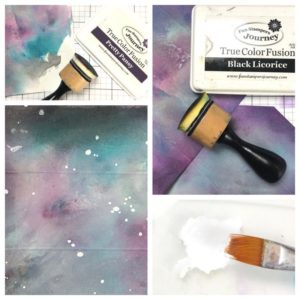
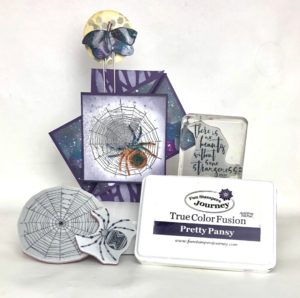
Once the Gel Press backgrounds were cut down to size (for all projects), I took the small dowel sponges and sponged Pretty Pansy and Black Licorice Fusion inks around the edges of the mats lightly. I added sprinkles of Whip Cream acrylic paint (watered down using the Media Mister) with a paint brush.
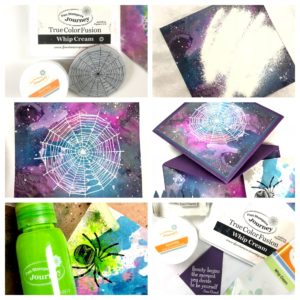
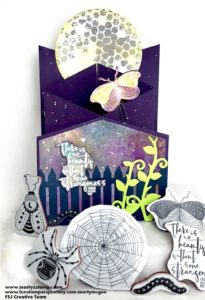
The spider web is stamped onto the Gel Press background mat in Whip Cream ink and embossed with White Embossing Powder. The spider was stamped using Black Licorice ink on a scrap of GelPress paper, spritzed with Electric Lime Splash and fussy cut. The sentiment was stamped in Whip Cream and embossed in white onto one of the corners cut off in step 5. It was sprinkled with diluted Whip Cream acrylic paint. The base portion of the card has the background mat with the picket fence cut out of Denim Days cardstock. The sentiment and the spider are popped up with foam squares. The final touch is Journey Glaze on the spider.
Just too stinkin’ cute!
TIP: I placed a glue dot (see pictures below). Top left picture is underneath the card before adhering everything together. Top right picture shows placement of the glue dot. Bottom picture shows where the dot sits on the base. Otherwise, the top portion would flop around and not stand up.
Here is the first of three projects – The Spring Fold Card featuring Strange Beauty
The second Fancy Fold card is a . . . .
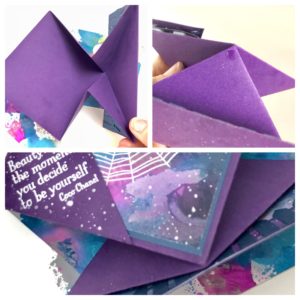
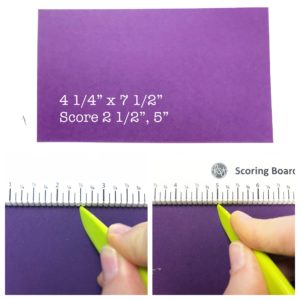
Twist Gate Fold Card
7 1/2″ x 4 1/4″ piece of cardstock
2 pieces – 2 1/4″ x 3 7/8″ printed paper (I used only one piece of Gel Press Background paper for front panels)
TIP: on the 2 pieces above, make SURE your cut in the correct direction!!!!
Paper Trimmer
Bone Folder
For this card: paper clip,Designer Series stencil and Vintage Screen stencil
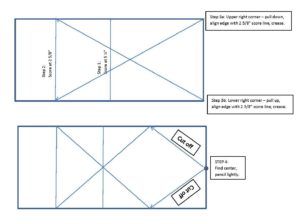
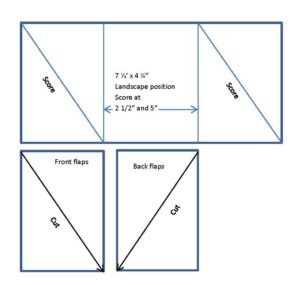 Step 1: Place 7 1/2″ x 4 1/4″ cut cardstock in landscape position,
score at 2 1/2″ and 5″.
Step 2: Score the left panel diagonally from the upper left corner to the lower right corner. Repeat on the right panel, score diagonally from the upper left corner to the lower right corner.
Step 3: Fold score lines and crease with the bone folder.
Step 4: Cut printed paper or stamped paper diagonally for the front flaps from the upper left corner to the lower right corner.
Step 5: Cut printed paper or stamped paper diagonally for the back flaps from the upper right corner to the lower left corner.
Scoring diagram in pictures.

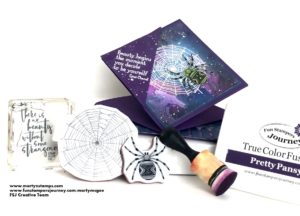
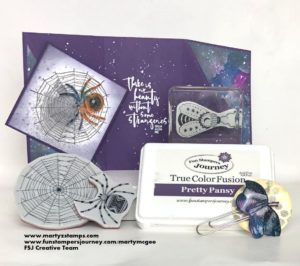
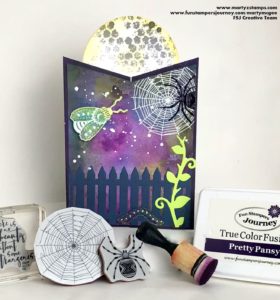
Front stamped image – Spritz Silver Shimmer onto a piece of Whip Cream Cardstock. Stamp the spider web on top of spritzed area using Black Licorice. Stamp the spider in Black Licorice onto Gel Press background scrap. Spritz a little Citrus Cooler onto the Spider and move around with a brush. Fussy cut the spider with detail shears. Adhere the spider to web with a foam square. Adhere the entire piece of cardstock to a Pretty Pansy mat. Sponge edges with Pretty Pansy and Black Licorice (remember to do this lightly). Add Journey Glaze to the spider and let it dry thoroughly. Add a blue Rainbow Drop to the spider’s back (Rainbow Drop shown on finished project).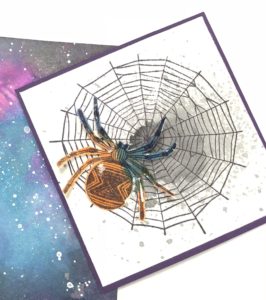
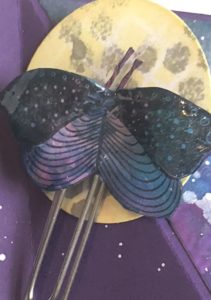
Stamp the moth onto a scrap piece of Gel Press background paper. Layer the image onto three pieces of Pretty Pansy cardstock with Journey Craft Glue. Fussy cut. Dye a small piece of twine (antennas) with Turbo Teal silk. Glue the antennas to the back of the moth. Add the moth to a paper clip with foam squares and adhere to the moon. Apply Journey Glaze and let dry. Once the moth was dry, the edges were brushed with Turbo Teal silk to color the white edges.
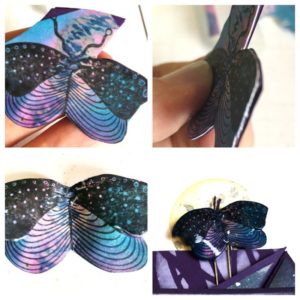
Moon – cut a circle with our Circle dies (I created a small one for this project and a large one for the last project). Place the honeycomb stencil over the top of the circle and spritz with Silver Shimmer Splash. Apply Banana Cream Fusion ink with a sponge onto the moon.

Adhere spider on web stamped image to the front flaps TIP: only adhere to one flap (this way the card will open). For the back flaps, on my card, I stenciled Whip Cream ink onto the flaps using the Designer Series stencil (tree portion). Stamp sentiment onto inside of the card with Whip Cream and emboss with White Embossing Powder. Clip the moth to the back panel when the card is closed. It will help to keep the card from popping open.
And here it is:
The last Fancy Fold card is a . . . .
Cascade Fold Card
2 pieces 5 1/2″ x 8″ cardstock
Trimmer with score blade
Bone Folder
Pencil
Scissors
Step 1: Cut two pieces of 5 1/2″ x 8″ cardstock
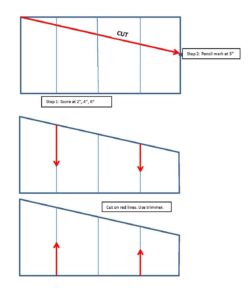
Step 2: Score at 2″, 4″, 6″
Step 3: Pencil a mark 3″ up from bottom of card
Step 4: Cut both pieces from top left corner to pencil mark.
Step 5: See diagram. On one piece, cut down half way on the two outer score lines.
On the other piece, cut up half way on the two outer score lines. These will fit together.

Top picture is Step 4.
Left picture is Step 5.
Middle right are the pieces fitting together.
Bottom right is top view.
For the stamped images and background mats, I did the same techniques as shown in the first two card examples. Here are some pics of various portions of the card. The background gel pressed paper on the back part of this card was created on Pretty Amethyst cardstock. To cut the front and back mats, I laid the panels onto the cascade fold portion marked lightly with a pencil and cut from those marks. I am definitely not someone that can measure and calculate my cuts!!!! I have to do it the hard way. What about you?
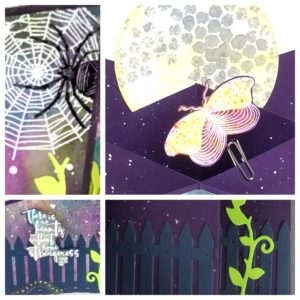
Here is the front and back of the Cascade Card.
Happy Crafting!
Product List


")


")
")


 This is an ATS set with a coordinating die.
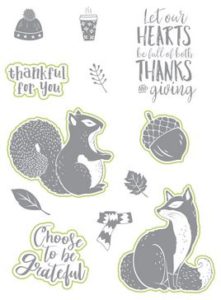 This is a full stamp set with coordinating die (see green outlined images).