Here in Georgia, the weather is fine, the trees are blooming, the birds are building their nests, and wouldn’t you know the most adorable bunnies showed up in my craft room wanting to make a grand entrance as well. They hopped right over and posed for a Pretty in Pink Bunny Delight portrait.
This was perfect timing for the Fusion Card Challenge – Pretty in Pink. Fusion Card Challenges allow three variations to a crafter’s designs. First choice, you can choose just the template layout; second choice, you can choose the color theme; or, you can combine both into one design. I decided to stick with the color theme of PINK.
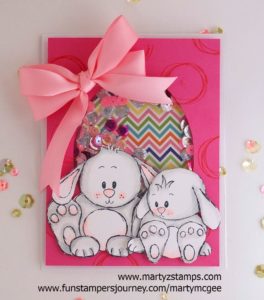
Once the bunnies were settled down and ready for me to create, I stamped their images onto Spectrum Noir cardstock using Fun Stampers Journey Spring Fling stamp set. I then colored them with the following Sprectrum Noir Alcohol Markers: The bunnies heads and bodies IG1 and IG2; their ears, feet, bellies, cheeks, and noses PP1. This was a very simple and easy coloring project. Great for beginners. They are just too cute.
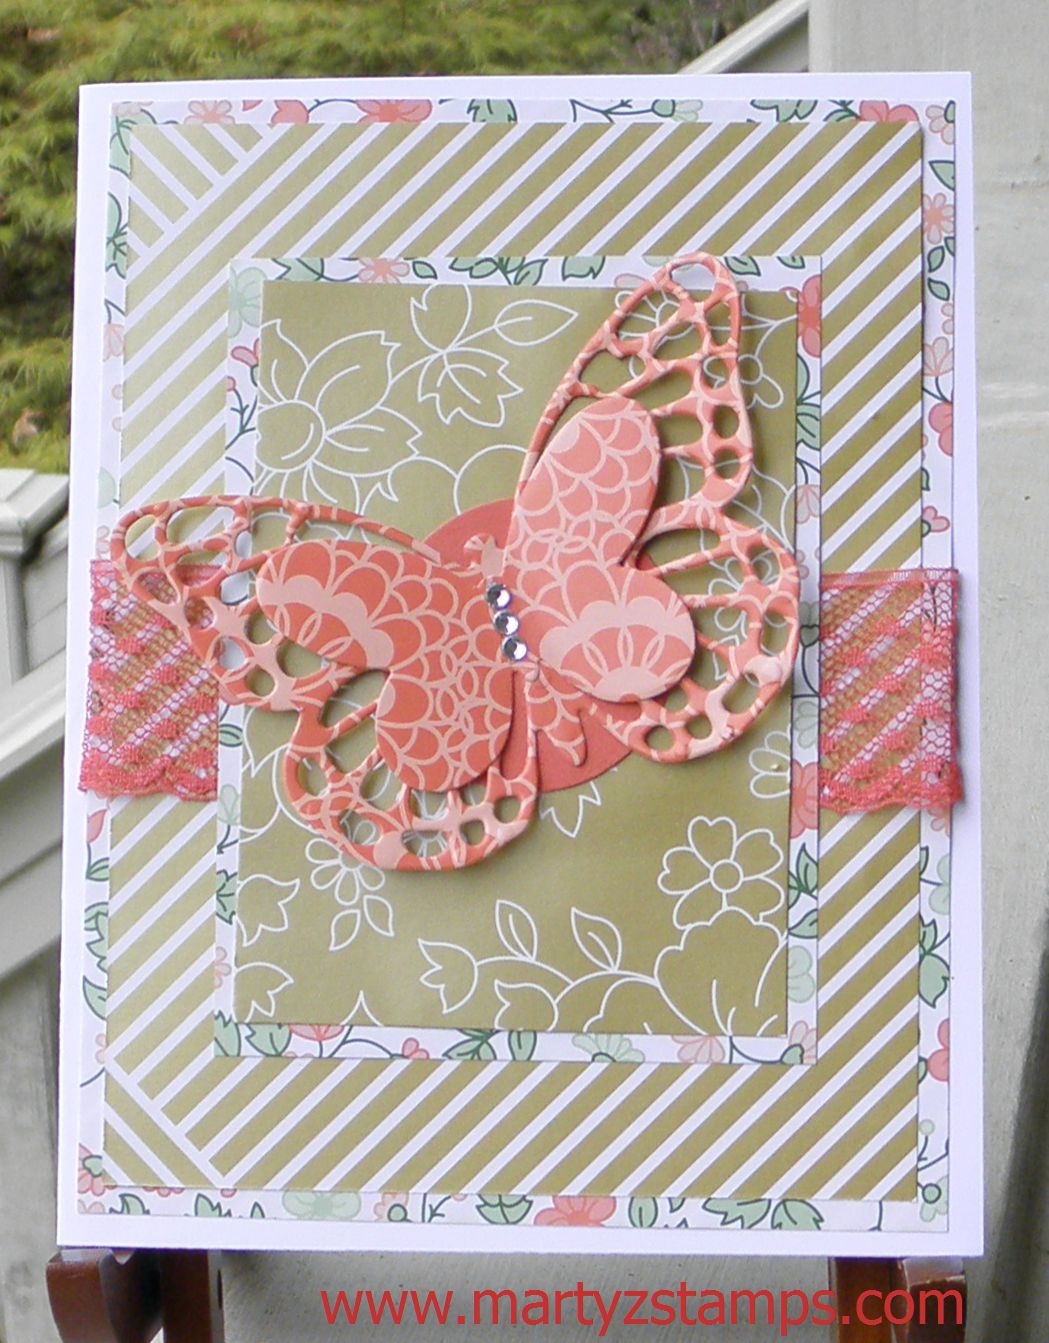
The base of the card is Fun Stampers Journey Whip Cream cardstock, and the mat with a large oval cut out of it is FSJ Watermelon Fusion cardstock. I stamped circles with FSJ Watermelon Fusion ink from the FSJ Planner Sketch stamp set. An acetate sheet was placed behind the Watermelon Fusion mat. The zig-zag accent mat is from Pink and Main Spring Fling 6×6 paper stack. The Watermelon Fusion mat is raised using a double layer of foam tape. The bunnies are popped-out using FSJ Foam Squares Medium. The sequins in the oval are assorted sequins from my stash (Note: a horizontal strip foam tape about a 1/2″ up from the bottom of the oval to keep the sequins from “disappearing” when the card is upright). The final touch is a double bow created from SU! pink ribbon.
Such a cute card.
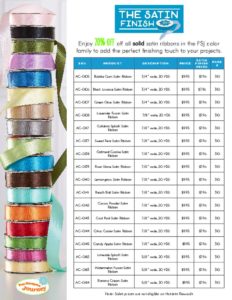
Supplies:
Fun Stampers Journey supplies can be ordered through me – click here