It is time for Fun Stampers Journey Creative Team Blog Hop. The perfect theme for this blog hop is Fall! I know you will be inspired by all the creativity. Remember to subscribe to our blogs. This way you will be notified each month not only with our regular posts but with a colorful line up of uniquely Fun Stampers Journey projects brought to life by the FSJ Creative Team.
I know you will be amazed and inspired by the talent of these creative paper designers. Our team’s blog post links are below. If for some reason you hop off the trail, go to Fun Stampers Journey Blog and pick up where you left off.

Kazan Clark
Lezlye Lauterbach
Carrie Rhoades
Christine Chan
Jill Hilliard
Jenny Watson
Marty McGee (you are here!)
Alissa Hall
When you live in Georgia and have 90 degree days in September, things just don’t seem right. You know what I mean? I’ve been asking myself, where is Fall? I have been asking that question because I’m really just tired of the heat and I want to see those lovely leaves change into orange, yellow and red and feel the cool crispness of a fall breeze.
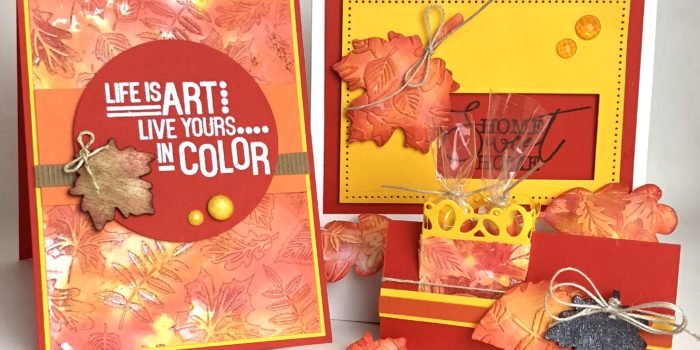
Well, the cooler weather is finally here and that means the leaves will be changing very soon. I must say, “So glad you could make it Fall!” To celebrate Fall’s arrival, I have created a set of cards inspired by those very same colors I previously mentioned. Come on, let’s give a cheer for Orange, Yellow and Red!
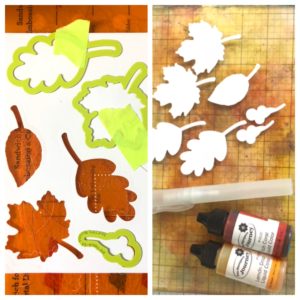
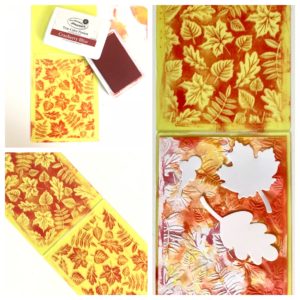
Both of the cards used the same beginning processes, which made the completion of these projects quick and easy. I used the dies from the Zen Leaves set and cut out two of each leaf except for one. It was so lonely, I decided to feature it on the treat box. To complete the first step, I pulled out the Gel Press, of course, Rich Coral and Lemon Drop Liquid Colors and the Media Mister.
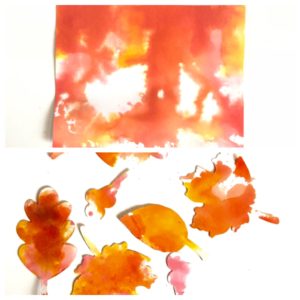
I took the Rich Coral and Lemon Drop Liquid Colors and ran an alternating line of each color across the Gel Press. I spritzed the colors with the Media Mister and held the Gel Press up to allow the colors to flow down. I gave it another mist of water and then placed my paper on top of the mix.
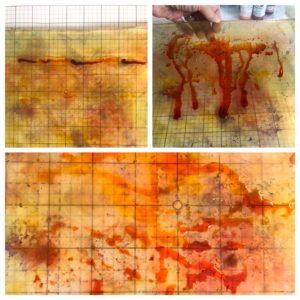
The first pull is at the top picture below. The second step required a little more Liquid Color spritzed with water. I took the leaves and dabbed them into the mix.
Now, here’s where I began experimenting. Thank goodness, it came out just fine (big sigh of relief). Anyway, I inked both inside panels with Rich Coral. I place the liquid color panel color side down onto the inked section without the logo; I took the leaves and placed them on the backside of the inked panel. I ran this through my Platinum die cutting machine. Since the panel was not fully dried, the leaves pressed into the cardstock and I had to really search for an edge to pull them off. Another bullet dodged!!
TIP: Let the inked piece of paper dry completely. I had another mishap due to my impatience on the treat box.
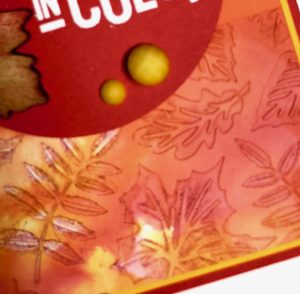
Such a deep, rich embossed mat. It just warms my soul. Note: The mat is de-bossed even though it looks like the embossed side.
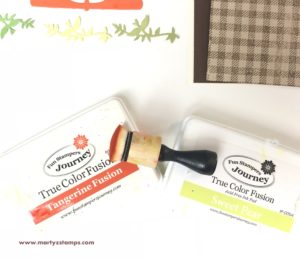
The first card has a base of Rich Coral and a Lemon Drop mat. The embossed mat is cut to allow a 1/8″ border allowing a hint of yellow. This embossed mat is broken up with a Tangerine Fusion strip of cardstock accented with a 1/4″ strip of corrugated cardstock along the bottom portion. The sentiment on the Rich Coral circle was stamped in Whip Cream and embossed with white embossing powder.
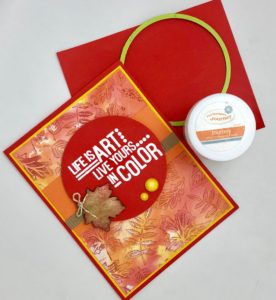
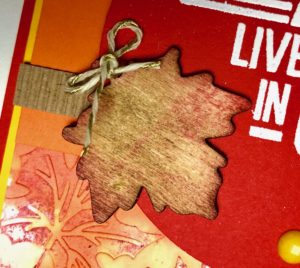
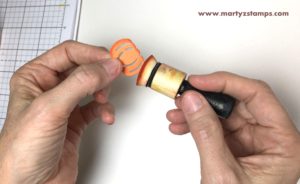
It was adhered with foam squares and accented it with a maple leaf from Golden Leaves Bloom Benefit. I inked over the top of the natural maple leaf with Oatmeal Cookie ink and edged it in Rich Coral ink.
Two golden accents from All The Things Bloom Benefit add a little sparkle to the card.
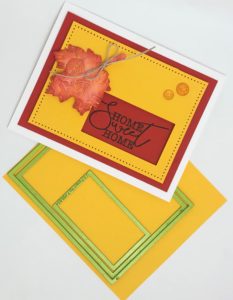
The second card has a base of Whip Cream and two mats. The first mat is Rich Coral. The second mat is Lemon Drop cardstock die cut using the Rectangle dies and piercing piece.
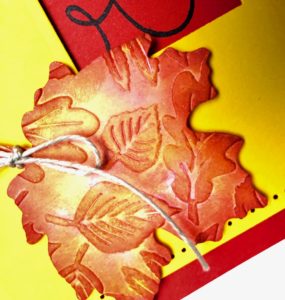
Here is a close up picture of the inked and embossed maple leaf.
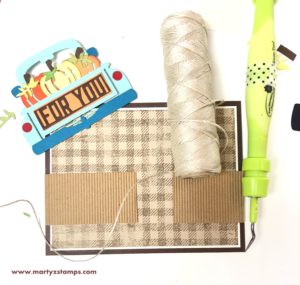
The sentiment was stamped using Black Licorice from the Humble and Kind stamp set. This card is accented with yellow Rainbow Drops and one of the inked and embossed maple leaves tied with a double bow Natural Twine. The Lemon Drop mat and the maple leaf are adhered with foam squares.
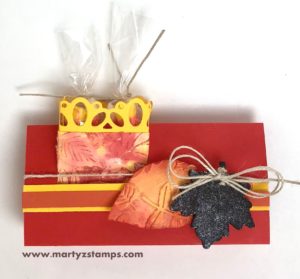
The treat box was created using Rich Coral as the base. A box to hold the candy was cut from Lemon Drop cardstock with an inked and embossed band glued around the middle of the box. An accent strip of Lemon Drop and Tangerine Fusion are adhered across the front of the Rich Coral base. An inked and embossed leaf along with a dark brown male leaf painted with Sparkle Silk are adhered to the front and tied with a double bow. The treat box holds some yellow, orange and white Candy Corn, yum! The directions for the box are below the picture.
Step 1 – 4″ x 6″ Rich Coral cardstock for the base.
Step 2 – Score the long side at 1″, 3″ and 5″.
Step 3 – 4 1/2″ x 2″ Lemon Drop cardstock for the treat holder.
Step 4 – Score long side at 1/2″, 2″, 2 1/2″ and 4″.
Step 5 – Die cut the top of the box (optional).
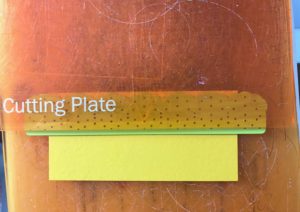
TIP: When you die cut the edge using an edgelit type die, make sure to place your top cutting plate where it is not all the way over the die.
Take the Rich Coral base and fold it in half. Place the folded side against the edge of your trimmer.
Step 1 – Measure in 1/2″ and cut from the fold to the 1″ mark.
Step 2 – Move the cardstock to the 2″ mark and cut from the fold to the 1″ mark.
Step 3 – Open the folded cardstock and the tented piece you just created will become the window flaps as shown below.
Step 4 – Take your shears and from the smaller tented fold, cut 1/8″ on each side of the fold. This will create a window with flaps. The “window flaps” will hold the treat box in place.
Step 5 – Place white liner tape as indicated below.
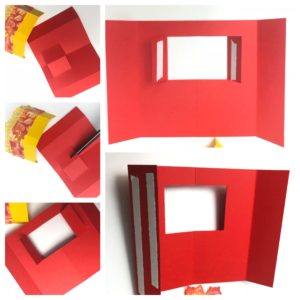
Adhere the base sides together. This will create a long, narrow tent. Then, decorate the treat box as you would like. Place it into the opening while holding the flaps back with the fingers of your opposite hand. Once it is in place, press the flaps onto the box. Embellish the front of the box as you like.
I hope this set of paper projects has and will inspire you to create your own Fall themed cards and giftables. Let me know in the comments what is your favorite project. Make sure to post your inspired creations to Instagram and Facebook, tag me so I can see your paper brought to life.
Product List


 Such a great use of scraps and it saved on cutting time as well.
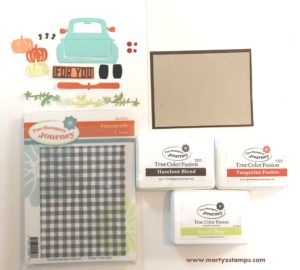


")